


DIY Epoxy Countertops!

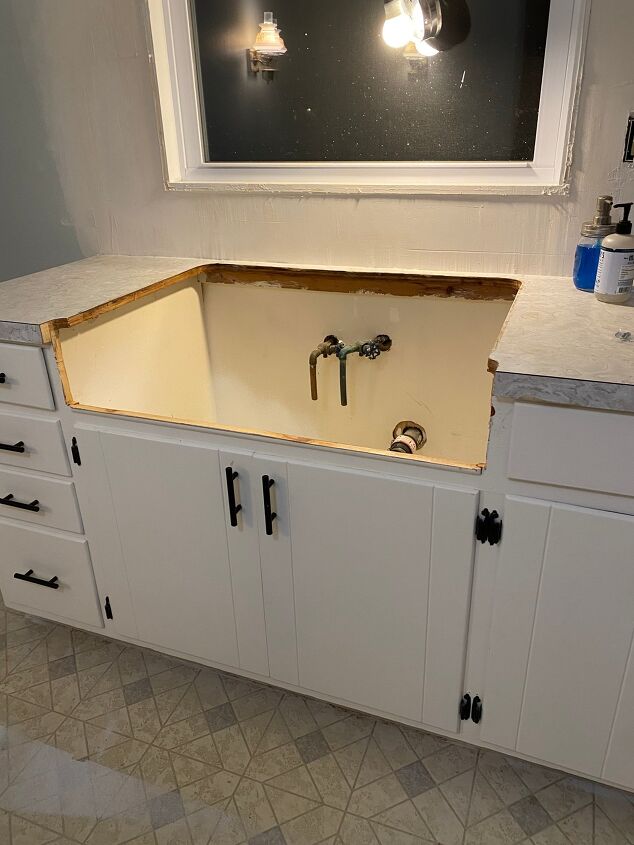
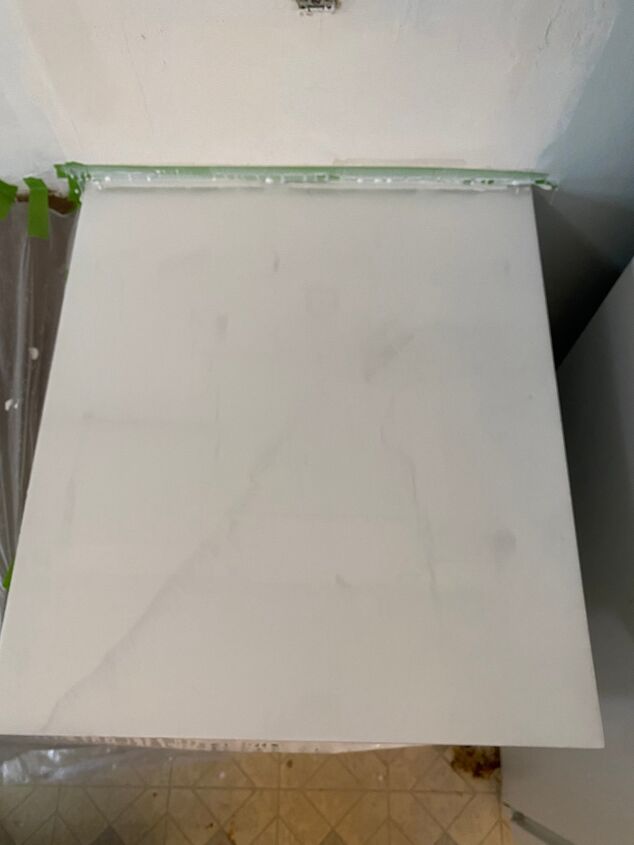
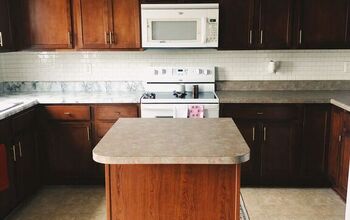
Aahhh I am so excited to share this DIY with you all! I am in the middle of renovating my kitchen and just finished my countertops! I used epoxy on my old laminate countertops to mimic quartz for a fraction of the cost! I love the look of quartz but could not afford it. After stumbling across this idea I figured I would give it a try, why not!! Under $280 and was super simple to do! My kind of DIY! I have tried to be as detailed as possible but feel free to reach out if you have any questions at all! Here is the before.
Supplies & Links:
- Epoxy
- 4oz Solid Epoxy Pigment Color (Cathedral Grey and Lilly White)
- Epoxy Application Tools Bundle
- Wet sand paper
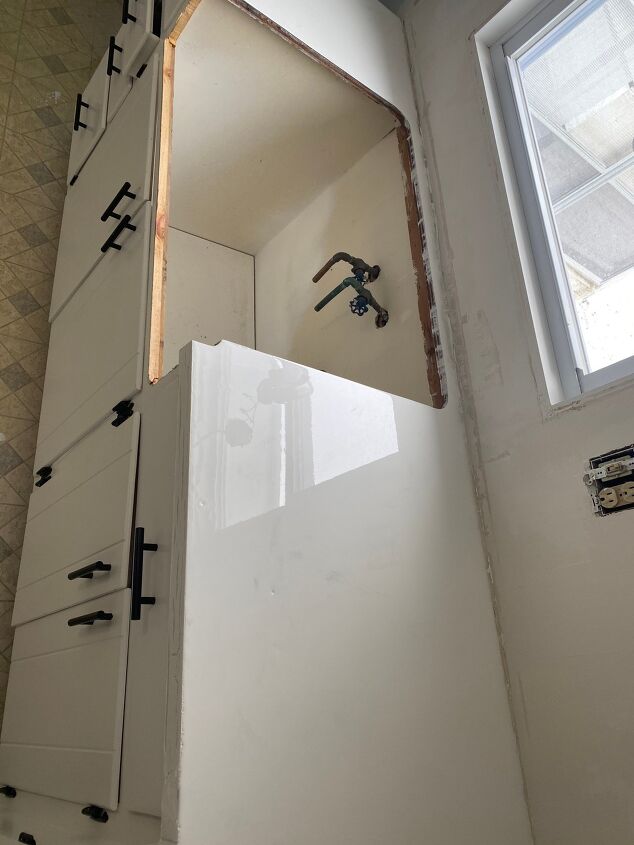
Don’t mind the mess there is still a lot of work to be done in here! First step is to remove the sink! Thankfully my sink was disgusting and I was planning on updating it anyway! Because of the way the epoxy self levels and spreads this step is necessary if you have a top mounted sink like mine. Now that the sink is out, you will need to cut your countertops to fit a new sink if you are getting one! If not, then obviously skip that step. Bye old ugly sink!
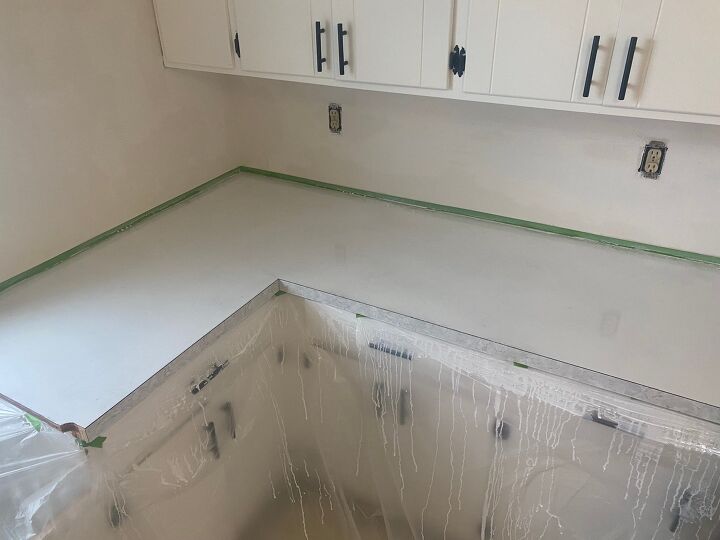
Next you will want to caulk where your countertops meet your walls. If you notice below in the picture, I taped the wall to make a smooth and even caulk line. If I were to go back and do this again, I wish I would have also taped the countertop so that the caulk is also smooth and even on the countertops. I did not realize the epoxy wouldn’t adhere to the silicone caulk and it ended up making the back of the countertops look not so perfect. Another step to the prep is to sand your countertops. I used 120 grit sandpaper with my orbital sandpaper and sanded the surface and edges to roughen up the surface a bit in order for the epoxy to better adhere. Then, you want to fully cover up your kitchen by placing plastic sheeting over your cupboards and floors. There is no way to prevent a mess during the pouring, so this part is key.
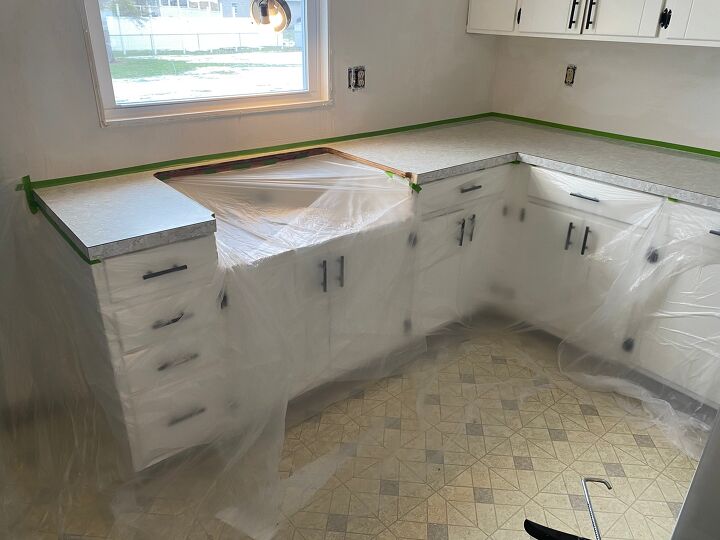
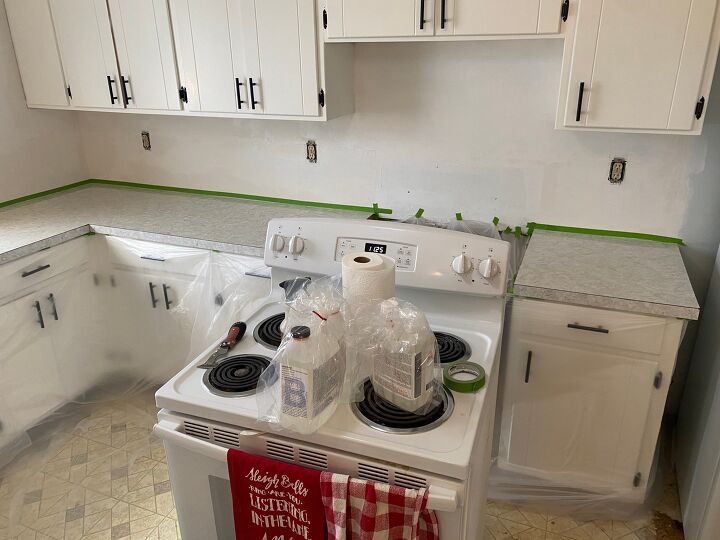
You’ll also want to pull out your stove or anything up against your countertops so that none of the epoxy drips or gets on anything but the countertops. This stuff dries rock hard!! Lastly, make sure your countertops are fully cleaned. Any debris will show through under the epoxy when it dries, I learned this the hard way. Read the end of this post for all of the mistakes I made 😦 And hopefully this helps you so that you wont make them! 🙂
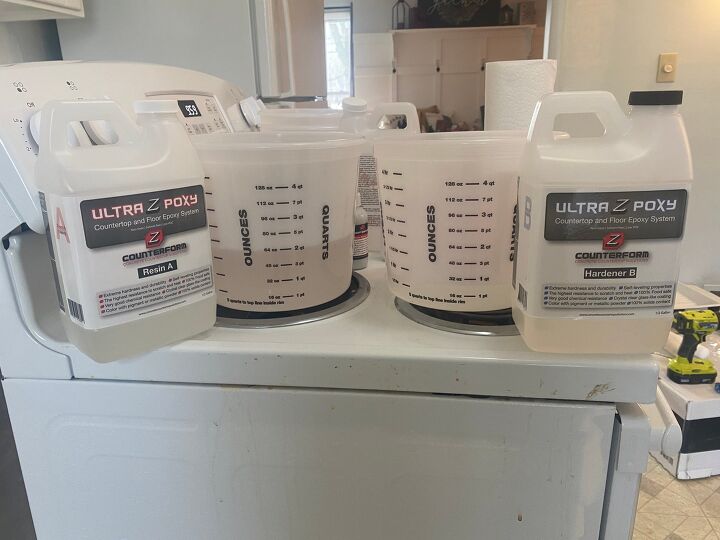
I bought all of these supplies shown below for just under $280 including shipping from Concrete Counter Top Solutions.
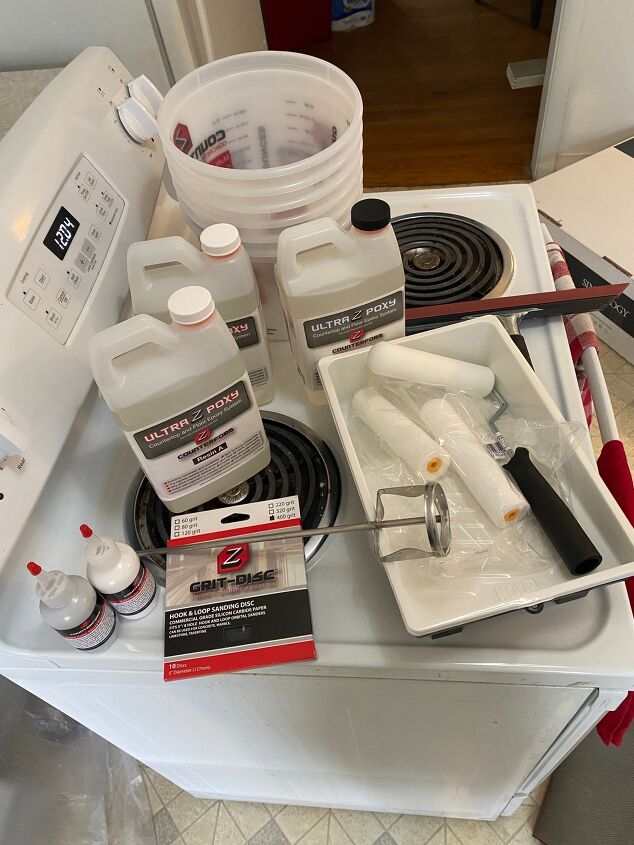
Now it is go time! You will now mix your first primer coat. Using the mixing containers, I poured about 24 ounces of part A and in a separate container 12 ounces of part B. It’s 2 parts A to 1 part B. You may want to make more or less depending on the square footage of your counters. I added in a few squirts of the white pigment to part A (just eye balled this). I just made it so that it wasn’t so opaque, in order to provide good coverage. Then I poured part A with your pigment in with part B and mixed them together. Using the jiffy mixer attachment with my drill, I thoroughly mixed for 1-2 minutes. Be careful not to get any drips of the epoxy on your drill, I got a few on it and they got inside the drill and completely ruined it 😦
Ok pour time! Pour the mixture all over your countertops. Use the squeegee to spread the mixture covering the entire countertop surface. Kind of just drag the epoxy lightly around the countertops so it gets in all of the nooks and crannies. I have videos on my Instagram here @abbbclark_homeee if you are more of a visual learner. Then use your foam roller to even out all of the areas. Although this stuff does self level, I just went around and made sure all of the areas had epoxy on them. Then I used my foam roller to lightly drag the excess epoxy from the back of the countertops to the edges and let it run off. Then use your roller on the edges to ensure the edges get covered.
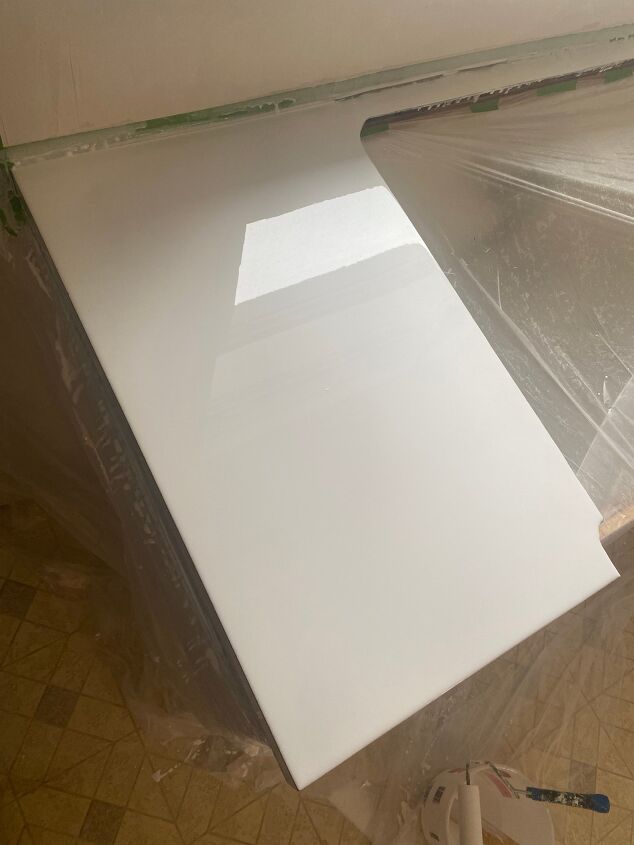
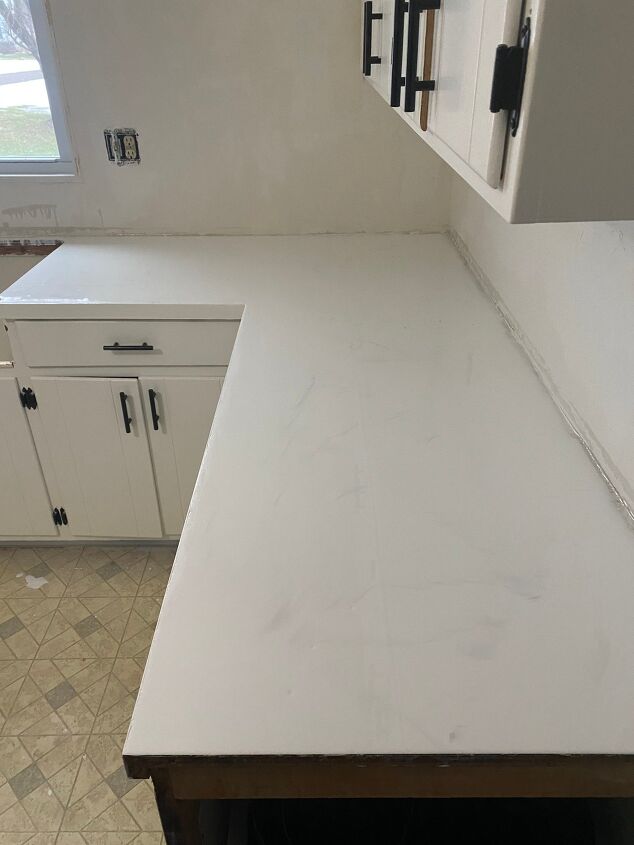
Your first coat is done! I noticed a few areas where I must not of cleaned well enough, and debris dried under my epoxy. If this happens to you, just leave it be, you can fix this the next day. Overall the countertops don’t look much different yet but don’t worry they will soon!
You should wait 16-24hrs until you apply the second and final coat. After about 20hrs I lightly sanded down my countertops with 120 grit sandpaper by hand. I did this because I noticed some uneven areas from debris. Also, the edges really didn’t adhere well to the epoxy so I sanded them as well in hopes that they would adhere better with the final coat. Then I once again thoroughly cleaned my countertops off to remove any dust/debris. Now time to mix the second coat!
For the final coat I mixed about 3 times the amount I mixed the first time to ensure I got good coverage. In separate containers I poured, 62oz Part A and about 32oz part B (2-1 ratio of part A to B). Again, this may differ depending on the square footage of your counters. I did not mix any white pigment in this time, YET. I poured part A and B in together and mixed thoroughly for 1-2 minutes using a paint stirrer, because sadly once again my drill broke from the dried epoxy. So be careful if using a drill with mixer attachment! Now that part A and B are mixed, I separated about 3-4oz into a separate container. This small amount I added grey pigment to. I just eye balled the amount to the color I liked. This will be used for veining to add in that faux detail at the end.
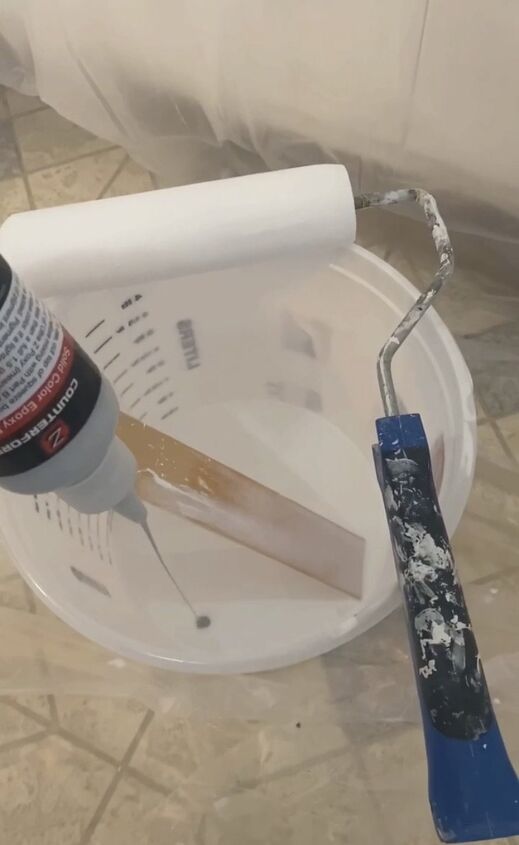
Set this small amount aside for the end. The remaining epoxy you will add white pigment to. I poured the entire bottle in, I wanted good coverage! Again I didn’t measure, I just kept pouring and mixing until it was no longer opaque and ended up using the entire bottle. Mix the white pigment in well using your jiffy mixer or paint stirrer. Now you are ready to pour your final coat! Pour and spread just like you did with your primer coat! Pour, then use your squeegee, then your foam roller! You cant really mess this part up! Once you have spread it all out and covered your edges, your counters will just be plain white. You can always just stop here and leave them this way, but I wanted to add in some detail!
This is where you will need the extra grey epoxy we set aside earlier. I was so nervous to do this part, I didn’t want to mess anything up! But I just went for it, and love how the detail turned out! I dipped my paint stirrer in the grey and drizzled the grey in random directions on the counter. Then I used my foam roller to blend it in with the white.

It is definitely not perfect, but I am in love. For the amount I saved I am in awe! The finish is glossy. Initially I thought I wanted a matte finish, but I actually like the glossy look for now. If you do want a matte look, you can use 400 grit sandpaper to wet sand it down. This will dull the shine (this is what the website says at least). I may do this in the future if I get sick of the glossiness, but for now I am going to leave it.
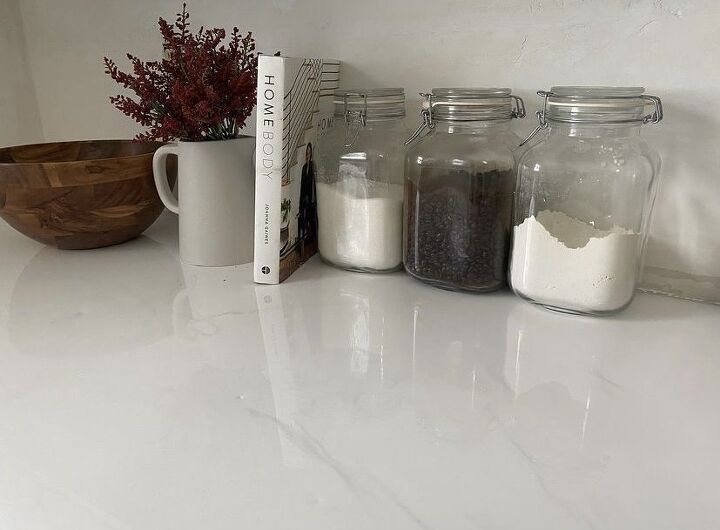
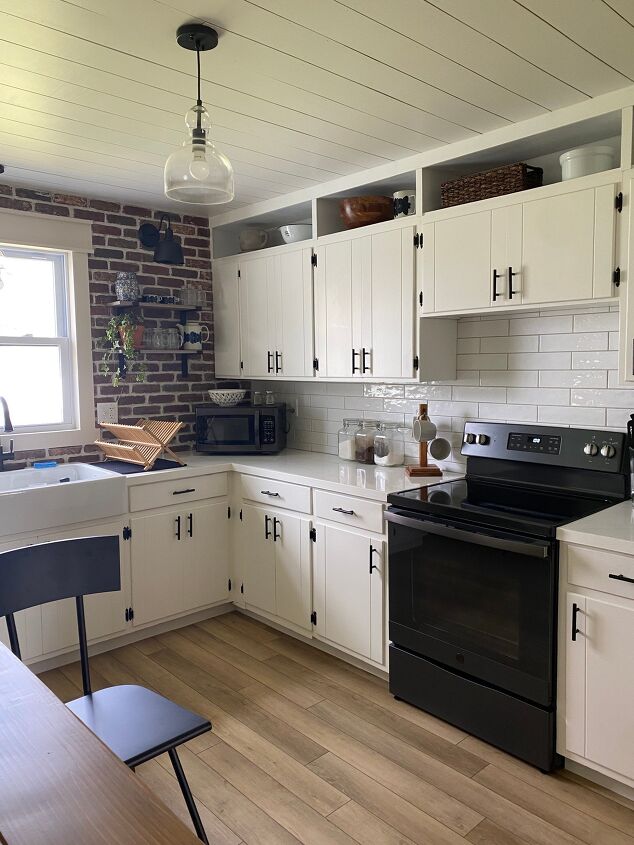
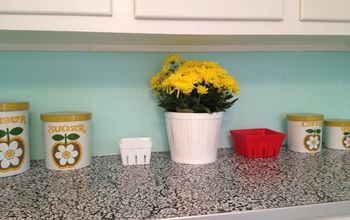
And here are the countertops a year later with the rest of my kitchen that I have updated!
Here is where I will tell you my mistakes so you can make yours perfect and learn from where I went wrong.
- Go light on the silicone caulk. The epoxy self levels and I applied too much towards the back of my counters so it looks a little janky back there where it didn’t adhere or level correctly. I guess I shouldn’t say go light on the caulk, but just be a little neater when caulking than I was or your edge towards the back will look a little rough. Tape both your counters and walls to make a nice and neat caulk line.
- Clean VERY thoroughly, I thought I did, but I didn’t clean enough. In a couple areas I can see tiny bumps where debris lies underneath. So just when you think you’ve cleaned them enough, clean them once more. You wont regret it.
- Sand well at the beginning especially on the edges to ensure a good adhesion. My edges did not adhere well and I am thinking this is because I did not sand enough. In fact I ended up having to apply some paint to my edges because the epoxy really didn’t sand that well to mine. So sand those bad boys down and I really feel like that will make a big difference!
It has been about a year now since I did this DIY. They are extremely durable! I am in love with them and so excited to share with you all! The one and only complaint I have about them is that in certain areas they stain, and nothing will remove the stains. Do I regret doing the epoxy countertops because of the stains in certain areas? Absolutely not! For the amount I spent on these (under 300!) they are a great temporary fix until I can afford a more luxurious and expensive countertop – zero regrets! I love theses countertops! Do you have old countertops that are in desperate need of an upgrade but don’t have thousands of dollars to spend on new countertops? Try this and let me know how it goes for you!! I would love to hear!! If you are looking for more DIYs like this, follow me on my Instagram @abbbclark_homeee !
Resources for this project:
See all materials


Comments
Join the conversation
-
I think they are beautiful and you are very brave to have tackled this project! But what a BANG for the buck!!
-
I'd love to redo my kitchen counters but don't want to spend $$$. This would be a good solution for me. A job well done and thanks for tips!


Frequently asked questions
Have a question about this project?
What caused the stains ? I thought epoxy didn’t stain. What about hot plates and pots? Do you need something under them or are they heat resistant?
One more thing... are those stick on subway tiles and if so how well does the adhesive work? They look so nice!
Do you think the epoxy would fill in the grout lines of square tile counter? Thanks