


Laminate Countertops Replaced With DIY Solid Surface Countertops

How we replaced our laminate countertops with DIY solid surface countertops.
This project is in collaboration with Solid Surface but the project and the content are all mine!
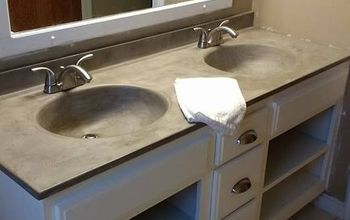
The biggest DIY project that I completed for our kitchen makeover was actually fabricating my own solid surface countertops. You might not be familiar with this type of countertop, but it's actually a really great material. It's a hundred percent acrylic, and you might recognize some brand names of solid surface, like Formica and Corian.
This is basically a sheet that I got from solidsurface.com, as well as all the information I'm going to be sharing today. I learned from the resources on their website. So if you want to tackle this yourself, and my post doesn't cover something that you need to know how to do, solidsurface.com is a great resource.
I'm going to show you today how I made my own countertops from start to finish. This process took me about 11 full days of work to complete.
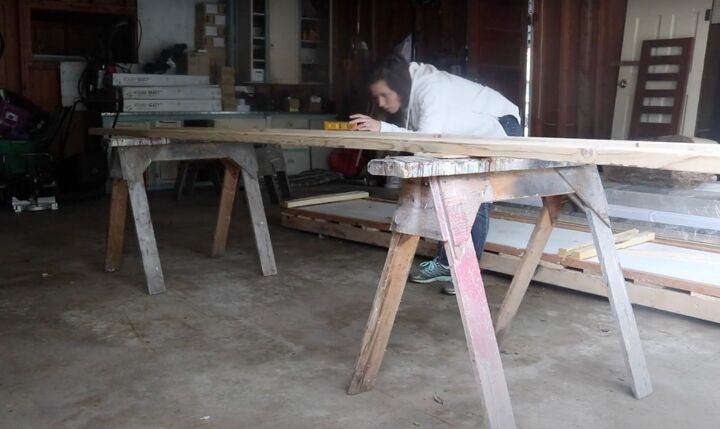
The first thing to do was set up a completely level workspace. I did that usingtwo sawhorses, several 2’ x by 4’, and then used a 1’ by 4’ to run perpendicular. It's really important when you're working on countertops that your surface is completely level.
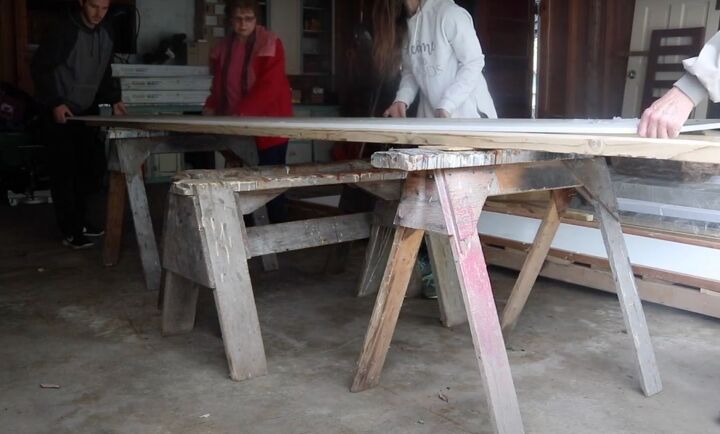
Solid surface is really heavy. And so whenever you're moving it, you need more than a few people to lift and carry it.
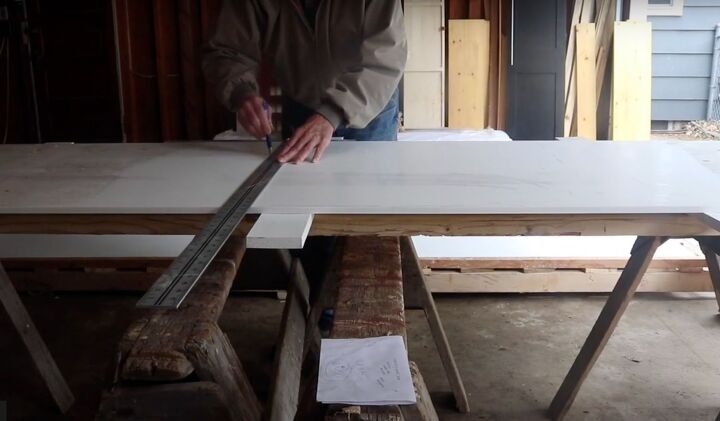
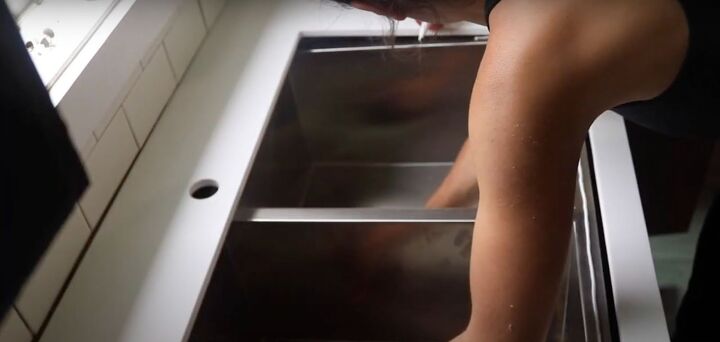
The first bit involved a lot of routering. Since I wasn't completely comfortable with that tool, I asked my grandfather-in-law to help. The first thing we did was mark off the line of where we wanted our flush under-mount sink to go.
Then we used a straight 1’ by 4’ is to create a template for our router to run against. The router bit we bought was a nice Diablo flush bit. Basically, this had a bearingon the top that routed against the template.
We used the router to cut out straight up and down flush to whatever we needed to be moved. To say I learned a lot during this process is such an understatement. I was nervous taking on this scale of a project. But if I can do it, then you can too.
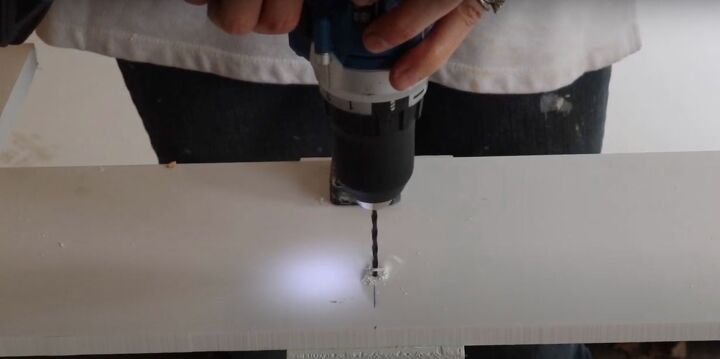
Next, we cut out the hole for the faucet measuring an inch away from the edge of the sink. We then used a smaller carbide drill bit to start the hole,
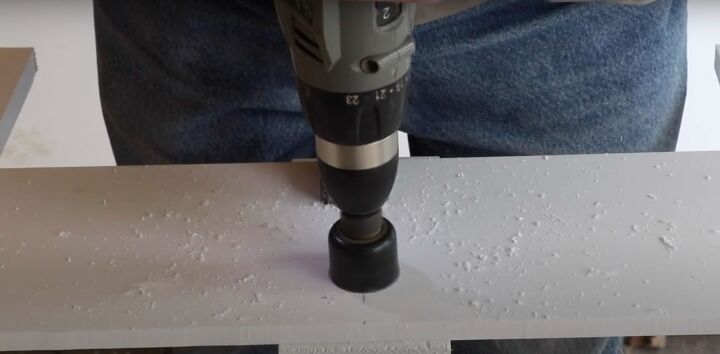
and then used a hole saw bit to drill out the one-and-a-half-inch hole. Your specifications may be different for the faucet you choose though.
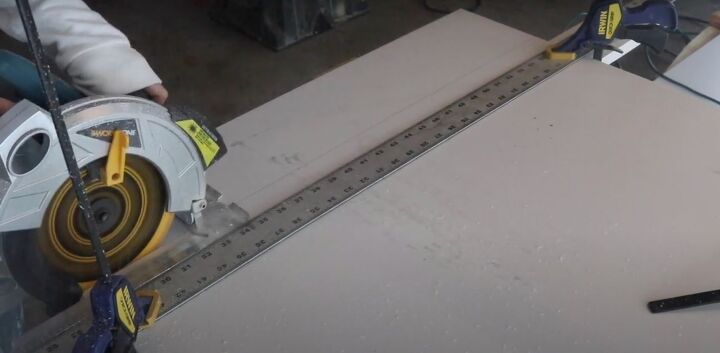
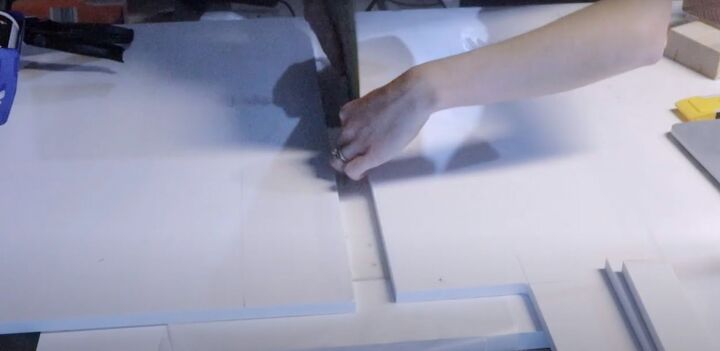
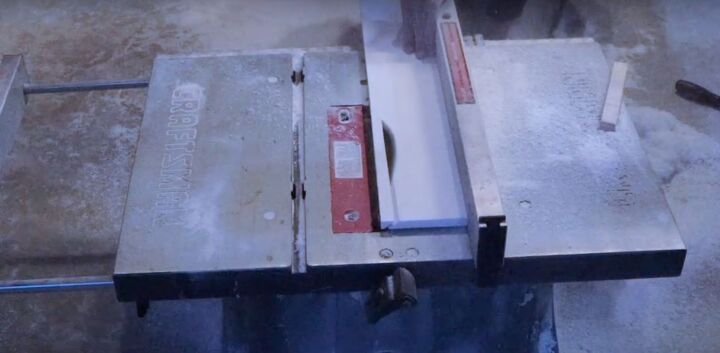
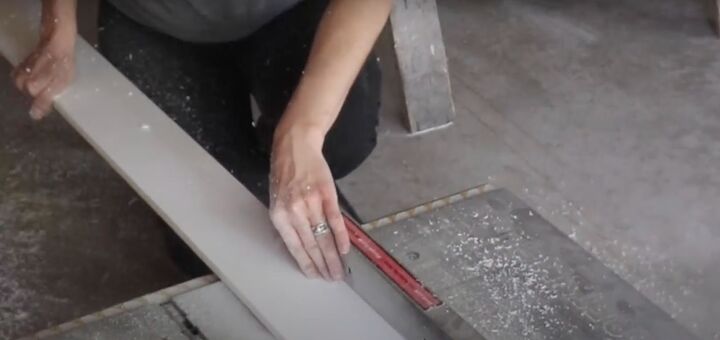
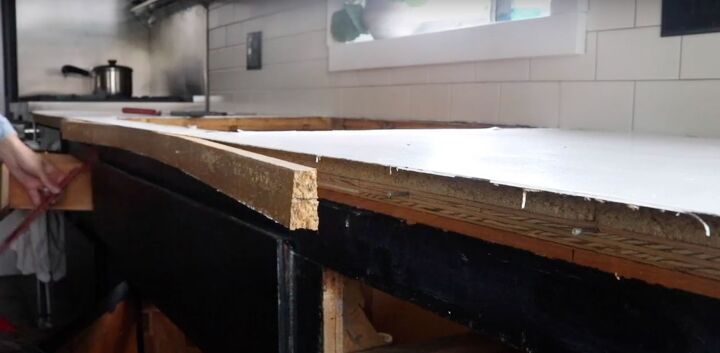
My countertop ended up being really long, (139”) so we did have to cut off a little bitof length. I used my corded circular saw with a 40 tooth carbide blade to cut through the material. Any tools that you're going to want to use for this material would be similar to what you would use to cut an extremely hardwood. Make sure to have a really nice brand new sharp blade.

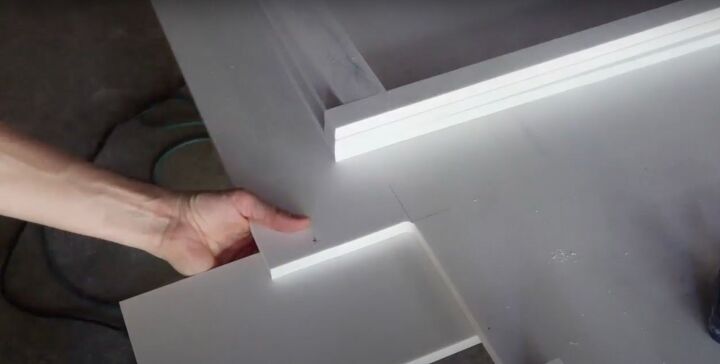
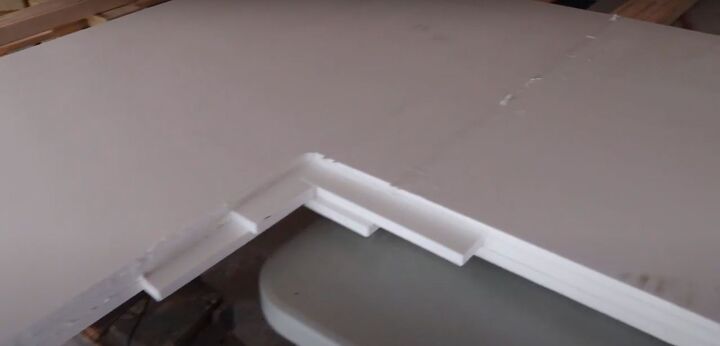
This type of counter does not use 45 degree angled corners. To make the corners, I cut into a continuous sheet to create help create a corner and then will butt another sheet next to it. We did that using a template with a 1’ by 4’ to run the router against again.
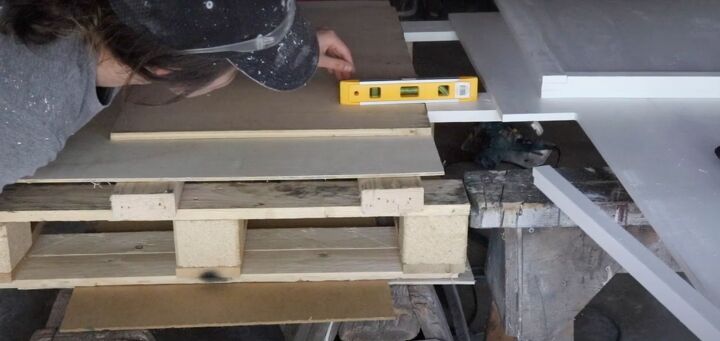
To create the L part of my counter I cut another sheet of the solid surface material in the size that I needed to get started. I also had to build a support system next to the original counter so that everything was completely level.
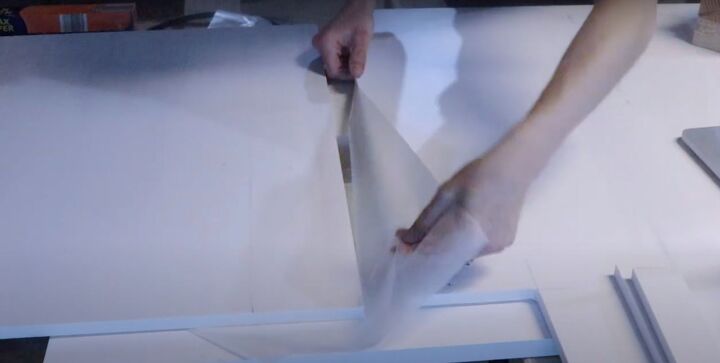
Since I was joining two factory-finished completely straight edges, I decided to skip doing a mirror edge and just join the seams with a special type of adhesive for solid surface counters. The adhesive was a two-part adhesive that hardens as it mixed together. First I needed to lay down some wax paper to protect against drips.
Then I sanded the seam and clean it with alcohol with rubbing alcohol.
Next, I squirted some of the adhesive in that special gun onto my seams. The special gun helped to mix the adhesive as it was being squirted out. I needed two quarter-inch beads along each side. You want to do make sure there are two beads so that you don’t miss any parts and it prevents there from being any weak spots.
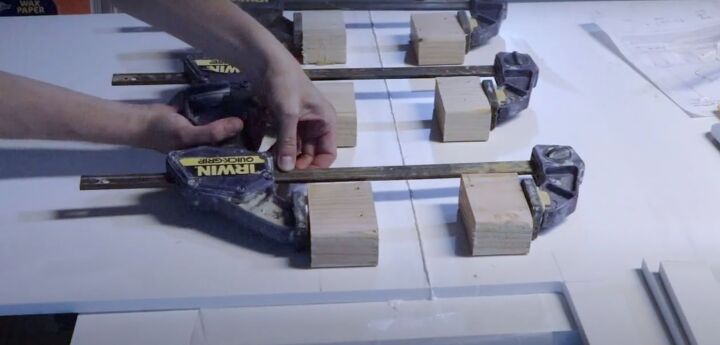
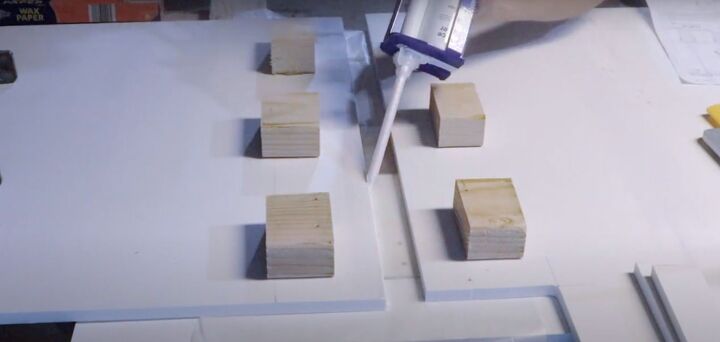
I then added some blocks with hot glue that I used to clamp the two sides together. I left it to dry overnight.
To protect that seam from underneath I cut a 4” wide piece of solid surface to attach with adhesive underneath the counter. I also ran it along my table saw to give it a 45-degree angle. I will attach this piecelater once I'm working on the drop edge.
The next day when everything was dry, I used a little rubbing alcohol to soften the glue and remove my blocks and clamps.
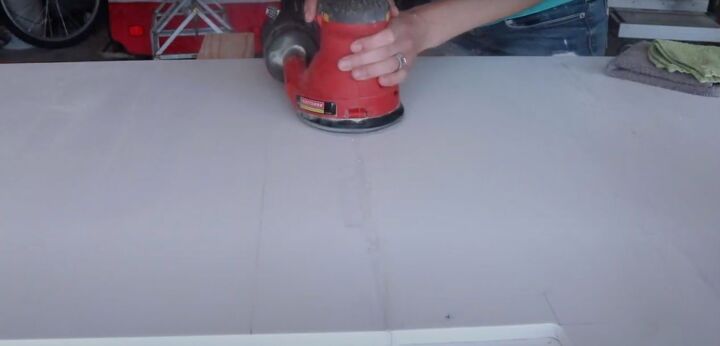
I then finished off the seam by sanding it using a succession of 100 grit and higher sandpaper and my random orbital sander until it's totally smooth.
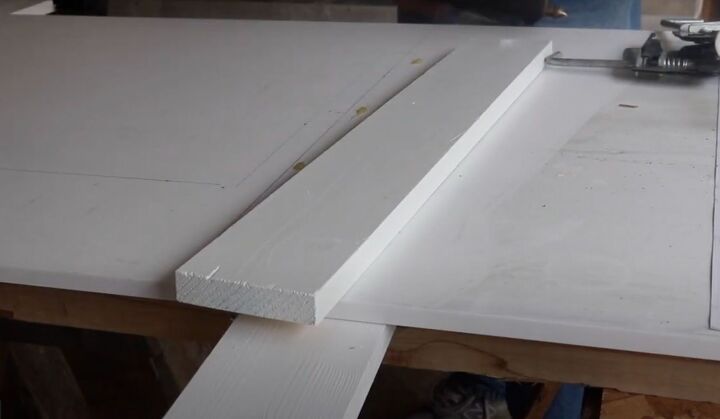
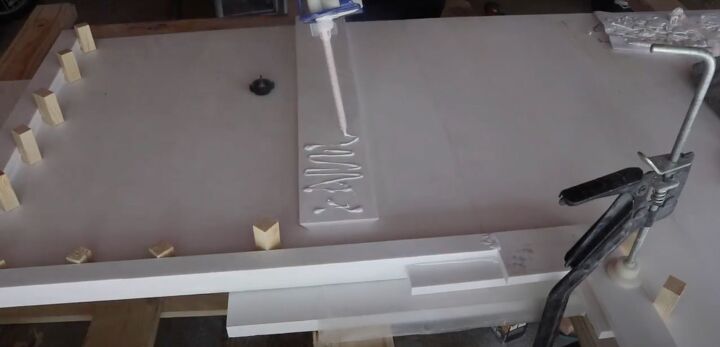
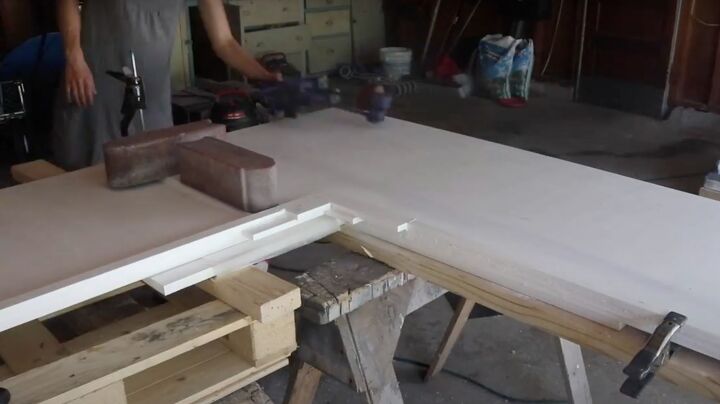
To build the drop edge, I started by cutting strips of 1” wide solid surface and then I dry fitted them to the edge. I wanted to build up the drop edge so that it was appropriate for my cabinets and so that it was high enough so that I could still open drawers. The material itself is only half an inch thick so I cut two strips to make an inch and a half thickness.
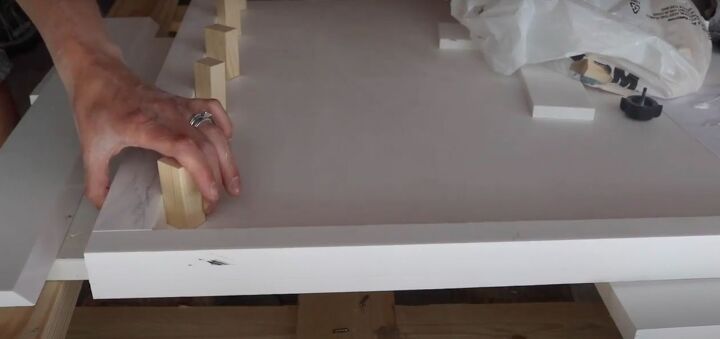
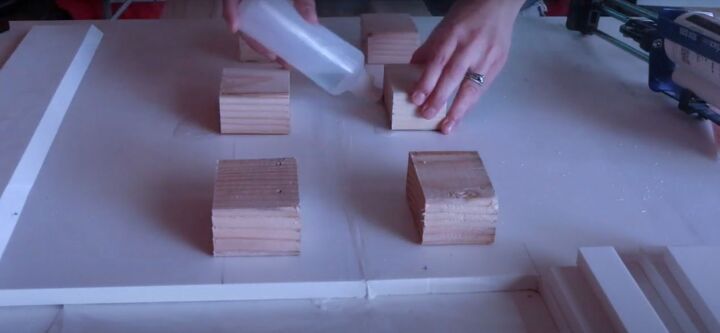
Now, when you're dry-fitting these, you want to cut little blocks of wood and hot glue them down onto the counter at a 45-degree angle. They will be your guide sothat everything gets glued on flush. I put mine approximately every four inches.
The corner part was a little bit tricky for me. I devised a plan to actually adhere pieces that were bigger than what I needed. Then, later on, when we flip over the counter I'll router them out so that that drop edges are the perfect thickness. When we got to the corner, I took a small piece of solid surface and made sure that overlapped. The seem needed to be at least 4” and you want to alternate each layer as it overlaps.
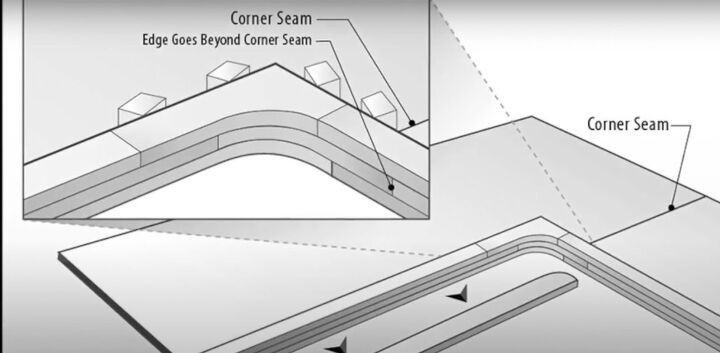
Here is a picture that I found on solidsurface.com to show you what that corner drop edge should look like. I basically followed that.

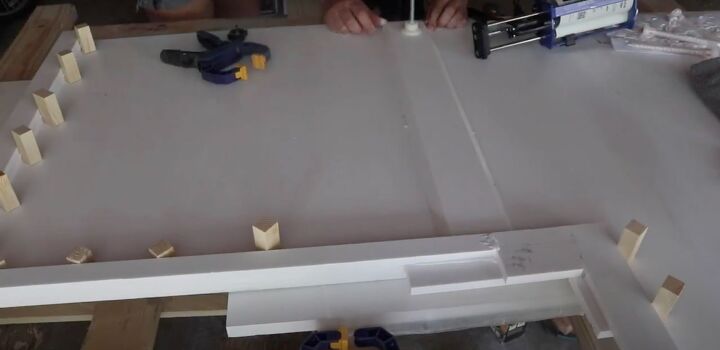
Then I glued everything in place with the same two-part adhesive I used before. Again, running 2 quarter-inch thick beads along the entire 1” drop edge on each layer. I also added it to each seam where they butt up against each other. Don't be afraid to use a little extra adhesive because if you don't get enough in there, there might be holes when you sand it down.
Now that the drop edge is in place, and the adhesive has dried, I attached the seam plate. Remember, this is the plate that I cut each side at an angle so that it will support the seam from underneath the counter. To adhere it, I just glued it in place.
We coated it in the adhesive, and then we put a clamp on one end.
Since I couldn't clamp the other side, we just put some heavy bricks down and then let it dry overnight.
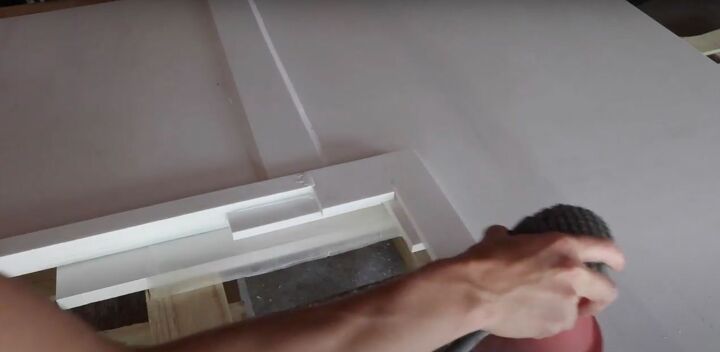
The next day I remove my clamp and began the sanding process.
I sanded down the globs of adhesive anywhere that they might interfere with the countertop installation using a random orbital. Since my countertop was still flipped upside down I got every aspect of the counter that I could from underneath including this is the flush mount edge where the sinks going to go.
When it was finally time to flip over the counter, I enlisted the help of multiple hands so that we could do it safely.
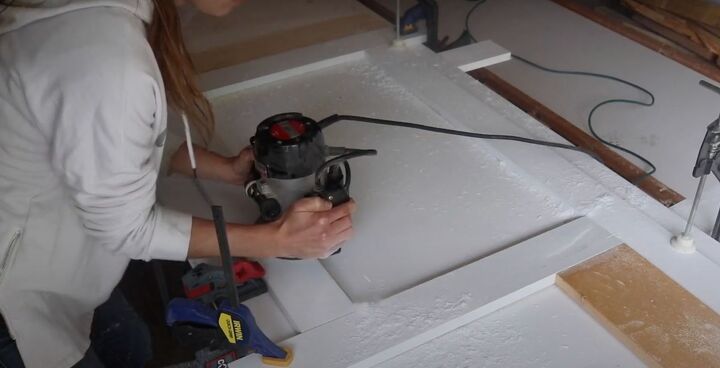
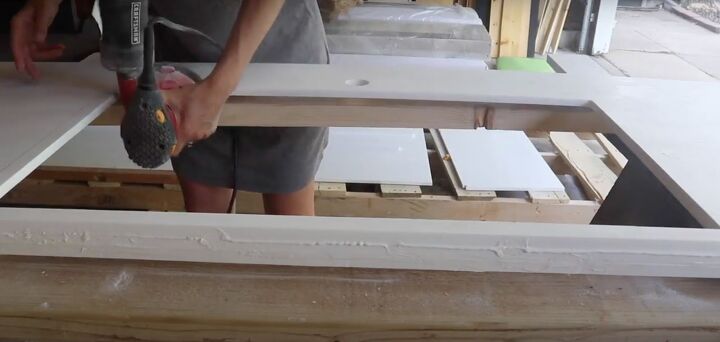
Now there was a lot of sanding to do to finish it up. I also had to router that whole edge to take off that excess corner, solid surface, and just kind of clean up the drop edge that I built to run my router along

Again, I built a guide with 1 by 4 is for my router to run against. I used that bearing to just clean everything up, cutting off the extra adhesive and making sure all of it was very flush.
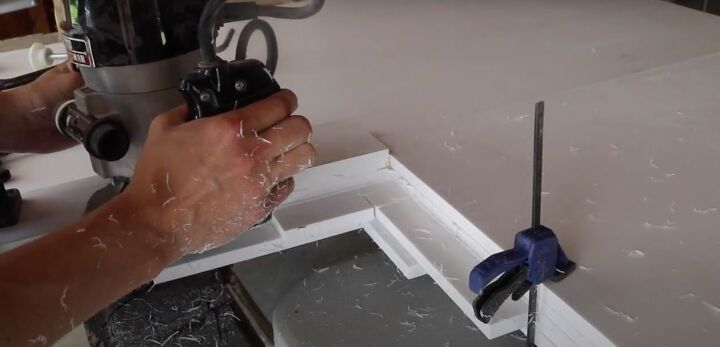
The router in the corner was a little bit scary, but I just set up my guides, and I took it slow when I finished up.
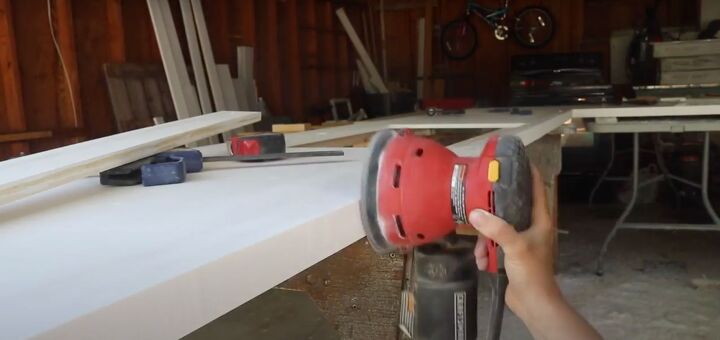
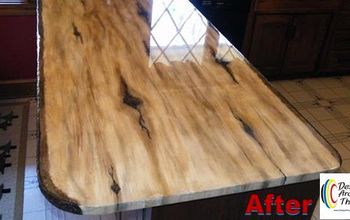
Finally, it was ready for the last sanding. It took quite a lot of time. I found that the fastest way to do it was to use a progression of different grits and papers. I started with a hundred and fifty grit then went to about 200 grit, and then I endedwith a 250 grit sandpaper for a matte finish. The higher the grit sandpaper you use, the glossier your counter will be. It's best to go in circular motions and to overlap your area by 20 to 30 percent.
Then it was time to mount the sink. To do that I attached under-mount sink clips with the same two-part epoxy. I marked off where the sink was going to go and right next to that, I used the epoxy to adhere the bolts. Be sure to clean the area with rubbing alcohol to help your epoxy stick.
You were not supposed to touch the two-part epoxy so I used a scrap piece of cardboard to mix it together and smear it on the bolts. I also smeared some on the bottom of the counter. It hardens really fast so this wasn't very hard to do. Just make sure to do it at least 24 hours in advance of installing the counters because the epoxy needs time to set up.
Next was the final step — the countertop installation!

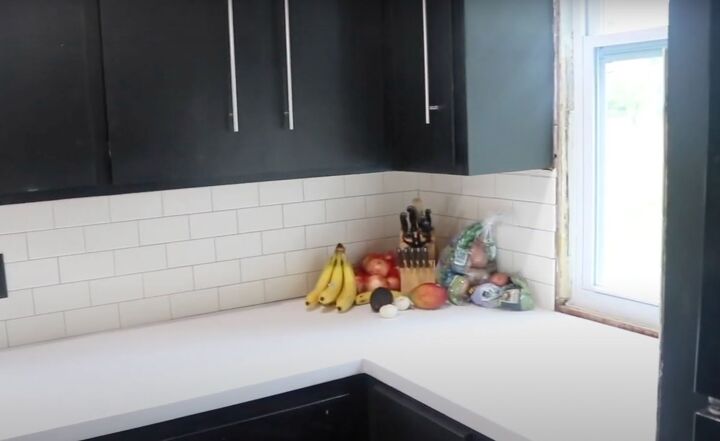
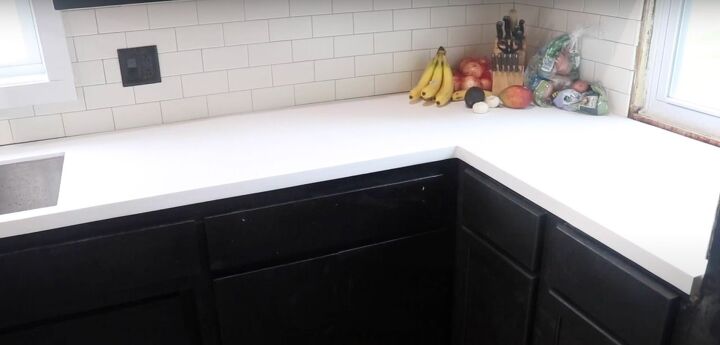
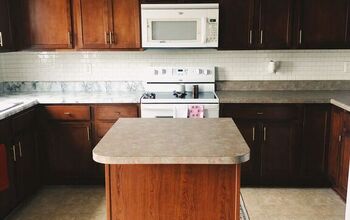
To prep my kitchen for the new countertop I needed to move a few things around. Our old stove was actually blocking a window so you can see now why I wanted to put in an L shape in the counter. I moved the stove out of the way first.

To fill in the spot where the stove was, I grabbed this 30” cabinet at my local hardware store and planned to paint it black. It blends in with the other base cabinetry in my kitchen so it was a good solution.

I painted two coats of black paint to match the rest of the cabinetry next.

Then, I had to remove a high cabinet and the microwave that was installed. We removed those because we want to install a new window.

I just filled the holes with some spackling and then sanded it down once it was dry.
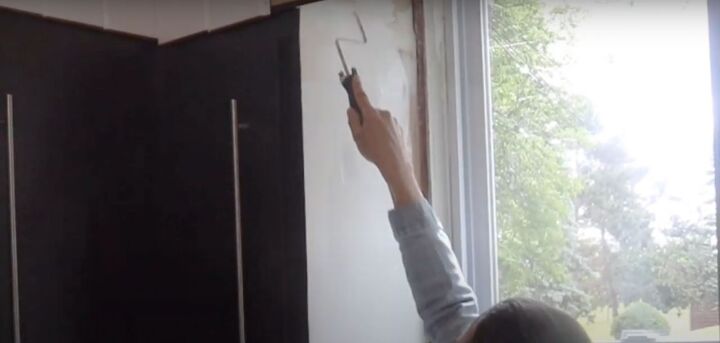
I then primed and painted it black like the rest.
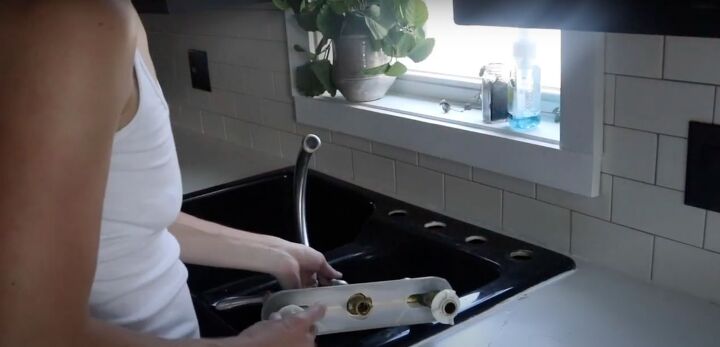
Next, the faucet needed to be removed, which was really easy...
and then I pried up the sink. I actually thought this was a ceramic sink, but it ended up being plastic. So that was also really easy to remove as well.
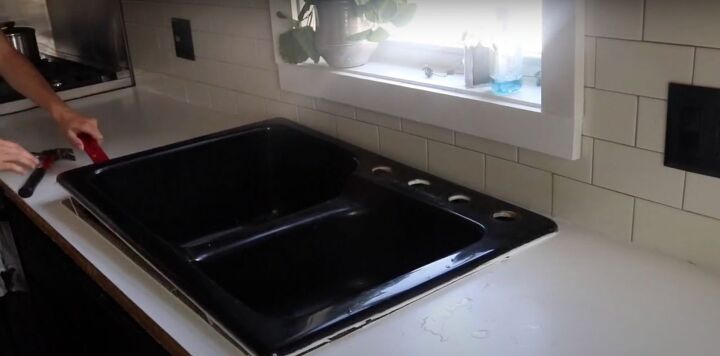
Unfortunately, what was not so easy was removing the existing laminate counters. There was plywood attached to them like a glue board and then there was lamination on top. What I discovered was that these were not attached like a normal laminate counter which was held on by screws. These were literally built to last, and it took me a lot longer to remove them than I hoped.
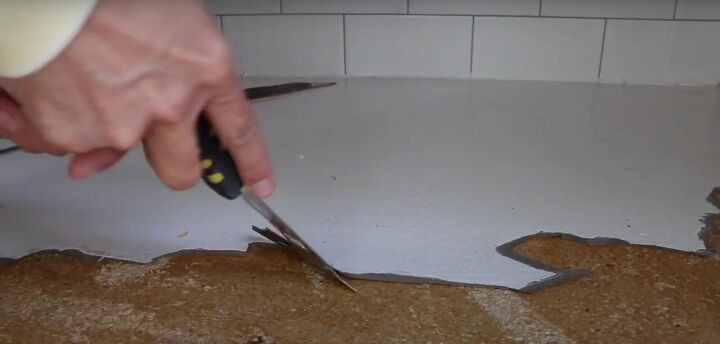
We ended up chipping off the lamination slowly to expose all of the riveted nails;the kind they put in pallets.
We then banged around them until we could get to the head and then we pulled them out slowly, one by one with pliers. We ended up pulling out 60 of these from the top glue board.
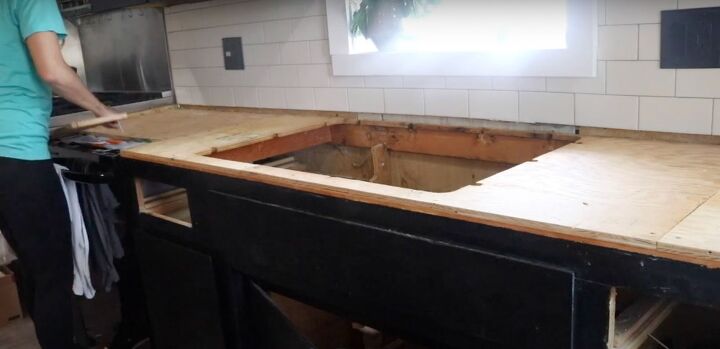
Fortunately, the layer below the plywood didn't have the riveted nails. It just had normal nails into the cabinet base. Thankfully those came up pretty easily with justsome prying and back and forth.
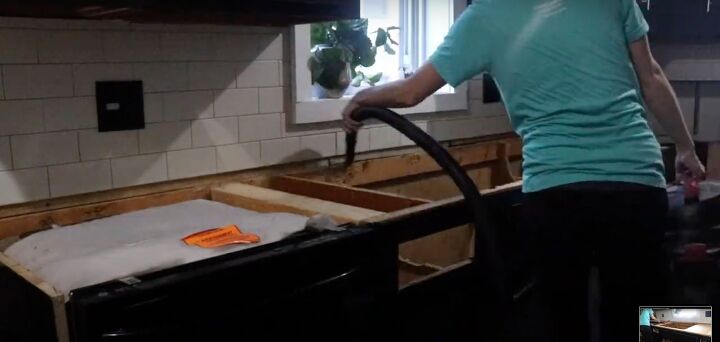
Finally, I was able to go in with a vacuum to clean the entire area.
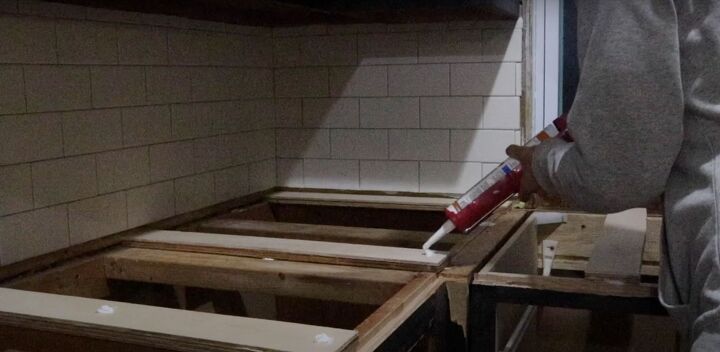
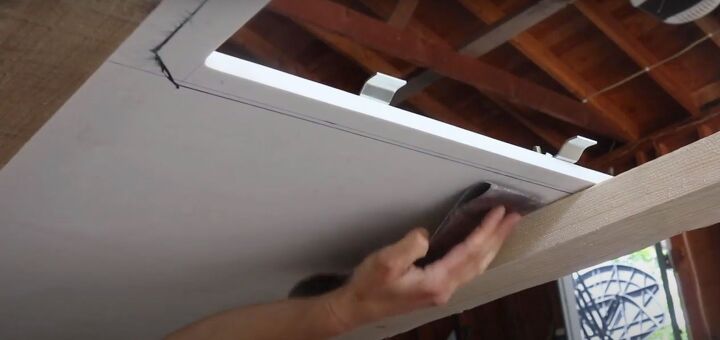
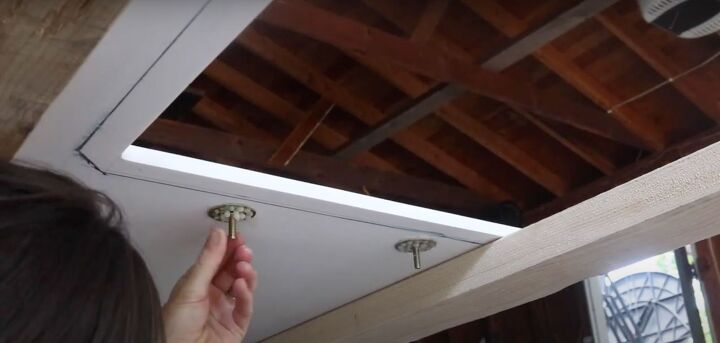
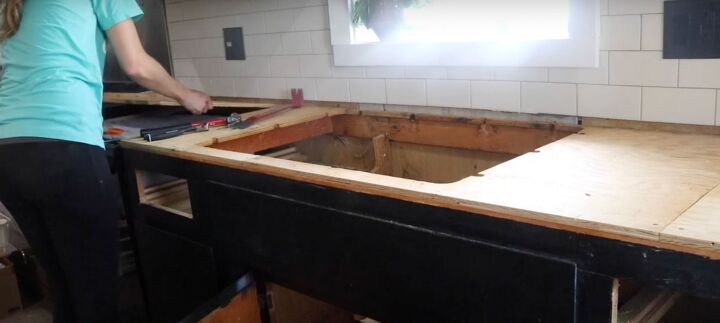
After that, I was able to start building the supports to actually lay the solid surface down on my cabinets. The supports were ¾” thick by 3” wide pieces of wood that I pre-cut. I put dabs of silicone on each edge of the cebinet to hold them in place. I put one about every 18 inches. Of course, I had to modify mine a bit to fit the under-mount sink cavity.
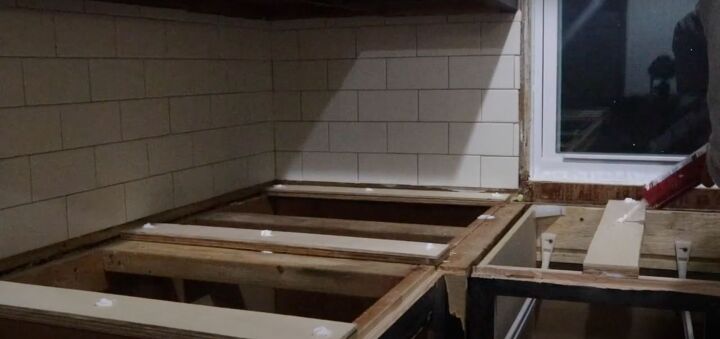
Before you lay down the solid surface counters you also want to dab that siliconesealant every 12 inches on your supports to hold the counter in place.

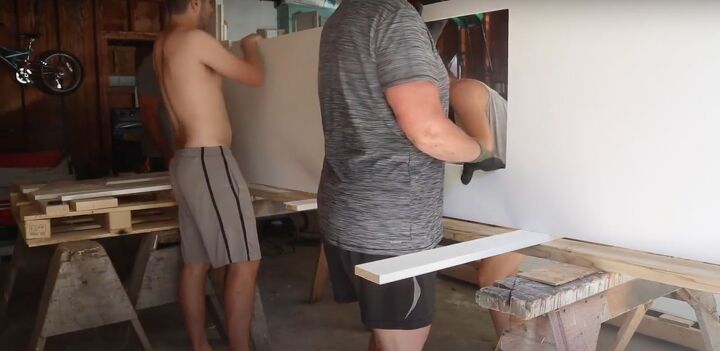
Finally, we were able to bring in our counter. Make sure you have enough people to help so that it is supported.
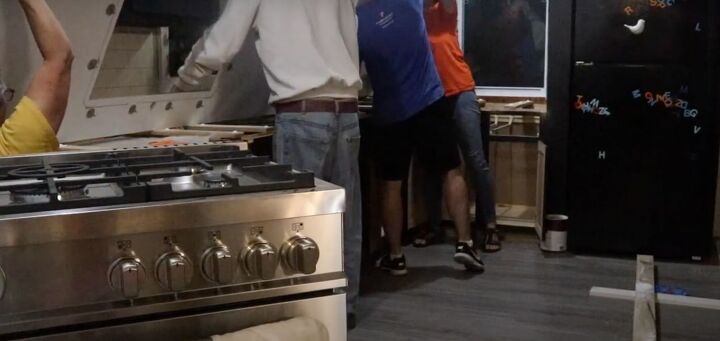
Then it was time to set it into place. We had to install it at a 45-degree angle so had to be very careful not to damage any cabinets or the supports.
I forgot to mention that before we put in the counter, I had put the under-mount sink in the sink cavity, otherwise, I don't think I would have fit in there trying to do it after the fact. Once the counter was in place, I lifted it up into its place and secured it with the sink clips and silicone caulking to hold it in place.
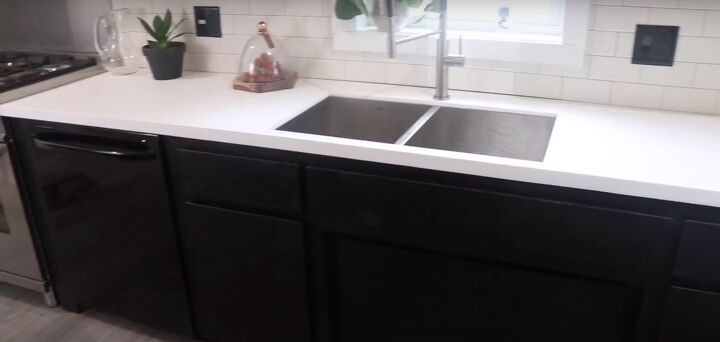
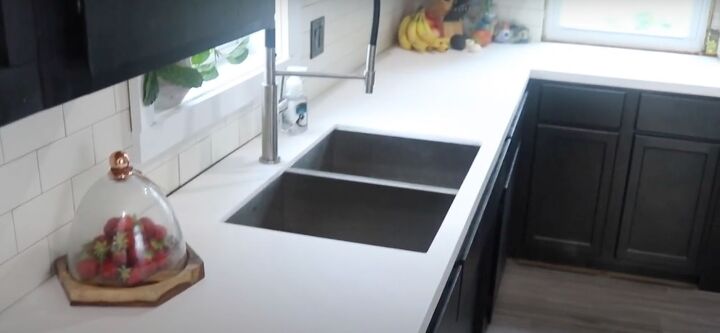
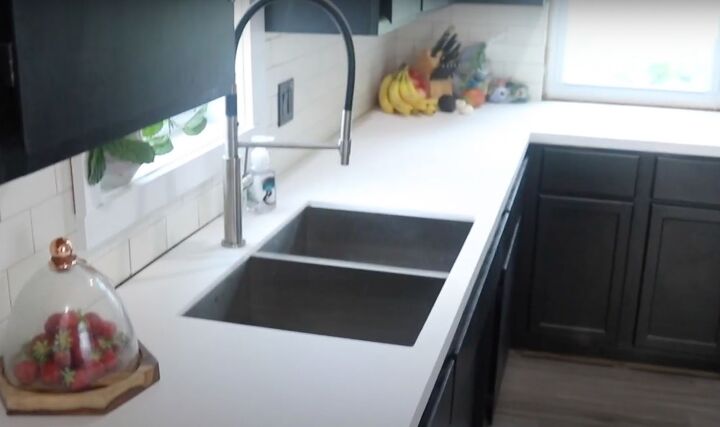
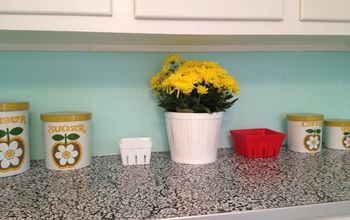
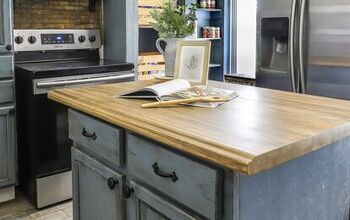
The counter turned out so beautifully. I'm really proud to say this project was a DIY. It is strong and durable enough for my kids to climb on and stain-resistant enough that I don't have to worry about berries or wine spilling. I have even fooled a few people already thinking that they are quartz.
Comments
Join the conversation
-
I agree with Flipturn and disagree with Nancy. No one would mount a new solid countertop over the old. Or they shouldn't. Thickness would be an issue in mounting the sink and plumbing fixtures. You can tile or new laminate sheets over the old if it's stable, even paint it. A new continuous solid top needs it's own supports.
-
$86 a square foot. That sounds like a great price


Frequently asked questions
Have a question about this project?
Looks great!
Did you set the new splash prior to setting the countertop, and what material is it? I appears to be subway tile, but I cant really tell from the photos. Thx!
Great job!! Can you say how much you paid a sqaure foot for the solid surface? TIA
Beautiful, what roughly did your project cost overall??