


My New Marble Kitchen Counters – How I Saved Thousands of Dollars
Thanks to the makers of the Giani Marble Countertop Kit for partnering with me on this post.
I’ve been wanting to swap out my home’s laminate kitchen counters with marble looking quartz countertops for a while. I am always looking for easy budget DIY kitchen makeover ideas.
My kitchen’s counters are nearly 20 years old.
But now that my twins are first-year students at private liberal arts colleges (with large tuitions), my husband and I are loathe to shell out thousands of dollars for new counters! I’ve seen many homeowners complete amazing budget kitchen makeovers on their own, so I though I’d give it a try!
Enter the best way to get “new” counters on a budget – a Giani Carrara White Marble Epoxy Countertop Kit.
Giani makes a variety of DIY kits to update a home on a budget — there is also a Giani granite kit to get “granite” countertops on a budget.
These super easy to use kits produce fantastic results. (Even for people like me with a beginner’s level DIY skills.)
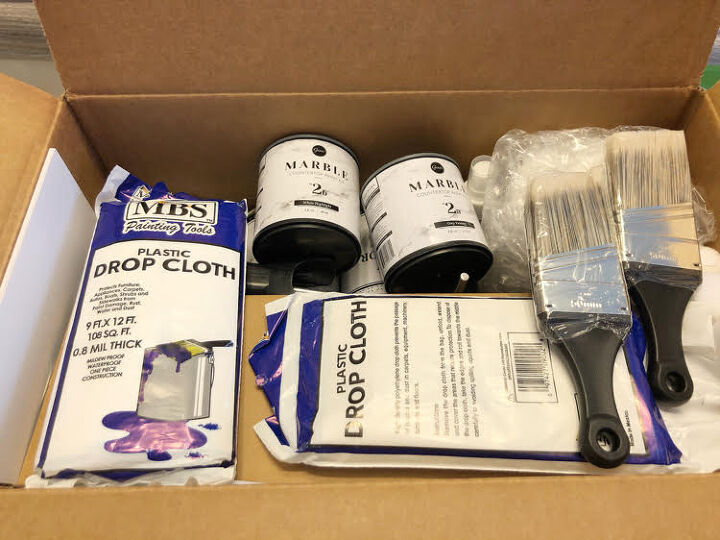
The Giani epoxy marble kits are available on Amazon for about $180, and contain everything you need to transform a dated counter. (Whether it’s laminate, dark granite, etc.)
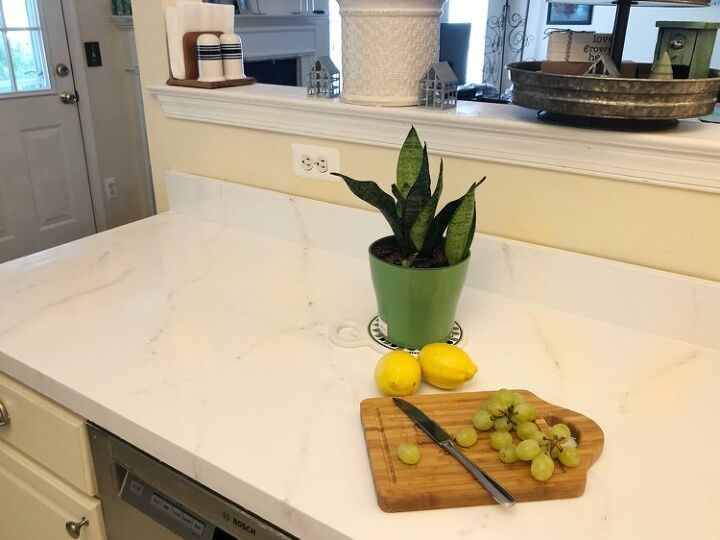
Epoxy Marble Counters on a Budget
Giani has different countertop kits available. I chose the Giani Carrara White Marble Epoxy Countertop Kit because I love the classic and clean look of marble counters.
The kit contains everything one needs to transform kitchen or bathroom counters: paint brushes, sandpaper, white base coat paint, gray and light highlighting paints for the veining for your “marble” counters, plastic tarps, and an epoxy top coat to give your counters a durable, glossy finish.
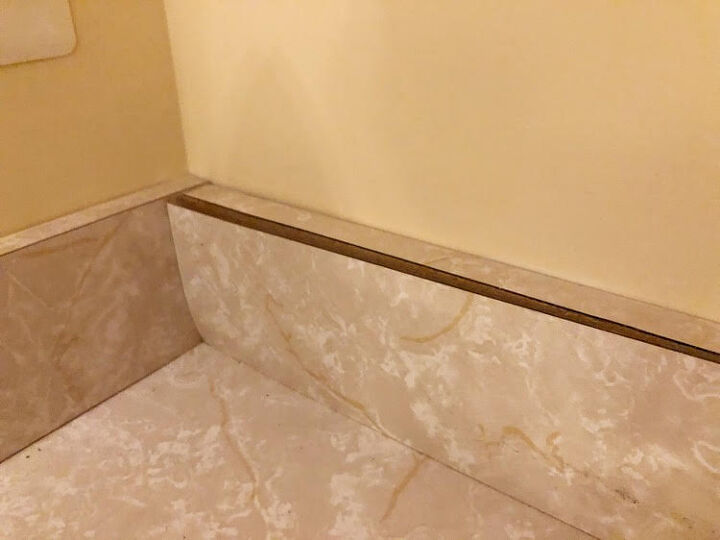
I have already used a Giani Carrara White Marble Epoxy Countertop Kit on my seriously dated master bathroom counter. I love the way my epoxy marble bathroom countertop looks!
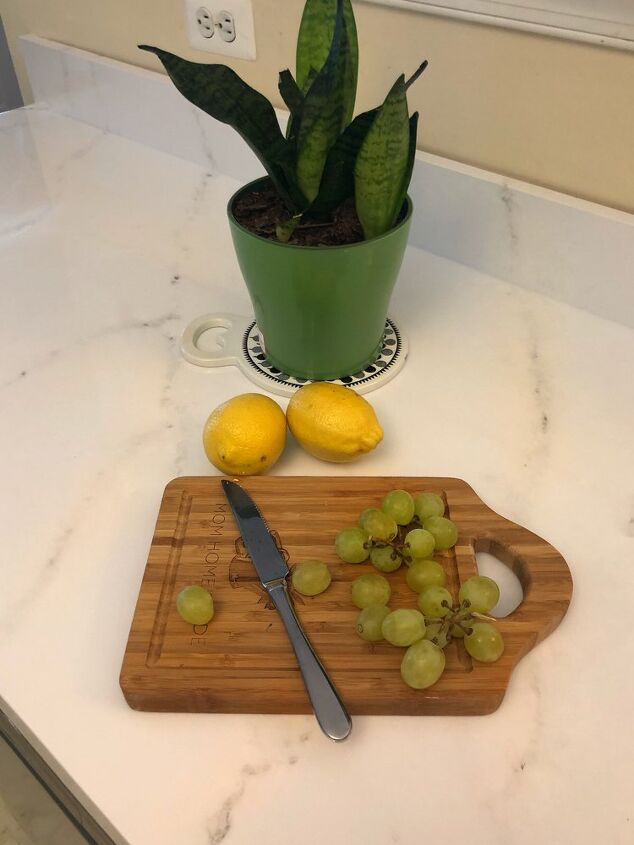
(Check out my Mom Home Guide YouTube video on my master bathroom transformation to see how easy it is to use a Giani Carrara White Marble Epoxy Countertop Kit.)
My once yellowed cultured marble countertop now looks brand new and beautiful! (Check out my bathroom epoxy marble countertop tutorial for the full details.)
Bathroom Counter Transformation
Fixing a Laminate Counter
Before I got to transforming my laminate counter with the Giani Carrara White Marble Epoxy Countertop Kit, I first had to make some fixes to my kitchen counter.
My laminate counters have a laminate backsplash. I was going to remove the backsplash before painting the counters, but those backsplashes seem to be glued to the countertop for life! I couldn’t get them to budge.
But the fronts of the backsplash were a different story. The laminate was coming off the backsplash in one corner where I used to keep a coffee maker. Also, the laminate edge of the counter in front of the sink was coming off a little, too.
I tried ironing the laminate back on (by ironing it to reactivate the glue), but that fix didn’t last long. It turns out that there wasn’t much glue behind the pieces that were coming off. (Ironing edges of laminate counters back on only works if there is enough glue left to hold it up.)
I posted a question on Hometalk on how to reattach the laminate pieces, and someone suggested I use a hot gun. So I got out my trusty glue gun, and within seconds, my laminate counters were fixed. Yay! Thank goodness for my glue gun.
Prepping a Counter for Giani Marble Countertop Paint
Once my countertops were fixed, I was ready to break out my Giani marble countertop kit!
My first step in prepping the counters was to sand them with 220 grit sandpaper. Giani says sanding is not needed, but I felt it would be helpful to remove some of the gloss from my laminate counters before painting. I wanted to make extra sure the paint would adhere properly to my counters.
After I sanded the counters, I followed up by scrubbing them clean with a Brillo pad. After I used the Brillo pad, I cleaned the counter off several times with a wet paper towel and then dried it with new paper towels.
I then taped off the sink and taped behind my laminate backsplash with Frog Tape. I tend to be a messy painter, and didn’t want to get paint on my kitchen walls or on my stainless steel sink. (Although I do hope to add a tile backsplash to my kitchen walls at some point — but that’s another project!)
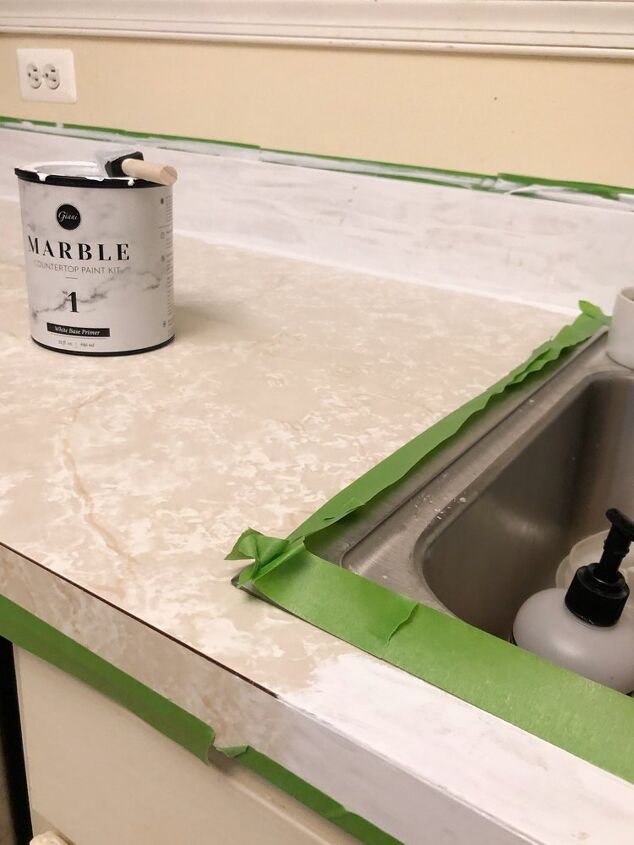
My Giani Carrara White Marble Epoxy Countertop Kit came with just about everything I needed for my countertop painting project, making my project so easy!
Painted Epoxy Marble Counter Supplies
1 Giani Carrara White Marble Epoxy Countertop Kit
Brillo pads
220 grit sandpaper
Paper Towels
Frog Tape
Extra Foam Paint Brushes
Painting an Epoxy Marble Counter
Once all the prep work was done, I could start using my Giani marble kit. I started by shaking and then opening the can marked “1”— the base coat paint. Once I opened the can of base coat, I stirred the paint before using any of the paint.
Then it was time to start painting! The Giani kit includes a roller to use for painting the counter. I discovered, though, when I painted my bathroom “marble” counter, using the roller gave me too much texture and not a smooth finish. (There must be something wrong with my technique.)
So, for my bathroom counter and my kitchen counters, I used a large foam paint brush to paint the counters instead. This method is slower, but it helped me to get a smooth finish.
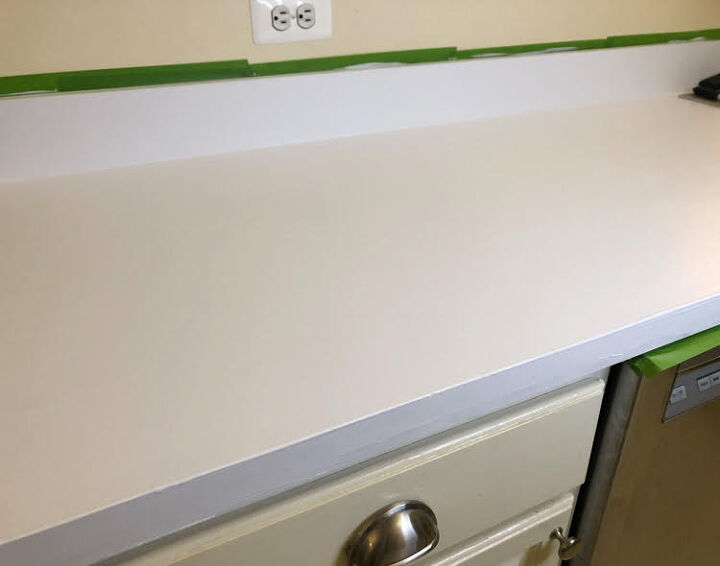
The paint in the Giani kit goes a long way — I was able to put 3 coats of base coat on my kitchen counters. I let the coats of paint dry at least 2 hours between coats.
After the 3 coat was dry, I used the included fine grit sandpaper to give the countertops an extra smooth finish.
Then it was time to paint on the veins using the can of paint marked “2a.”
From my bathroom epoxy marble counter project, I discovered that it’s best to work on small sections of a vein at a time, using as little paint as possible.
I wanted to add some depth to my painted marble veins. So I added some darker gray acrylic and white paint to a paper plate with the gray paint provided by Giani. I mixed the colors of the paints to create various shades of grays.
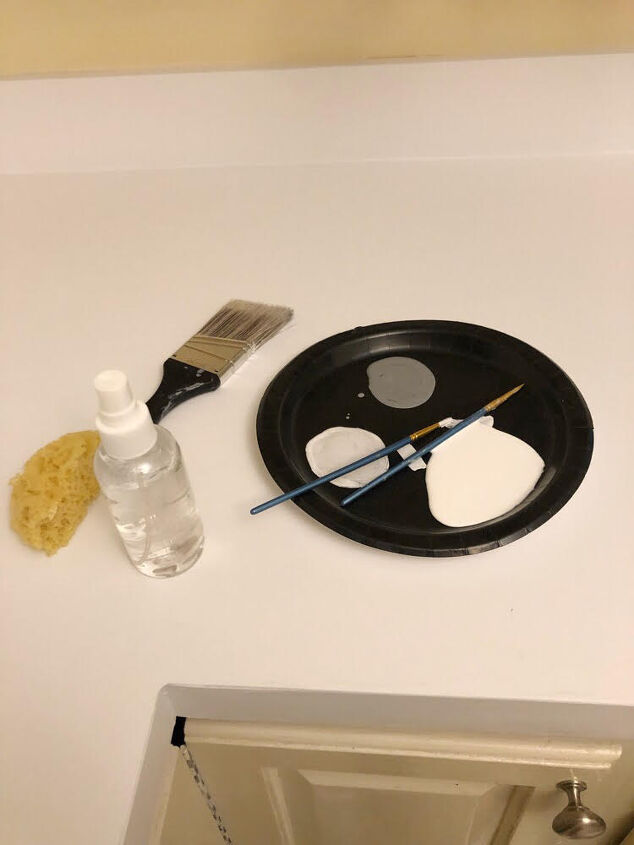
I used the provided thin paint brush to paint on each vein.
I sprayed a painted vein immediately to soften the look. I used the large paint brush in my Giani kit to dab at and blend a vein.
I made sure to continue the veins over the edges of the counters, and up onto the laminate backsplash.
Once my veins were painted, I used the included sponge and small can of white paint (the can marked “2b”) to highlight and soften the look of the veining on the counters.
I found it helpful to watch YouTube videos before painting on the veins. (Just search for Giani marble counters on YouTube.)
There are various looks you can get depending on the technique you use. Some people go for large bold and modern veins, while others paint on fainter, more subdued veins.
I chose to go with the more subdued veining look for my kitchen counter’s marble veins. My bathroom counters have a bolder veining look. I think that’s just because it was my first attempt at painting on the veins. (It took me a while to develop my preferred technique.) I still like the look of my bathroom counters, though.
Glossy Epoxy Marble Counter
After my countertops’ veining was completed, it was time to mix one of the cans of epoxy with a can of activator from the kit. (The kit comes with 3 cans of epoxy and 3 cans of activator.) I poured a can of activator into a can of epoxy and stirred it for exactly 3 minutes and 30 seconds.
I used a foam brush to paint the epoxy on my counter’s backsplash. I worked on my counters in sections, working on one side of the kitchen, and then completing the other side.
At first I poured on epoxy on a small section and used one of the kit’s included soft rollers to roll out the epoxy. But I found that I got a smoother application using my foam brush, so I used a foam brush to cover the rest of the counter and its edges with epoxy.
The next day I used the kit’s included sheet of extra fine sandpaper to sand down any air bubbles I found.
I followed up the next day with another coat of epoxy, using another of the kit’s cans of epoxy and a can of activator. I was glad that I had extra cans of epoxy and activator from my bathroom counter project. I somehow managed to miss putting epoxy on a corner section of my countertops.
The epoxy takes several days to cure. I avoided putting any heavy options (like my KitchenAid Mixer) on the counters for 2 weeks after applying the epoxy to my kitchen counters.
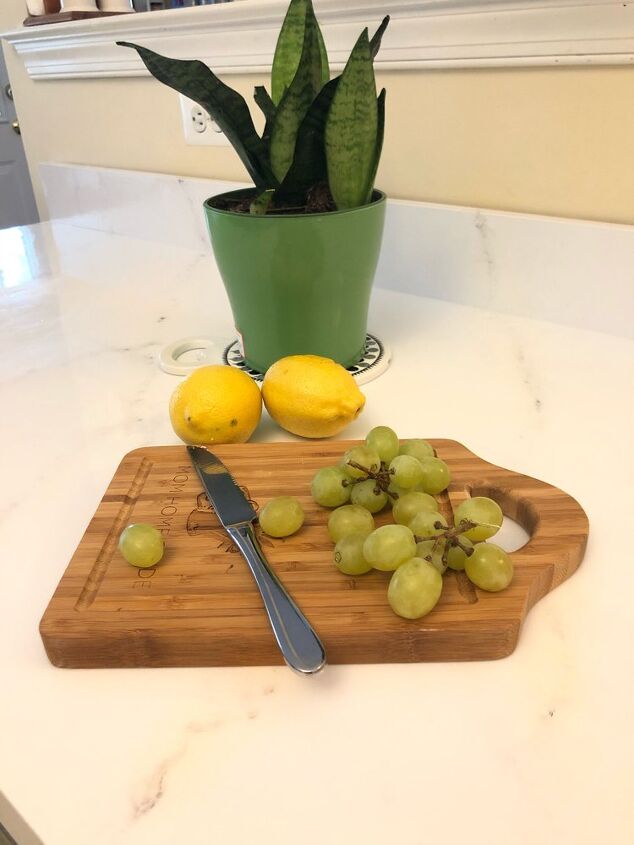
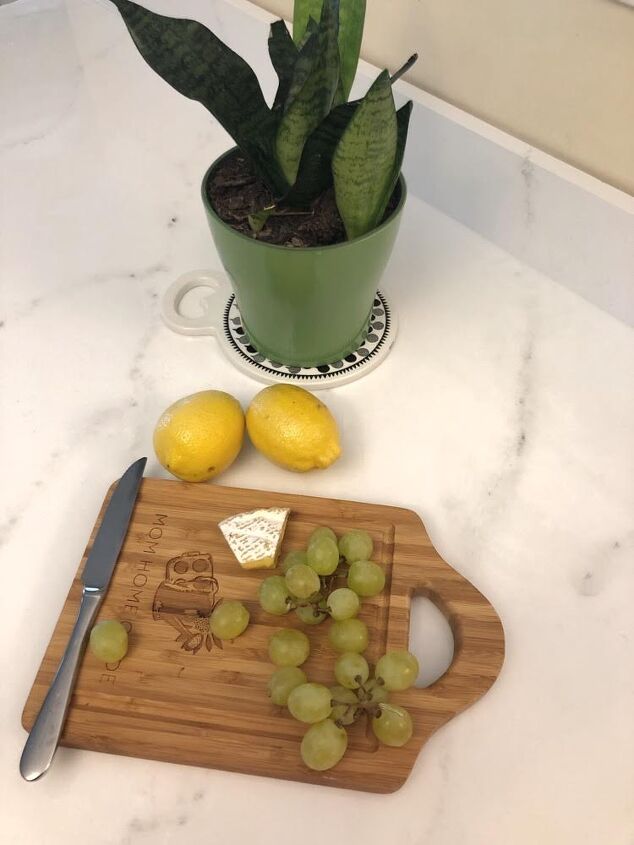
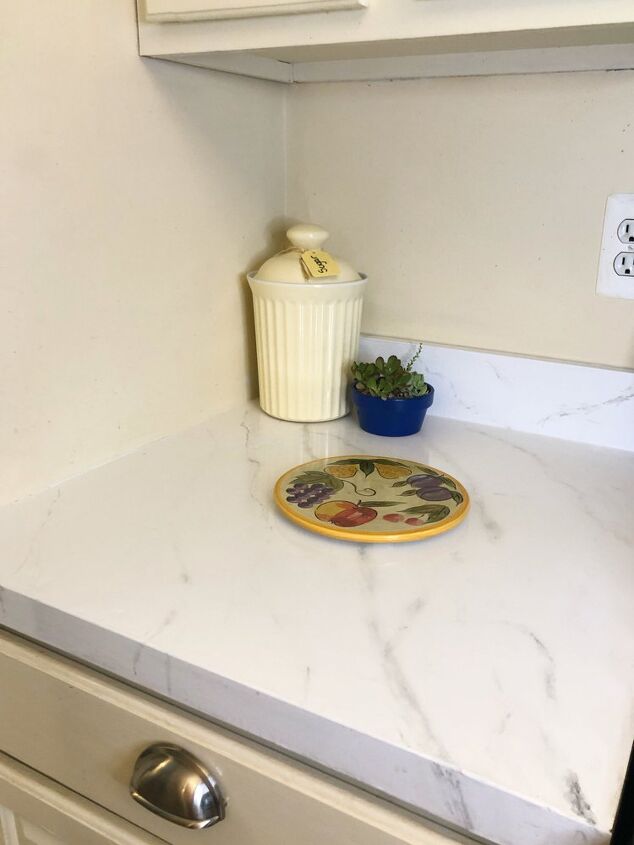
I love my beautiful, easy to clean, epoxy marble kitchen counters! This has to be hands down one of the best DIY projects I’ve completed on my home.
Resources for this project:
See all materials


Comments
Join the conversation
-
Your Giani looks really nice. My bathroom (*with instructions warning me) did not like getting wet, so I blew $2600 on the kitchen to do granite, and it was worth it (DIY backsplash included). When the kids are out of school, you'll want to go ahead and upgrade. Enjoy for now 🤗
-
You did an awesome job! Since granite is way out of my price range this is a nice alternative to pricy granite.


Frequently asked questions
Have a question about this project?
My laminate is textured; will the marble kit work and end up with a smooth counter?
Would this work on Corian countertops also?
Does this process work on tiled counters? I hate my tile, I can't keep the grout clean and I'm worried about bacteria.