


Dated Den to Fabulous Kitchen
The original kitchen was just off the entryway and was quite small. Before deciding to buy this home I had to come up with a plan to make a better kitchen. I knew the current layout would never work for me and our family. With a little imagination and a lot of work we were able to relocate the kitchen into the former den area. Not only did this allow for more than double the storage and countertop space, but I love that the two windows that flanked the fireplace, now flank my range.
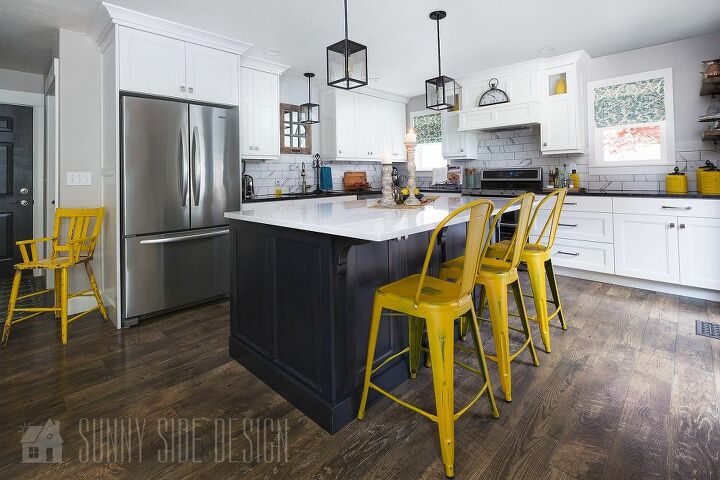
I’m so thrilled with the way this kitchen turned out. I had it all pictured in my mind and to see it come to fruition is thrilling. I remember the day the cabinets arrived, I was just giddy with excitement! I couldn’t stop taking pictures and texting them to everyone, the poor installer I’m sure wasn’t too thrilled that I kept clicking photos of him. Let’s take a look of what it looked like before.
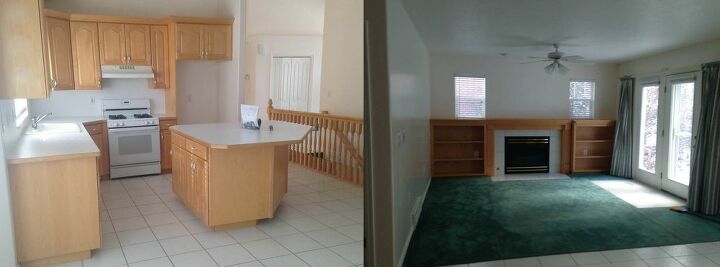
The original kitchen was just off the entryway and was quite small. There was only 1 large upper cabinet, 1 upper corner cabinet, a couple of small cabinets, 1 bank of drawers and the island. I knew that this would never do, but with a little imagination and a lot of work we were able to relocate the kitchen into the former den area. Not only did this allow for more than double the storage and countertop space, but I love that the two windows that flanked the fireplace, now flank my range.

The first step was removal of the mantle, fireplace, green carpet and tile. We rented an oscillating machine that was supposed to remove the tile (it’s pictured behind my husband), however we soon discovered that there was a metal mesh that was stapled to the sub-floor that the tile was adhered to and it didn’t work! So, it was just a lot of muscle and sweat to remove all that tile.
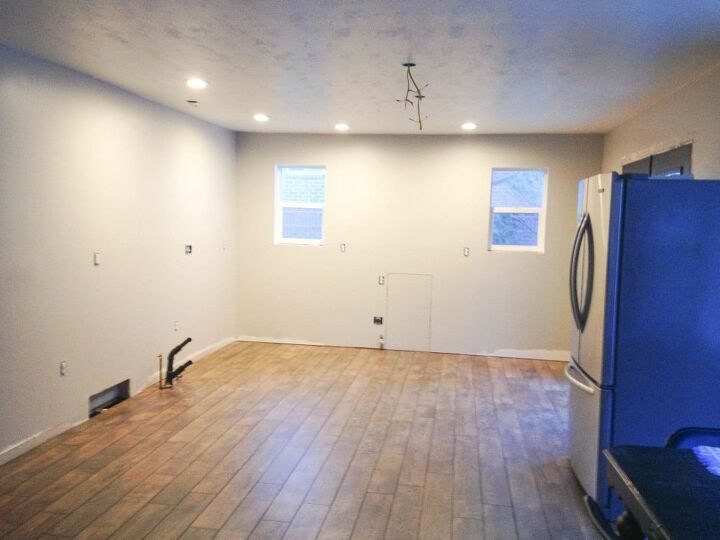
We were lucky that this area backed up to the laundry room, so all the plumbing was close by and it was not a huge expense to add the plumbing. A gas line was already in place for the range because of the fireplace. Electrical outlets were relocated counter height, can lighting was installed around the perimeter of the room and pendant lighting added for the island. I choose a “greige” paint color that I had loved in our previous home, Behr “Perfect Taupe” and had it lightened by 75% for the perfect color. Installation of the flooring followed the painting.
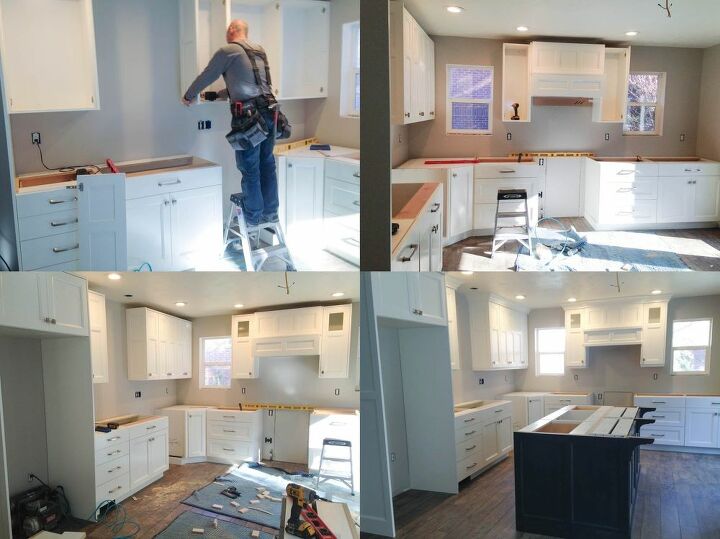
My heart was racing with excitement the day the cabinets arrived. I had it all pictured in my mind what my new kitchen would look like and now it was coming to fruition! We had custom cabinets built and installed with Mountain Crest Cabinet. They did a beautiful job, the price was very reasonable, I couldn’t be happier!

The following week my countertops arrived and were installed. I chose a black granite called Steel Grey and for the island Cashmere Carrara quartz. Finally I had a functioning kitchen. It took us just 6 weeks to do the kitchen, not bad for a couple of amateurs.
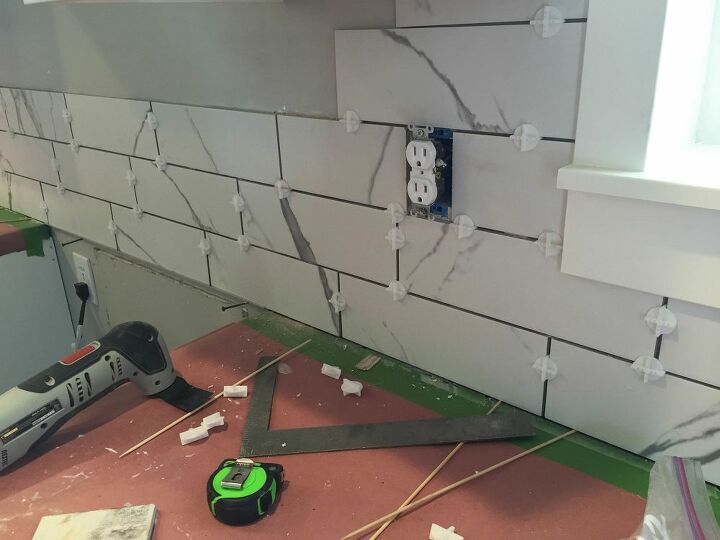
A porcelain tile was chosen for the backsplash with a grey grout. I love the look that is gives without the expense of real marble.
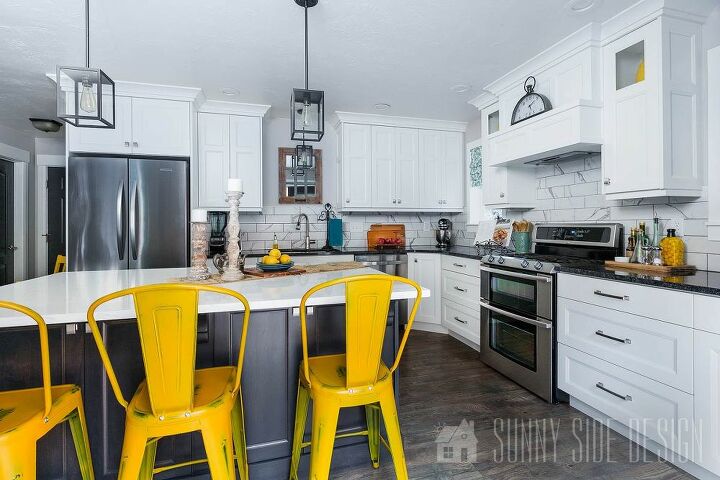
We were able to do this entire kitchen including appliances for $18,800. I placed a mirror above the kitchen sink that reflects the beautiful trees in my backyard. The fun pendant lights I found at Lowes, and the vintage looking clock on my exhaust hood shelf I found at a local nursery of all places.
To see more photos of our kitchen renovation please go to our website 2thesunnyside.com


Frequently asked questions
Have a question about this project?
Your kitchen looks amazing! I love the flooring, what is it and the color? Looks like reclaimed wood which is the look I want. Great job!