


Easy DIY Picture Frame Molding – One Room Challenge Spring 2021 Week
Find out how to easily plan, measure, cut and install picture frame molding to add a polished finished to any wall in your home.
This post contains affiliate links. Please see my full disclosure policy for more details.
Welcome back to week 2 of The One Room Challenge! I am so thrilled to be participating in this event with some of my very talented blogger friends. Make sure that you hop on over to the project page and show them some love too!

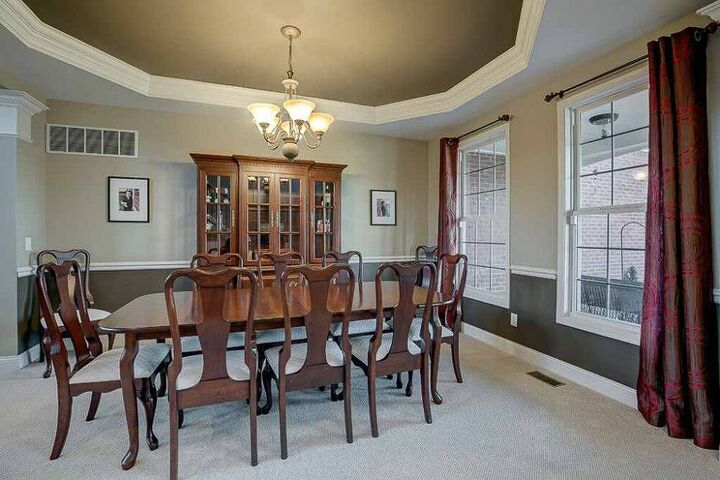
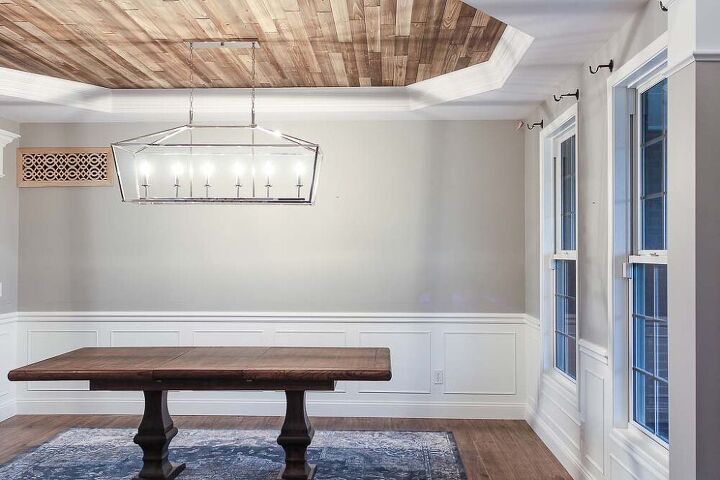
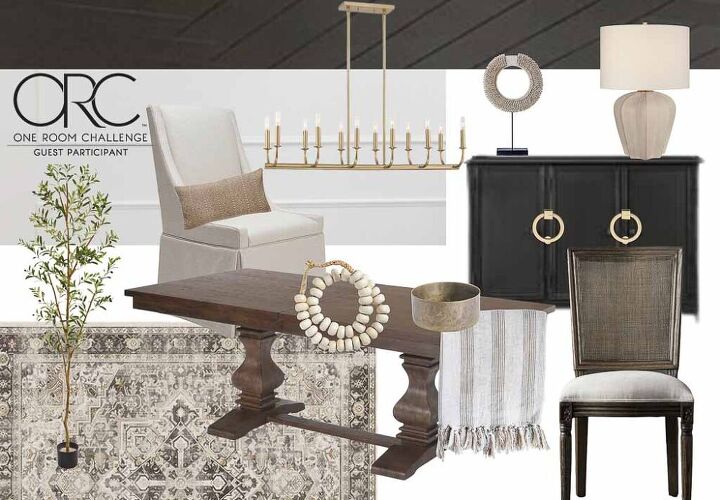
Last week I outlined my plan for our Open Concept Dining Room Makeover. This week we’re diving right on in to the messy middle of this space. Here’s a quick recap of the changes that are going into the room:
- Picture Frame Wall Molding
- Fresh coat of dramatic paint
- New light fixtures
- A new kid-friendly area rug and window treatments
- Antique Buffet Makeover
- Re-caning a set of antique chairs and re-upholstering
- DIY accessorizing
- Full Room Reveal!
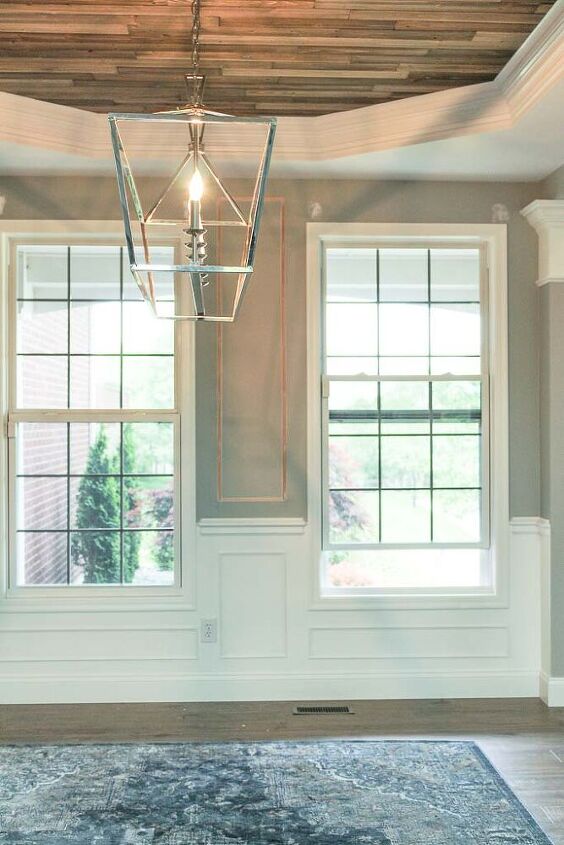
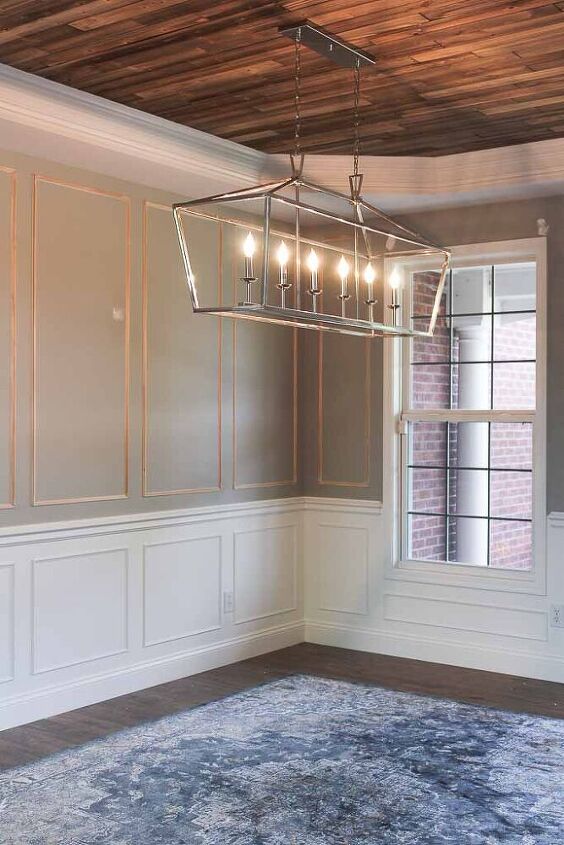
It’s a lot of work to get done over the next six weeks and I’m really going to push myself in all of my second trimester glory to finish this room. So let’s hop right into week 2’s project. We’re installing the full floor to ceiling picture frame molding treatment on the dining room walls.
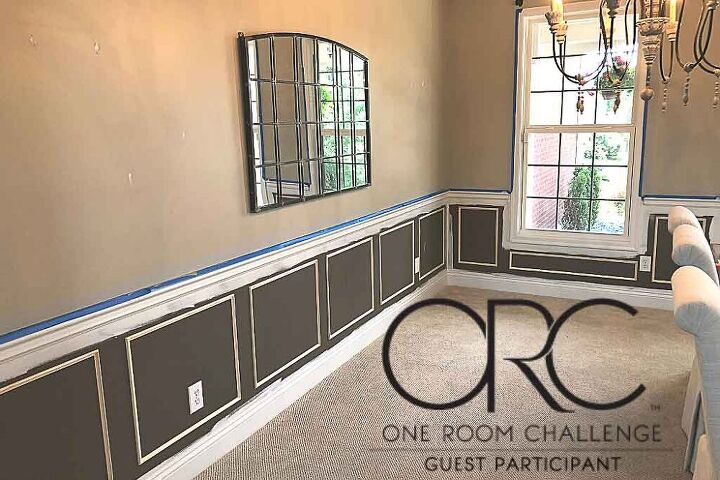
I mentioned last week that our dining room already had a beautiful chair railing installed when we purchased our home. And one of the first updates we made to the space was to add our own DIY box moldings to attach to the lower portion of the walls.
This was our budget version of wainscoting, which is true wood panels attached to the walls that creates a decorative second layer.
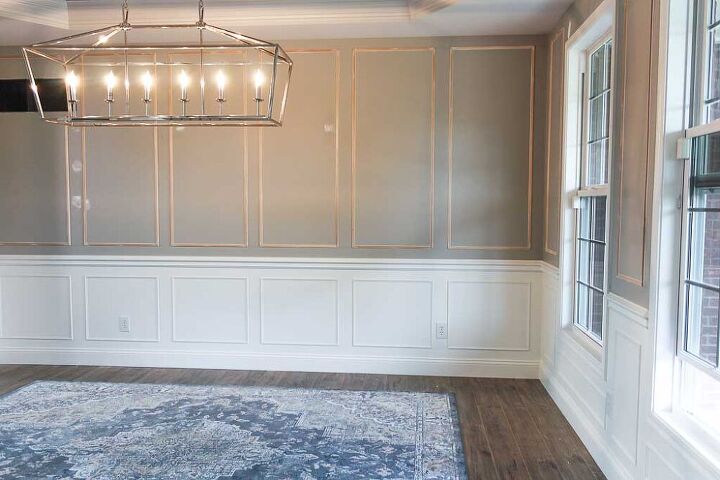
Determining the exact placements and measurements of your picture frame molding boxes is probably the most tedious and difficult part of the entire project. One you nail this down (pun intended), the rest is pretty easy to finish up.
There are a few things to keep in mind before you start cutting and nailing up decorative trim on the walls. The layout and design of the boxes is entirely up to you and how you want the look of your room to feel, but here’s a few things to keep in mind before you get started:
- Do you want all of the boxes to be the same width and height?
- How many boxes do you want on the wall? For symmetry, odd numbers are usually best if the space allows for it. Ours didn’t, which is why we ended up going with six box moldings.
- What type of trim will look the best with the style of your home? Modern, traditional, etc.
- Do you have windows, or other odd openings that you’ll need to adjust your measurements to work around?
I love to visualize the placement of things before I commit to a permanent fixture on my walls. My go-to technique for this is just outlining the plan in painter’s tape to make sure that the layout will work for the space.
I completely failed to document this when we installed the lower molding boxes a few years ago, but I highly recommend this for beginners.
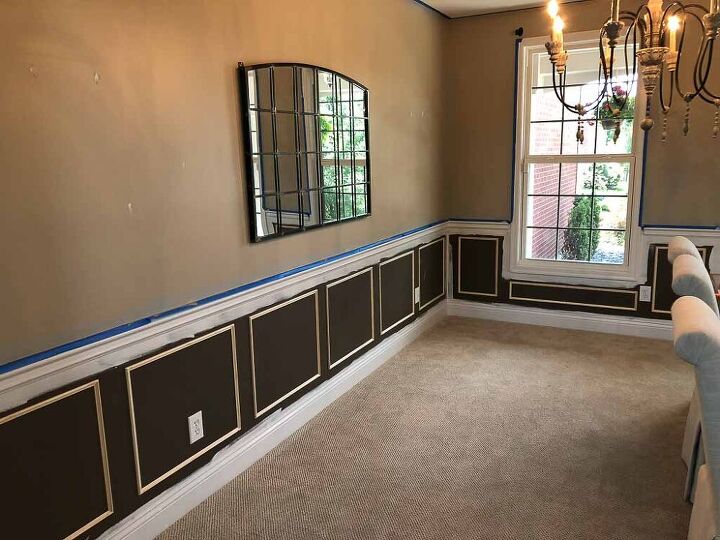
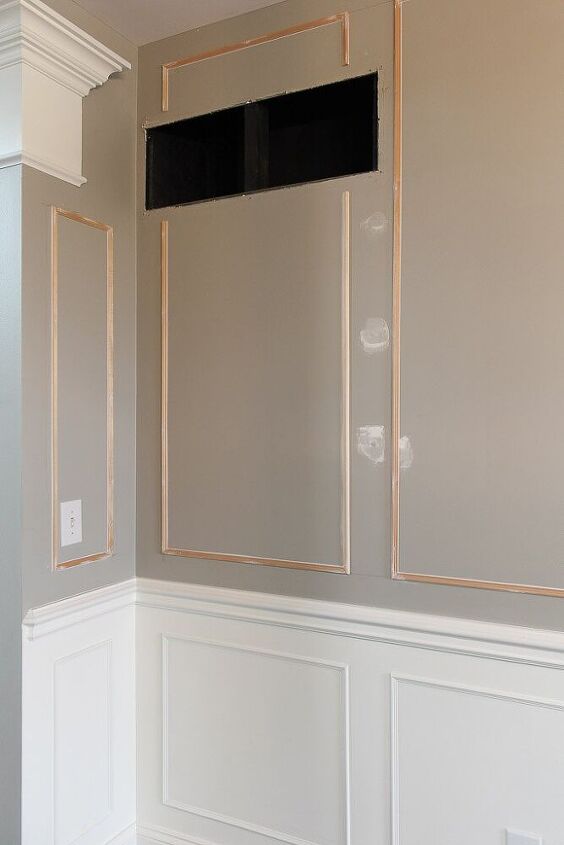
Since we were working with existing baseboards and chair railing, we decided that we wanted to leave 3 inch spaces between those pieces of trim and the new box moldings. You’ll always want to determine the height of your boxes to begin with. After the spacing we were left with roughly 21-inch-high boxes to work with.
My husband used his square to mark the upper and lower portions of the boxes since we already knew the chair rail and baseboards were level. This was a huge help when it came time to install.
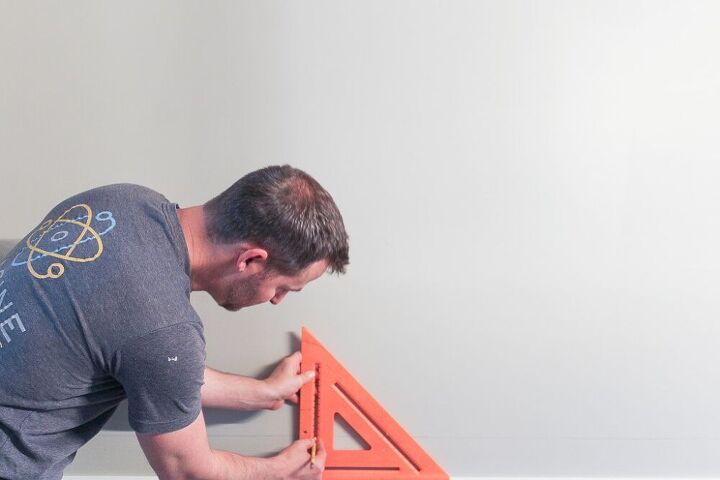
Next we decided on the width of our boxes. We had to make adjustments for the length of the wall in order to space out or boxes equally. We settled on 4 1/2″ spacing between each box, and ended up with 6 complete picture frame molding boxes in the end each 24 inches wide.
So, not a complete square, and just rectangular enough for some visual interest. We did have to make adjustments for the odd walls between windows and door openings though. For those we simply reduced the width of the boxes. Keeping the 4 1/2″ spacing between any window casings and odd openings.
For the smaller areas underneath windows, we made similar adjustments this time on both the height and width of the boxes.
Finally, since we already had the lower portions of the wall boxes completed, the top was that much easier. We simply lined up our upper boxes to be the same width. Then we adjusted the height leaving 3 inches between the boxes and ceilings and the boxes and the chair rail.
Once we had our layout and measurements down, we were ready to make our cuts.
This really is one of the easier steps in the entire project, because you’ve already done the difficult math of measuring and planning your layout. The miter saw is your best friend for this process and incredibly easy to use for beginners.
It’s easiest if you batch all of your cuts at once. We started by making all of the horizontal top and bottom pieces of the boxes. Each strip would need a left and right 45-degree angle cut at each end.
Then, we prepared the length of all of the sides of the boxes using the same left and right 45-degree angle at each end. This creates those nicely joined picture framed corners when you attach them all together on the wall.
Batching the install of your molding is another way to make this project move along much quicker.
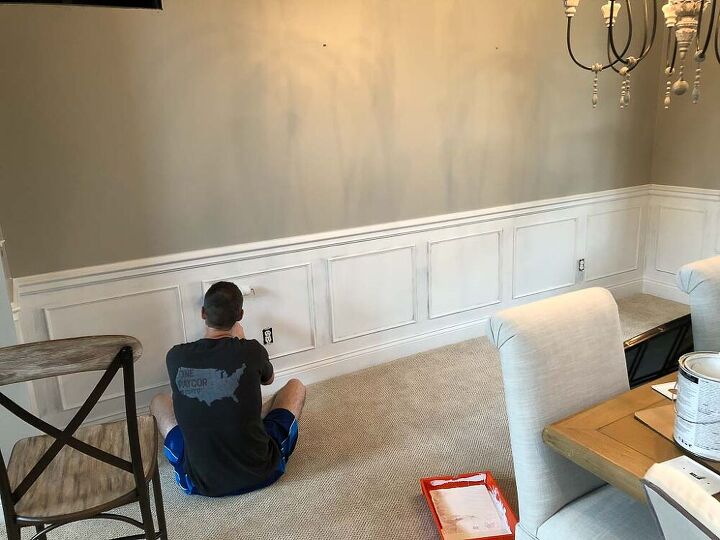
Begin by attaching your top and bottom molding strips to the wall using a brad nailer. Don’t worry if the trim pieces don’t sit perfectly flush. That’s what the magic of caulk is for.
Once you have all of the top and bottoms of your boxes secured to the wall, you can move on with attaching the sides.
The very last part of this easy project is to finish up the molding by filling in all of the nail holes with wood filler, and caulking all of your seams. For the most part, both of these materials dry fairly quickly. So you can be ready to paint your picture frame molding all in the same day.
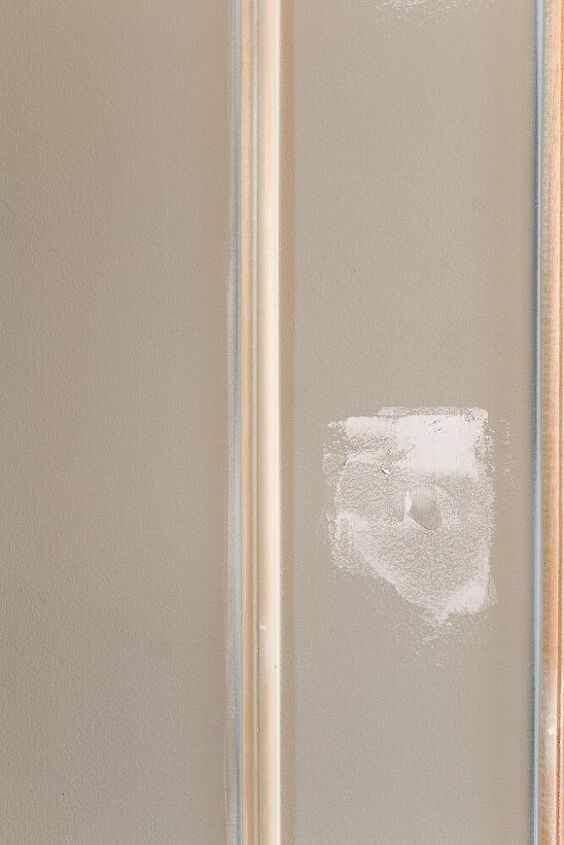
I do recommend caulking ALL seams along the molding strips and not just the gaps that appear visible. This is because wood expands and contracts with changing temperatures. So gaps that you may not notice initially may become pretty visible later on, and you’ll wish you’d just caulked everything.
- MEASURING TAPE
- MOLDING
- MITER SAW
- NAIL GUN
- SQUARE
- FINISHING NAILS
- CAULK & CAULK GUN
- PENCIL
- LASER LEVEL
- WOOD FILLER
- PAINTERS TAPE
I can’t wait to show you what this room looks like next week when it’s all painted! Stay tuned for week 3’s progress of The One Room Challenge. And be sure to check out the design plan for the space if you haven’t seen it yet!


Frequently asked questions
Have a question about this project?