


DIY Budget Friendly Kitchen Refresh

Transform your kitchen with this low cost, minimal prep, DIY painted Kitchen tutorial!
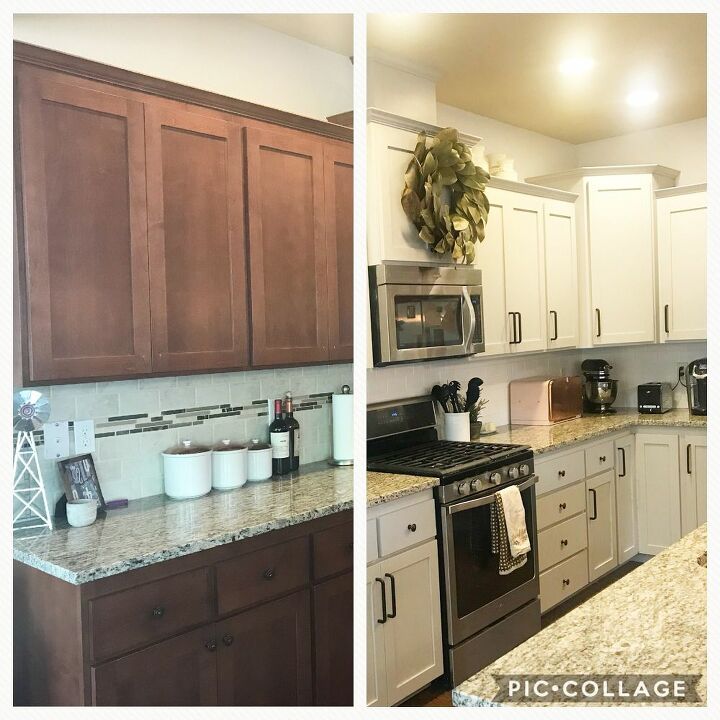
Before & After on a budget friendly DIY kitchen refresh!
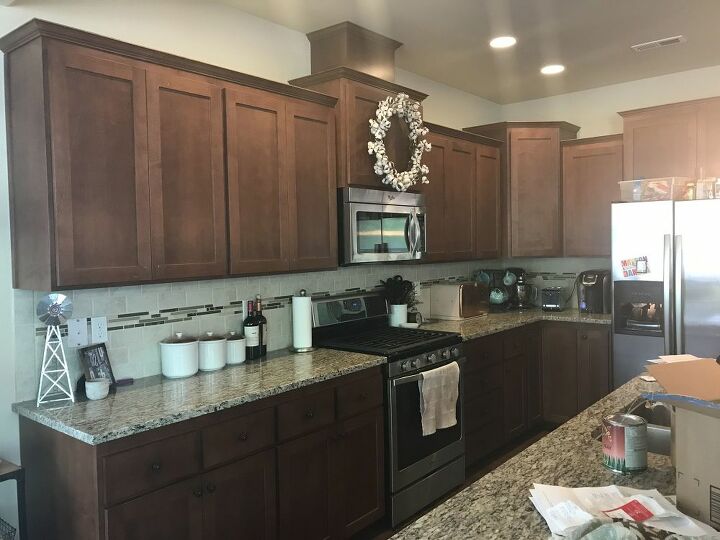
Before: Our kitchen had great shaker style cabinets, but it was always so dark and gloomy.
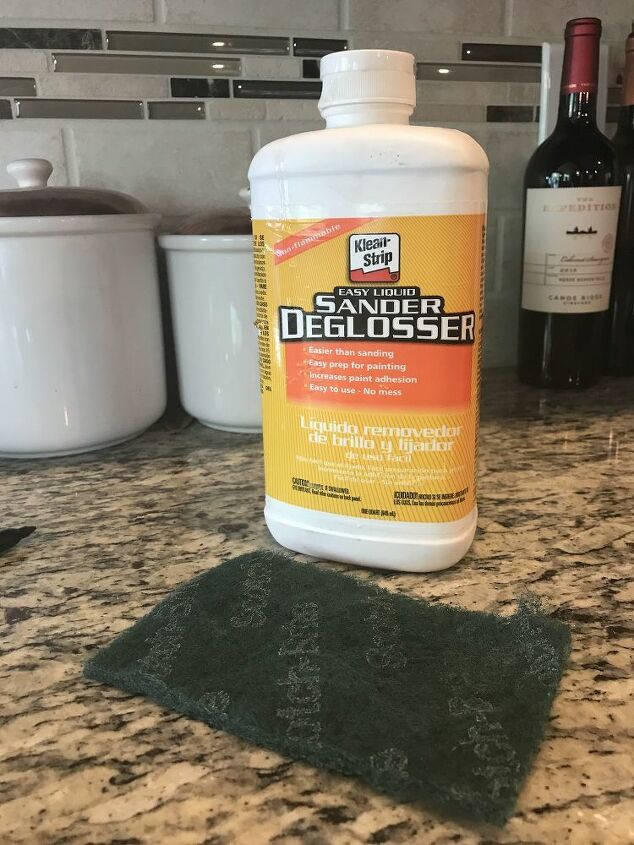
Using Liquid Sander and a Scotch Brite pad, wipe down all cupboards and boxes. This helps remove any grease and grime, giving the paint good adhesion.
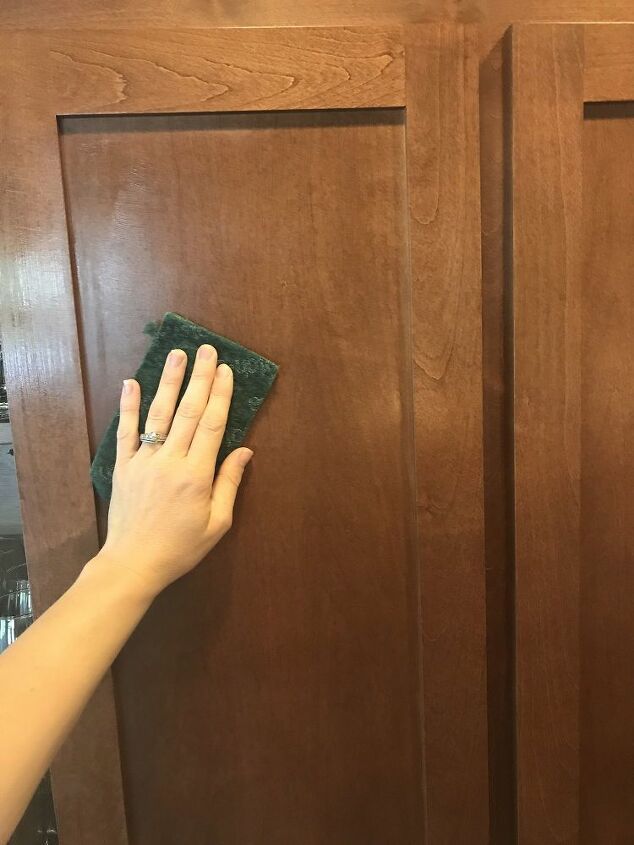
Using Liquid Sander and a Scotch Brite pad, wipe down all cupboards and boxes. This helps remove any grease and grime, giving the paint good adhesion.
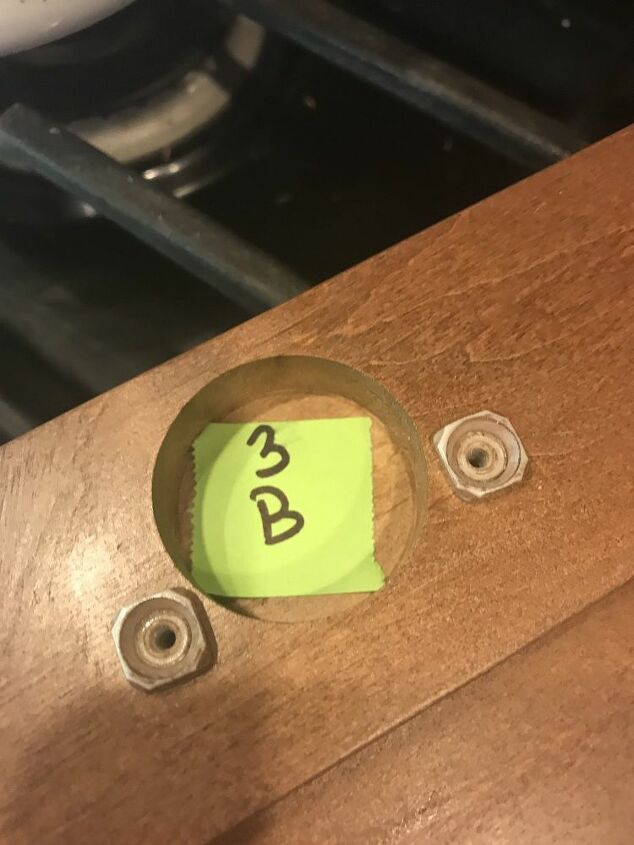
Remove doors and mark each doors location to make for an easy match up when you go to rehang the doors.
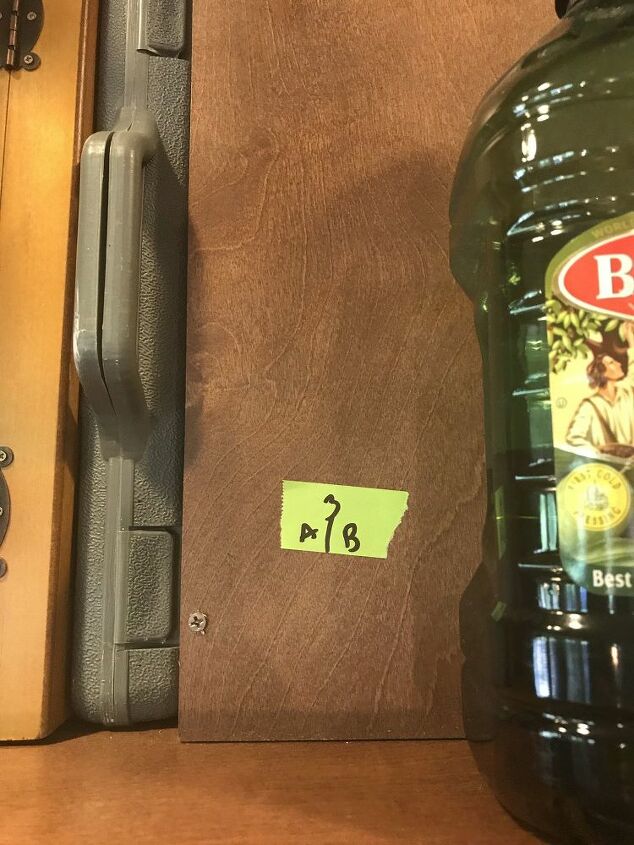
Remove doors and mark each doors location to make for an easy match up when you go to rehang the doors.
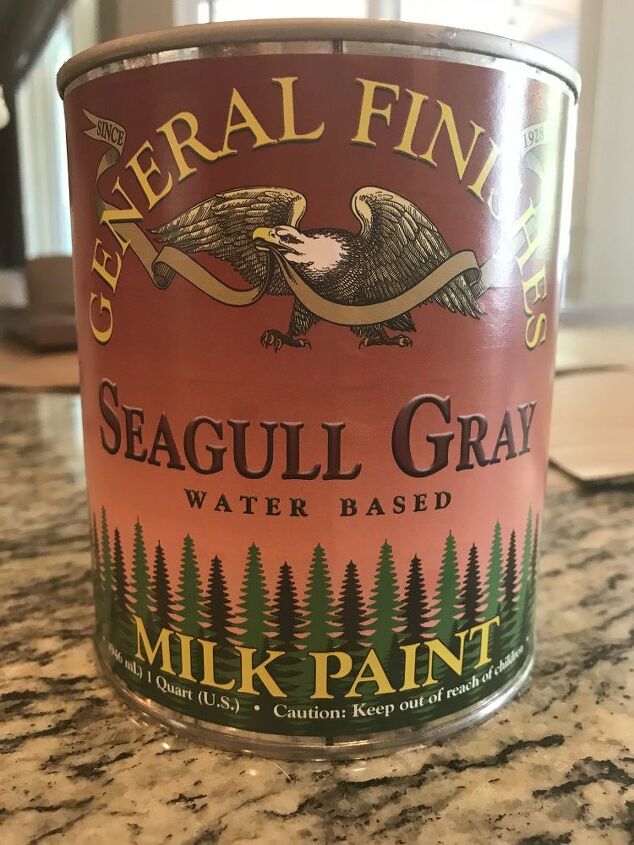
I recommend using General Finishes Milk Paint as it hold up great, offers great coverage with little prep work and zero primer! The color I chose was Seagull Gray.
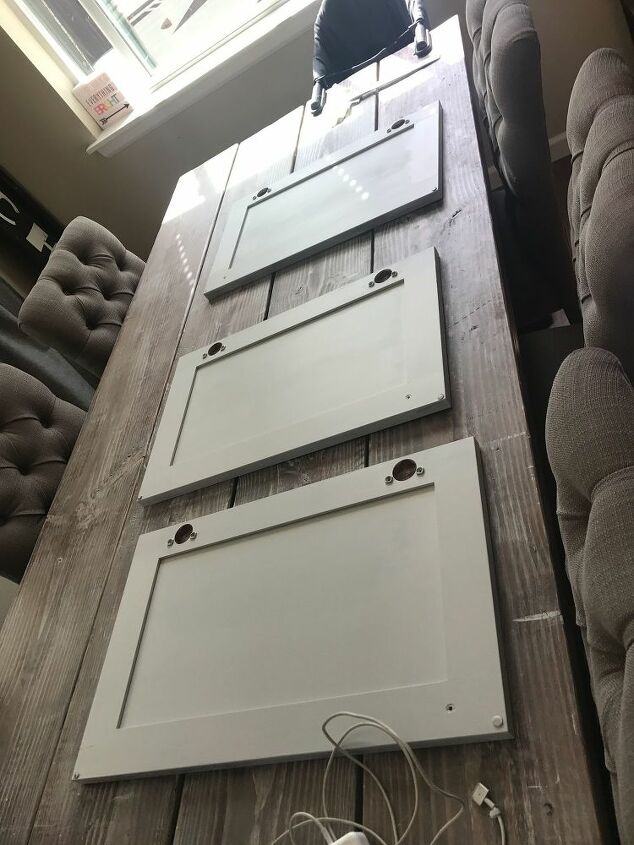
Start by painting the boxes with a brush and foam roller. Two to three coats or until there is no under color showing through.
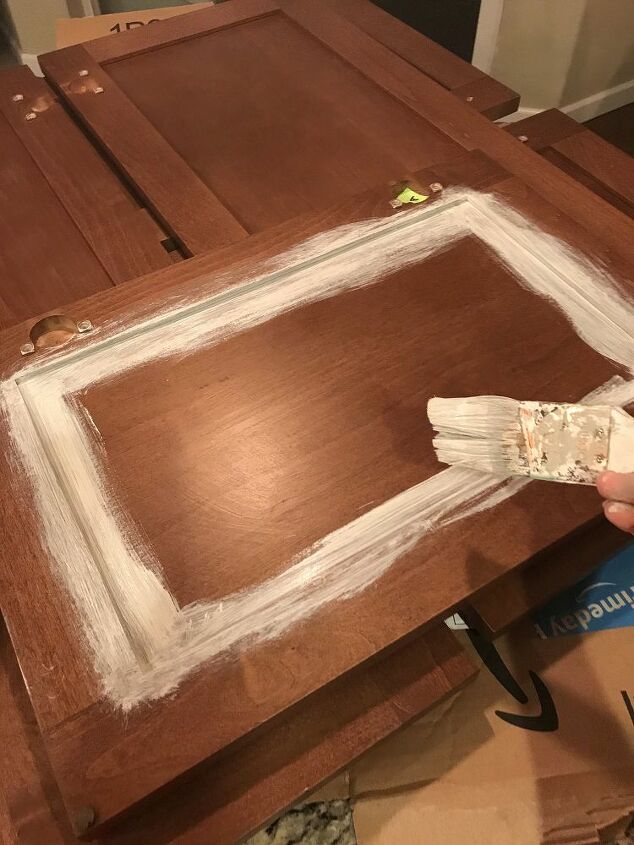
Using your angle brush, paint the cracks of your doors.
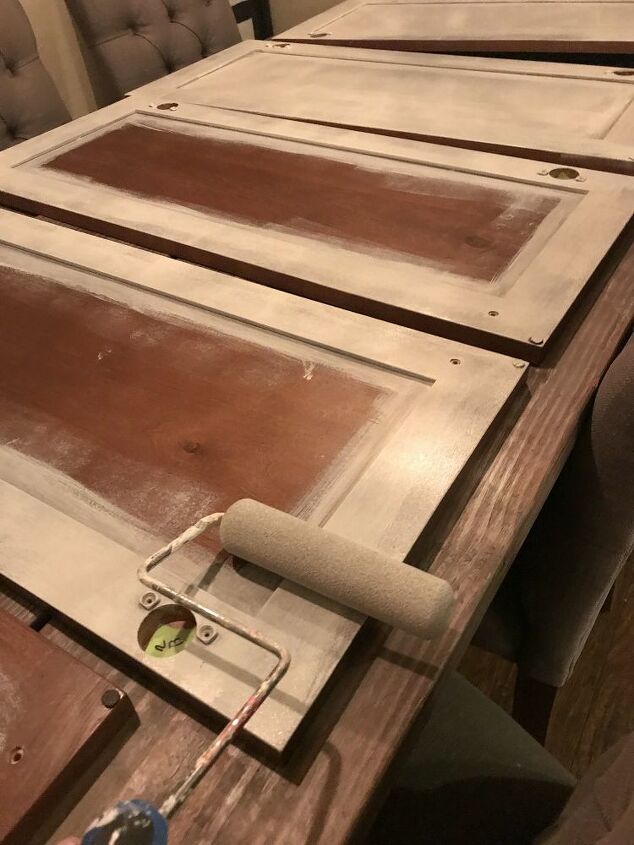
Then paint all flat surfaces with your foam roller.
Give the doors proper time to dry before rehanging to avoid any scratches to your new paint. If you want to add extra protectionAdd Caption
, you can use General Finishes Clear Coat in Flat to add addition strength and avoid chipping over time.
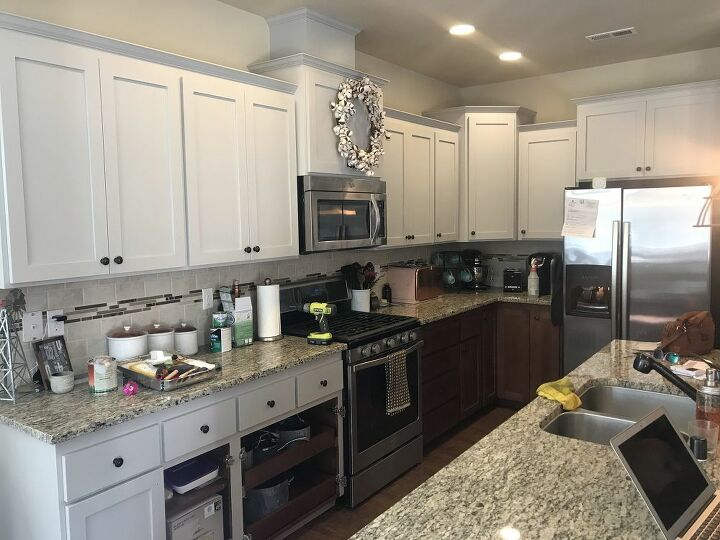
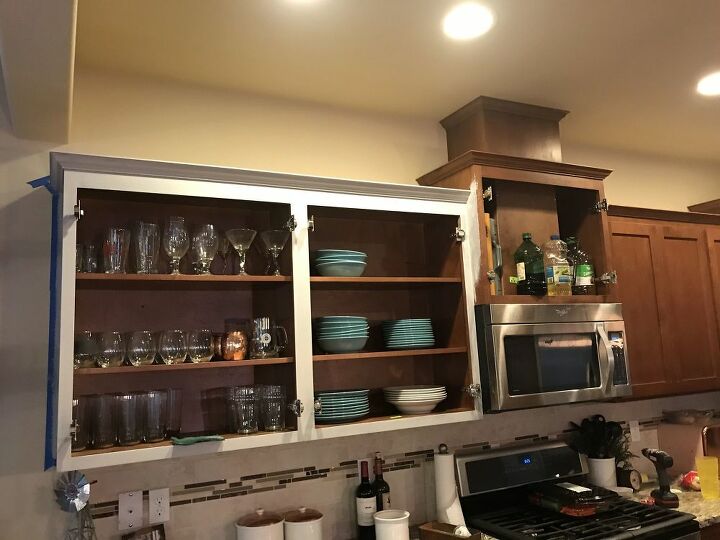
Begin rehanging your doors and watch your kitchen transform!
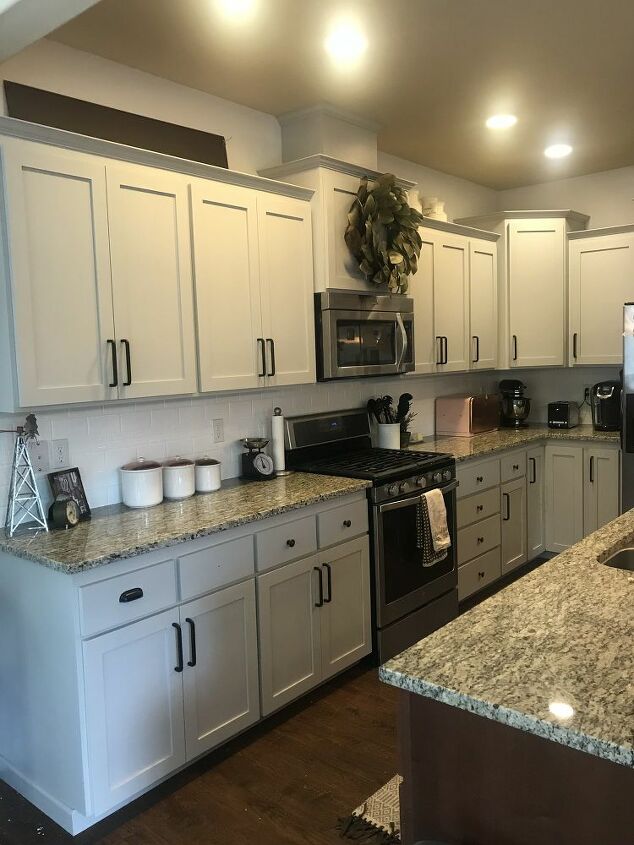
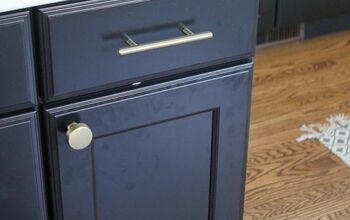
Add new handles (optional), and sit back and admire your new kitchen!
Comments
Join the conversation
-
Beautiful and simple transformation!
-
Looks so bright and modern! Nice job.


Frequently asked questions
Have a question about this project?
What is the color of your paint for your cabinets