


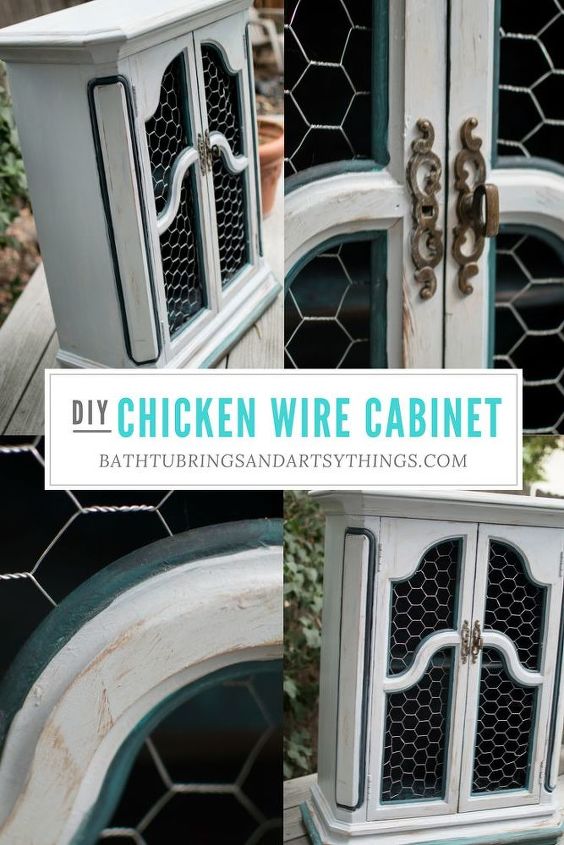
Add Storage to Your Kitchen by Creating a Chicken Wire Cabinet

by
Cassondra
5 Materials
$30
6 Hours
Medium
Take a look at this chicken wire cabinet! I love finding old pieces of furniture and remaking them into something beautiful once again! It is almost like giving someone a second chance or bringing a new life to the lonely and forgotten. Each piece of furniture has a story and a unique adventure to tell, and by fixing it up, you are not only allowing that story to come out, but are opening up an opportunity for new stories to arise as well.
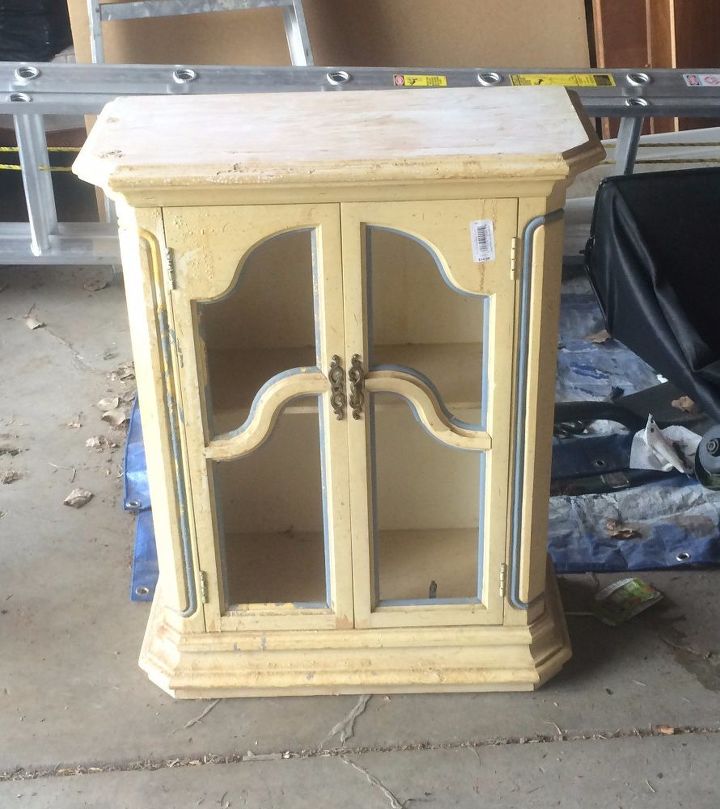
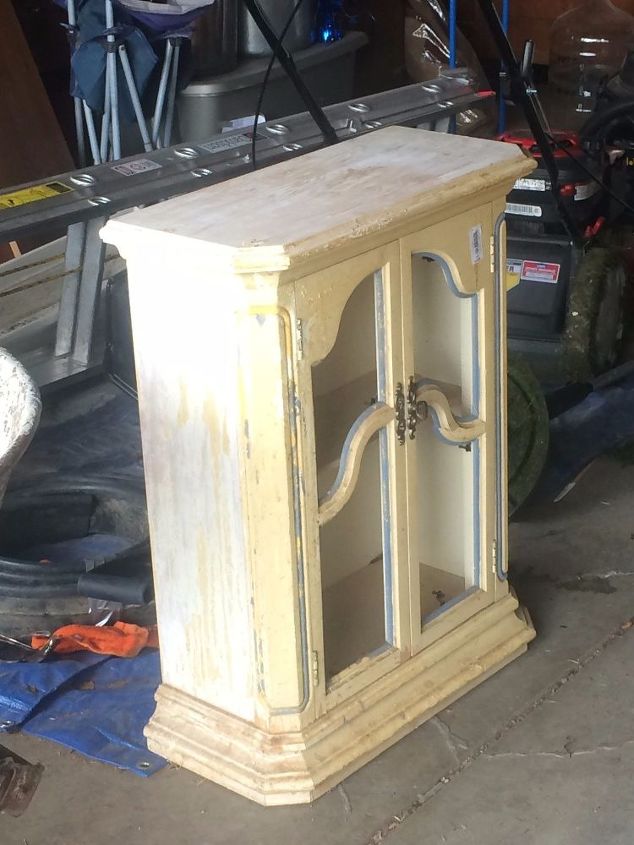
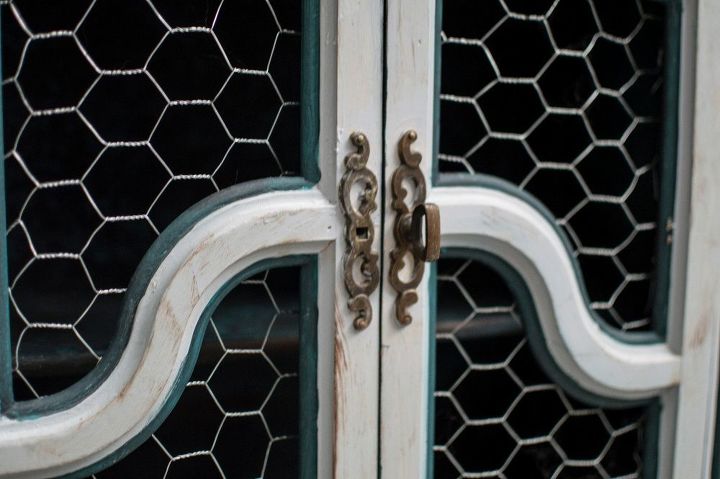
Here is an old and ugly cabinet I found at a thrift store. It had a good shape and definitely had a story to tell. I immediately began thinking of all of the things I could do to this unique piece of furniture. The latches were amazing, so I wanted to keep them and the windows were just begging to command attention somewhere. I also envisioned an antiqued, weathered look, with perhaps an aqua trim.
And so I started to work on this. Let me tell you this. Some projects are not for the faint of heart. Once I started looking at the current finish on this, it was clear that someone else had started this same project and given up. There were bubbles everywhere. Most likely from some sort of stripper, paint drips and spots were unevenly coating everything and the wood was broken in between one of the windows.
So out comes the paint stripper. I am not a big fan of stripping paint. This thing especially had small nooks and crannies and curves galore. Not to mention like two or three layers of paint.
The stripping process was by far the most challenging and time-consuming part of this project. Once I was done stripping, it was time to repair the window. I used wood glue to glue it back together. Luckily, it did not give me much of a problem. Going out that little strip of wood would have been a deal breaker for me.
And now, it is time to paint. I painted the inside first. I did a dark, almost black teal. I decided it looked a little too dark, so I then sponged some lighter texture on to the dark. If you are ever completing a similar project, you could also use wallpaper on the inside. Remember, if you can imagine it, you can do it.
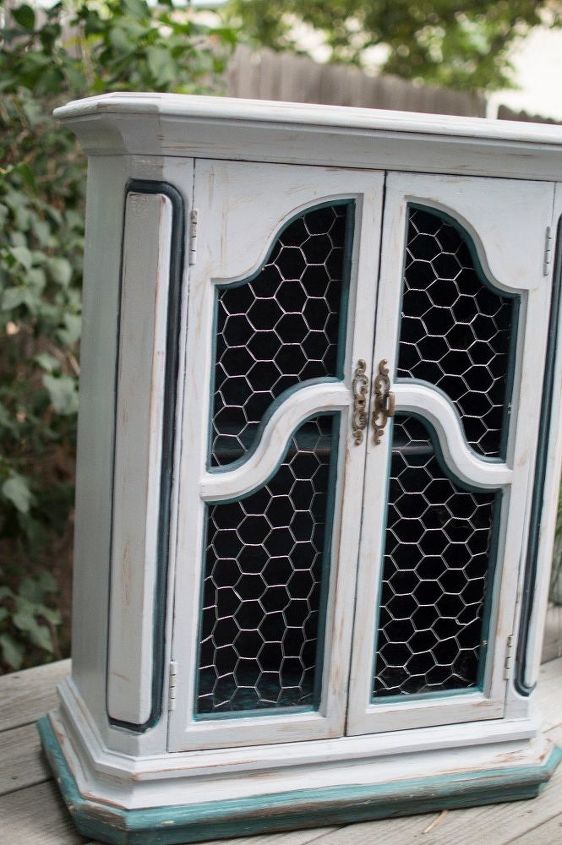
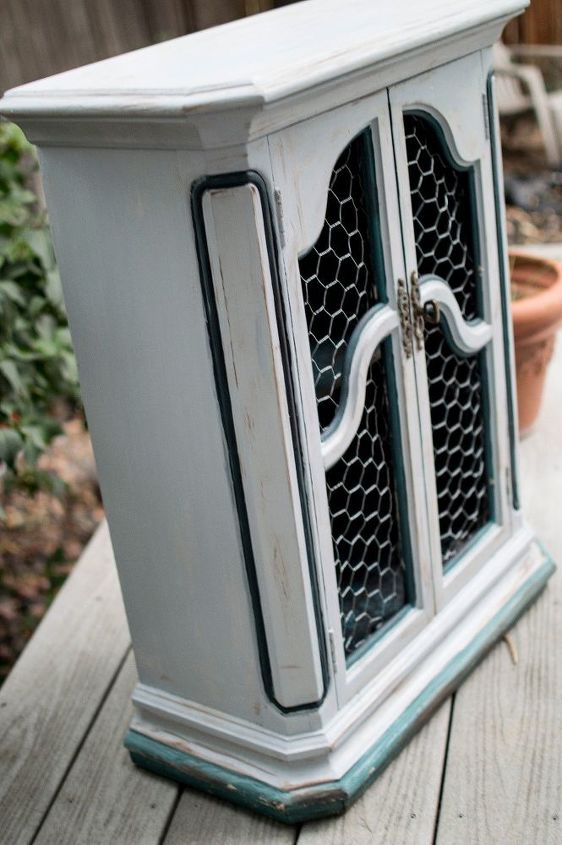
For the outside, I decided to go neutral with a cooler palette, so I used a grey chalk paint for the base. After painting the entire thing, it was time to paint the accents. I went with a dark teal color that complemented to blueish tones in the grey. This part required a steady hand to paint only on the trim accents, but after a while, it was done.
It looked good, but almost too new. I got brave and decided to try out some Martha Stewart antiquing paint I picked up. This is basically just a tint-able paint that you carefully streak over the current paint. I added dark brown. I think I may have made a few spots too dark, but in the end it turned out looking pretty neat.
For the windows, I had originally wanted to add some sort of stained glass. The problem I was having was, I just couldn’t envision any design that would look good and go with the look and layout of the cabinet. So, came up with a plan B. Chicken wire.
I stapled chicken wire on the inside rim. This really complimented the look and gave the cabinet the farmhouse look I wanted in the first place. I am so glad I didn’t waste time cutting glass!
I placed this cabinet in my kitchen and added all of my jars and canning supplies. Now I have a place for preserving that looks the part. I am pretty happy with how it turned out. All with just a little work and imagination. Now, there will be many more stories for this cute little cabinet to tell!
Strip away old, bumpy paint using a paint stripper
Sand any rough spots to ensure a smooth surface
Paint the base coat with flat grey chalk paint
Add teal accents around windows and lightly streak some antiquing paint over the surface
Staple chicken wire on the insides of the windows and seal sharp edges with caulk.
The completed shelf, I used as a canning station.
Want more details about this and other DIY projects? Check out my blog post!


Frequently asked questions
Have a question about this project?