


Chic and Shabby Elegant Vintage Mahogany China Cabinet
2 Materials
$40
10 Hours
Medium
The exceptional quality, integrity of craftsmanship and historic beauty of vintage and antique furniture puts modern MDF, pressboard and stapled pieces to shame. The following tutorial demonstrates how to turn an undesirable, landfill bound piece of furniture into a family heirloom worthy of grandstanding anywhere in your home or office space. This would be why I rescue and resurrect these fine works of art with love from the heart.
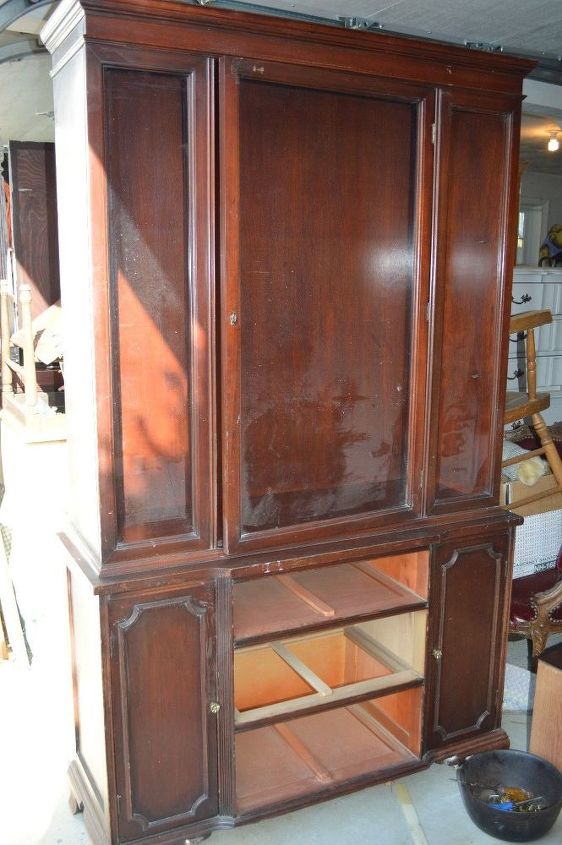
- Begin with a dilapidated yet full of potential piece of furniture.
- Clean dirt and grime from surface with a mild cleanser and sanding sponge or cloth of choice.
- Lightly sand to give 'tooth' to the existing finish if it is glossy or slick to the touch.
- Fully sand if surface finish is unstable as in chipping paint, varnish or shellac.
- This piece was lightly sanded in necessary areas.
- Remove glass if you prefer and can do so without damaging the glass or the stabilizing trim inside.
- I removed only one panel for this project.
- Glass may be carefully scraped with a sharp razor blade to remove paint overlay along edges once completed.
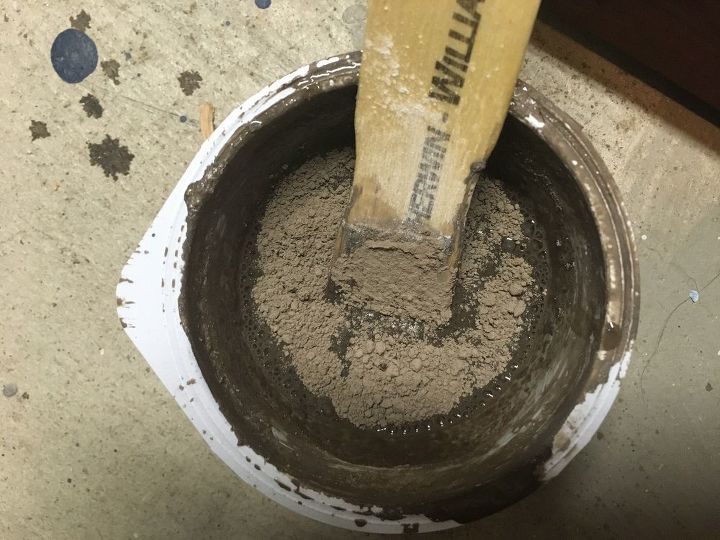
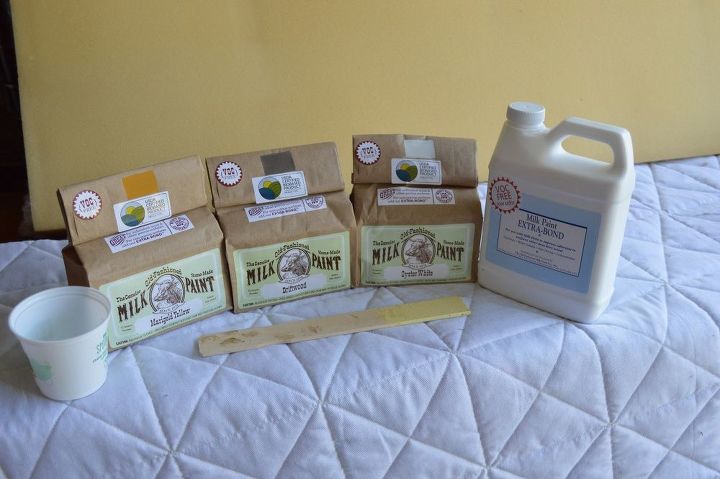
- Mix Old Fashioned Milk Paint true milk paint in desired color.
- Combine equal parts paint powder and water.
- Add OFMP extra bond according to the directions to ensure better adhesion to the piece.
- If chippy and crackled texture is wanted, omit the extra bond or use less in the mix.
- Use extra bond in the paint for only the first coat applied.
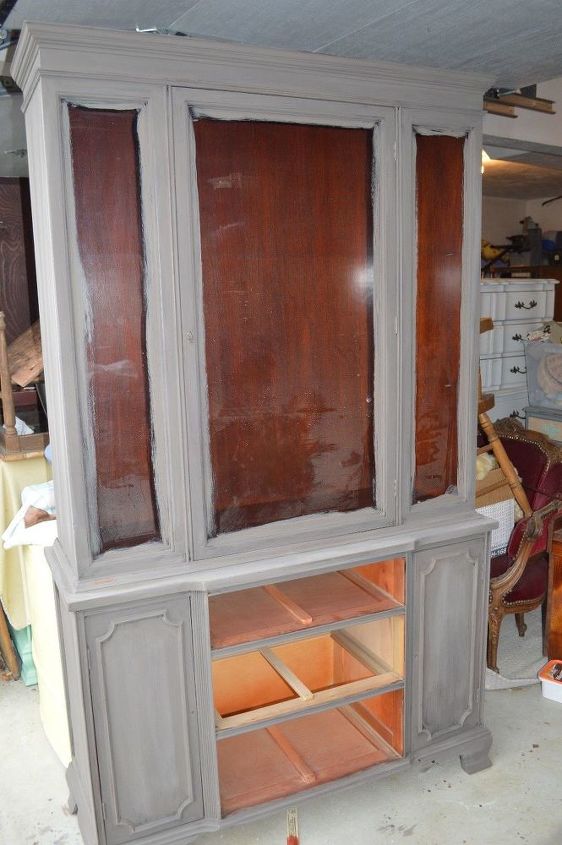
- Apply first coat of OFMP. I used Driftwood on the exterior.
- Coat will be sheer and a bit uneven in appearance.
- Do not fear paint failure.
- The paint will improve after the second or third coat (if necessary).
- Allow paint to dry in between each coat for approximately half and hour to overnight.
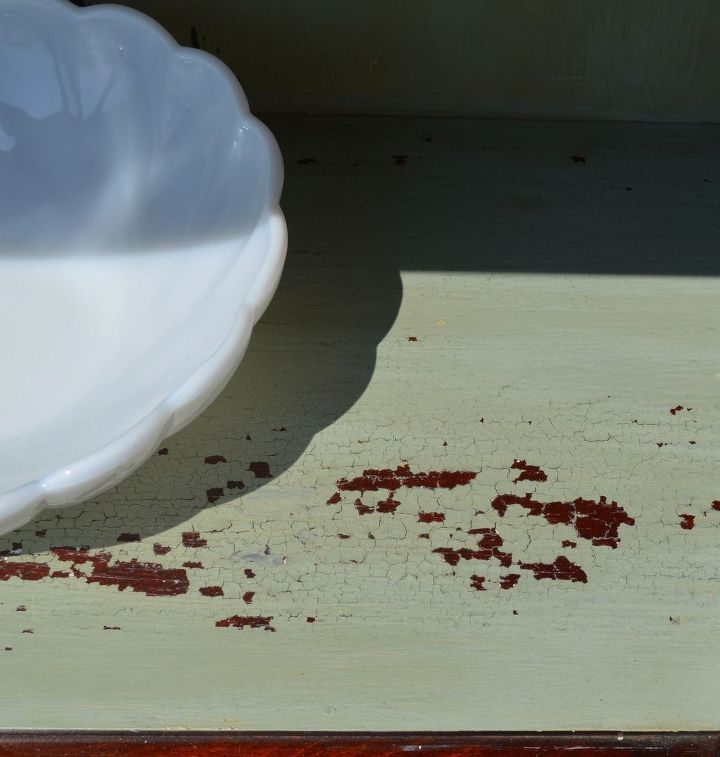
- Chipping and crackling typically occurs after second coat is brushed over the first coat and begins to dry.
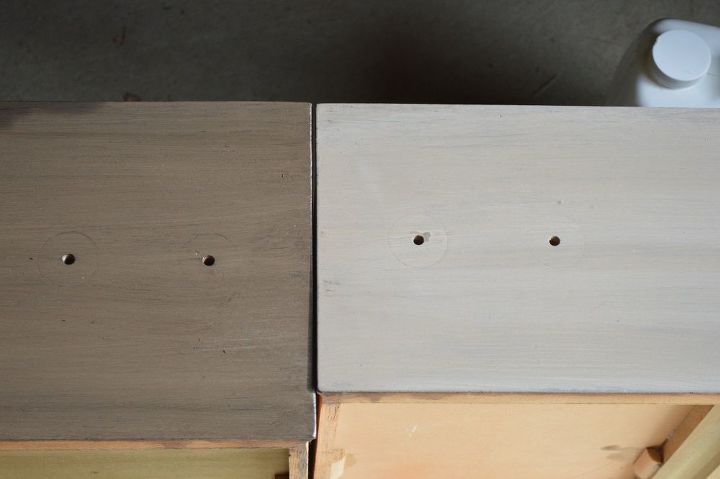
- Hand rub Daddy Van's all natural wax for a top coat and to enrich the paint tone.
- Use a wax brush or, as I do, a cotton cloth preferably with little lint fallout.
- I used Noir wax color to heighten the gray undertones of the driftwood paint.
- Wax brings out the depth and richness of the color so apply accordingly.
- Notice the difference between the waxed drawer on the left and the uncoated paint on the right.
- Admire your pretty paint options.
- Mix your choice of color for the interior as instructed on the pack and noted above.
- Add the extra bond if desired.

- I chose marigold, but after the first coating, I decided to custom mix a shade of sage instead of the yellow.
- For each paint powder addition, incorporate equal parts water for proper paint consistency.
- Snow white and oyster white lightened the marigold in increments of teaspoons.
- Continue with intervals of paint additions and mixing until the desired tone is reached.
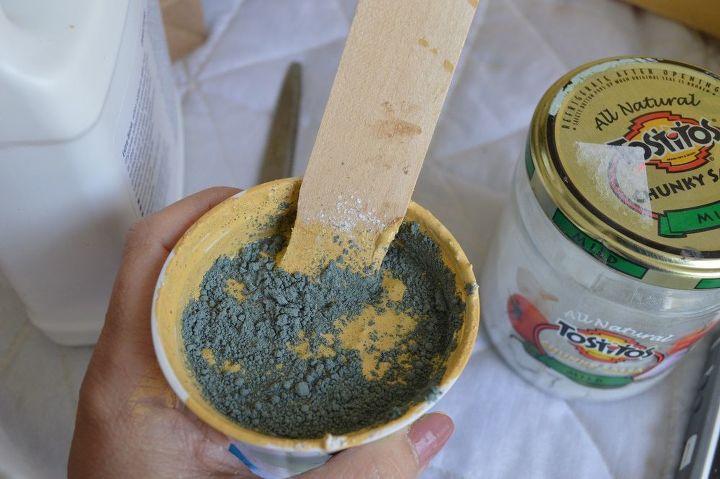
- Mix the additional colors in small quantities to the premixed base paint color.
- Be careful to add new color in small batches and mix thoroughly between each addition.
- Continue stirring until most lumps are smoothed before adding new paint powder.
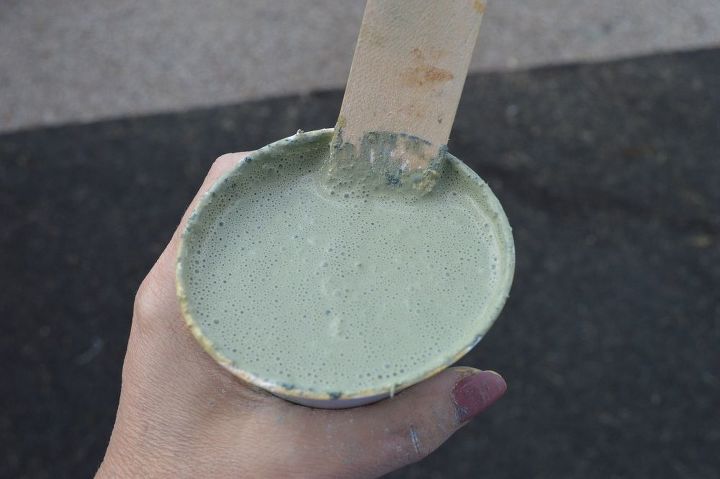
- I used a combination of marigold, snow white, oyster white and sea green to concoct this beautiful shade of sage.
- Mix well and let stand for approximately 15 minutes.
- Remix steadily smoothing lumps against side of container.
- Paint as many coats as are necessary to achieve the finish you are designing.
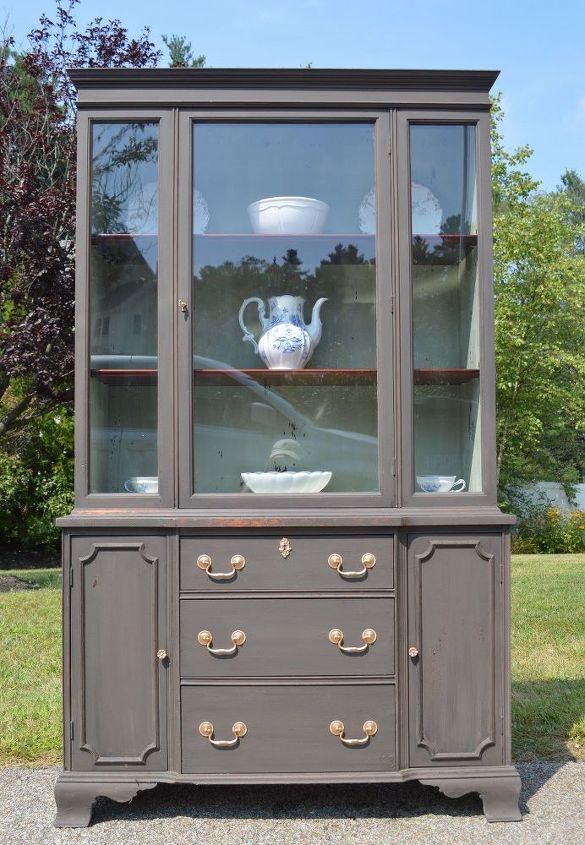
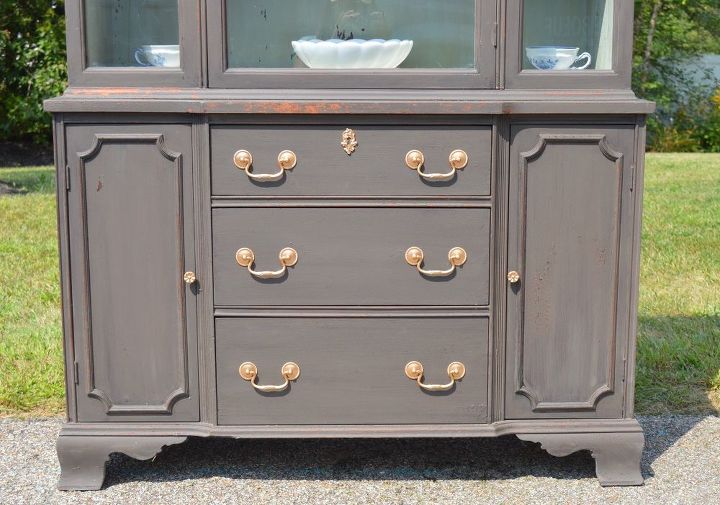
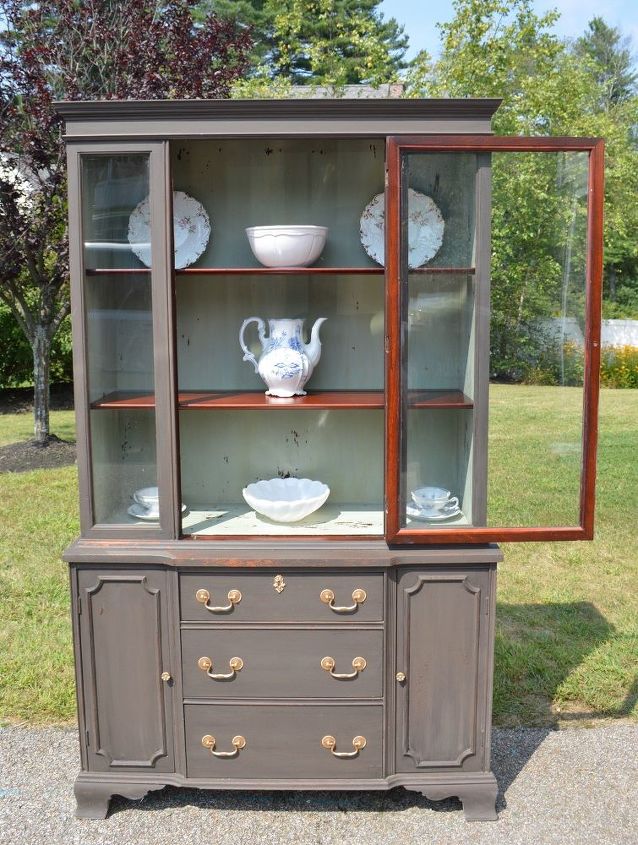
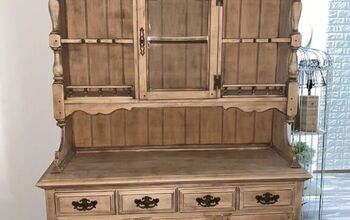
- Here is the completed piece with the driftwood paint and noir waxed exterior.
- The interior is complete with three coats of the custom sage color paint and dark wax.
- Notice the beautiful and charming chipping and crackling that is carried all over the piece inside and out.
- Paint the hardware or change it out according to taste and design.
- I chose to paint the original hardware a lustrous gold to add a touch of flair and elegance against the rustic chic paint finish.
- The nature of the true milk paint by OFMP showcases itself allowing the vintage mahogany to peek through and create unity with the mahogany shelving.
- Crackling in random areas adds to the refined rustic and shabby chic creation.

- Fill the piece with your precious collectibles and dishes.
- Observe with a sly smile every guest's awe of your incredibly unique piece so elegantly shabby chic.

Want more details about this and other DIY projects? Check out my blog post!


Frequently asked questions
Have a question about this project?