


Curbside Table Gets a Gratitude Stencil Makeover
4 Materials
2 Days
Medium
I love it when I find decent furniture on the side of the road. Today's post is definitely a representation of that. When I was out for a walk in my old neighborhood, I walked past a table and 2 chairs on the side of the road. I wasn't a fan of the chairs, so I decided that I would just come back for the table.
My co-worker gave me 2 Queen Anne style chairs that I thought would go perfectly with the table. I decided to GET MY STENCIL ON with all 3 pieces.

BEFORE
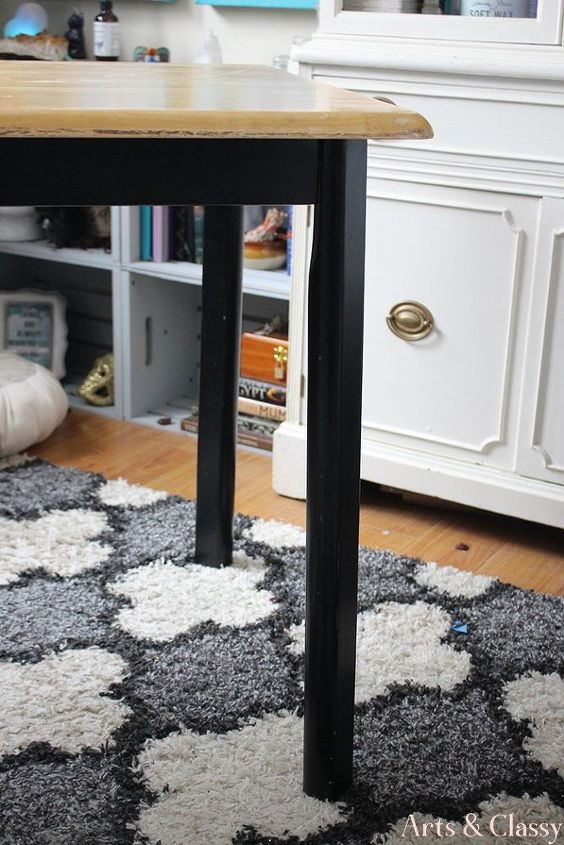
BEFORE
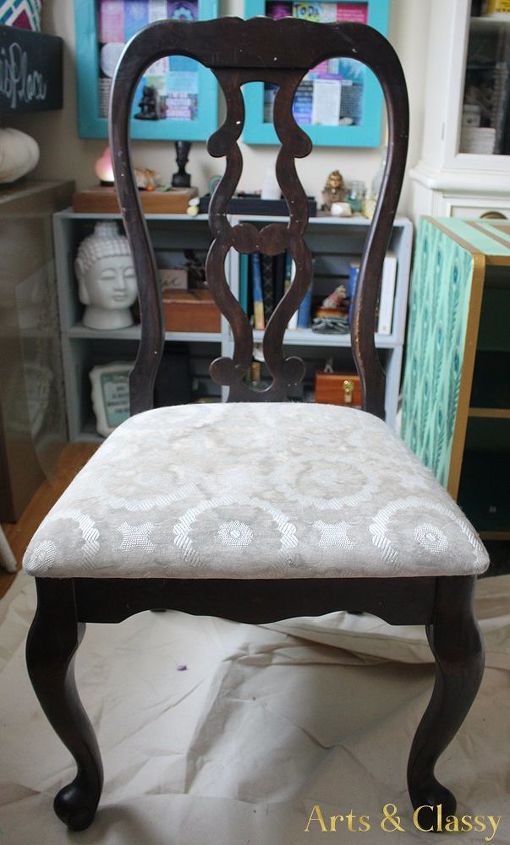
BEFORE
STEP 1
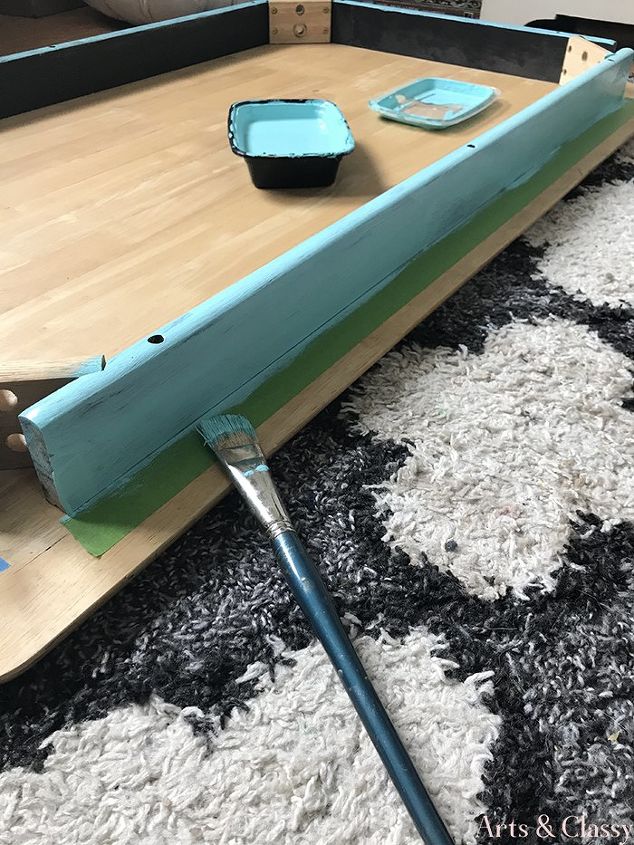
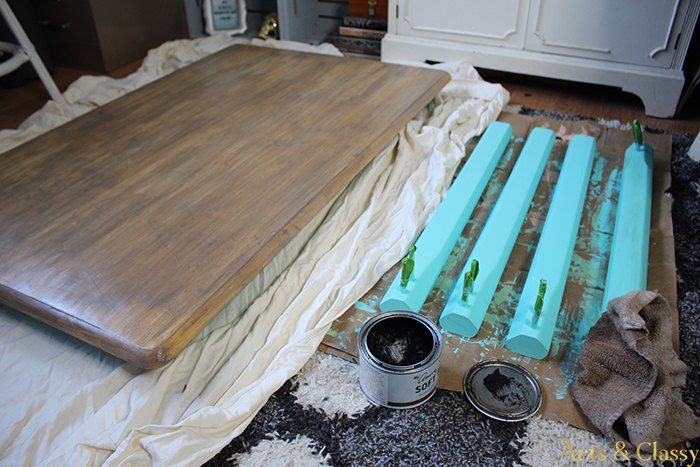
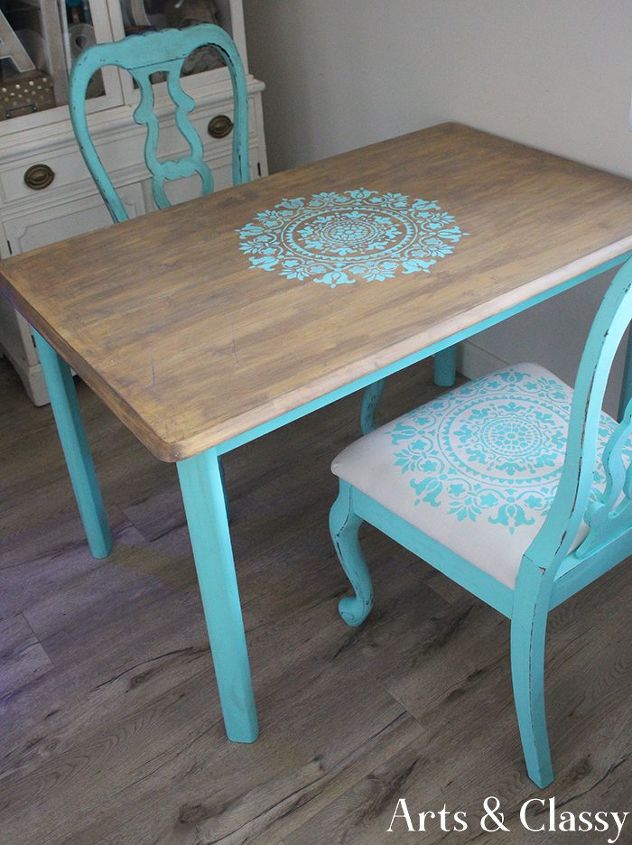
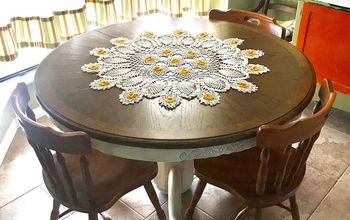
I started with the table. I had to disassemble the table to paint it with my teal chalk paint. I used the same color on a chair I made over recently. I started by masking it off with frog painters tape.
I also used my frog tape to mask off the screws on the legs of the table before painting them.
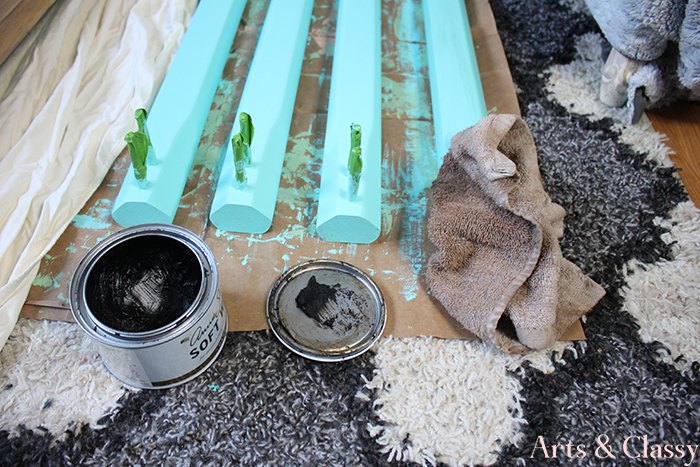
STEP 2
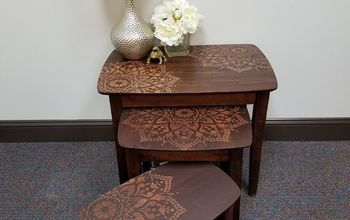
After I let the paint dry on the legs it was time to seal the paint with my dark furniture wax. For the table top, I had to sand it down to level out the surface. Then I mixed 2 different wood stains to get the look I wanted and applied with a stain sponge.

STEP 3
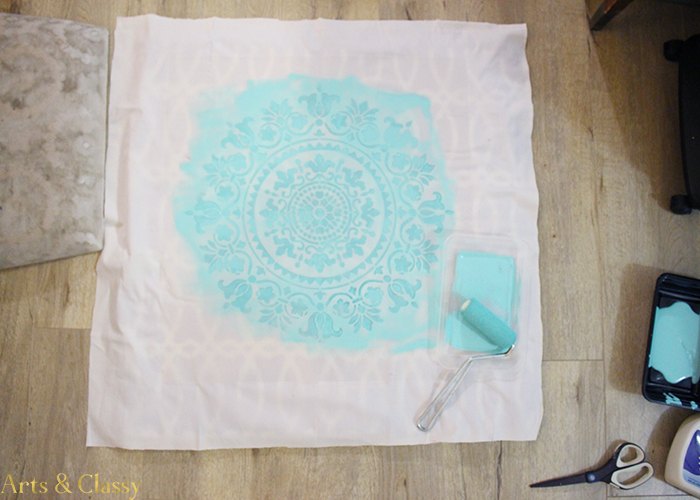
I tackled painting the seat fabric of the chairs. I had to remove all the screws and staples from the chair seat before I removed the old grungy fabric. I pulled out my scissors, mounting spray, and the Gratitude Mandala stencil to secure it to my fabric.
STEP 4
Once the stencil was secure, I used my foam roller to apply the chalk paint. My method to apply the paint was to stay light.
*HOT TIP* don’t pack the paint on the roller.
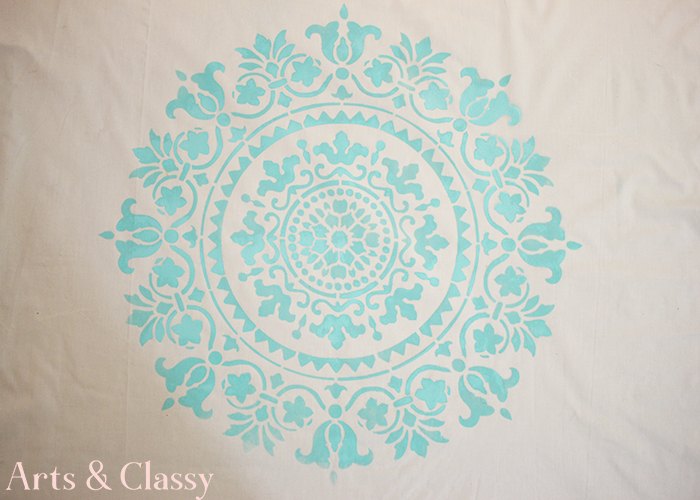
I left the stencil on the fabric while the paint dried before I removed it. Then moved on to the next.
STEP 5
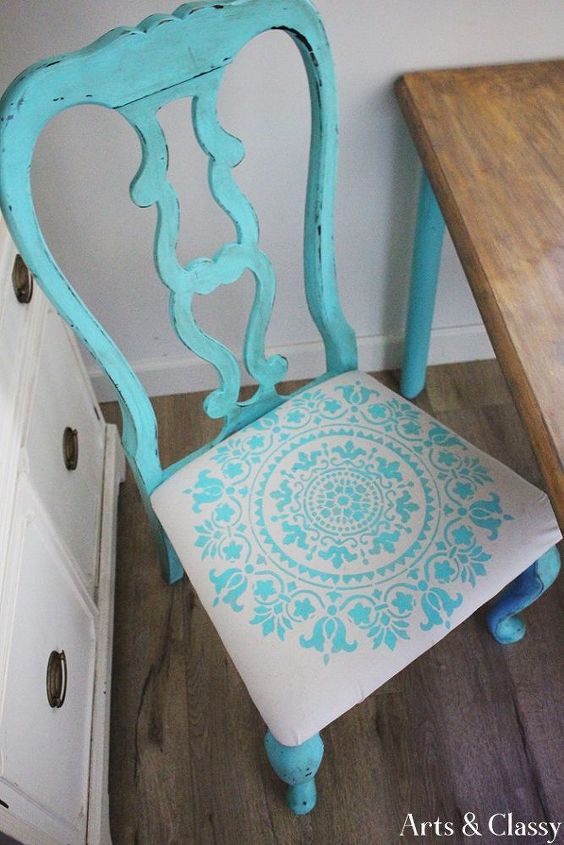
I painted the frames of both chairs with the same chalk paint. When the paint dried, I took dark wax to seal the paint. Then I went back and sanded down the frame to age it. I wanted there to be a Betina to it. Once both seats covers dried, I was able to reupholster the seats of the chairs with my staple gun.

STEP 6
I put the table back together and used the same stencil to complete this set. I used the mounting spray again to secure it on the table top. I used the foam roller for this part too. Same rules apply.
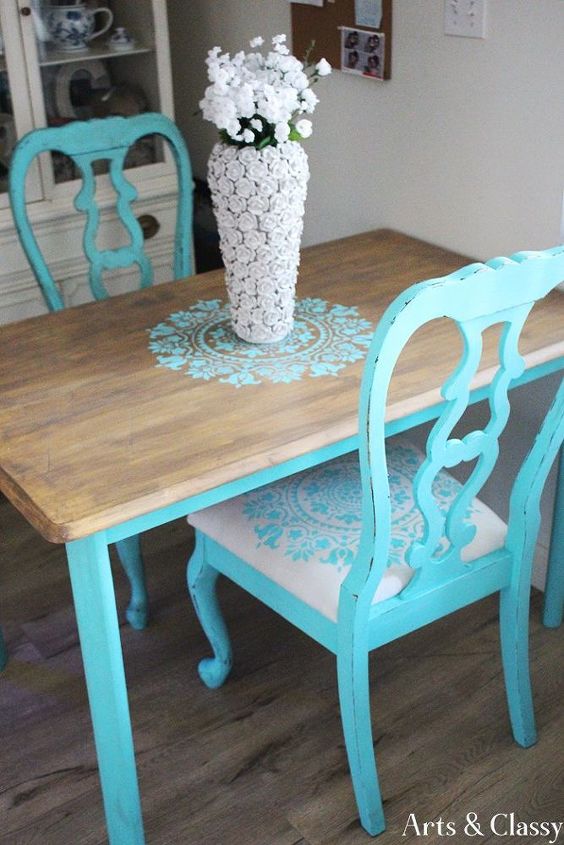
Once it dried, I was able to dress it up in my little dining area space. I did start using this as more of mini office space. I love this table. It’s a perfect size.
Resources for this project:
See all materials


Any price and availability information displayed on [relevant Amazon Site(s), as applicable] at the time of purchase will apply to the purchase of this product.
Hometalk may collect a small share of sales from the links on this page.More info

Want more details about this and other DIY projects? Check out my blog post!
Comments
Join the conversation
2 of 24 comments
-
i am definitely inspired! Job well done!
-
Beautiful!


Frequently asked questions
Have a question about this project?
Love it...Where did you get the vase?
Love it...Where did you get the vase?
Love the finished project. Your explanation was great and well presented. Easy for anyone to follow your directions. Did you mean Patina instead of Betina?