


Dining Room Buffet Table DIY
With the holidays fast approaching I have been thinking ahead to our Thanksgiving and Christmas dinners. I am for the first time hosting our family Thanksgiving, so I needed to start preparing. I have always wanted a buffet table in our dining room for holiday meals so this was the perfect timing to make it happen!
*This post is sponsored by Krylon. Thank you for supporting the brands that allow me to create inspiring content while featuring products I genuinely use & love! All content, ideas, and words are my own.
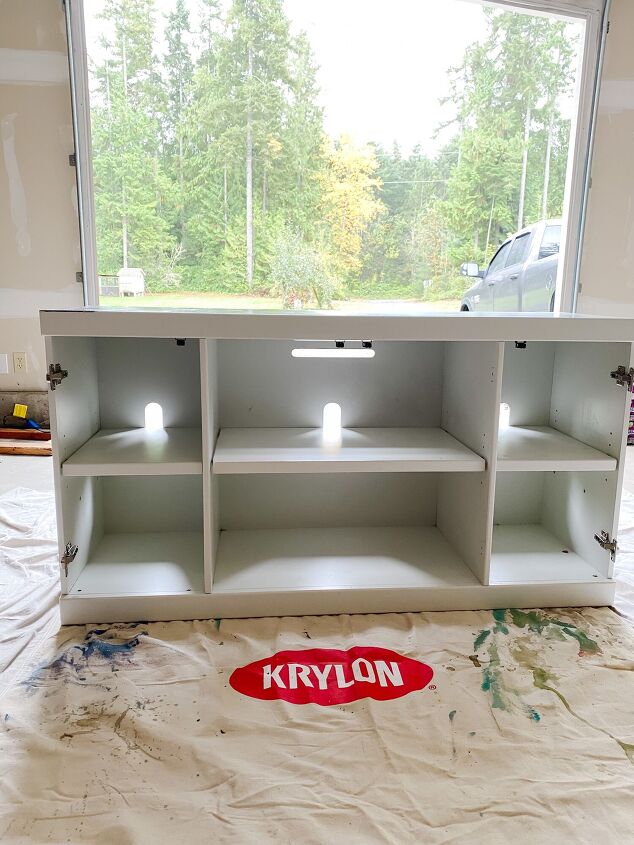
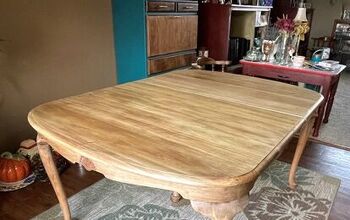
Instead of purchasing something new I decided to DIY a table instead. This console was actually a part of an entertainment center that I scored off of Facebook Marketplace this year. We ended up using the side bookcases for our kids bedroom, so this center piece has been sitting in the garage waiting for me to reinvent it. It was the perfect size and shape for a narrow dining room buffet table that will house my serveware and be an extra service for food. I have had my eyes set on a few expensive buffets that I loved and I knew that I could easily recreate the look for less than a quarter of the price.
- Furniture Piece to upcycle
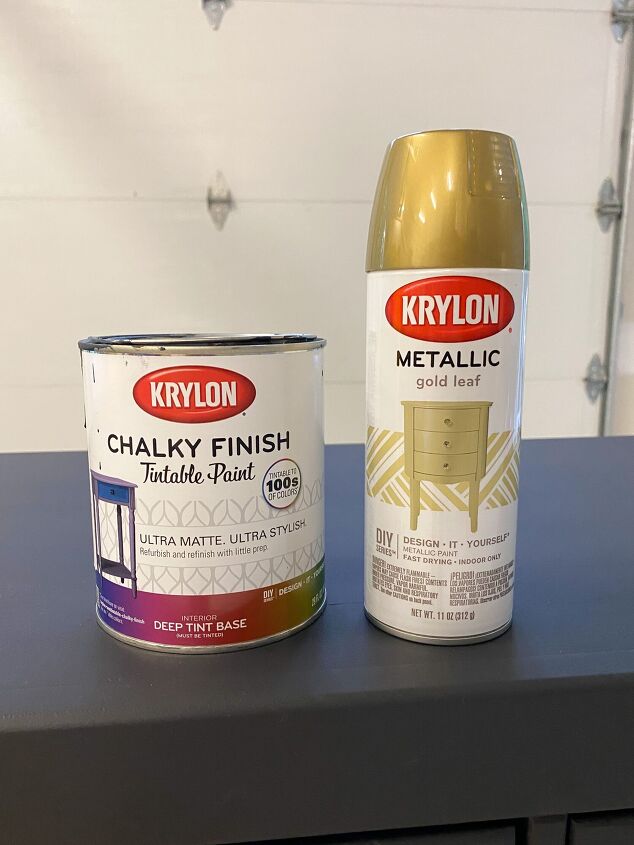
- Krylon Chalky Finish Brush On Paint (I choose Dark Kettle Black)
- Krylon Brilliant Metallic Gold
- Foam roller
- Paint Brush
- Painters Tape
- Caning, fabric, or placemats
- Strong glue
I decided to use Krylon’s Chalky finish brush on paint for this project because it creates a smooth, ultra matte finish to transform your projects. You can choose from over 100 different colors ( I choose Dark Kettle Black). The best part is there is no primer or prep needed.
Step one: Make sure to clean your furniture really well, this will not only get rid of random debris, but it will also make for better adhesion for the paint.
Step two: I removed all of the hardware and doors from the cabinet. It is much easier painting doors when they are laying down flat.
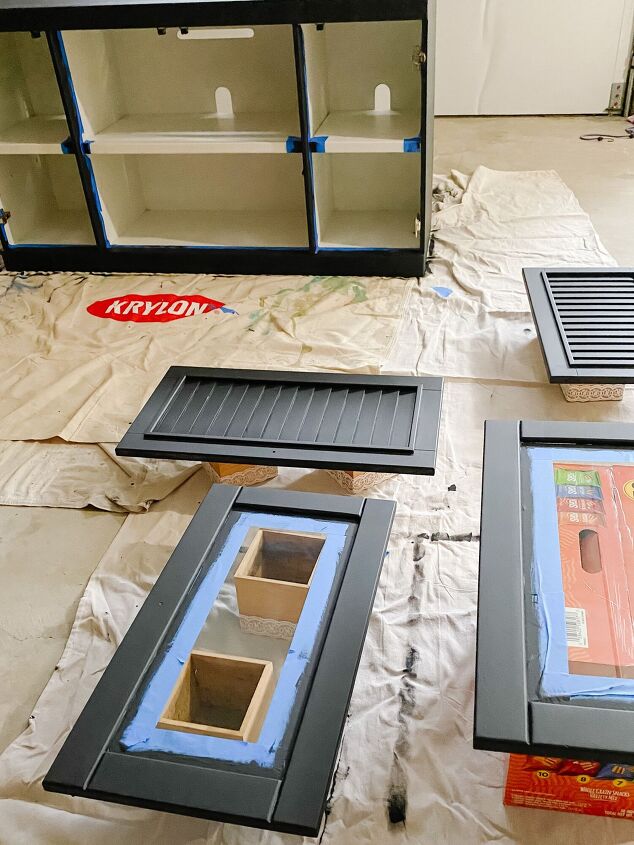
Step 3: I used painters tape to tape off the glass on the doors and the inside of the cabinet that I was not going to paint.
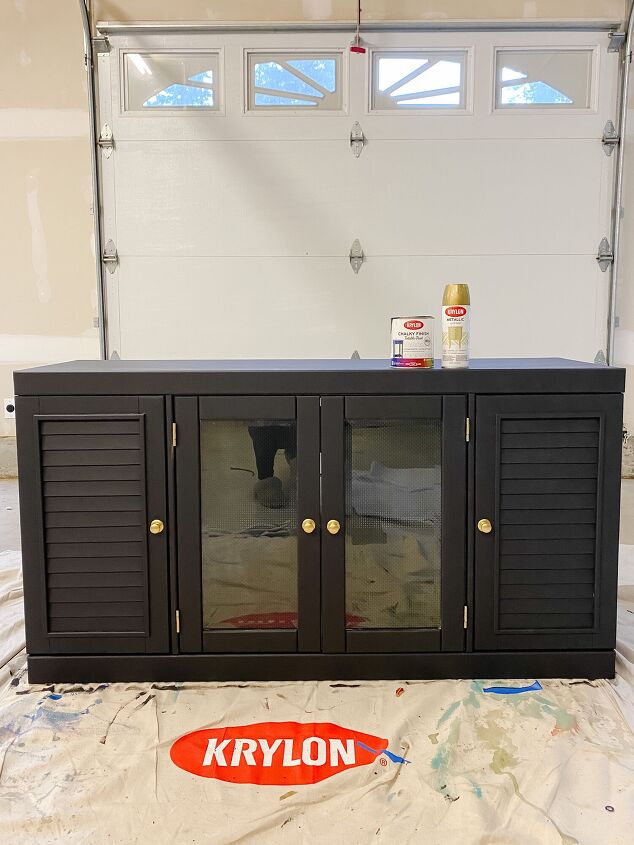
Step 4: Time to paint! Use the foam roller on as much of the piece as possible because it will give you the smoothest finish. You will need to use a paint brush to get into some areas, but once you are able to get into the small areas go back over with the foam roller to smooth out any brush strokes that you may have caused. I did the recommended coats which was 3 coats total. The dry to touch time is only 1 hour which made it easy to complete in one afternoon.
Step 5: Now that the cabinet was painted I moved onto the cabinet door fronts. I wanted to replicate the expensive console that had a cane detail on the door fronts. I cut the cane fabric to size and was able to insert it into the back seal behind the glass. I didn’t want to remove the glass in case I decided later to change it back.
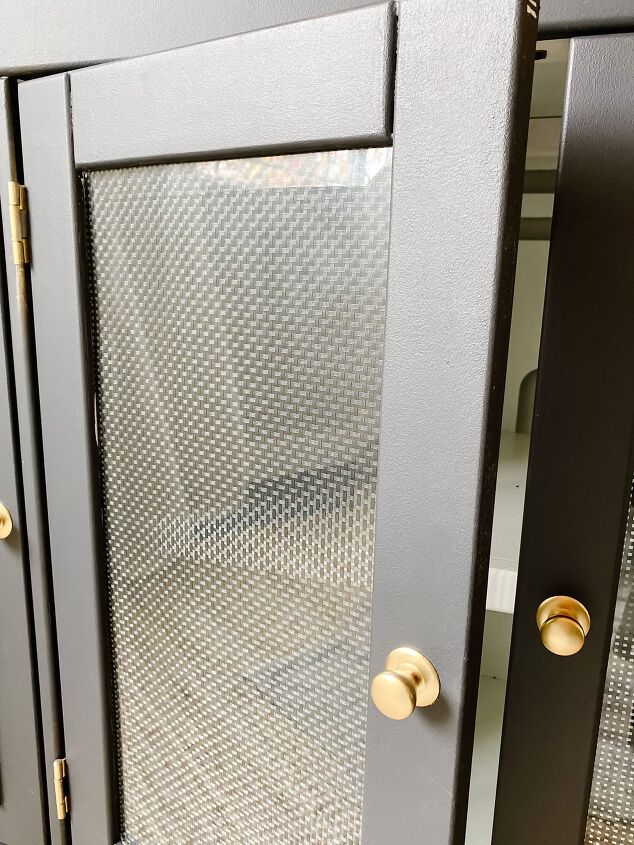
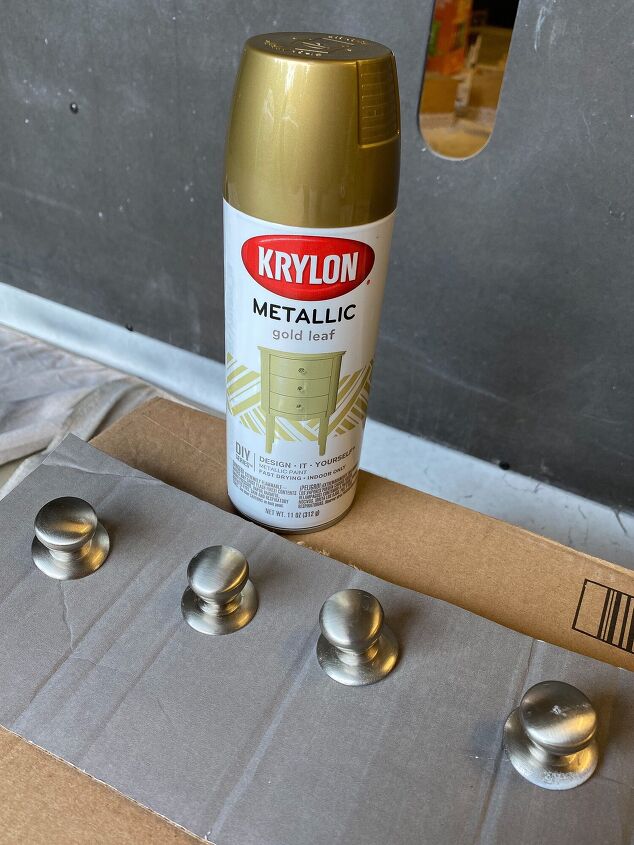
Step 6: Last step was upgrading the hardware. I liked the size and shape of the original hardware just not the color so I used a few coats of Krylon Brilliant Metallic Gold to transform them. I love how the gold pops against the black.
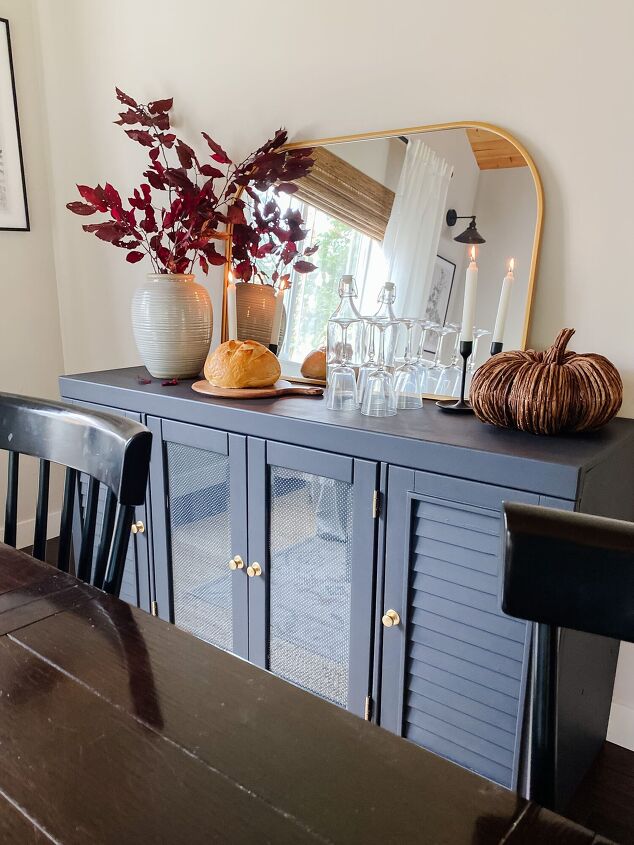
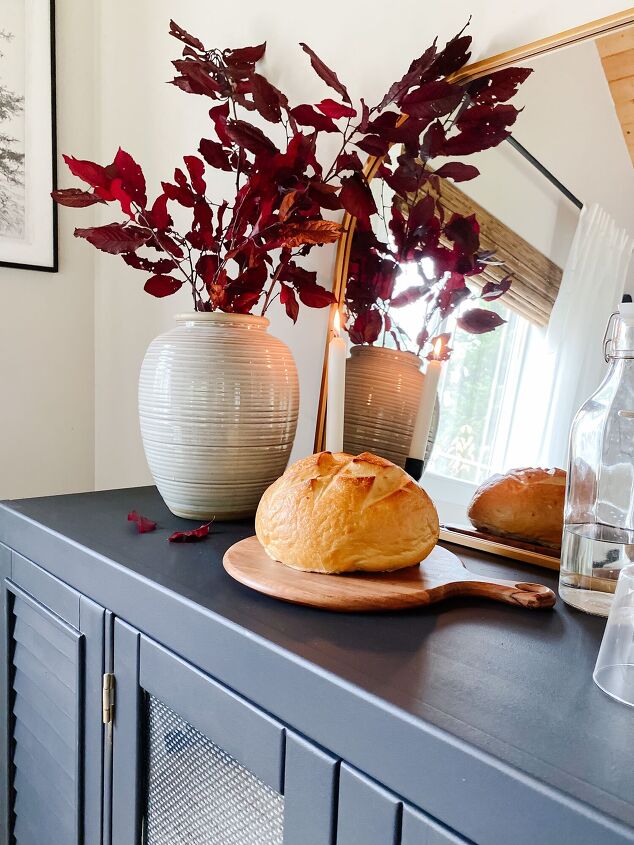
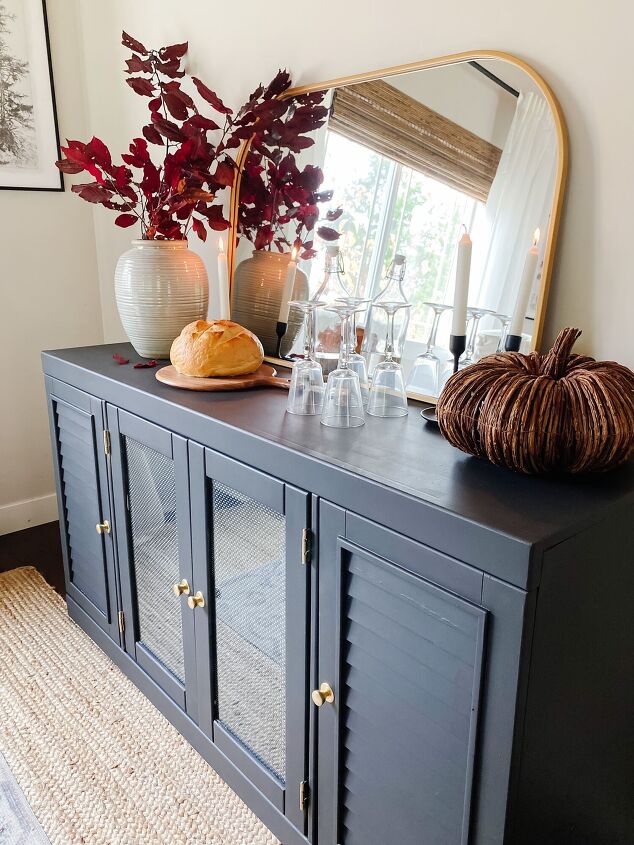
Here is how it turned out. Can you believe this before and after!

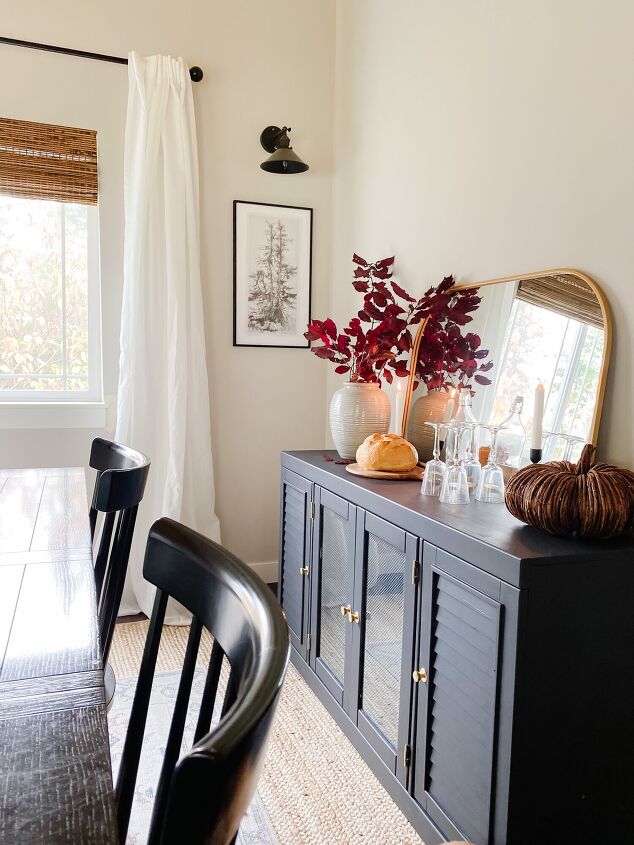
Here it is styled in my dining room. This is going to be so perfect for holiday entertaining for years to come!
For more Krylon project ideas and inspiration, click here.


Frequently asked questions
Have a question about this project?