


DIY Epoxy Pour Tabletop – Epoxy Pour Tutorial
Looking to give new life to a tired old countertop or tabletop? DIY epoxy pour on tabletop or countertop will give new life on a budget.
I recommend testing the epoxy pour on a smaller scale before you jump into your first big project.
Testing the epoxy pour will help figure out the do’s and the don’ts, how comfortable you are with the steps, and if it is something you can tackle.
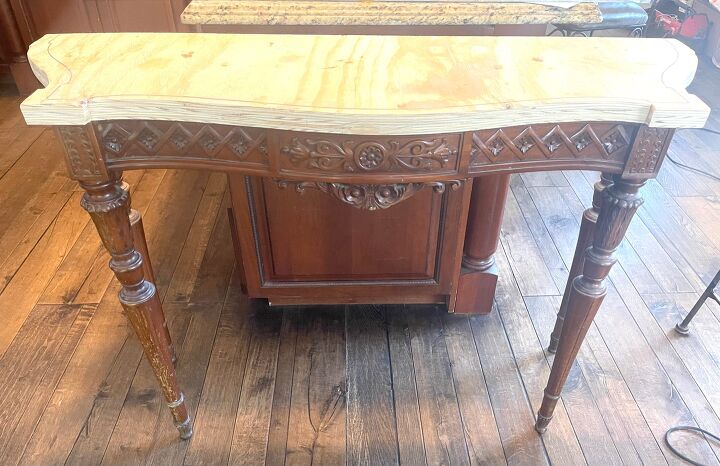
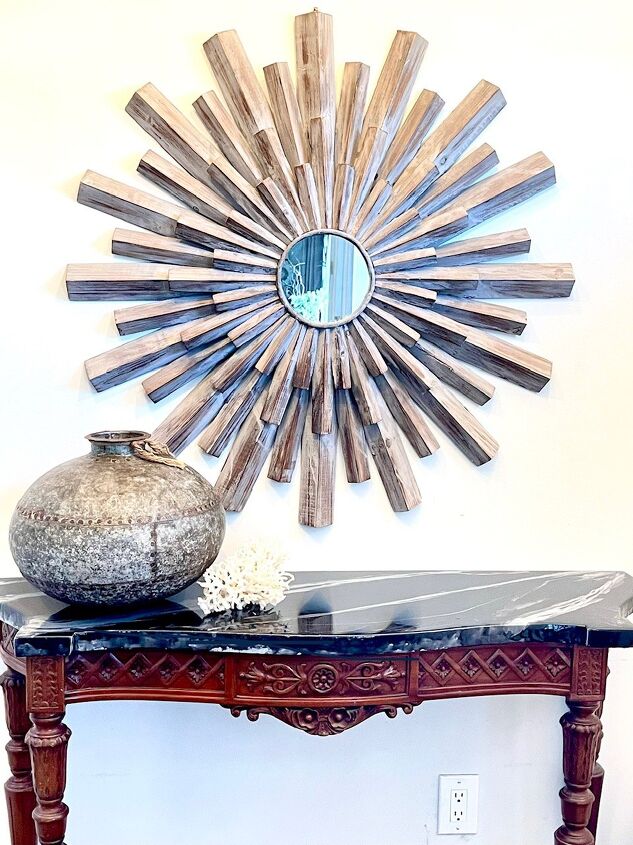
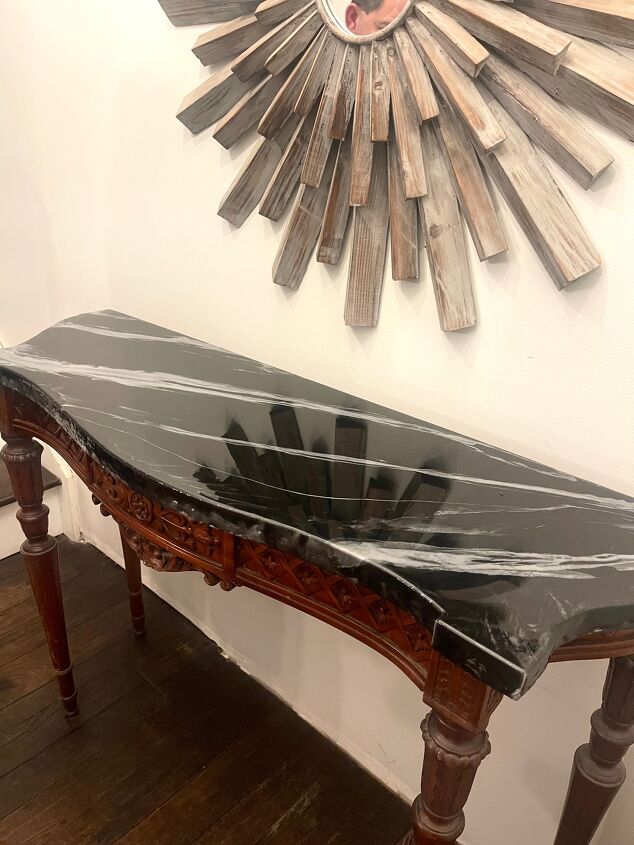
I decided to test the DIY epoxy pour on a console tabletop.
The first step in this process is to make sure the top edge of the tabletop has a curved edge. Use a router bit to make a rounded edge on the top so the epoxy can easily roll off to cover the sides. This will create a beautiful finished edge.
Sand the top and the sides of the wood till smooth.
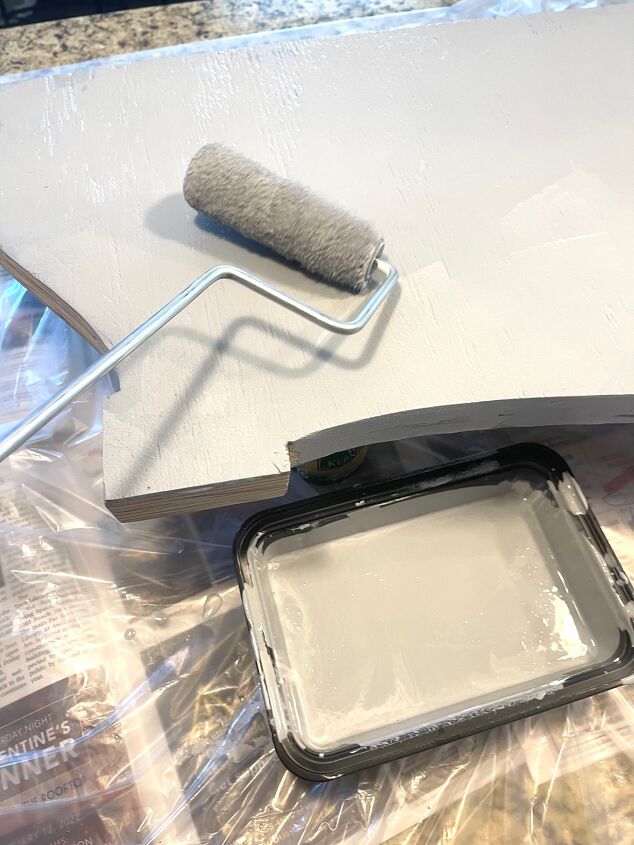
Next, prime the wood with a bonding primer. I used two coats of Behr Primer, tinted with a gray and light sand in between each coat. You’ll have to wait for 24 hours before pouring the epoxy (full disclosure, I didn’t wait 24 hours before I poured the epoxy, I waited a couple of hours). I had to get this project off my kitchen counter as quickly as possible, I had company coming that evening.
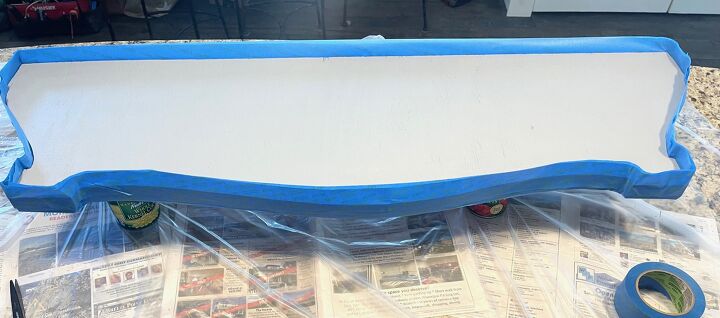
Once the primer is completely dry, it’s time to tape the edges with painter's tape. Tape the edge of the tabletop an inch above the edge and an inch below the edge. I doubled the tape to give it strength, so the epoxy doesn’t push the tape and pour off the board prematurely.
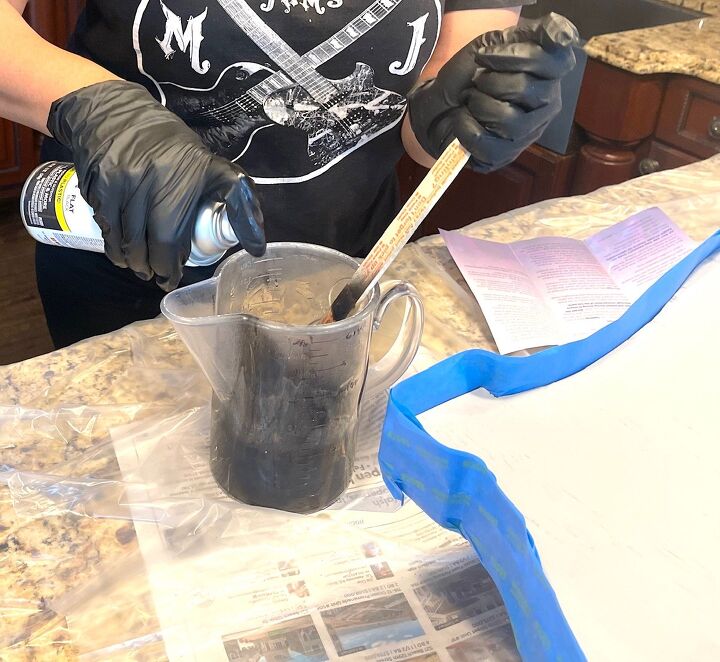
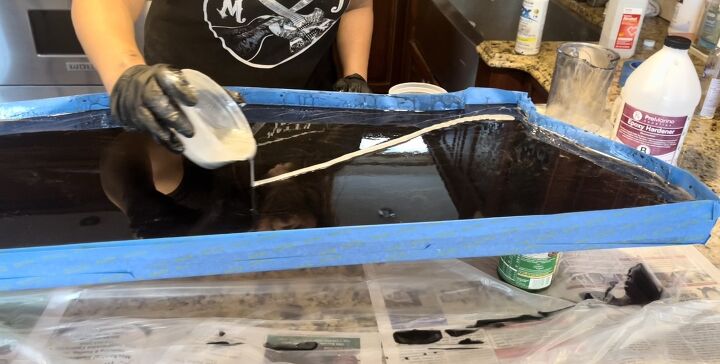
It’s mixing time, I used 3 ounces of epoxy and the hardener per square foot. When I do the epoxy pour on my countertop I will be using upwards of 6 to 8 ounces per square foot. But since this is a test I didn’t feel the need to use that much on this tabletop.
The epoxy and the hardener that I used are mixed one to one ratio. Some epoxy is 2:1 ratio so make sure to read the manufacturer’s instructions carefully. Pour the hardener, part B in a small mixing bucket first, then pour part A. I poured part B first because part B is less viscous, it’s thinner basically going to fall to the bottom quickly and follow with part A which is thicker.

I sprayed black Rustoleum acrylic paint into the epoxy mixture and stirred well. Adding a small amount of spray paint little by little will give you the transparency or the opaqueness you desire.
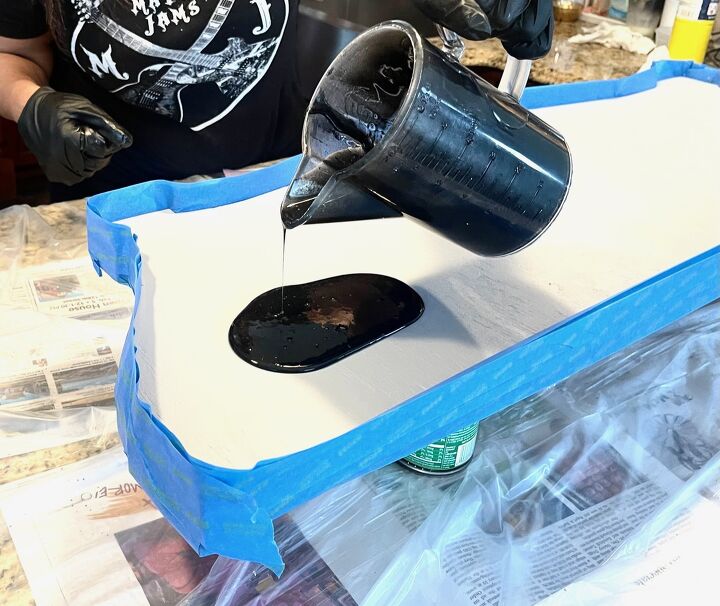
Then quickly pour the mixture onto the surface and spread it throughout.
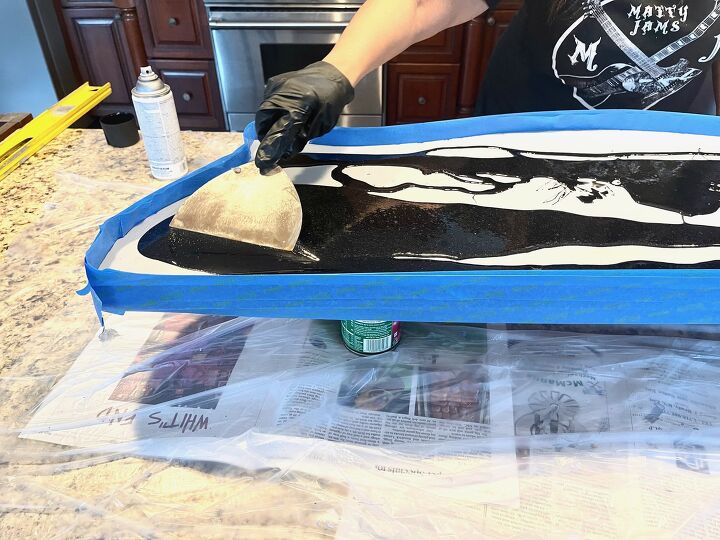
I used a plaster spatula to spread the epoxy over the board and gently move the product around and over the edge.
Once the epoxy is spread throughout evenly, surface bubbles may appear due to the mixing process. You can easily remove the bubbles by spraying with isopropyl alcohol and by using a torch, heat gun, or even a blow dryer on high heat.
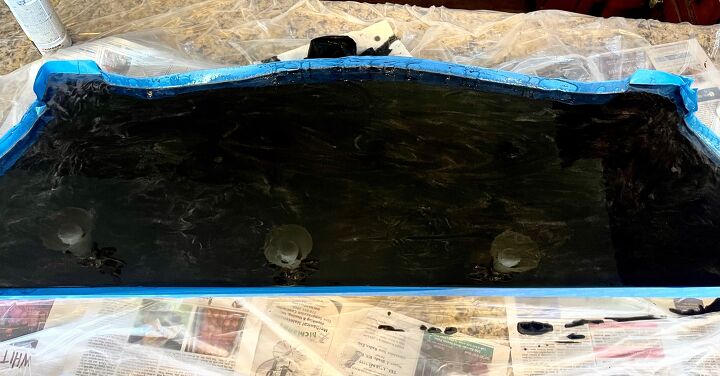
Next, I mixed a small batch of epoxy with silver Rustoleum paint to create the vein and variations on the black to look like granite.
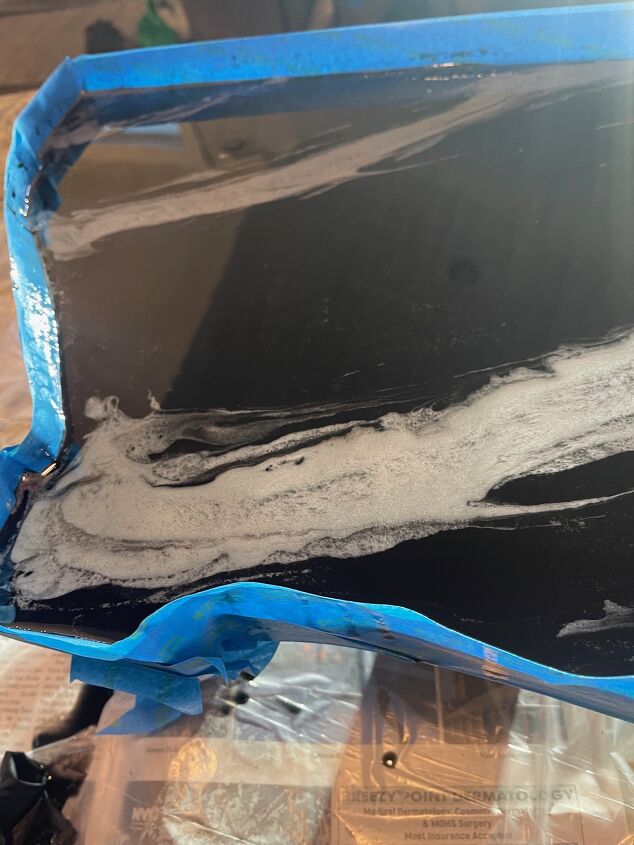
Once you achieve the look you want, let it dry for about an hour before removing the tape from around the edges. Test to see if the paint rolls off too fast off the edge. If it does, wait a little longer so that it will roll off slowly. Use a paint stick to scrap off the drippings on the bottom of the edge.
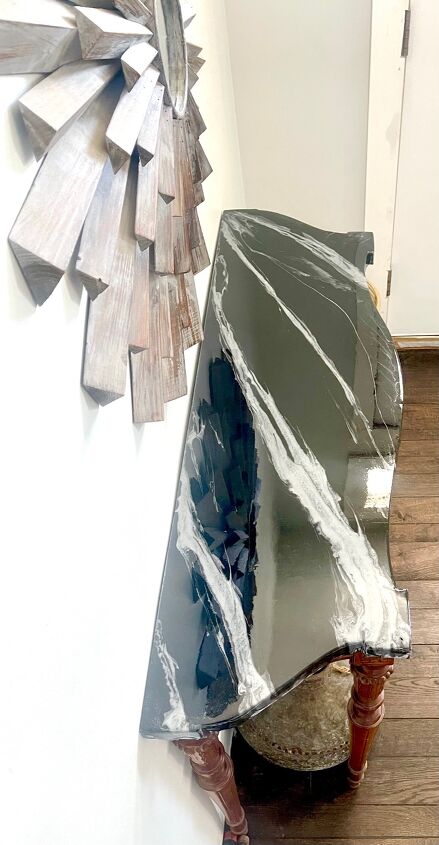
Let it dry for at least 4 hours before moving it.
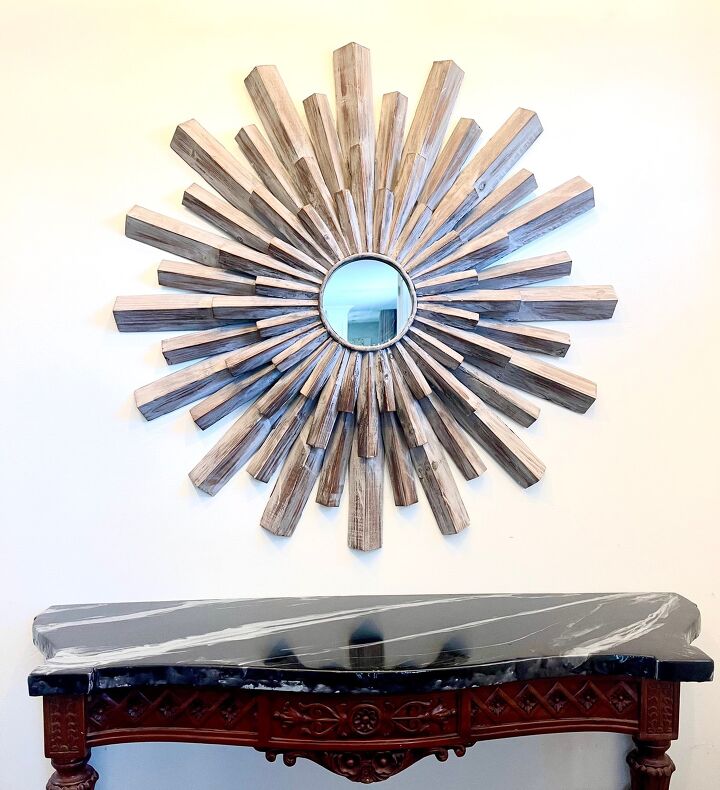
This DIY epoxy pour tabletop turned out so well, I can’t wait to tackle my countertop.
Resources for this project:
See all materials


Comments
Join the conversation
-
Thank you so much!
-
What a beautiful job ! The table looks amazing thanks for shearing


Frequently asked questions
Have a question about this project?
If I just did this to the leaf of my dinner table, would it be noticeably thicker?
When you poured the white in did you drag it with something or just let it flow on it's own?