


Epoxy Counters 101…over Laminate/formica.
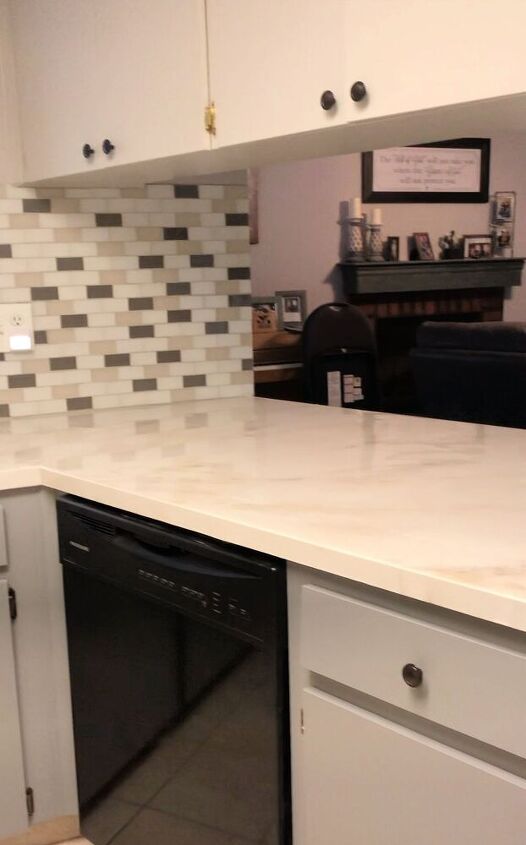
Epoxy counters are pretty simple, but because it’s time sensitive it is a little stress inducing. This will be my third kitchen epoxy project. The picture below is the before obviously.
Preface…if you’re thinking of doing epoxy, be sure to watch the video below as well as my other epoxy videos on Youtube. I have tons of useful information there.

This is my friends kitchen and she had a very small budget to make the biggest possible impact, so naturally epoxy counters are the answer. I painted her cabinets inside and out, removed the tiny formica backsplash, epoxied the counters, installed backsplash tile, a plumber replaced her sink, and I plan to make her a tailored roman shade when she picks fabric.
I have a separate video tutorial on the backsplash removal
First things first…epoxy.
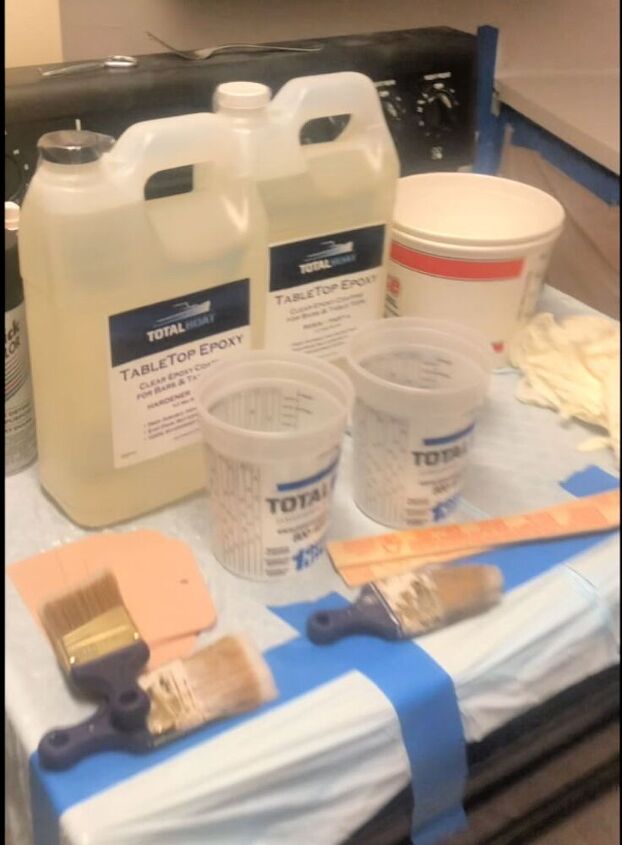
I used Total Boat Brand epoxy pictured above. This will be my third time using @Totalboat epoxy and I love it. The quality is excellent, the price is right and you can order from the website and get the epoxy very quickly. Plus you can get most of the other supplies from them as well.
Supply List:
- epoxy
- buckets : 2 small 1 large
- paint sticks for mixing
- spreader
- paint brushes
- plastic tarps
- heat gun
- painters tape
- duct tape
- plastic gloves
- powder for the inside of the gloves
- spray paint
- latex house paint in color of your choice for the background
- BIN Zinsser Shellac Based primer for priming the formica
- sand paper: 200-400 grit to sand counters before priming
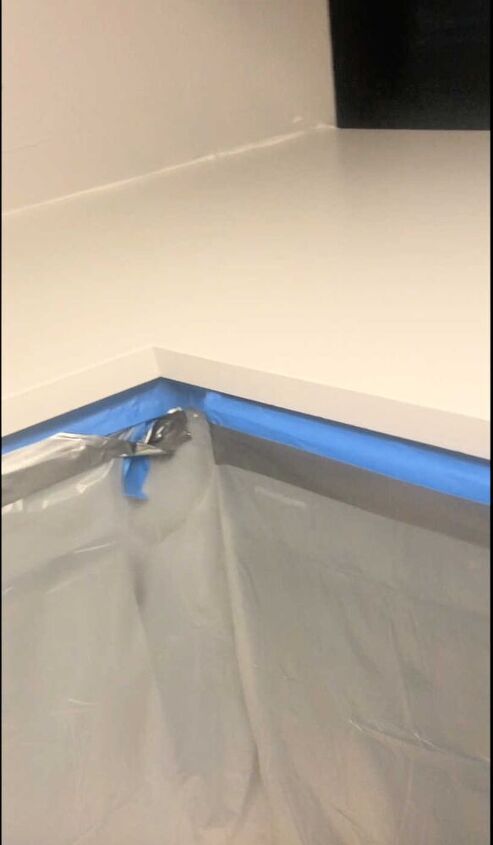
Step 1. prep the area
Tape off the floor and the cabinets with plastic tarps and painters tape. Use painters tape first to tape the plastic tarps to the cabinet boxes. Then run another line of duct tape on top of the painters tape to make sure the plastic doesn’t come off. You must use plastic…epoxy will soak right through canvas painters tarps and most paper.
Sand the counters to give the primer a little tooth to stick to. Make sure to round over the edges of the counter(I show this part up close and personal in my epoxy over laminate video). Then prime the counter with the Shellac primer followed by two coats of your desired latex paint color. Lightly sand between coats.
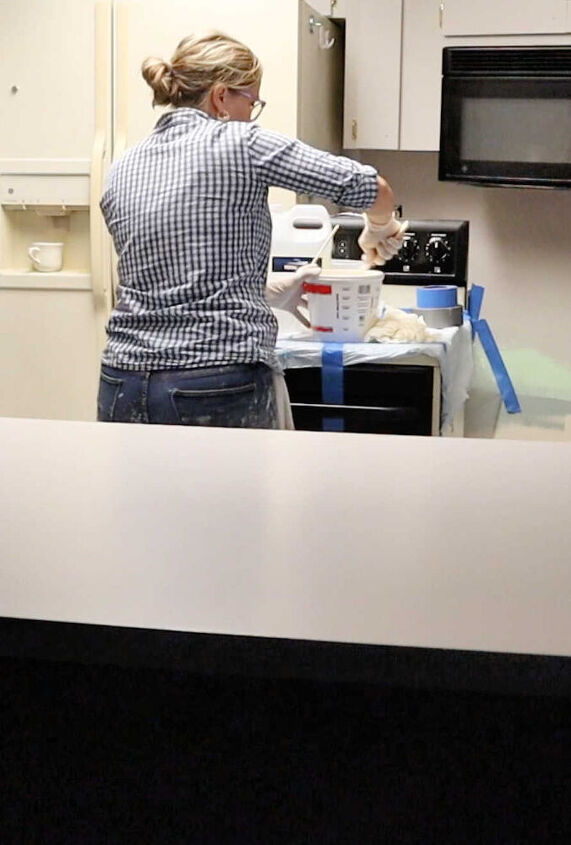
Step 2. Mix the epoxy
It’s very important to mix the epoxy exactly 1:1 ratio. Use buckets with measurement marks and make sure your pouring on a level surface. Once you dump the two parts together you have to thoroughly mix the epoxy. Set an alarm and mix for the full time allotted on the label. I usually mix for a full 4 minutes scraping the bottom and sides of the bucket the whole time.
Sidenote: Make sure your epoxy is in the temperature range recommended on the label. Usually somewhere between 60-80 degrees F. I think.
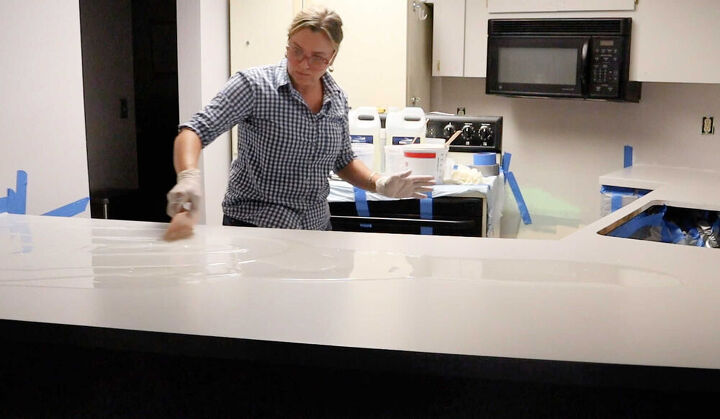
Step 3. Spread Epoxy
Pour out all the epoxy from your bucket. If you leave a bucket full of epoxy it will harden in a matter of 10 minutes. If it’s poured out on your countertop it won’t heat up and will stay workable for about 45 minutes.
I additionally mix my epoxy on my countertop while I’m spreading it out, just in case some of it didn’t mix in the bucket. I spread my epoxy with the plastic spreader almost to the edges and let it flow over the edges very last.
Sidenote: I apply my epoxy fairly thin. Thinner than most I’d say…because the thicker you apply it in one coat the faster and more it will turn yellow. Details about why I know this in my video.
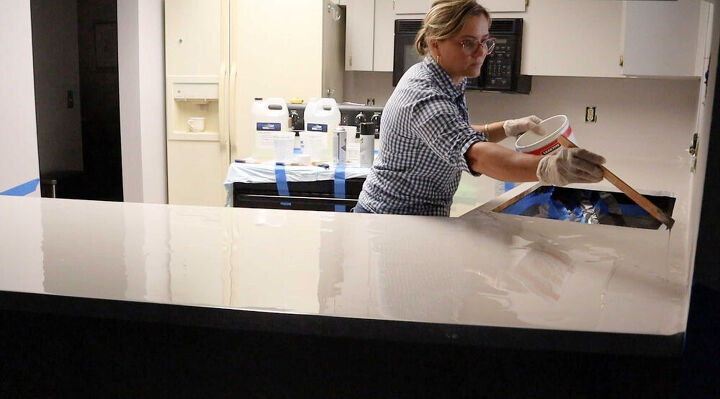
Step 4. Use spray paint to create your design.
Spray a pool of spray paint into the bucket that had your epoxy mixture. Then using a paint stick pick up a glob of spray paint and drizzle it onto the counter. This part is completely subjective and you can create your veins any way you want.
At this point you can do so many different color and technique variations. You can mist your whole counter with spray paint to add more background color. Or you can pick up some spray paint color with a brush and chop it into the epoxy to make random large areas of color. The options are endless.
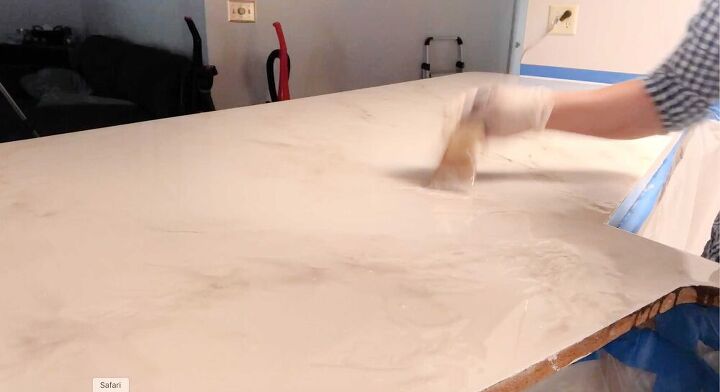
After I drizzle some paint onto the counter in vague vein like patterns I use a paint brush to “chop” the paint and epoxy to soften the look and create faint/subtle striations of color to be the background for the veins.

Then once I have some subtle color all over the counter, I come back with the same colors and paint stick and add in some more sharp and obvious vein lines over the areas of color I already created. You can go back and add or soften the colors as much or as little as you want for about 45 minutes.
Sidenote: Don’t forget to let some of the colors drip over the edges to continue the vein lines off the edges.
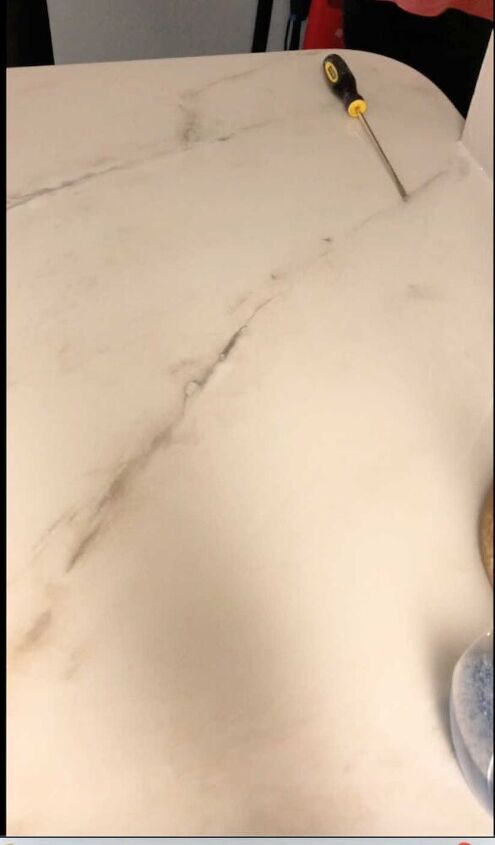
Step 5. pop any air bubbles with the heat gun
Once you have the design the way you like it, you have go over the counter with a heat gun to pop air bubbles. This also makes the surface super flat and can even manipulate the design and move the color around a bit.
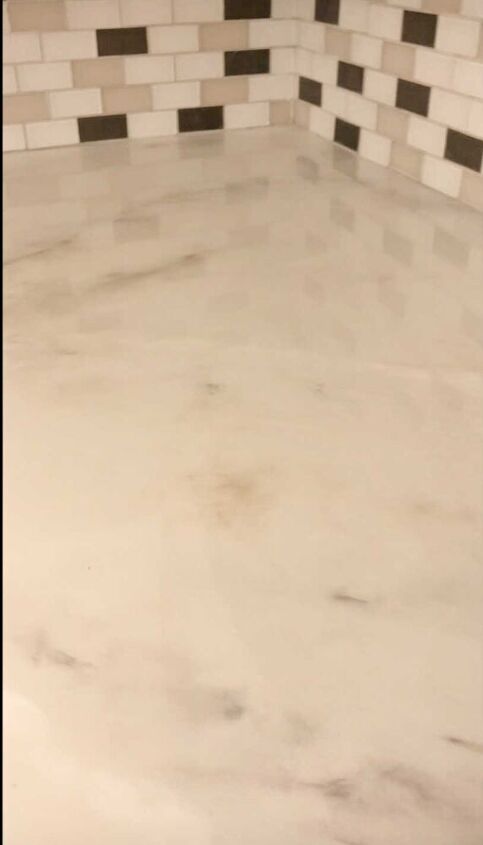
Once all the air bubbles are popped and the design is satisfactory scrape off all the drips under the bottom edge of the counter, look at your countertop with a flash light and remove and hairs or other debris, then stand back and admire your work.
It takes about 24 hours for the epoxy to set enough to reinstall the sink and touch it. Probably a full 48 hours before setting anything on top of it and a full 30 days before its fully cured and you can set hot things on it.
If you are thinking of embarking on an epoxy project be sure to watch my video series on Youtube.
Resources for this project:
See all materials


Comments
Join the conversation
-
That’s wonderful! Eventually I’ll install something nicer.
-
You’re welcome, I have many epoxy videos on my YouTube channel.


Frequently asked questions
Have a question about this project?
How does this react if you put something hot or warm on it?
I am hoping you can help me. I hired a guy who supposedly had done epoxy counters for 15 years. He had great reviews and answered all my questions, so I felt confident he would do a good job.....wrong! Now I have tacky countertops after 3 weeks, and after numerous times of trying to contact him, he is totally ignoring me and not responding to my request to come make it right. What can I do to fix this mess...I am heartsick. Also there are 2 small areas (pea size) where the formica is exposed. I am an avid diy person, and not afraid to tackle a repair, but I need guidance on how I can proceed. Of course, it is too late to stop payment on my check. He cashed it that day....probably knew he had flubbed up. Can you help me? Thanks.
Does the expoxy eventually yellow over time?