


Great Ideas Come From Great Coffee
Any idea what great idea I’ve come up with this time?
Wanna see?
Oh good!
Come on over and sit by me and I’ll grab you a nice hot cup of coffee.
Speaking of coffee……

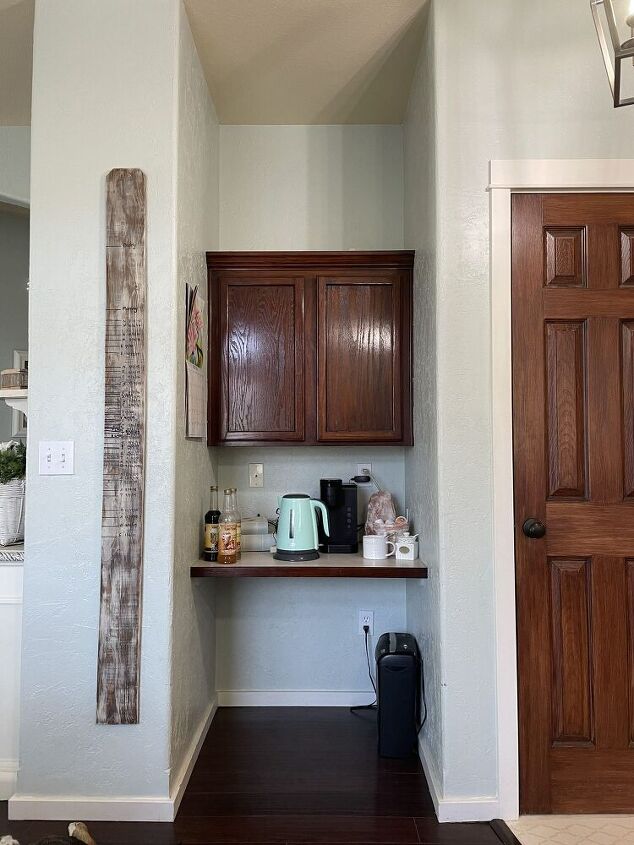
I’ve been looking for a piece of furniture for this nook for a couple years now but every piece I find is either way too narrow and would look too tiny in this space, or it’s just an inch or so too large.
I’m not kidding.
So one day when I was getting super annoyed at yet ANOTHER cabinet that wouldn’t work in this space I had a brainwave.
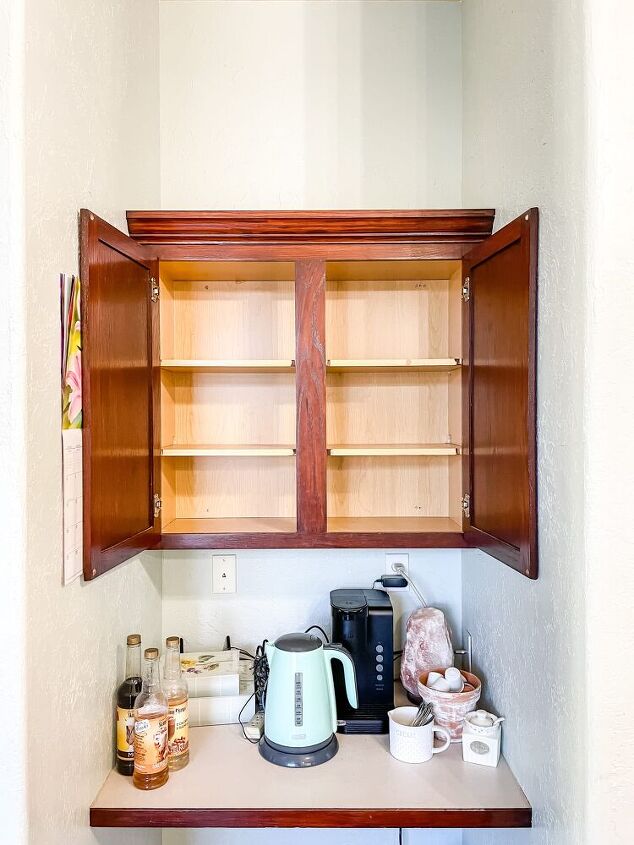
Off came the cabinet from the wall.
I had removed the doors before we took it off the wall to make it a bit lighter and easier to remove.
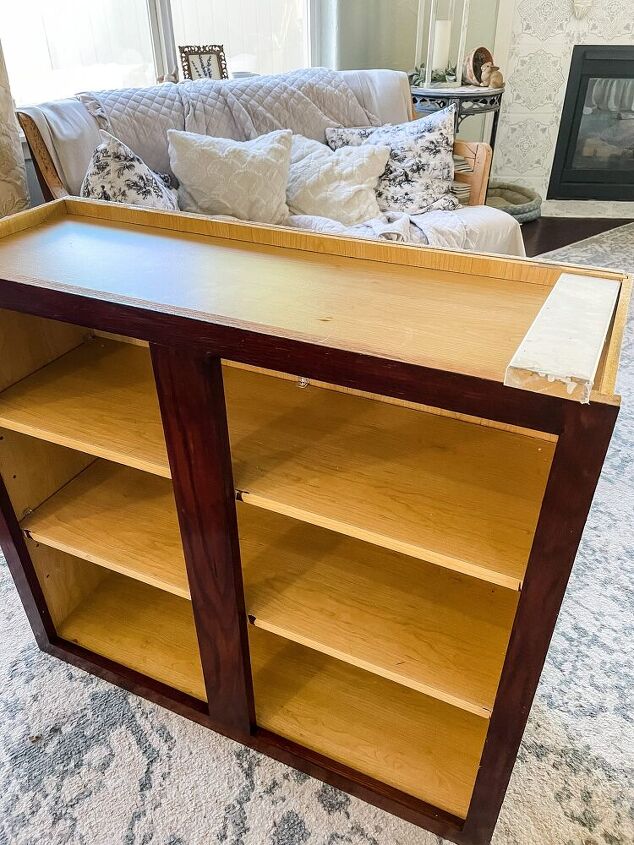
I took the 2 lengths of board that had been holding the crown in place when it was a wall cabinet. I flipped the cabinet upside down so I was working on the bottom of it and I glued and screwed the piece of wood at either end as shown in the photo. Make sure your screws aren’t long enough to come through the bottom of the cabinet.

Next I drilled some holes into these pieces of wood on either end of the bottom to install legs. I purchased the legs at Home Depot and of course measured where I wanted to put the feet and marked the spots before drilling. Make sure the hole you drill is a little bit smaller than the threaded part that is in the legs which allows you to install them. Also make sure you don’t drill very far into the wood. You don’t need a very deep hole and you don’t want to risk coming through the bottom of the cabinet.
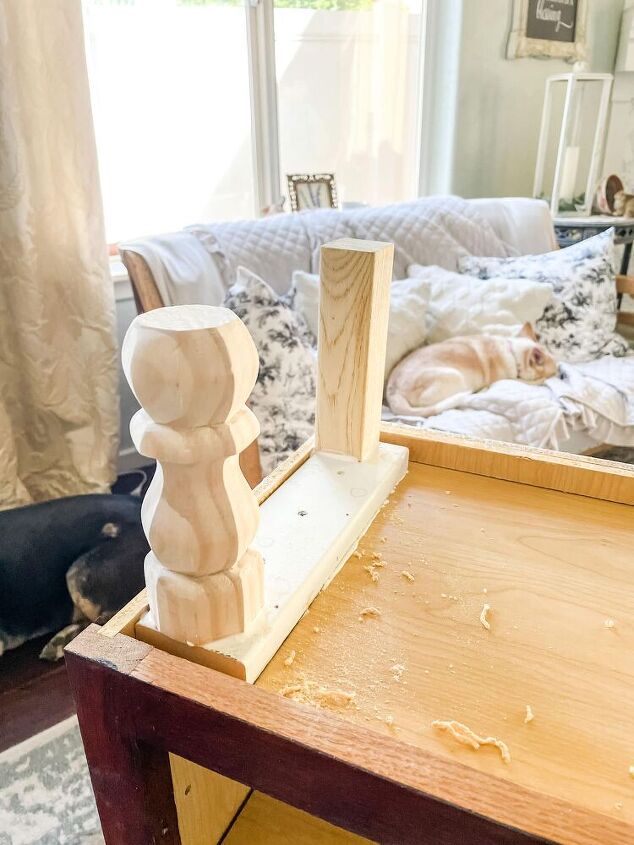
I put a little bit of wood glue on the bottom of the legs and then simple screwed them into the holes I drilled until they were tight.
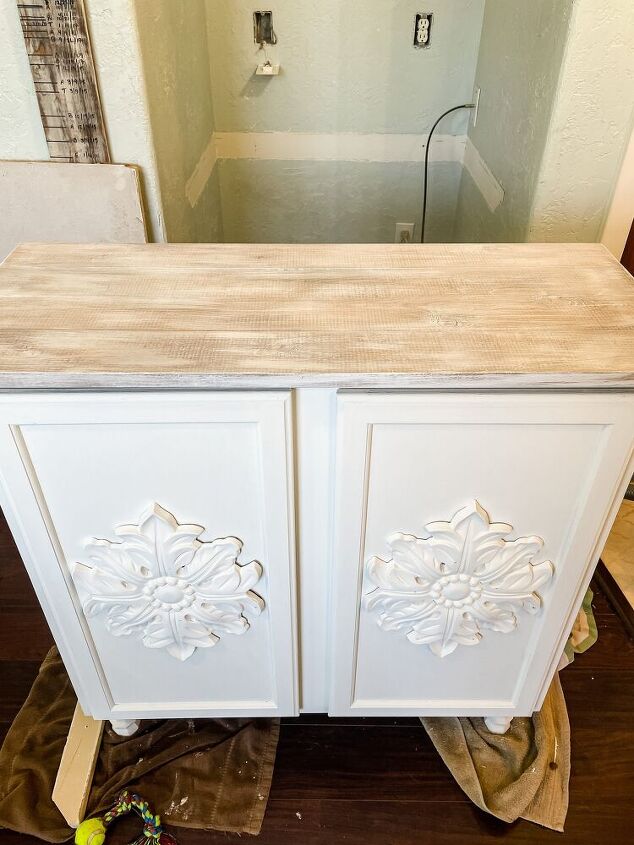
I am using 4″ legs for this piece because I didn’t want it too tall. I am using turned legs for the front which is highly visible and just square legs for the back ones that you don’t really see. You could use turned legs for both front and back but very often you will see this with the fancy legs in front and plain ones in back and I want this to look like a purchased piece of furniture so that’s why I chose to do it this way.
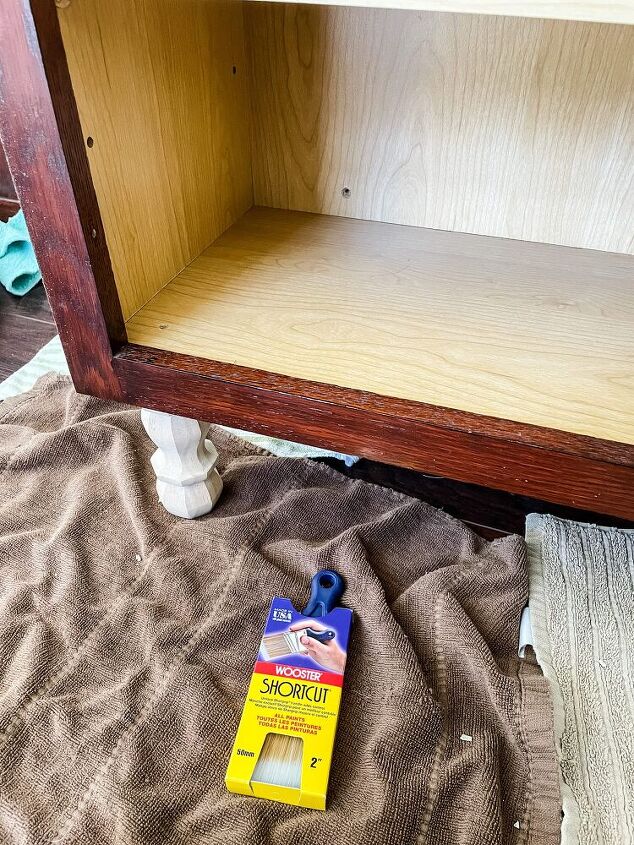
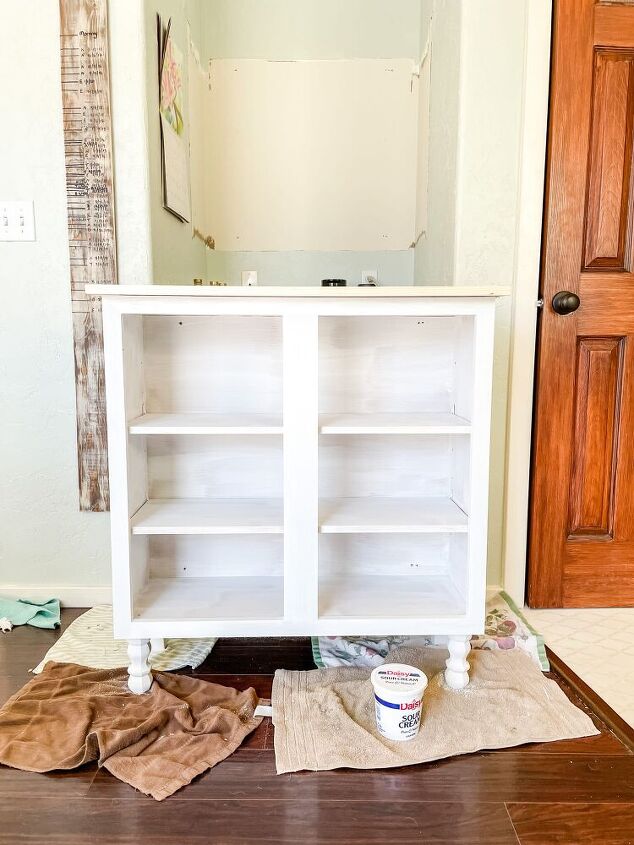
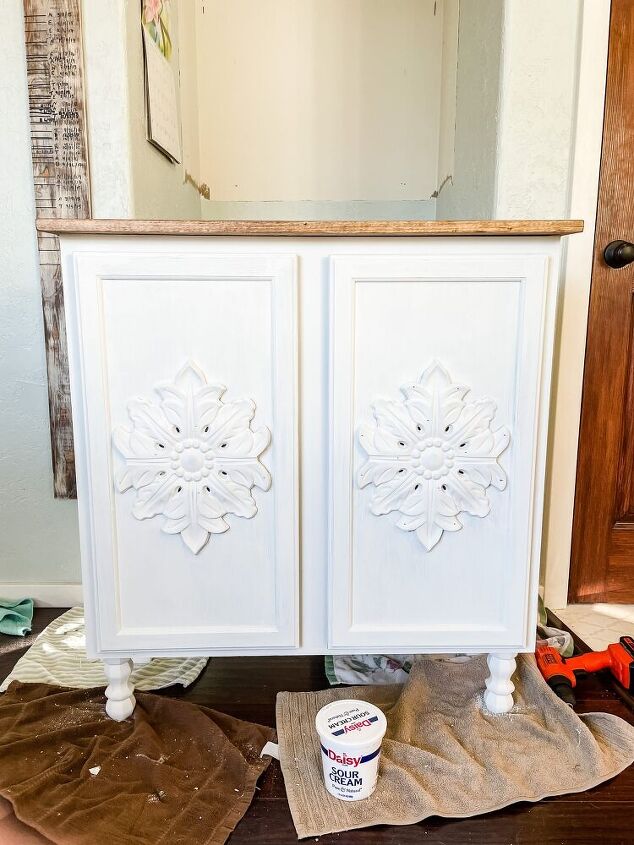
After letting it dry for a little bit I carefully turned the cabinet right side up and prepared to start painting.
I’m using my favorite little brushes (also from Home Depot) and my homemade Chalk Paint in the color White Dove (Sherwin Williams).
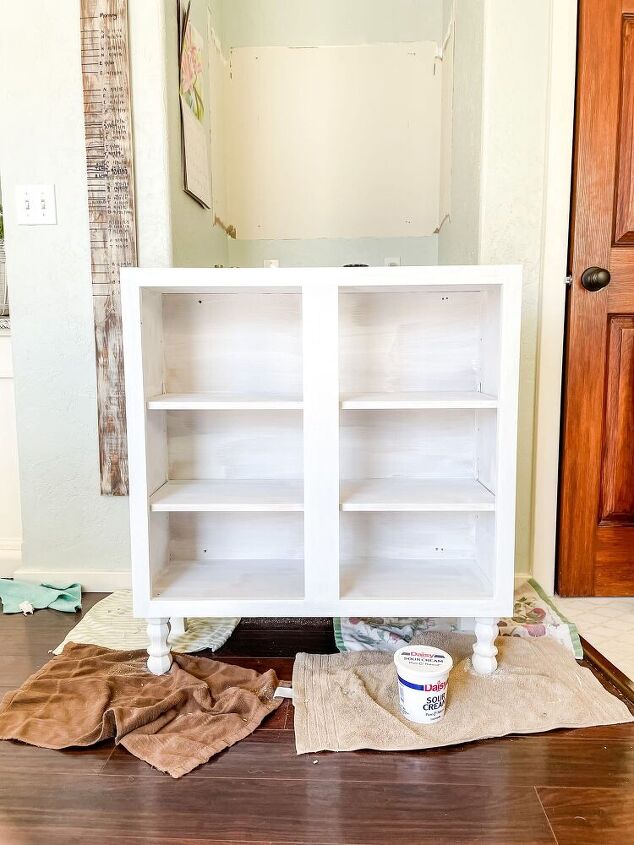
I’m painting this inside and out, legs and everything.
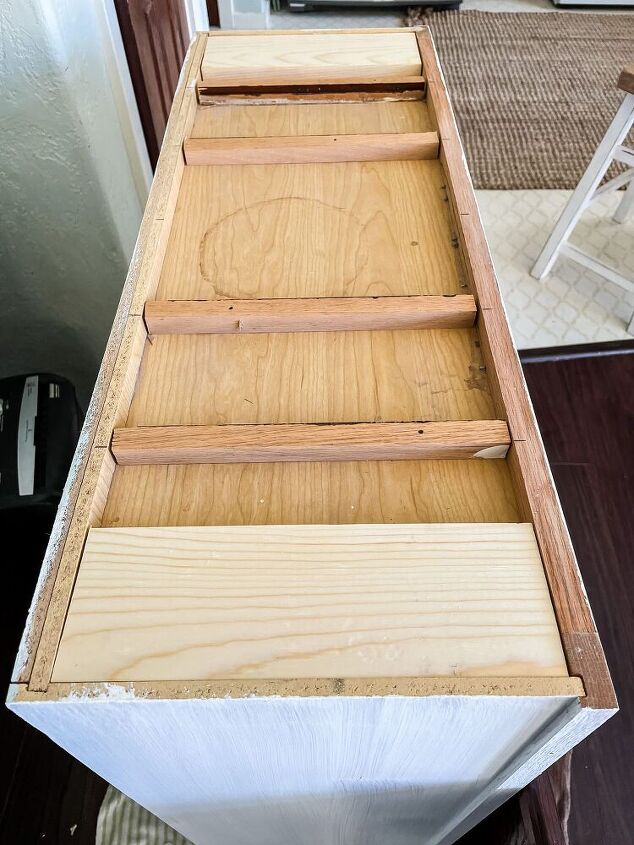
While waiting for the first coat of chalk paint to dry, I got started building a top for this piece. I cut 2 pieces of wood the exact size of the recessed part of the top of the cabinet. I also cut a few skinny little scraps of wood to put in the middle of this recessed area so the wood top wouldn’t dip down if I had something heavy on it. My cabinet was exactly 10.5 inches from front to back inside the recessed bit.
I used wood glue and short screws (just long enough to go through my pieces of wood and just a little into the cabinet base) to secure the THIN pieces of wood in the middle but DO NOT secure the larger end pieces you cut.
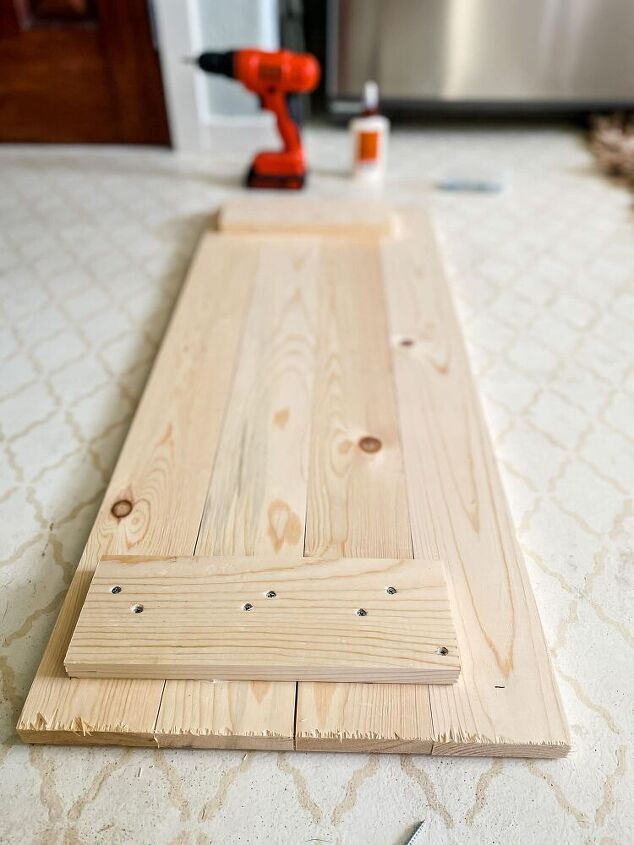
Next I took 1×4 pieces of pine and cut them the length I wanted for my top. I left enough for about 1/2″ to hang over each end and it still fits within the nook I’m building it for.
I carefully measured to see where to put the 1×4 pieces I cut for either end of the top. I want them to fit snug at either end which allows the top to just sit in place and it won’t slide at all but is removable. Once I had the measurements just right I used wood glue and a few screws to secure them to the underside of my top pieces.
I also made it so that the top would be flush with the back of the cabinet and overhang a little in the front.
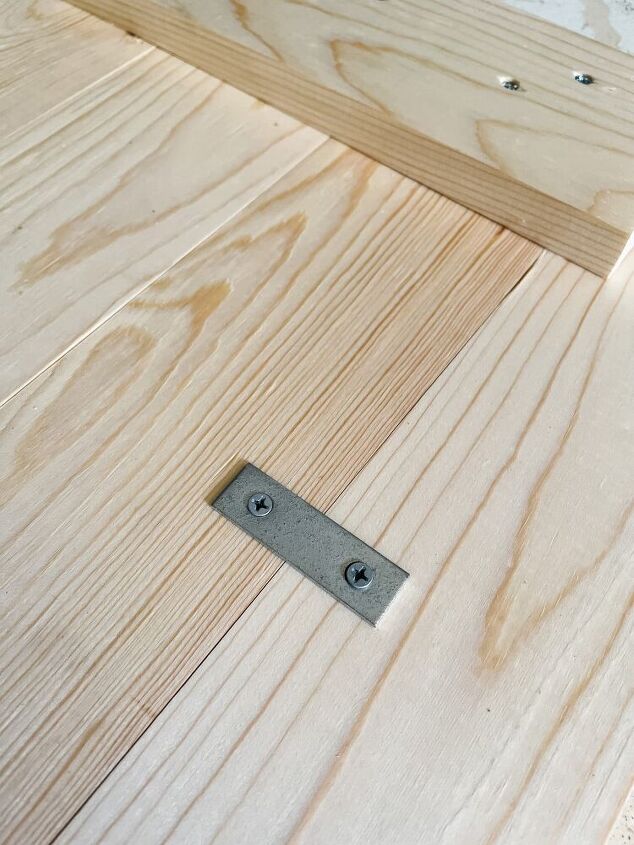
To secure the piece that overhangs the front (since I can’t secure it to the pieces that fit on either end) I used some flat metal plates used for just this sort of purpose. I only used 2 but you could certainly put more in if you chose to. Just secure one screw into the front board and the other screw into the next board behind it.
The top sits very securely on the top, doesn’t slide at all and will only come off if you lift straight up. I’m planning to leave it removable for now but if you want the top to be stationary and permanent, simply put a couple screws in from INSIDE the top of the cabinet base, into the pieces of 1×4 at either end.
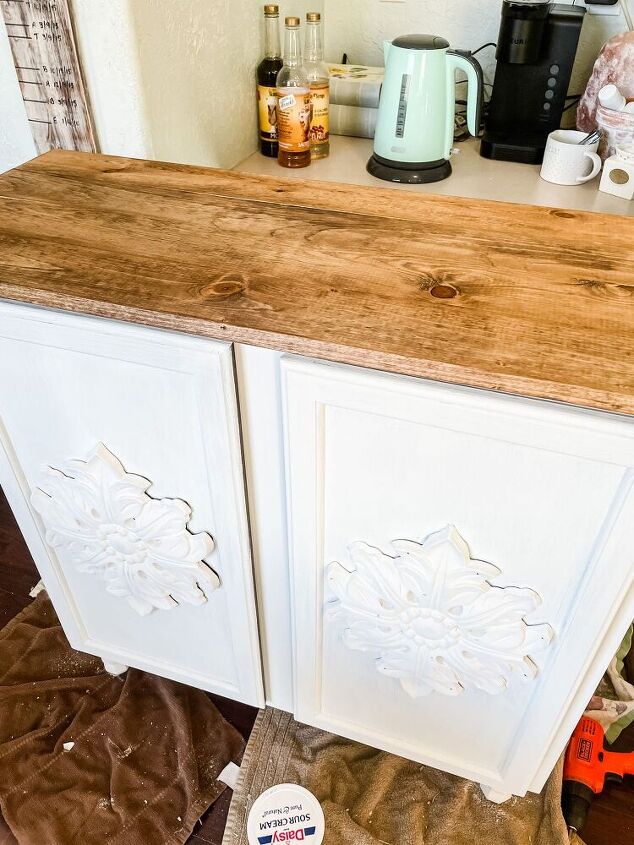
Next I sanded the wood top very well, on the top surface as well as all edges and corners. I applied a coat of Minwax Early American stain and allowed it to dry.
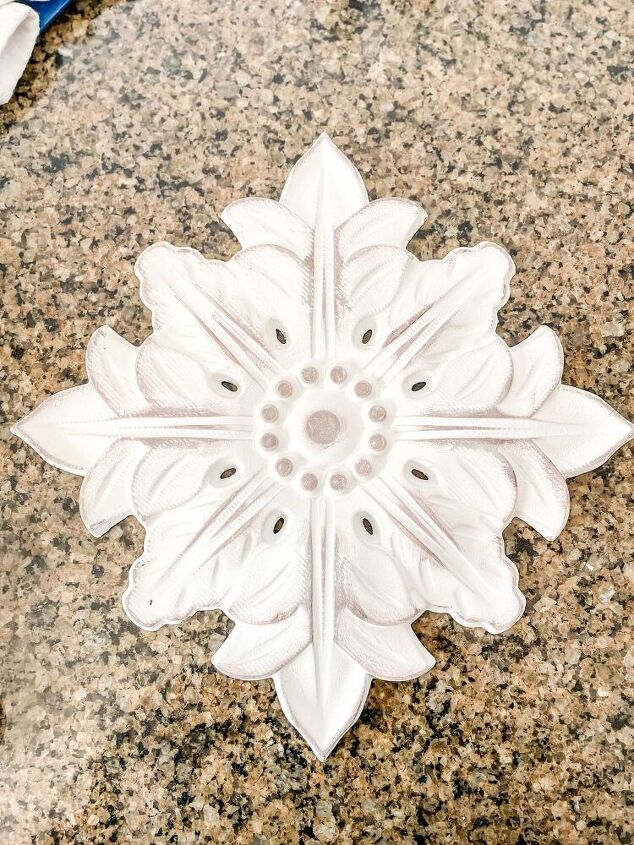
I bought these decorative wall pieces at Hobby Lobby when they were 50% off because I thought they had such a lovely design to them. At the time I wasn’t sure if they would fit on my cabinet doors or if they would be too wide. As it turns out they were just a little too wide to fit in the recessed panel but no worries.
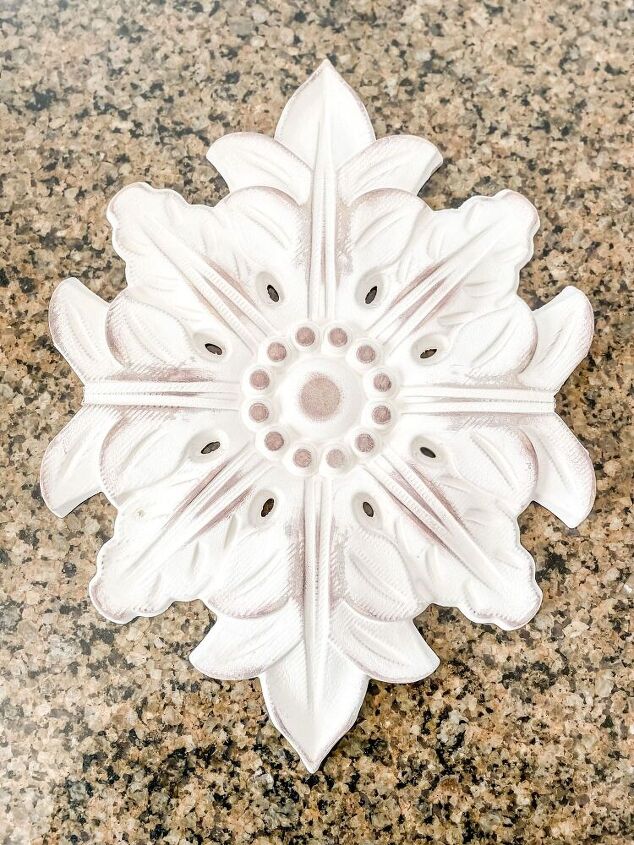
After removing the hanging hardware from the backs of these pieces, I used my jigsaw to cut out the points on either side. I sanded them smooth and you can’t tell they weren’t supposed to be like this all along.
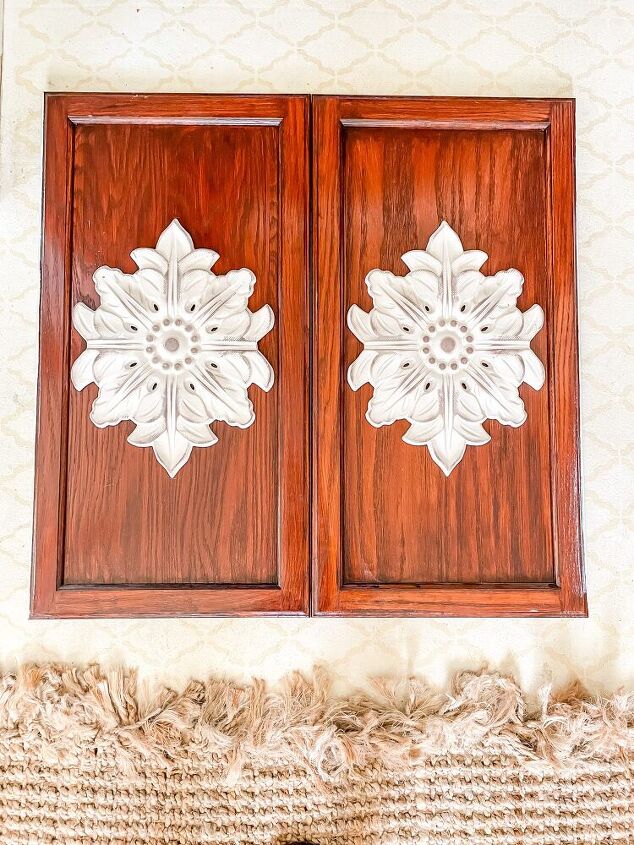
Next I measured until I had them exactly in the centers of the doors, marked where they needed to go and then applied some Gorilla glue to the backs of them. Once they were in place I used my Ryobi nailgun to secure them with extremely tiny, short brad nails.
Everything got a couple coats of chalk paint and then I hung the doors back on the cabinet to continue working on them.
I caulked all around the edges of the decorative pieces and filled the tiny nail holes from where I attached them. This is time consuming but really makes all the difference in the end result of the piece.
As for the top I decided to whitewash it so I dipped a dry brush into the tiniest bit of chalk paint and wiped it on a paper towel. I brushed over the top lightly until I had the look I liked.
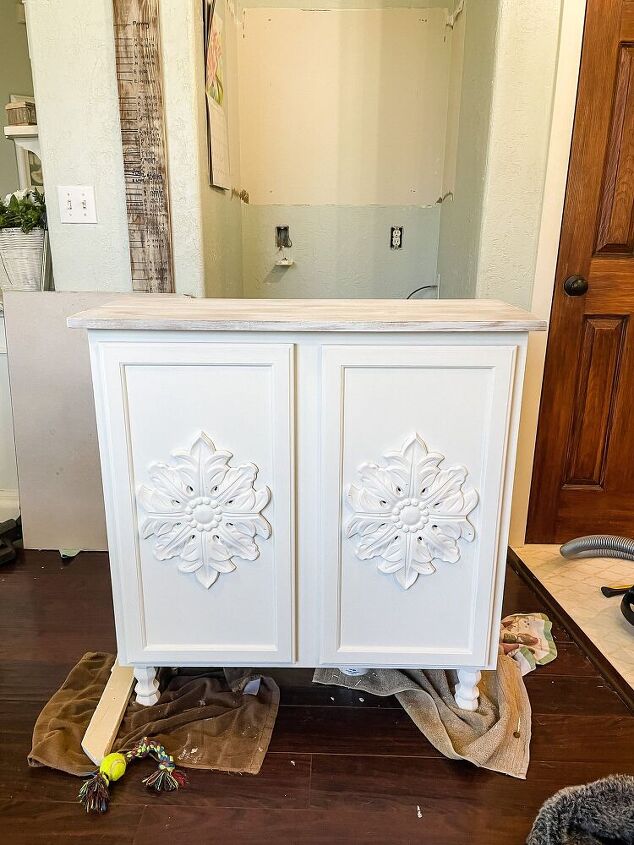
The last step is to apply polyurethane to seal the chalk paint. I did 2 coats on the base of the piece, 3 to the top and shelves as these will get a lot more wear.
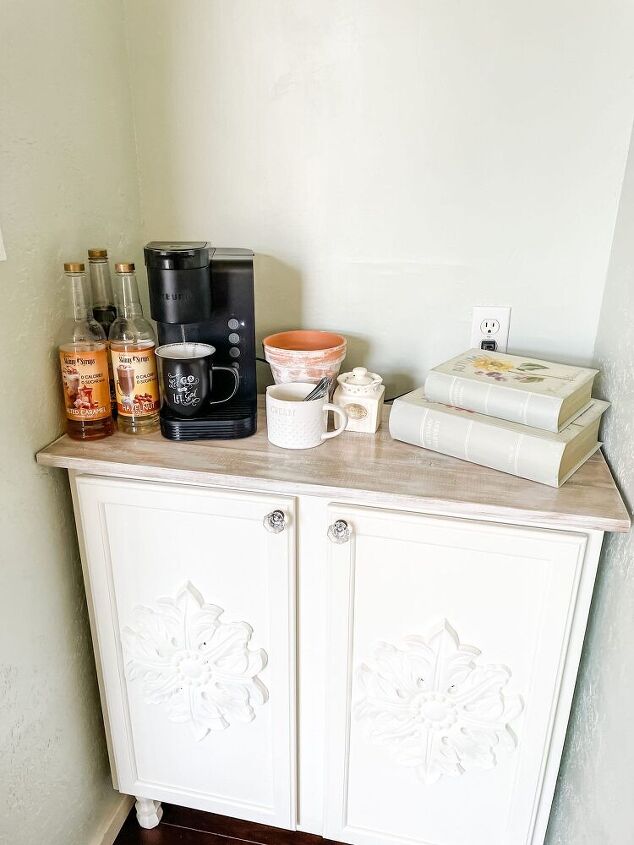
The finishing touch, like adding some jewelry or a belt to your outfit, was some lovely little glass knobs. I wanted to add some to again make the piece more custom and furniture like but didn’t want to take the focus away from the details on the doors. Glass knobs were just the ticket and are such a vintage touch.
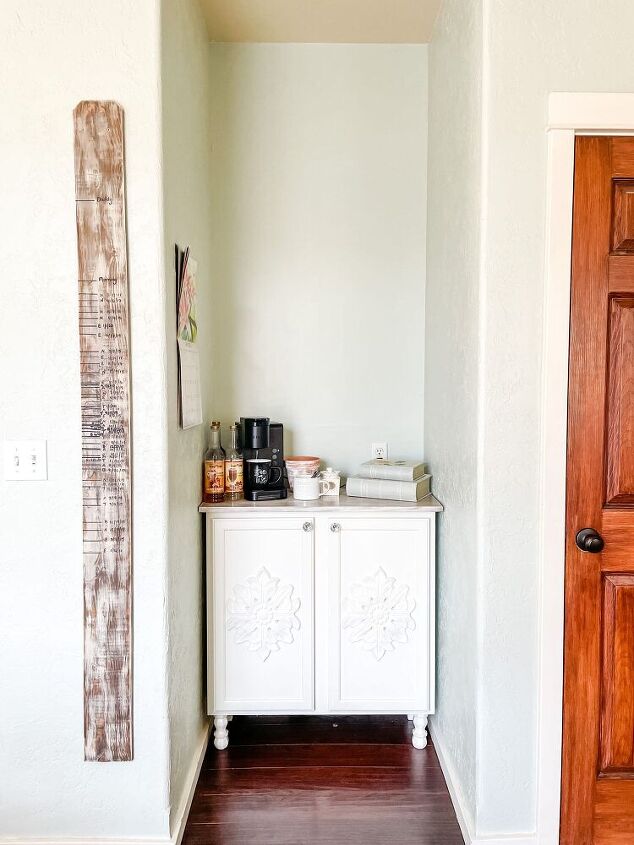
At long last!
Keep in mind this nook is far from finished here but if I shared any more details in this picture with you then it would ruin the surprise as to what else I’m doing in the nook!
Let’s just focus on the cabinet, shall we?
Resources for this project:
See all materials


Comments
Join the conversation
-
Thank you!. I'm planning to get new cabinets and now I think I'll save one of my uppers and move to a space under my breakfast bar. I will then be able to use it as a handy pantry area. I won't fill in the top but use it for space to put a box and spot for keys. My condo is not large and I'm always looking for good ideas to save space. I try not to bring anything in unless I take something out.
-
Beautiful! Now I’m inspired to create something beautiful out of the top 1/2 of my old China hutch that’s been in the garage for years!!! Thank you for sharing.


Frequently asked questions
Have a question about this project?
Just curious as to why you wanted the top to be removable? This is a great idea - well executed. Kudos to you!
Why was the nook originally there? Do you know?