


DIY LED River Table
8 Materials
$175
2 Days
Medium
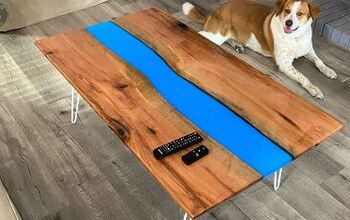
Hey Everyone, Jeremy Hoffpauir here. I received a lot of positive feedback over the last few months on my previous two epoxy resin table projects, so I decided to build an LED Epoxy Resin River Table with Sinker Cypress. This table has embedded fire glass and hairpin legs. Keep reading to learn how to build one of your own.
{
"id": "4640712",
"alt": "",
"title": "",
"video_link": "https://www.youtube.com/embed/CS3YvHGS-Aw",
"youtube_video_id": "CS3YvHGS-Aw"
}
{
"width": 634,
"height": 357,
"showRelated": true
}
I received a text from my friends at Riverside Lumber in New Orleans about some unique Sinker Cypress they received. Immediately, I went over there the same day because Sinker Cypress sells very quickly. I love working with Sinker Cypress because it is such a beautiful wood with lots of history.
So, I purchased a piece of Sinker Cypress that was about 8 feet in length and 17 inches wide.

Wood Prep
I normally start my woodworking projects with preparing the wood and this project is no different. Sinker Cypress is a beautiful wood species, but it is a little soft and requires special care during the preparation process.
First, I cut the 8 foot piece of sinker cypress at 50″ long. I used my straight edge and circular saw to make the cut. The LED epoxy resin river table will be 48″ long, but I left an extra inch on both ends to square the edges in a later step.
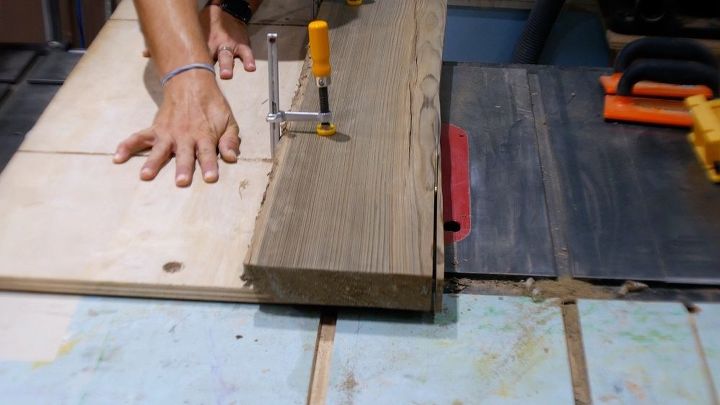
Straight Sides
Next, I ripped the wood with my bandsaw. Why did I use my bandsaw and not my table saw? Good Question. The Sinker Cypress did not have a straight side to ride along the fence of the table saw.
Obviously, it is not safe to run a piece of wood this heavy through a table saw without a fence or sled to keep the wood from moving. Since I don’t have a jointer, I couldn’t get a straight side. I do have a jointer jig, but the piece of wood was a bit too wide for my jointer jig. I had to run it through my bandsaw to cut it in half.
I didn’t care if the cut was not exactly straight because I needed to trim off some of the wood anyway. Good thing I didn’t care because it was definitely not straight.
Then, I took the two pieces of sinker cypress and straightened out one side using my jointer jig with dovetail clamps. I really love this jointer jig because it really gets the sides very straight.
Remove Bark, Flatten Surface, & Sand
I used a few of my general use chisels to remove the loose bark from each piece of sinker cypress. I wanted to maintain the ‘live edge’ look of each piece, so I was careful during this process.
Plane Surface (You don't need to do this. Sanding works just fine)
The sinker cypress was relatively flat because it was planed by my hardwood dealer; however, it was still a bit rough. I ran each piece through my planer a few times. I removed 1/64″ on each pass.
Sand Surface
Next, I sanded each piece of sinker cypress with my orbital sander. I sanded the faces, sides, and smoothed out the live edge where I removed the bark. I started with 120 grit, 150 grit, and finally 220 grit.
Quick Tip: For a very smooth finish, wipe down the wood with a damp cloth and sand again with your highest grit. The water lifts the grain a bit and helps remove the excess.
Square Ends
I used my miter saw to square each end of the sinker cypress. It was only necessary to remove about 1/2″ from each side to get it square. This worked out because I may need to square it again at a later step and I would have 1″ remaining. Remember, I cut the piece at 50″.

Melamine Box
The melamine box is a very important step for the LED Epoxy Resin River Table. Epoxy resin doesn’t adhere to melamine, which makes melamine a perfect material to contain the epoxy resin. I constructed the melamine box to the exact dimensions of the table in order to prevent the epoxy resin from seeping on the sides and ends.
The bottom of the melamine box needed 2 pieces of melamine because I didn’t have a piece wide enough. I glued the 2 pieces together using spray adhesive with an activator. This will create a strong enough adhesion to hold together.
Ultimately, the sides/ends of the melamine box would provide the necessary stability.
The melamine box bottom was 20″ wide, 49″ long. I cut the sides at the same length as the bottom and they were 2 7/8″ high (wood is 2″ thick, melamine 3/4″ thick).
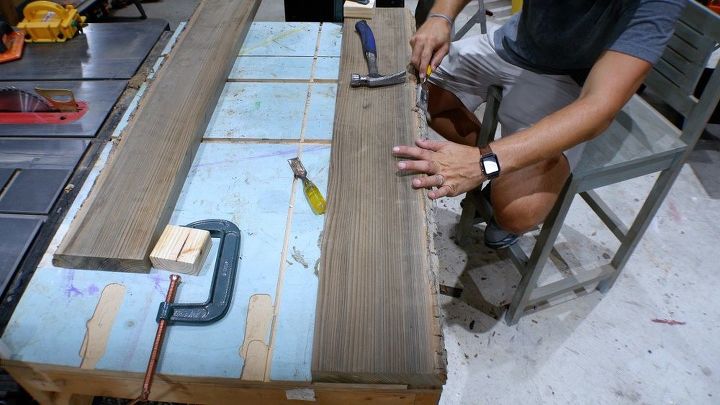
Next, I attached the sides with screws after drilling a pilot hole.
I placed the sinker cypress pieces on the bottom and measured the ends to get an exact measurement. The ends were 21.5″ wide.
Quick Tip: Tape measures are great, but use the board itself for a more accurate measurement.
I used my hot glue gun to seal the melamine box on the sides and corners for the LED Epoxy Resin River Table. Next, I put a generous coat of Johnson Paste Wax on the bottom, sides, and top of box where the particle board was exposed. Johnson Paste Wax further prevents the epoxy resin from adhering to places it should not.
Then, I placed the pieces of sinker cypress into the box and sealed around the edges and corners to prevent the epoxy resin from seeping out.
I put down a thin piece of silicon caulk down the seam of the melamine box bottom. This wasn’t necessary, but I decided to do it anyway.
In case you were wondering, the silicon caulk did not adhere to the seam. Why? Because I put the paste wax on the bottom – smh. I amaze myself at times! This didn’t hurt anything because the caulk wiped off easily.
Quick Tip: It is very difficult to prevent the epoxy resin from getting under the wood, but it is worth the effort to prevent it as much as possible.
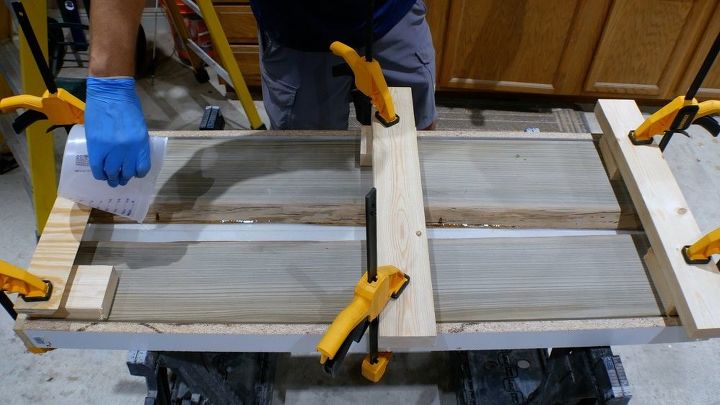
Epoxy Resin First Pour
Before I mixed the first batch of epoxy resin for the LED Epoxy Resin River Table, I used 6 blocks, 3 2x4s, and 6 f-clamps to hold the sinker cypress in place. This helps with minimizing the epoxy resin from seeping under the table.
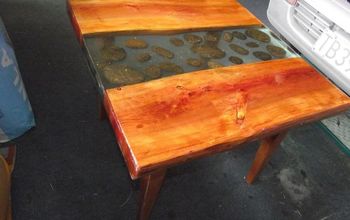
I’ve worked with epoxy resin on my sinker cypress table project and my river rock table project, so this isn’t my first rodeo with this material.
Keep in mind, it is so important to follow the instructions precisely regarding mixing and applying the epoxy resin. This stuff is not cheap and if you think you can skip an unimportant step – think again!
I mixed the epoxy resin at a 1:1 ratio (1 part hardener, 1 part resin) at a total of 16 ounces. Sixteen ounces is sort of my ‘sweet spot’. This amount is easy to handle. When the material is first mixed (not whip b/c that causes bubbles) it will turn cloudy. After a few minutes of mixing/stirring the material it will begin to ‘break’ and become easier to stir. Then, it will turn more clear and that’s when it is ready to pour.
I slowly poured the epoxy resin and covered the entire bottom about 1/4″ thick. Next, I used my heat gun to remove the bubbles.
Quick Tip: In order to remove as many bubbles as possible, it is important to use the heat gun every 2 to 3 minutes for about 20 minutes.
Epoxy Resin Second and Third Pour
Second Pour
Once the first pour cured, I removed the f-clamps, 2x4s, and 2×4 blocks from the LED Epoxy Resin River Table. The second pour repeated the same process as the first pour with the same amount of material (16 ounces total).
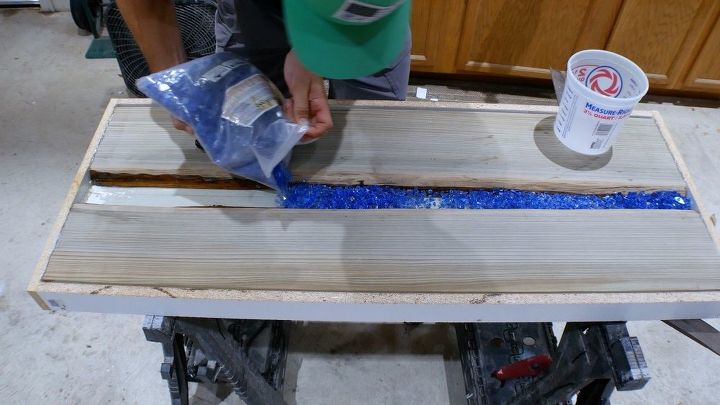
Third Pour and Fire Glass
I wanted to embed crystals in the middle of the epoxy layers on the LED Epoxy Resin River Table because, well, it’s just looks cool. Once I checked the prices of crystal, I quickly shift my focus to alternative materials. I found fire glass as an alternative. Fire Glass is used in outdoor fire places, which is why it is called Fire Glass.
I poured the fire glass on top of the second layer of epoxy resin and made sure the height of the fire glass was below the height of the table. Next, I poured a layer of epoxy resin to cover the fire glass. I used my heat gun to remove the bubbles.
Remove Melamine Box
The melamine box was very easy to remove. Honestly, it is a pain in the rear to prep the melamine box with wax, hot glue, etc., but it is very much worth the time.
So, I removed the sides, back/front, and then the bottom. I had a surprise when I lifted the bottom because I didn’t anticipate that much epoxy resin to seep under.
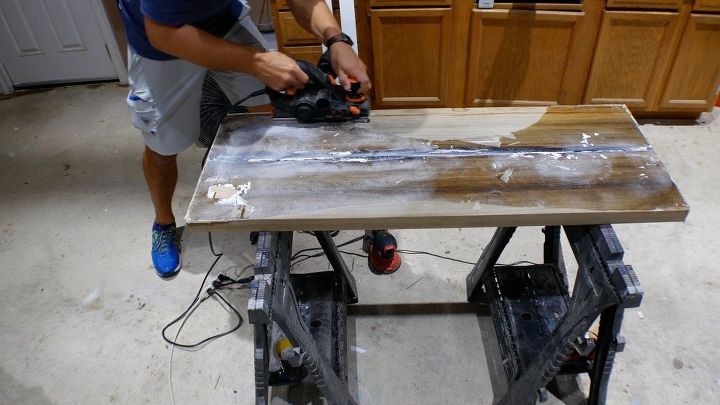
I used my electric hand plane to remove 1/64 of an inch per pass. It took quite a few passes to remove the excess, but it worked. I rarely use my electric hand planer, but I’m certainly happy I have one. They are really cheap and work well for applications like this.
The electric hand planer is not perfect as it leaves some ‘run marks’.
Hand Plane, Sanding, Wood Prep
Hand Plane
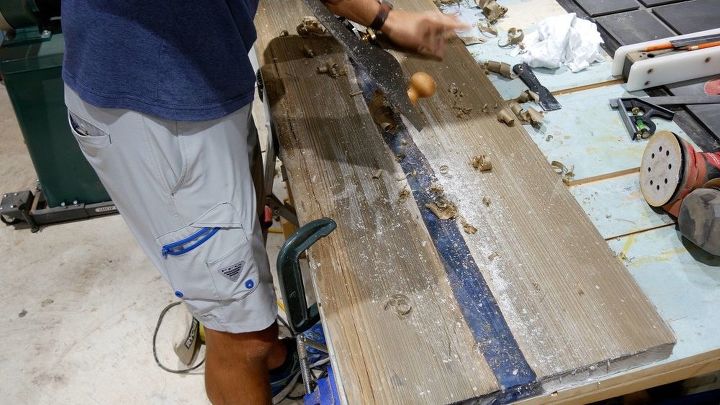
Next, I used my Lie Nielsen low angle jack plane to flatten out the bottom of the LED Epoxy Resin River Table. This hand plane is one of my favorite tools in my shop. It is a bit expensive, but I like to buy once and cry once instead of buying twice and crying twice. :)
Sanding & Wood Prep
Just when I think I am done sanding for a while, it is time to sand again. I loathe sanding in case you haven’t noticed. I sanded the table and epoxy resin very lightly with 220 grit sandpaper. It’s perfectly fine to sand on top of epoxy resin as long as you plan to apply another coat.
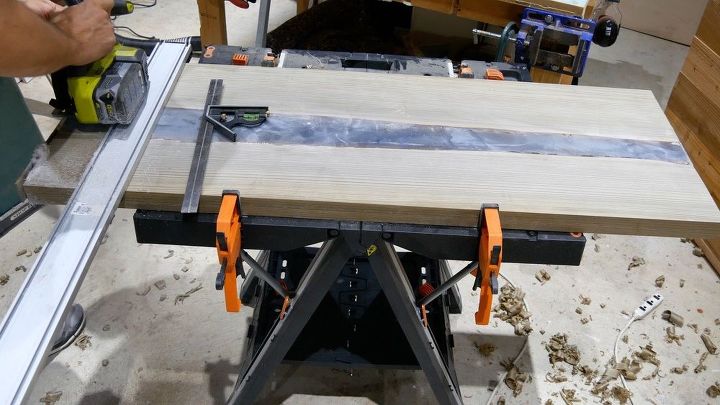
Next, I used my Stanley block plane to make sure one side was straight. Then, I ran the piece through my table saw on one side and the other side. I removed about 1/4″ on each side.
Finally, I used my worx bench, straight edge, and circular saw to remove 1/2″ from each end. This makes the table exactly 48″ wide. A few of my friends make fun of me because I don’t have a woodworkers workbench. I’m sure they are awesome, but I don’t want a 4oo pound workbench in the middle of my shop. The stuff I have in my shop works for me. 🙂
Roundover Edges
You don't need to use a router for this step. An orbital sander will work to soften the edges around the table.
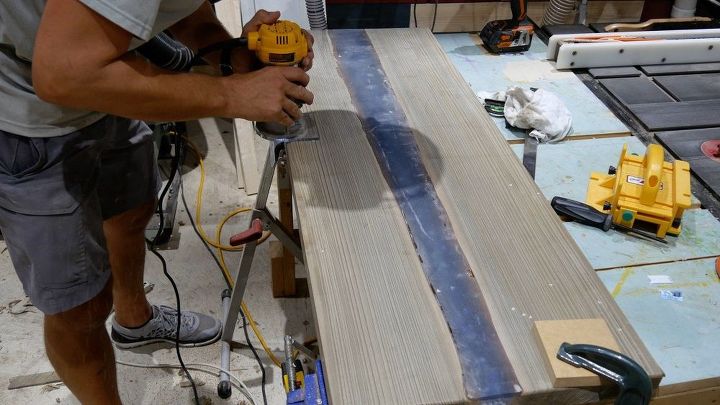
I decided to use a 1/4" roundover bit and my trim router to put a small roundover around the top of the LED Epoxy Resin River Table. It was perfect – I’m glad I didn’t use a 1/2″ roundover bit.
Epoxy Resin Final Coat
On my previous 2 epoxy resin tables, I covered the entire table with epoxy resin. Sinker Cypress is so unique & beautiful, I didn’t want to cover it with epoxy resin. I wanted to feel the texture of the wood and see it in it’s natural color as much as possible. Epoxy resin gives it a semi-gloss look that is rather dark. This dark tone certainly looks awesome, but I wanted something different for this table.
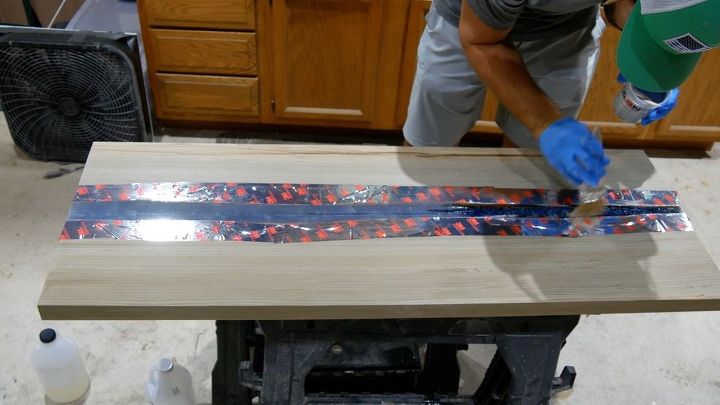
I decided to use HVAC tape before applying the final coat of epoxy resin to the table. The HVAC tape would prevent any epoxy resin from reaching the table. I mixed 6 ounces of epoxy resin and applied the final coat with a chip brush. I didn’t have a foam brush at the time, so I used what I had in my shop.
After I applied the final coat to the LED Epoxy Resin River Table, I immediately removed the tape.
Small Problem
I am still not certain how I missed these bubbles that did not escape before now, but somehow I managed to miss it. No big deal, it’s an easy fix since they are near the top.
I used my drill with a round countersink bit to gently bore out the bubbles. It worked like a charm.
Apply Finish
First and Second Coat
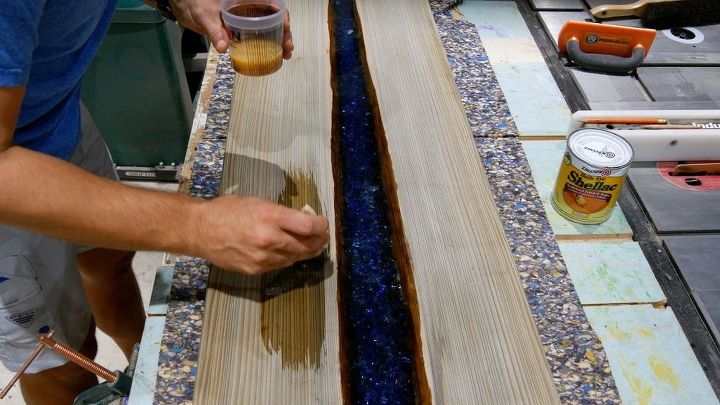
I decided to use Shellac(transparent/clear) for the finish on the LED Epoxy Resin River Table. I actually went to the store and bought foam brushes for this part of the project. Shellac dries very quickly and it is a great finish to use on wood. I applied one coat and sanded with 220 grit paper.
I repeated this exact process for the second coat.
Third Coat & Wax
For the third and final coat, I mixed Acetone with the Shellac to thin the mixture a bit. I applied this finish and used 1000 grit sandpaper wrapped around a sanding block to very lightly hand sand the final coat.
I used my buffer to apply a thin coat of wax (beeswax & linseed oil). The buffer allowed me to control the look of the finish a bit more.
Quick Tip: DO NOT allow acetone to reach the epoxy resin. Another coat of epoxy resin will be needed if it does.
Hairpin Legs
I purchased the hairpin legs online from amazon. The legs are 28″ and they are sold in 2 colors – raw steel or black. I chose raw steel because it matches the style of table and the hardware in our house more than the black.
The quality of these hairpin legs shocked me because I did not expect them to be such solid legs.
I had to clean them using mineral spirits as they were full of residue. Presumably, the residue was put on them intentionally to prevent rust during shipment. Once they were clean, I placed them on the ends of the table and marked the holes with a double sided pencil. Next, I pre-drilled the holes and screwed them in place.
LED Lights
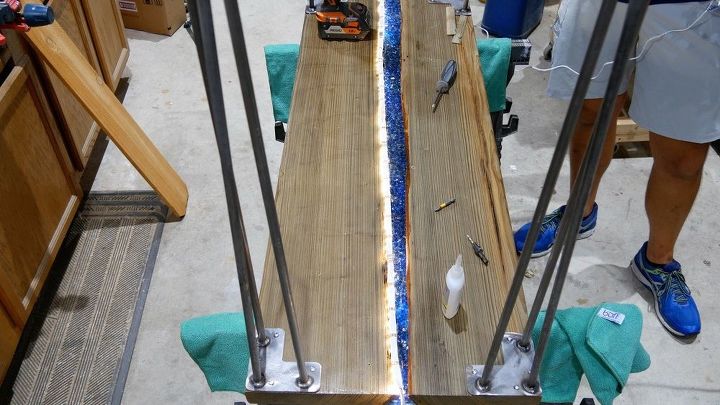
Honestly, this LED Epoxy Resin River Table was fine without the LED Lights. In fact, I prefer the table without them. However, I purchased them for this table so I put them on using CA glue.
I made sure to install the strip of lights on the edge of where the wood meets the epoxy to hide it. Ultimately, it worked because they are not visible at all when they are not turned on.
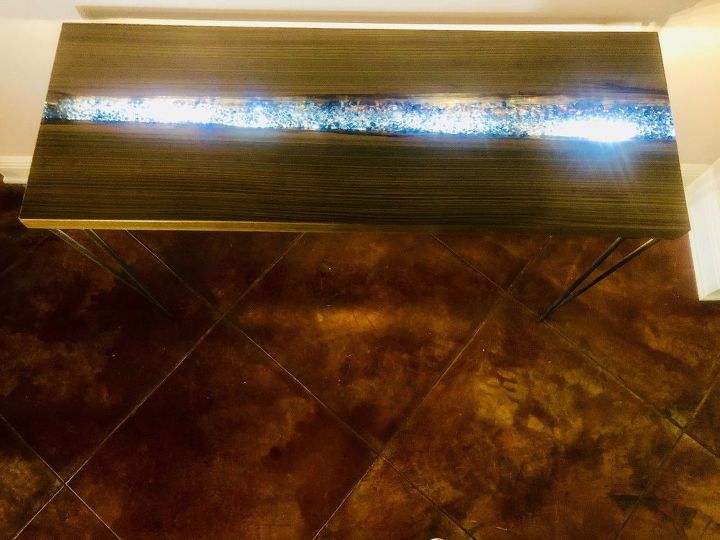
I flipped the table over and it looks ‘ok’ with the lights. I should have bought the less bright LED Lights. I’m getting mixed reviews – some people love the lights and others don’t.
We will turn them on during the holiday season at our house. 😉
Final Thoughts
This was a fun project and I’m really happy with the final result. I’ve had a few people offer to buy it from me for more than I expected, but I’m not ready to sell it.
I listed the material I used for this project in this post. The tools I used for this project are listed on my blog post.
I hope this post provided you with some value. Be sure to visit my blog post on my website for more details on this project including FREE digital DIY plans for this river table.
Please consider and visiting my website for more projects and other fun stuff.
Feel free to contact me anytime if you have any questions. I'm happy to help!
Final Thoughts
This was a fun project and I’m really happy with the final result. I’ve had a few people offer to buy it from me for more than I expected, but I’m not ready to sell it.
I listed the material I used for this project in this post. The tools I used for this project are listed on my blog post.
I hope this post provided you with some value. Be sure to visit my blog post on my website for more details on this project including FREE digital DIY plans for this river table.
Please consider and visiting my website for more projects and other fun stuff.
Resources for this project:
See all materials


Any price and availability information displayed on [relevant Amazon Site(s), as applicable] at the time of purchase will apply to the purchase of this product.
Hometalk may collect a small share of sales from the links on this page.More info

Want more details about this and other DIY projects? Check out my blog post!
Comments
Join the conversation
3 comments
-
outstanding ,,this is on my list to build ,,,,,
-
It looks fantastic...great job.


Frequently asked questions
Have a question about this project?