


How to Refinish Secondhand Dining Room Chairs

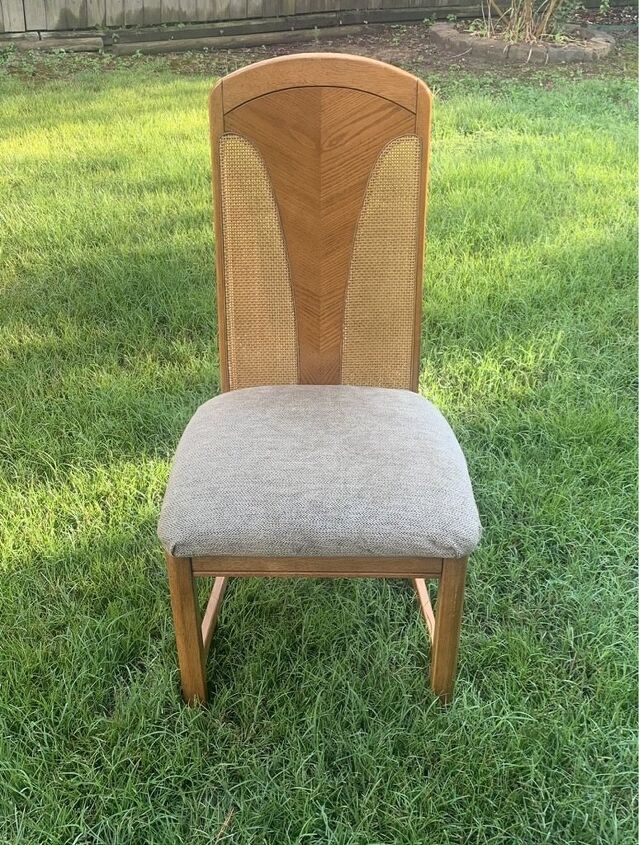
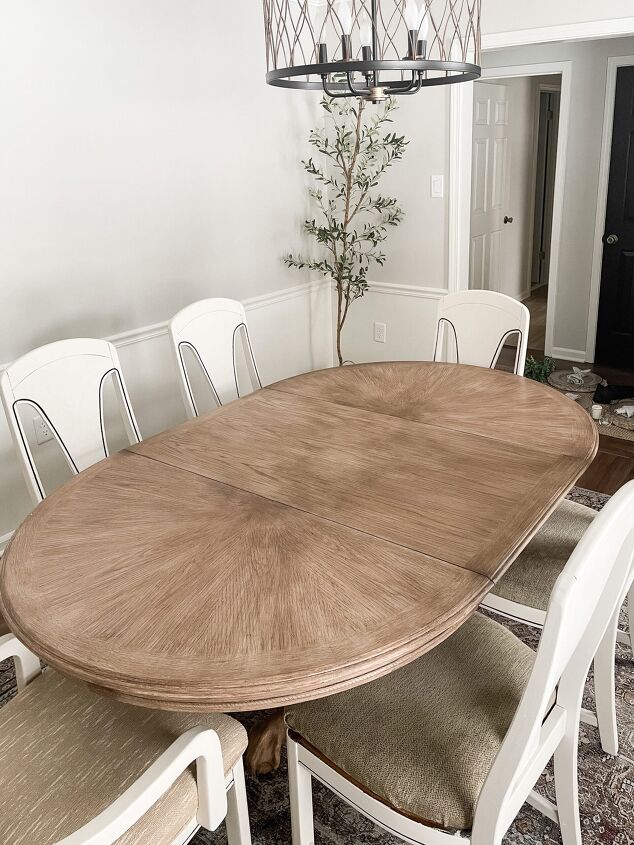
Let me share something about myself that I’m not always proud of… I am extremely inpatient. With that being said, I didn’t want to wait 6 months-1 year so that I could afford a dining room table and chairs that I loved. I didn’t want the dining room in our new house to sit empty that long! So I did the next best thing (which in hindsight, is actually the best thing), I found a solid, wooden table on Facebook Marketplace for $80, and a set of unique vintage chairs for $10/piece and started researching how to re-finish them!
For direct supply links and a more detailed tutorial, visit emilyronehome dot com!
STEP 1: Take a BEFORE picture!
I promise, you’ll want one! Maybe even remember to take progress pictures throughout the process as well.
Best wood paint!
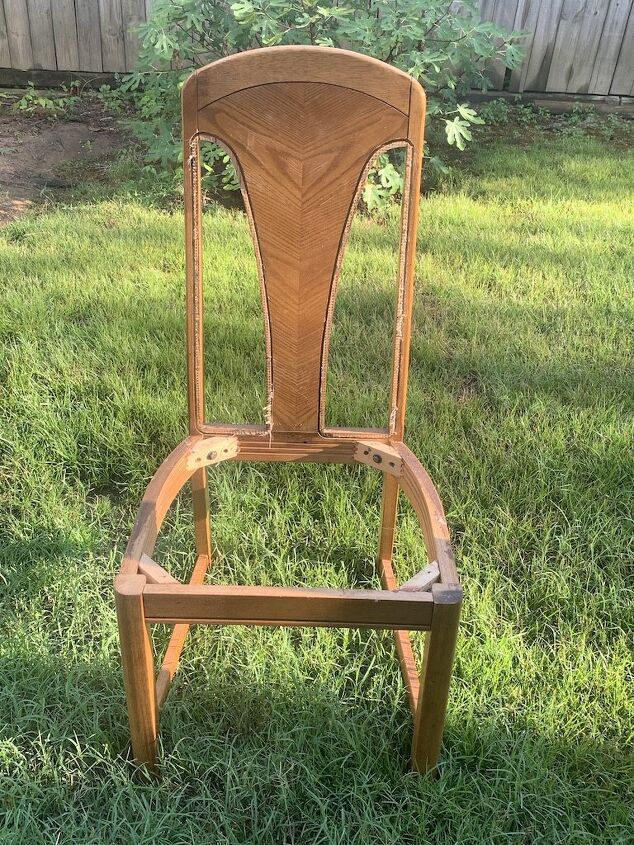
STEP 2: Remove cane
The cane was already removed from one chair, so I needed to remove it from the remaining five. I found this tutorial to learn about cane webbing and how to remove it. The first step is to remove the spline. The spline is the round wooden border that holds the cane in the grooves of the chair. Use a utility knife to score the border of the spline and the frame of the chair. Think of this step like how you need to score the caulk between the crown molding and the wall before you can remove the molding.
My spline was extremely difficult to remove. After scoring the border, I used an awl (a long metal tool) to pry the spline out, and tried to slowly pull the rest down. Mine frequently cracked and broke off, requiring me to use the awl to restart pulling the spline out. I think it would have been helpful to do something to loosen the glue, such as heat it with a hair dryer, or spray with water/white vinegar.
After you have the spline out, you can pull the cane to remove the webbing. If the spline is out, this step should be easy.
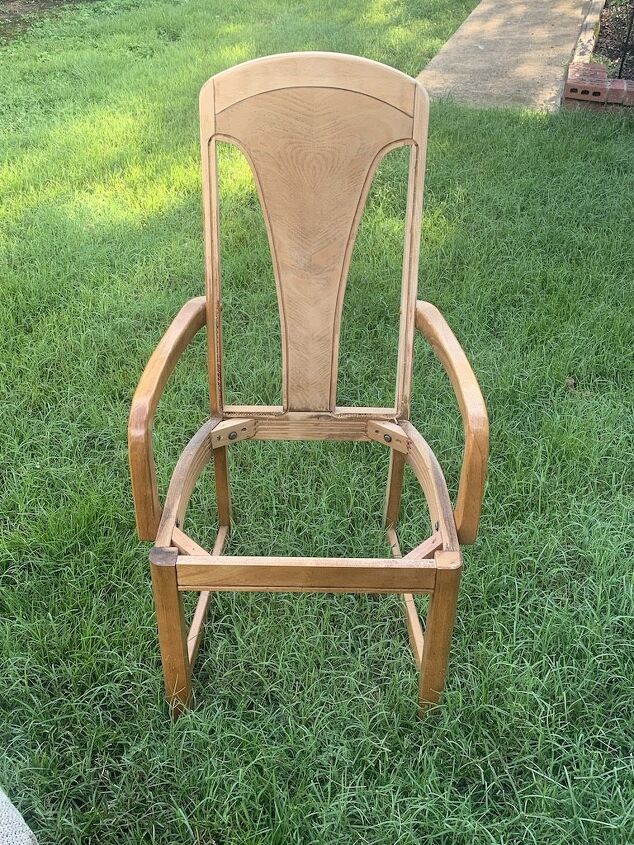
STEP 3: Sand
I highly recommend my Black & Decker palm sander listed above. At this stage, I was unsure how I wanted to finish the chairs. If I wanted to stain the chairs, I would need to sand them down to raw wood. Make sure and use proper safety gear including work glasses and a dust mask. I started sanding the surface of the chairs with a coarse 80 grit sandpaper, then moved to 120, then 220.
Always use even pressure and sand with the grain of the wood, not against it. The more fine the grit of the sandpaper gets, the smoother the finish you are creating. Clean up after sanding with a damp rag and tack cloth to ensure your chairs are free from dirt and debris. You want a clean surface before applying your finish.
Sanding was very time consuming with all 6 chairs. I knew if I wanted to paint the chairs instead of wax or stain, I would not need to take them all the way down to raw wood. I sanded a couple, then waited to choose my finish to avoid doing unnecessary work.
STEP 4: Paint your chairs
I finished the table first (see how I finished it here), and made my decision for finishing the chairs based on the wood tones in the table. I chose to use my favorite chalk paint additive to create a custom chalk style paint. For me, this product is great based on the price point, customization options and the fact that I had all kinds of interior latex paint already on hand after painting our whole house (remember what you learned in my Paint 101 post here, the terms “water-based” and “latex” are interchangeable).
I mixed the chalk paint additive in the color Asiago by Valspar and water per directions printed on the product. See my post here for more details about how to use the chalk paint additive to paint your furniture projects with minimal prep work! Make sure the chairs are smooth to the touch (may require light sanding), and free of dirt, debris, grease, etc.
STEP 5: Seal
Once your chairs are painted (I painted 2 coats), allow dry time and seal. I prefer a finishing wax to seal my furniture. Note that a wax sealer does not provide the same “hard” finish as poly, but it still protects from scuffs, stains and scratches with a softer finish that feels smooth and resists water. To apply the finishing wax, place a small ball of wax inside a thin clean cloth (such as cheese cloth). As you start to work the product into the furniture, the wax warms up and will work through the cloth. This is the recommended technique and allows for a thin, even coat of wax to protect your piece.
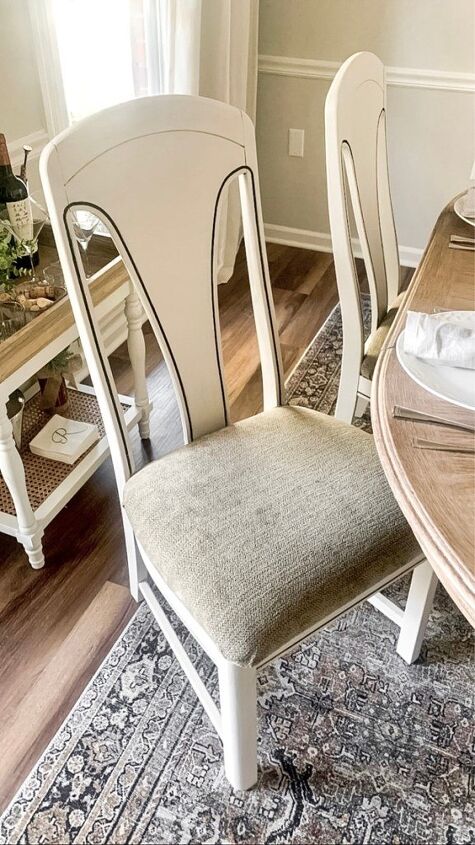
And there you have it! I love how unique these chairs are, and you can’t beat the price point. Always keep an eye our for neat second hand finds on apps like Facebook marketplace, Nextdoor, OfferUp, and Craigs List. Refinishing chairs is not as hard as it may seem, and very rewarding.
For direct supply links and a more detailed tutorial, visit emilyronehome dot com!


Frequently asked questions
Have a question about this project?
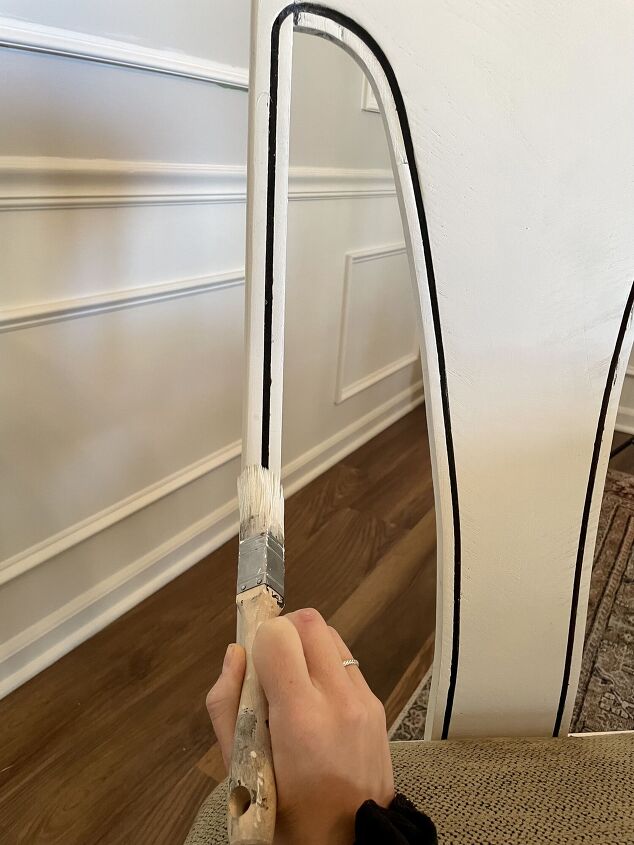
What did you do to "outline" the backs of the chairs? You don't say in the post.
Love it, in fact I like it better without the caning. What was the additive and what was it’s purpose?