


Replacing a Particleboard Table Top With a Wood One

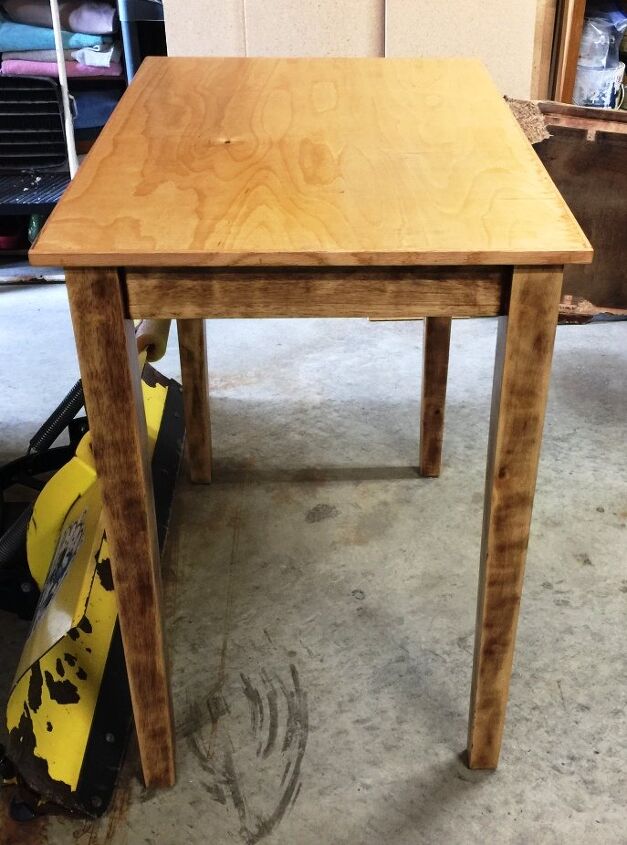
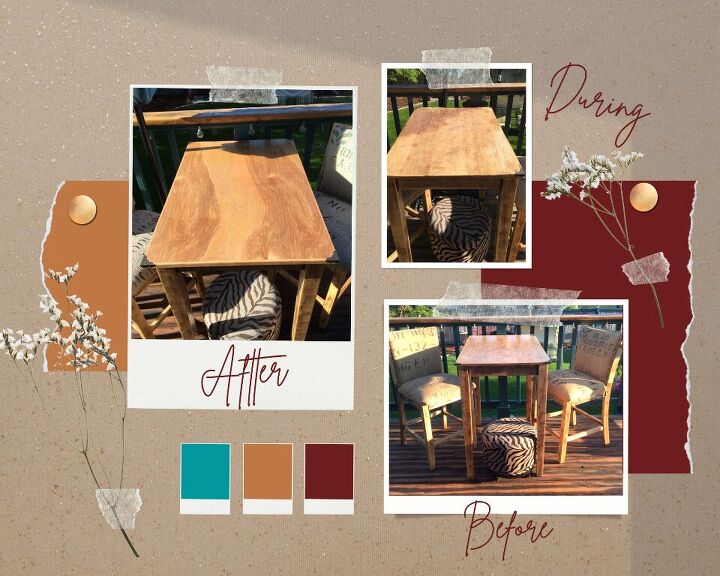
When I refinished a wooden pub table for our deck last year, I wondered if the veneer-covered particleboard top would hold up in the weather. Turns out my fears have been realized and it did NOT hold up to the weather! However, the legs and frame of the table are doing great! So, I have decided to replace the top.

As I mentioned above, I refinished a pub table last year to use on our upper deck. Hubby had brought home a couple of tall wooden chairs that were sitting by the side of the road. They were both broken but I took up the challenge to repair and refurbish them. They came out beautifully! Once I knew I'd be able to fix them up, I went in search of a tall table. I lucked out and found one at the Goodwill for only $25!
The table post is here: http://www.hometalk.com/diy/bedroom/furniture...
The chair post is here: https://www.hometalk.com/diy/repair/furniture/have-you-used-burlap-to-upholster-here-is-my-first-experience-with-it-44339987
Although I didn't think the tabletop would do well in the weather, I forged ahead with the project. After all, it was only $25 and some of my time. Besides, I love a good project! As you can see in the pictures, the corners were really damaged. To help protect the wood, I used Helmsman Spar Urethane and applied 3 coats. Once the wood had been sealed, I used metal corners to cover that damage.
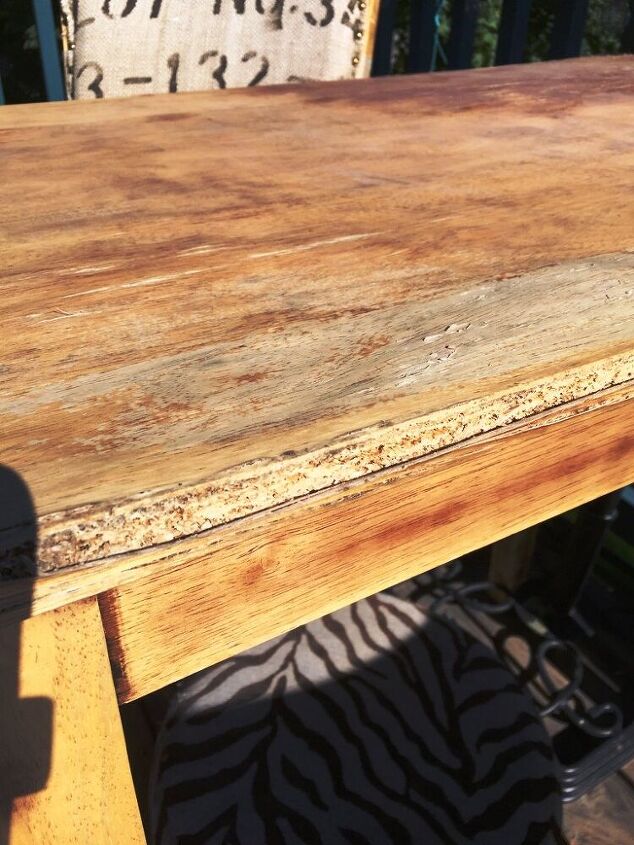
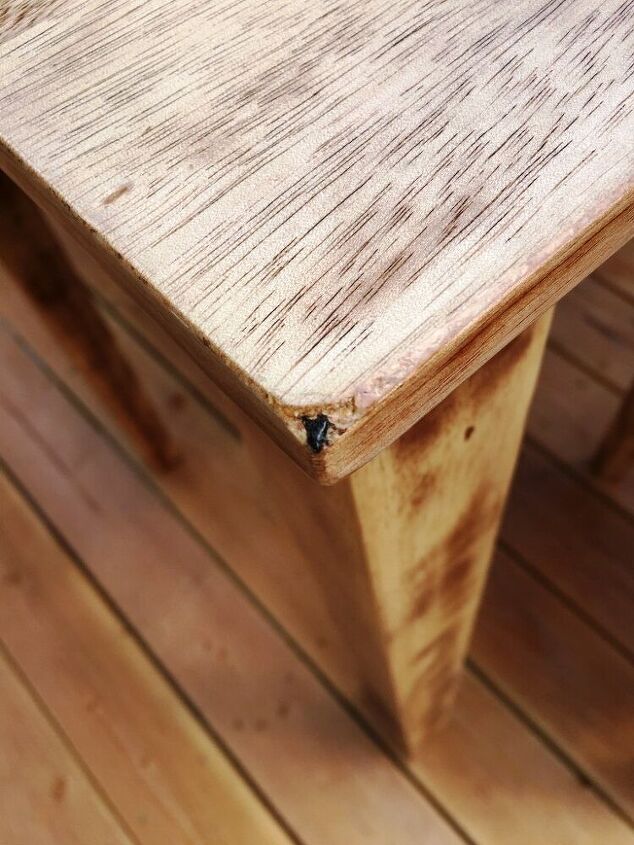
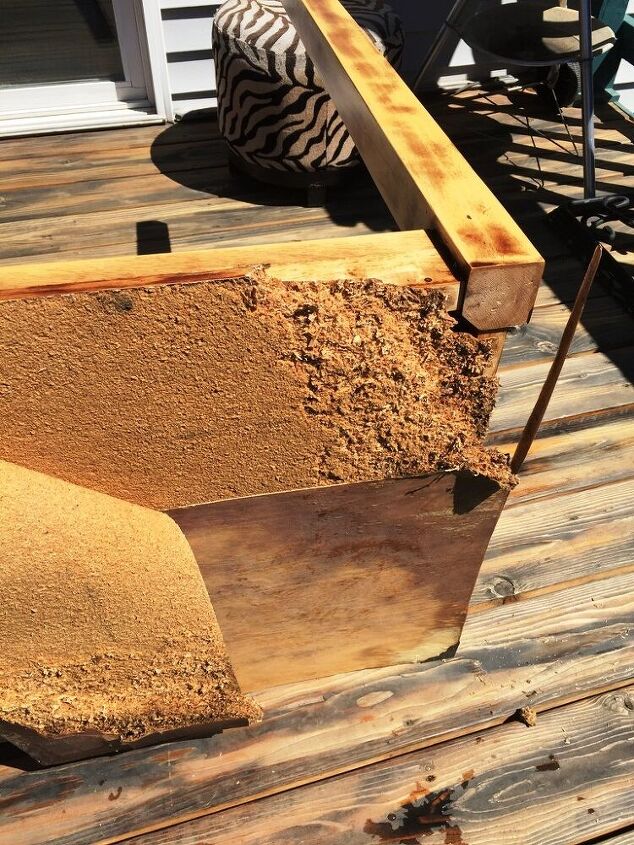
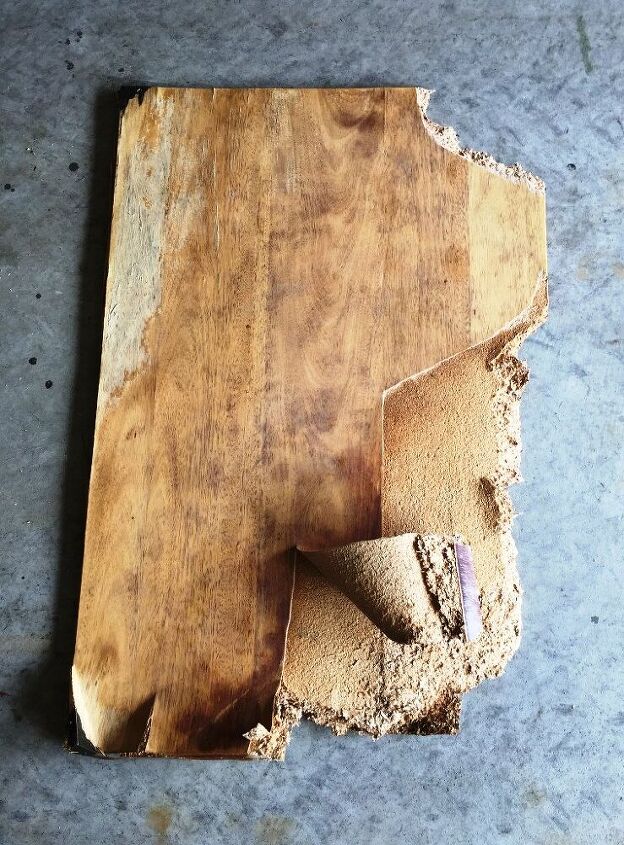
But, rainwater was still able to get into the damaged wood creating additional damage. Below are pictures of each of the 4 corners before I attached the metal pieces. You can probably see that the wood veneer was over particleboard.
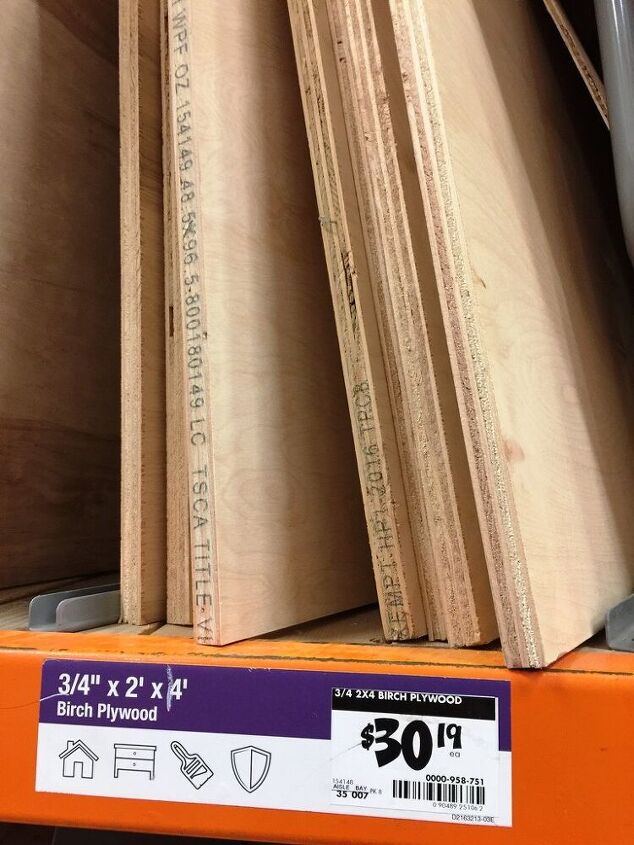
I searched for what wood would be best to use as a replacement and settled on Birch-covered plywood. Home Depot sells them in 2' x 4' lengths. The tabletop I am replacing is 24" x 35" for $30.
Hubby suggested I buy a full sheet of plywood and save the extra wood for a future project. While that is a great suggestion, I didn't see the need to spend an additional $30 at this time. Besides, that would mean taking the truck into town, having someone help me load the extra plywood, etc. That just seemed like more effort than I wanted to exert.
So, I bought the smaller piece and a Home Depot associate cut off 12" from the length, making the piece the right size for the job! To protect the sides of the plywood, I decided to buy some wood trim. I found a 3/4" trim that would work really well. The trim was sold in 6 ft lengths so I bought 2 of them. That added $14 to the project.
Tip:
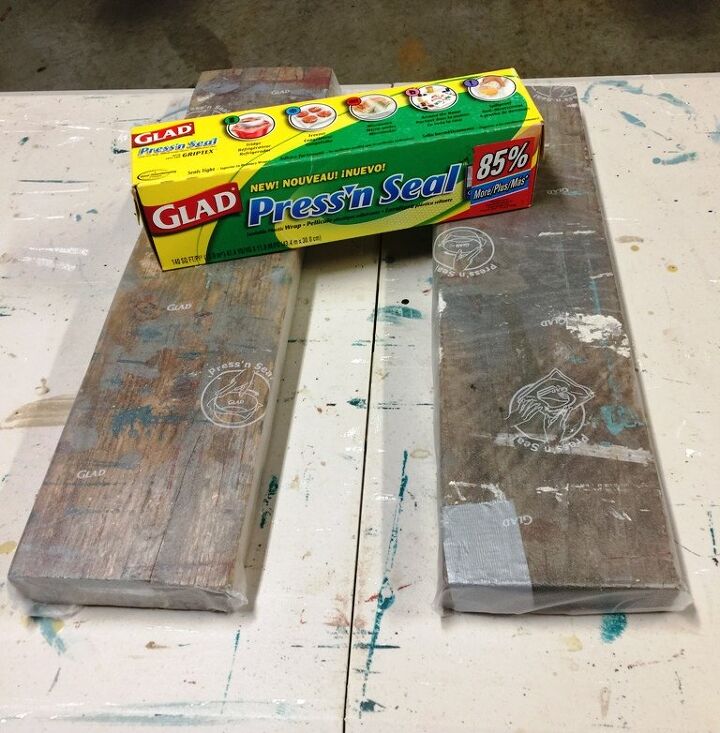
**To raise the wood off the surface of the worktable, I use old 2" x 4" pieces of wood. Since the wood is old and rough, I cover it with Glad Press'n Seal. Using this method will keep the wood you're working on from getting scratched and the Press'n Seal doesn't stick to the finish**
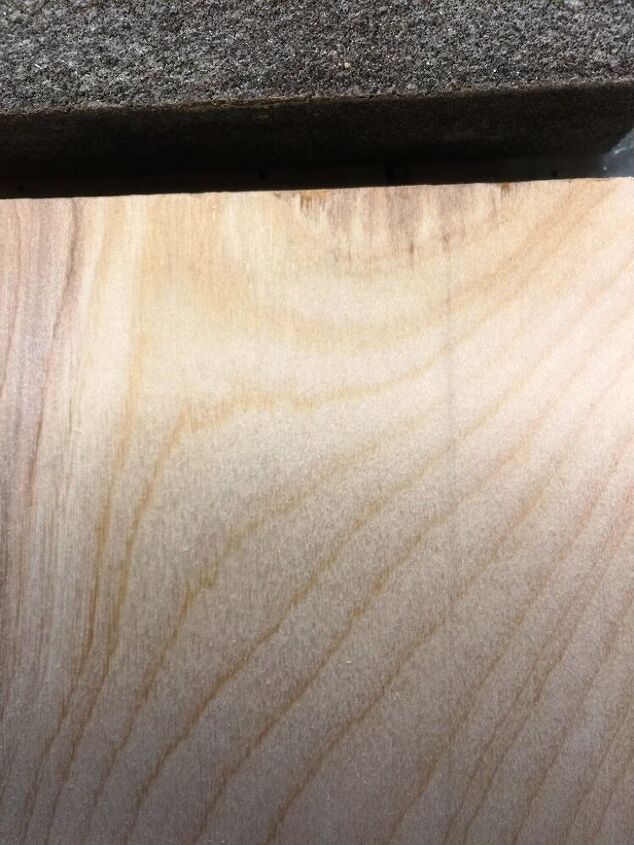
When the plywood was cut, the saw made small chips along the edge.
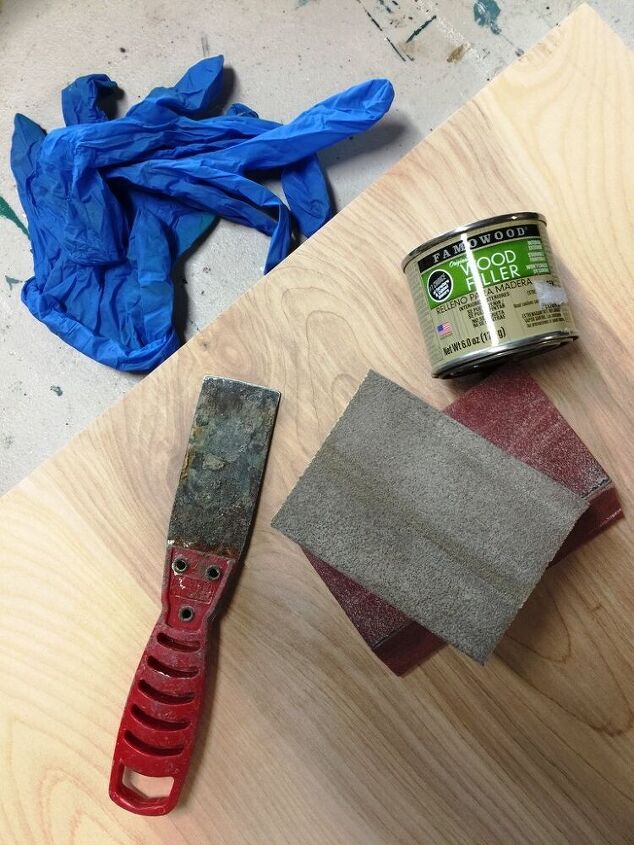
To start the project, I used wood putty and a putty knife, to fill in the chips on both ends of the board then sanded off the extra when the putty was dry. Then sanded the top and bottom of the piece of wood and along all four sides. I started with a sanding block that was 80 grit and then used a 220 grit one.
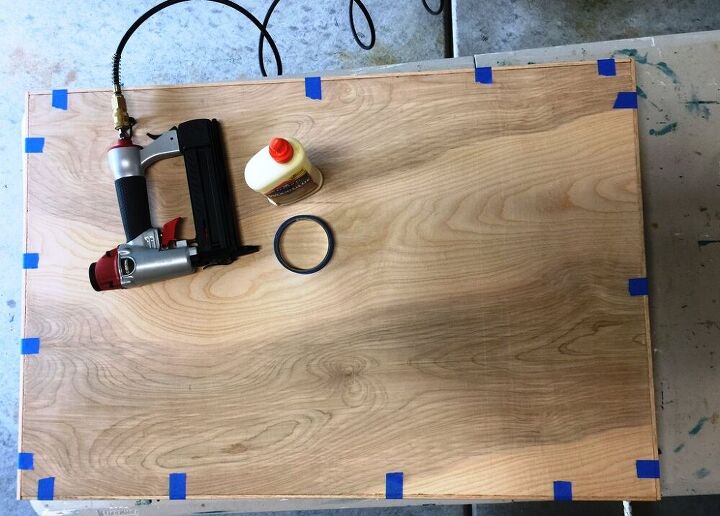
The next step was to attach the trim to the sides. Using my miter saw, I cut the 4 pieces of trim with straight cuts. I considered mitering them but felt like having the straight cuts would provide better strength at the corners. It's good that I bought more trim than I needed because I cut the first piece too short. To attach the pieces, I applied Elmer's glue then used painter's tape to hold them in place while I used my nail gun to secure them further.
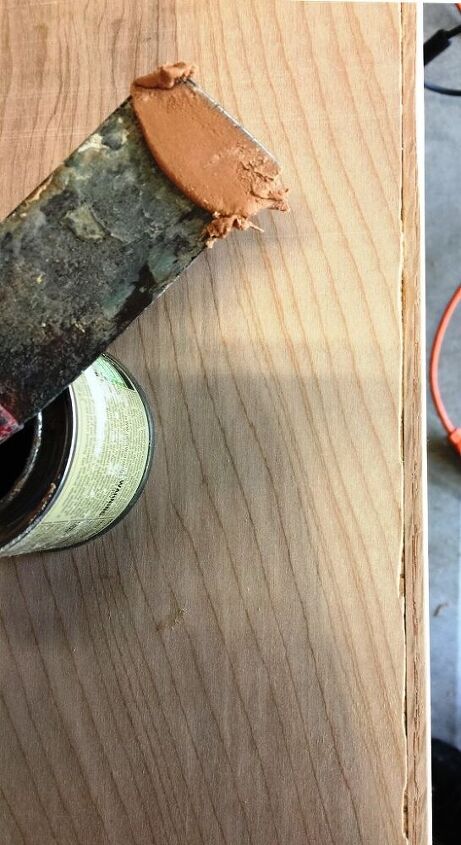
When the glue was dry, (I allowed it to dry overnight even though that wasn't necessary), I removed the tape and filled in the holes made by the nails with wood putty. I also applied wood putty in the small gaps between the trim and the plywood.
After allowing the wood putty to dry - about 1/2 hr - I sanded trim and both sides of the top with sanding blocks. For parts where I needed more umph, I used my Makita orbital sander.

Before sealing the wood, I had to decide if I needed to stain it first. When I refinished the table, I left the wood bare because it matched the chairs and then simply sealed it with Spar Urethane. Since this was new wood, I wasn't certain if it would match the color of the legs & frame.
I tested some stain that I had on hand, Early American on a section of the piece of wood that had been removed from the 2' x 4' plywood. I also applied some of the spar urethane to another section. When those applications were dry, I carried it to the deck where the table is sitting to compare the color. The one that matched best was the section withOUT stain. Great! That will save me time.
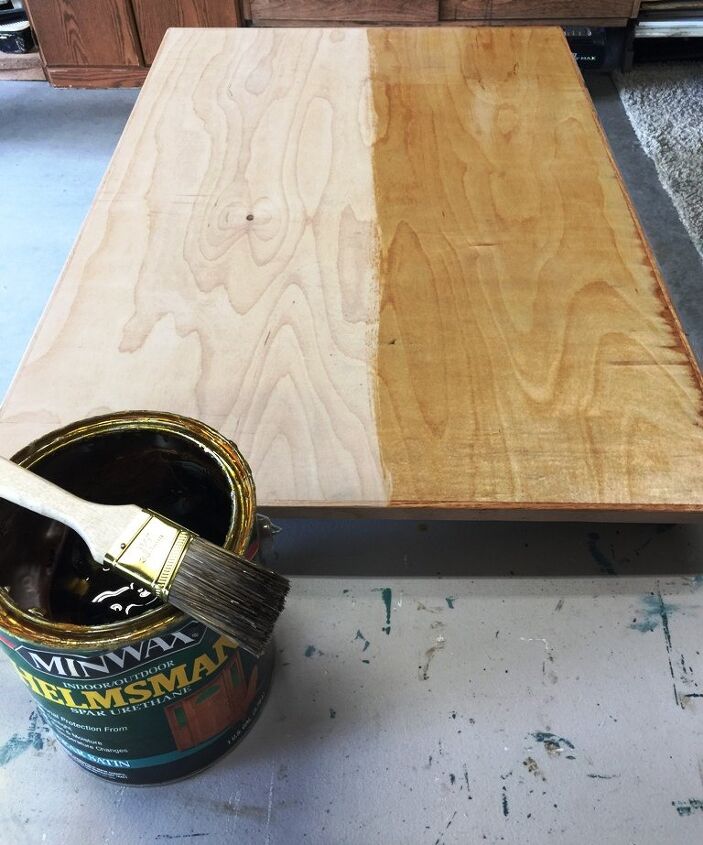
I decided to start on the back side of the new tabletop and applied 2 coats of sealer, allowing each coat to dry for 4 hours. When each coat was dry, using a sanding block, I gave the piece a quick sanding & wiped it down with a tack cloth. The next day, I started the sealing process on the top of the piece
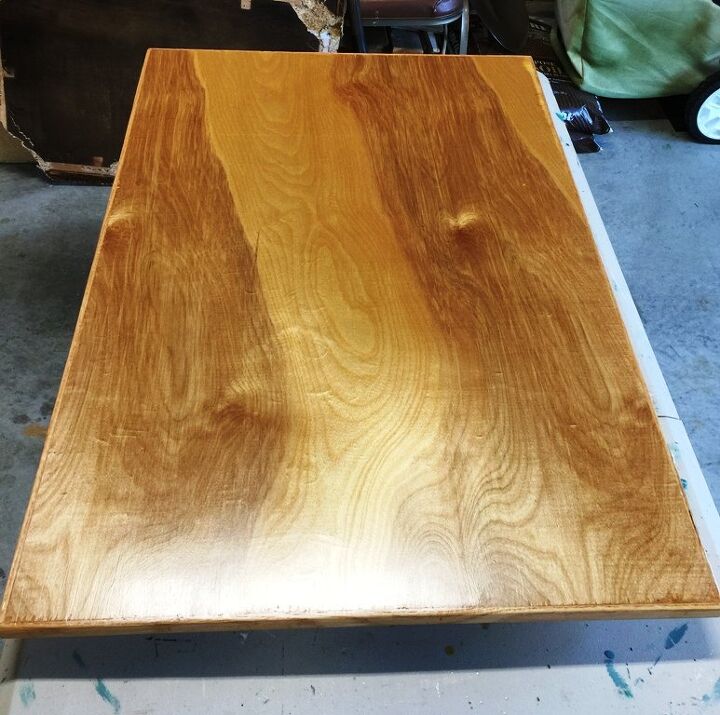
I chose to apply 3 coats on the top and followed the same process, allowing 4 hours between coats for dry time, using a 220 grit sanding block to sand between coats & wiping down with a tack cloth before the next coat.

By the time I got around to having the time to work on this tabletop, the old particleboard top was severely damaged! The veneer had started to peel and the rainwater had swollen the particleboard.
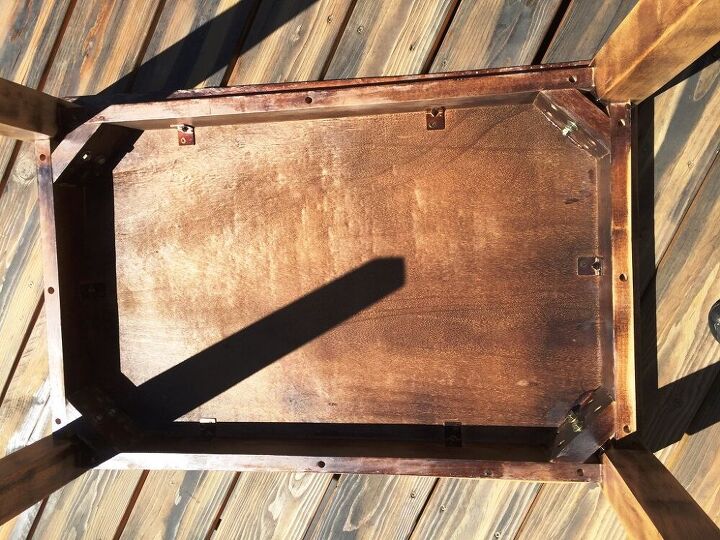
Before starting this tabletop replacement project, I looked to see how that top was attached to the legs. To my delight, it was attached with metal angles, 2 on each of the long sides and one on each of the short sides.
I removed the 6 screws and low & behold, the tabletop didn't just lift off. It had crossed my mind that they may have glued it to the frame and they did. I then noticed that there were ALSO 3 screws on each of the four sides of the frame. So....I started removing screws.
Two of the 12 holes were packed with debris; I think maybe some bugs created nests in there, so I had to dig that out before I could find the screw heads. Once all the screws were out, starting at the most damaged corner, I pulled off what I could then used a hammer and crowbar to pry off the rest of the top.
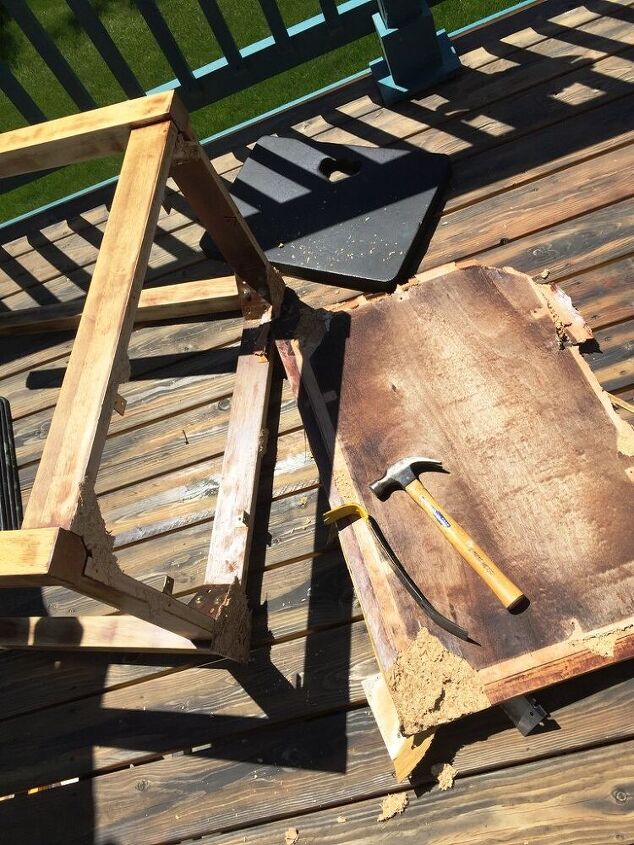
When the entire top was off, I chipped away any remains of the particleboard and glue using a hammer and putty knife.
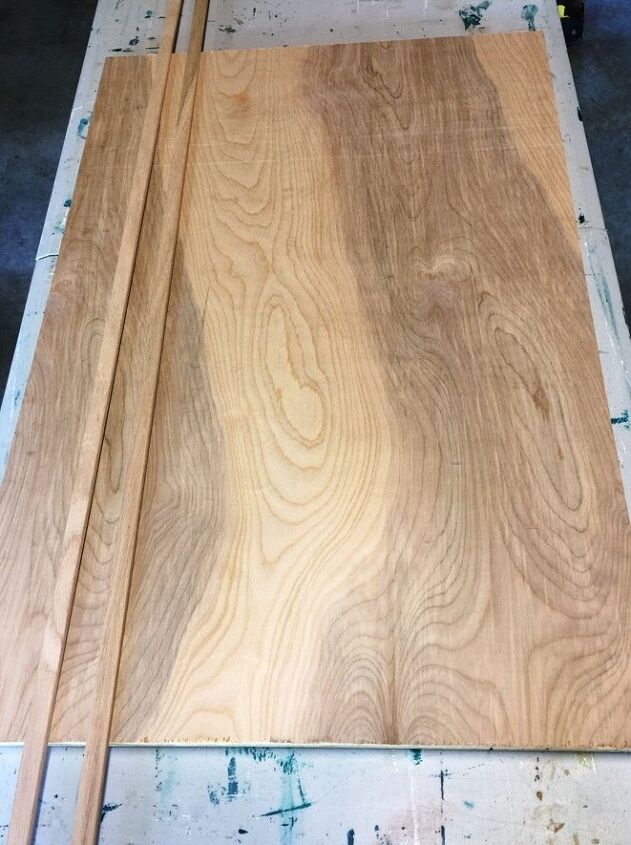
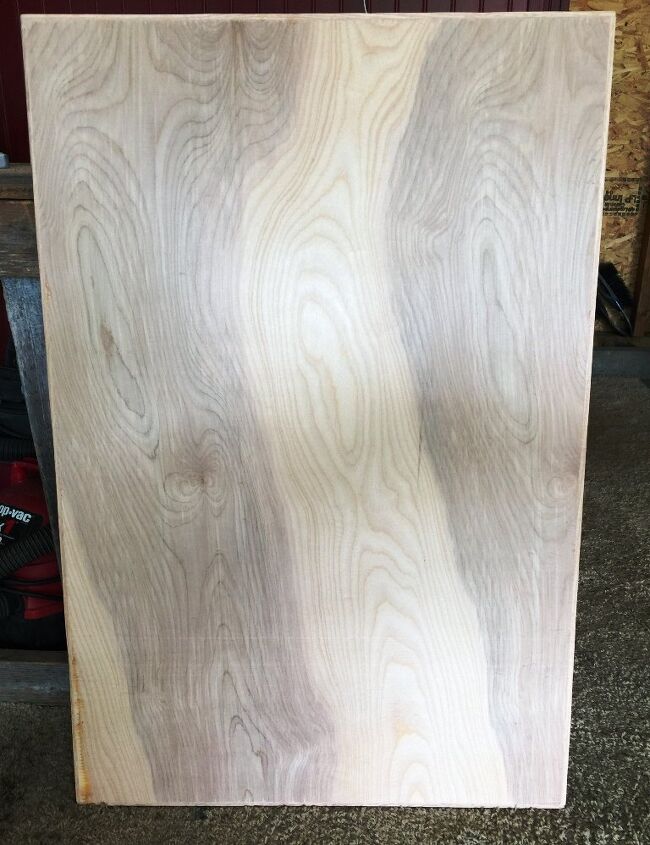
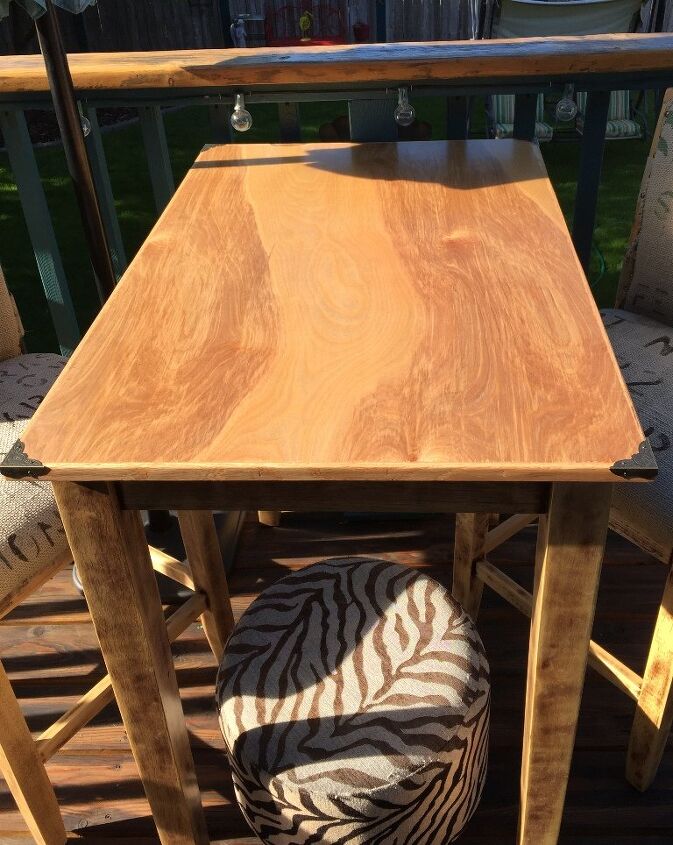
Although I bought the birch plywood to use for the tabletop, while I was working on the piece, I wondered if the underside would look better with the legs. Once the sealer was dry, I did check it out to see which side matched better.
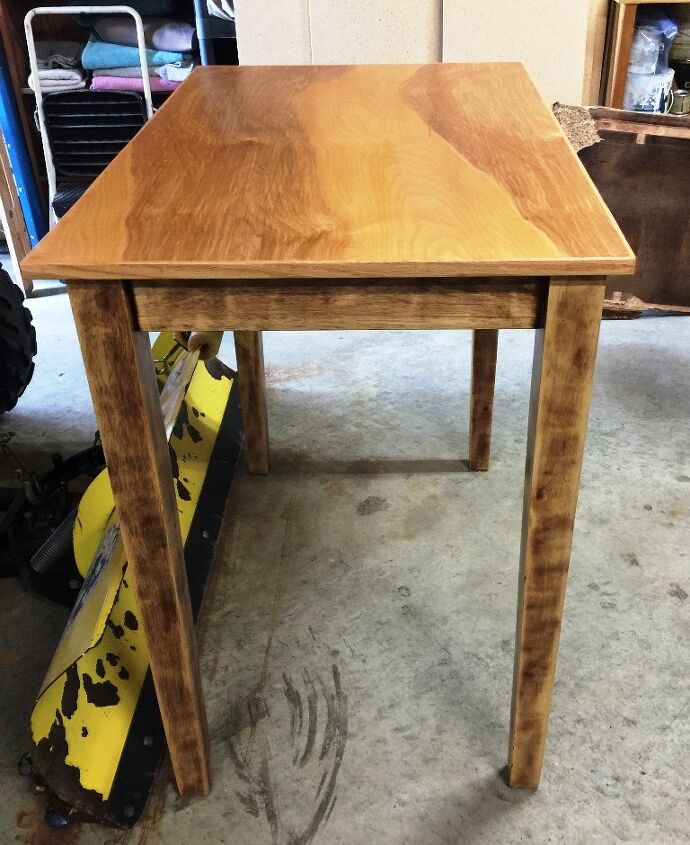
While they both looked good, I really loved the flow of the grain on the birch side so I decided to keep it as the top of the table.
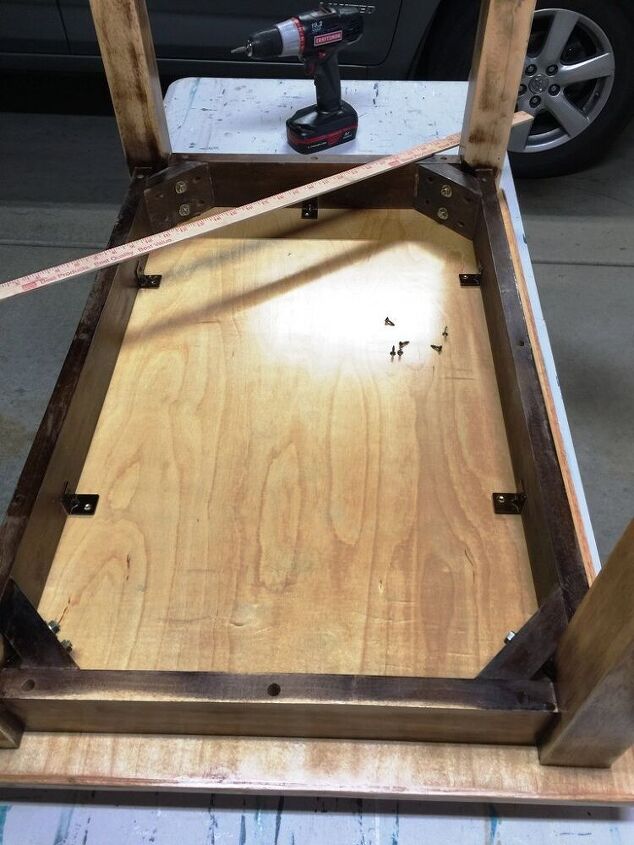
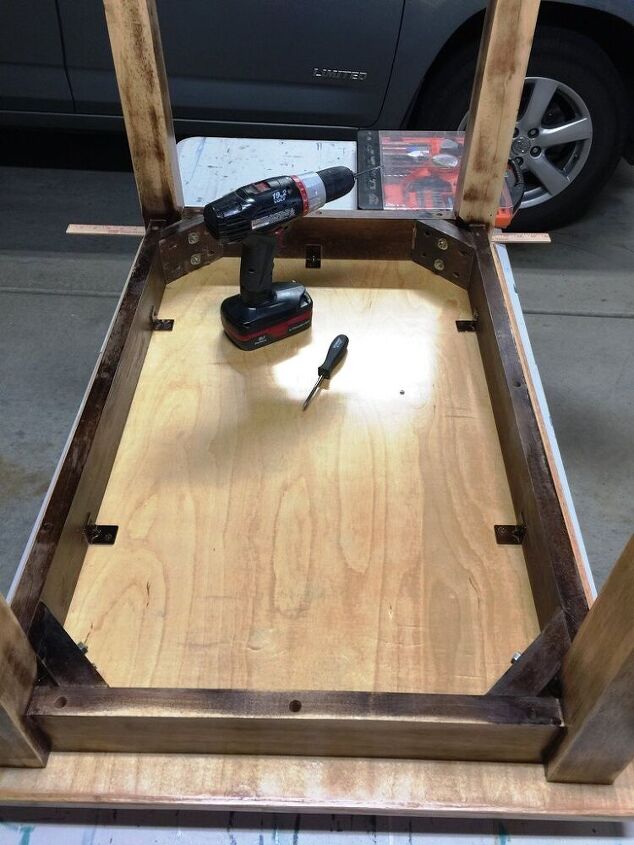
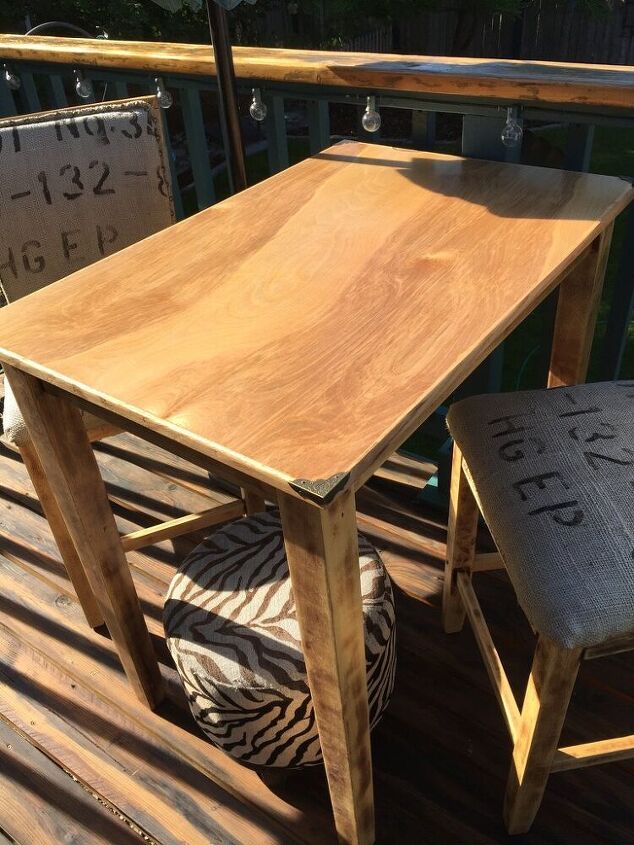
Once I made my final choice for which side would be 'up', it was time to attach it to the legs. I laid the tabletop, birch side down, on my worktable then set the frame & legs on top of it. Using a yardstick, I centered the frame on the tabletop. I decided to pre-drill holes for the screws to prevent any splitting of the wood. Then inserted the screws using a screwdriver.
I chose not to use any construction glue. I also decided not to use the 12 screws in the frame. The table does not get heavy use and it's easy to carry by the frame when we move it from the deck to the shed to be stored over the winter.

I had already decided to add the same metal corner pieces that I had used on the original top. When I bought them, they came in a quantity of 16, so I have plenty!
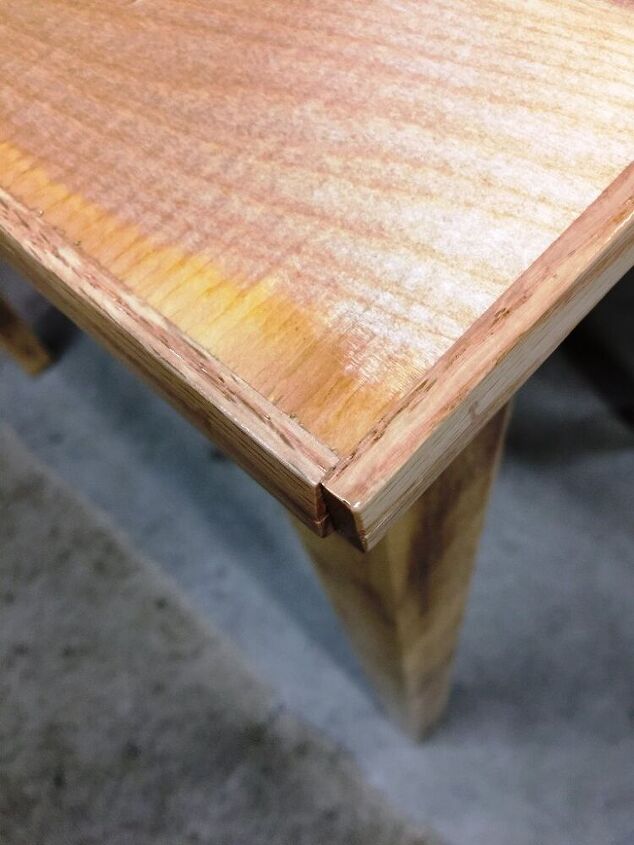
I was going to add them just because I just loved the look. Turns out, I needed to add them. When I was cutting the trim, I didn't account for the additional width I would need to butt the corners to each other so I ran short of the trim on one end.
Using the corner pieces covers that mistake along with some of the places where I needed to use more putty. **If you plan to use these metal corners, be sure to have a pair of needle-nosed pliers on hand. The nails are very small so holding them with your fingers while using a hammer is not possible**
Making this new tabletop didn't take all that much time other than the built-in time for drying glue & sealer. Removing the old top was more work than I had anticipated, but I was able to remove it!
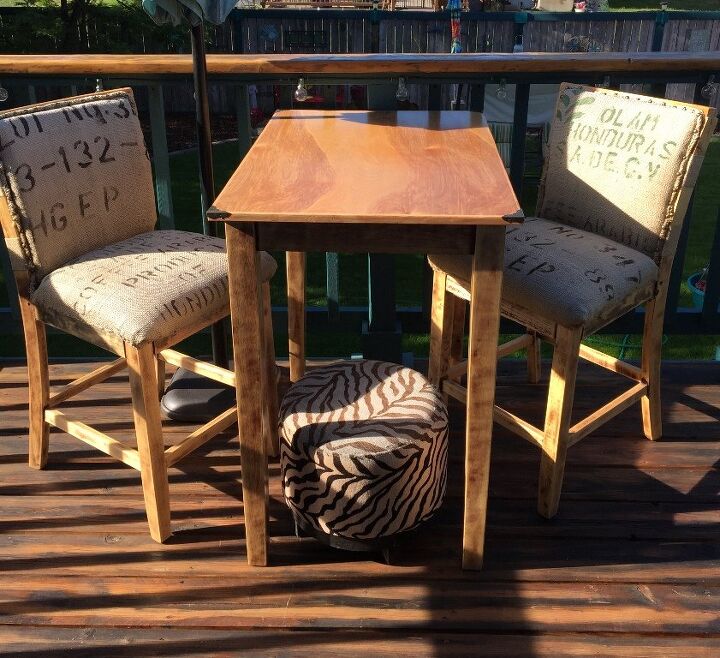
Since I had done all the work on the new tabletop first, that's a really good thing! It looks beautiful and my hope is that it'll last for many summers on our deck! The total cost of the table is now roughly $70
Detailed instructions are on my blog.
Comments
Join the conversation
-
That is such a change from the old! Great job!
-
Looks great. The spar urethane should protect it from the weather for many years. You might have to lightly sand and recoat every few years. Good share


Frequently asked questions
Have a question about this project?