


Life Unpainted...Restoring A Vintage Country Hutch Without Annie Sloan
For all of you "don't paint that wood!" enthusiasts out there, I am sharing my latest DIY project...without paint! Not every vintage piece of furniture requires a coat of chalk paint and wax to make it pretty. Sometimes its best just to enhance the beauty of the wood and add some color another way.

The country cupboard, all prettied up!
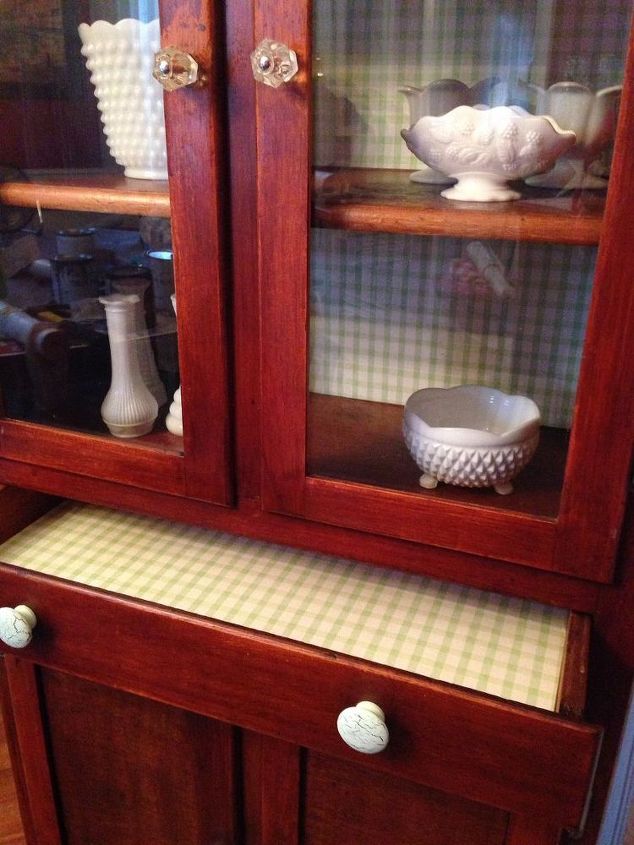
A scratched and worn vintage cupboard is glowing again thanks to some poly wipe on get stain and pretty green check wallpaper. (and a tiny bit of crackled paint for the knobs). For the complete tutorial, please check out my blog post here: http://countrydesignhome.com/2015/01/19/newlifeforanoldcupboardwithoutpaint/
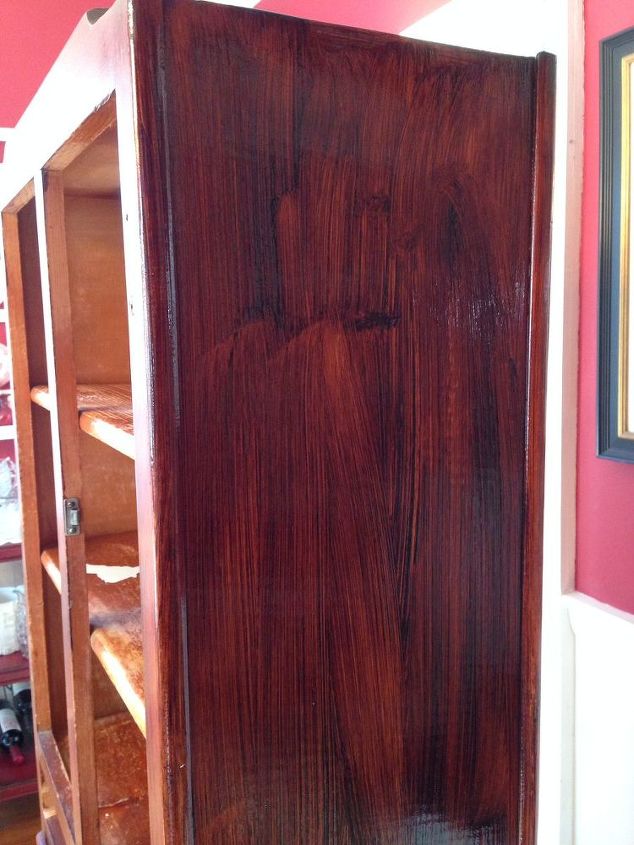
To cover up the scratches, restore the finish and enhance the overall beauty of the wood, I used a Wipe On Gel Poly Stain by Mastercraft. The finish isn't perfect, still a little streaky in places. But my goal was to make it look as if it had been well-used and loved, but fresh and pretty.
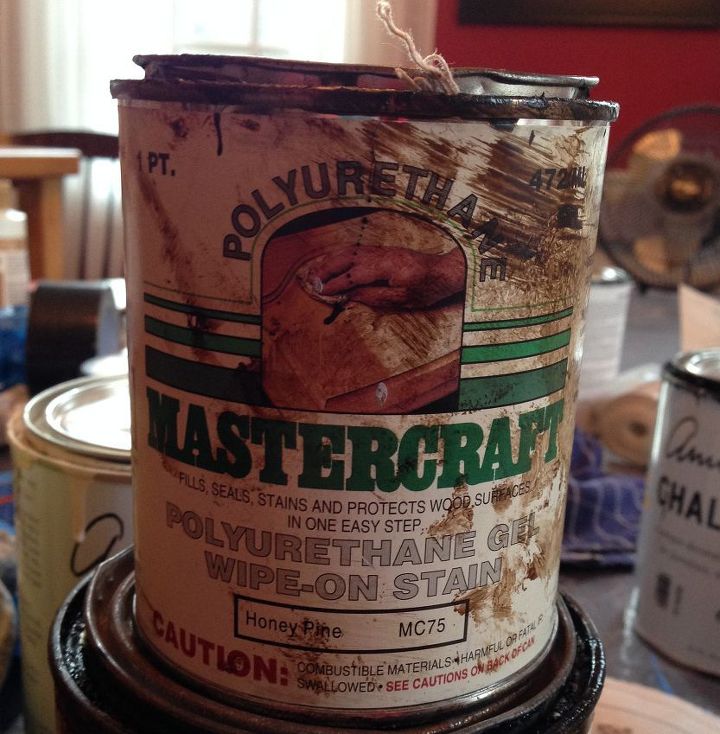
This is a very well-used can of Mastercraft Poly Wipe-On Gel Stain. You literally just paint the stuff on, wait a couple of minutes and then wipe it off. It dries to a glowing satin finish, enhancing the color of the wood stain already on the piece. This stuff is pretty smelly, so open up a window!
This is a closeup of the wood finish after I was done with the gel stain. It literally glows!
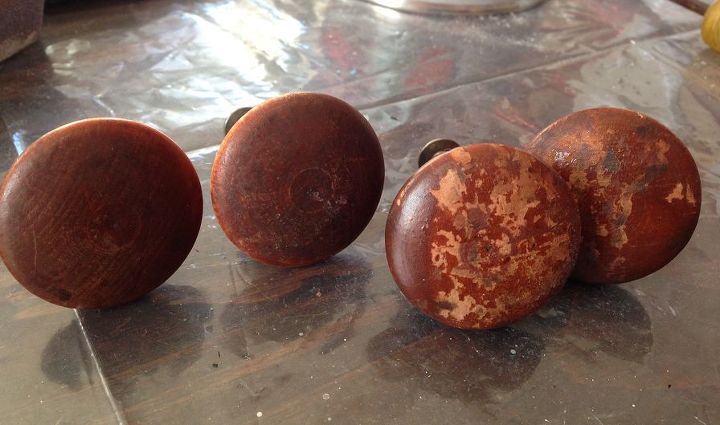
These old wooden knobs had seen better days, so I decided to complement the wallpaper inserts by adding just a touch of green crackled paint.
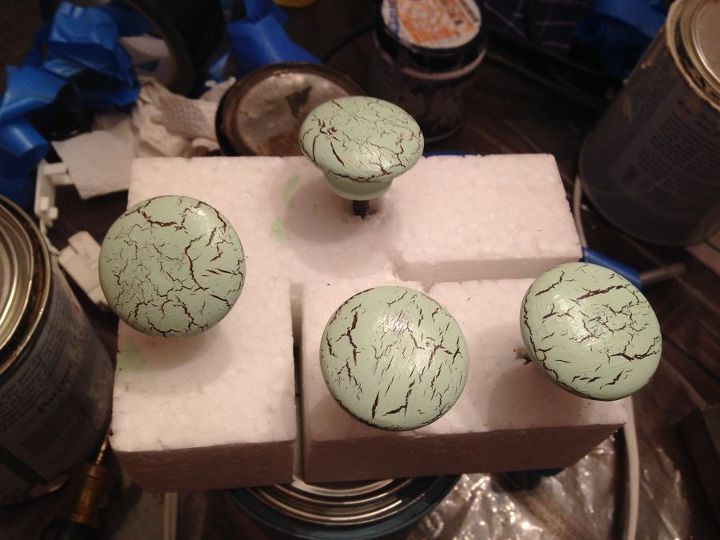
These are the knobs after the crackling medium was applied, then coated with paint and sealed with satin poly.
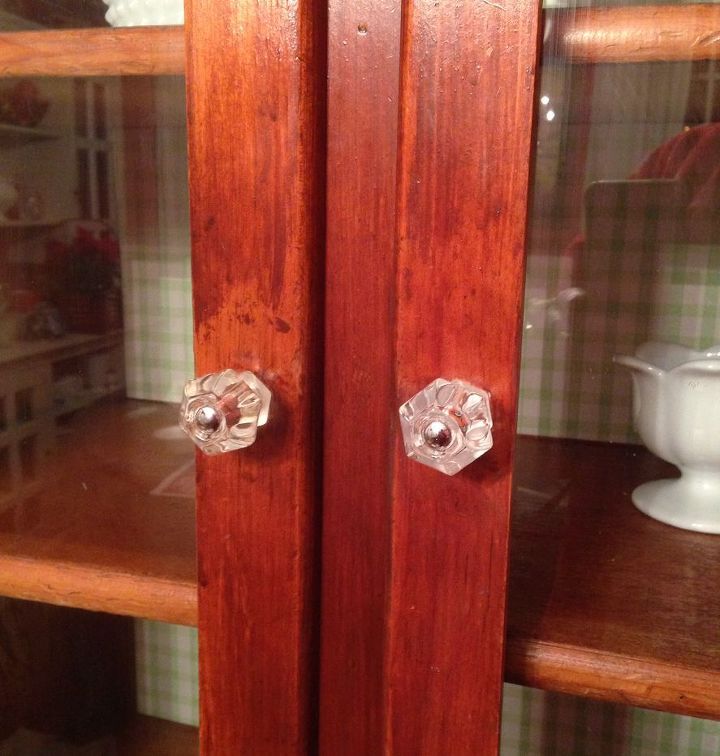
The two top doors were glass, so I adding just a touch of country pretty by switching out the wooden knobs for glass ones.
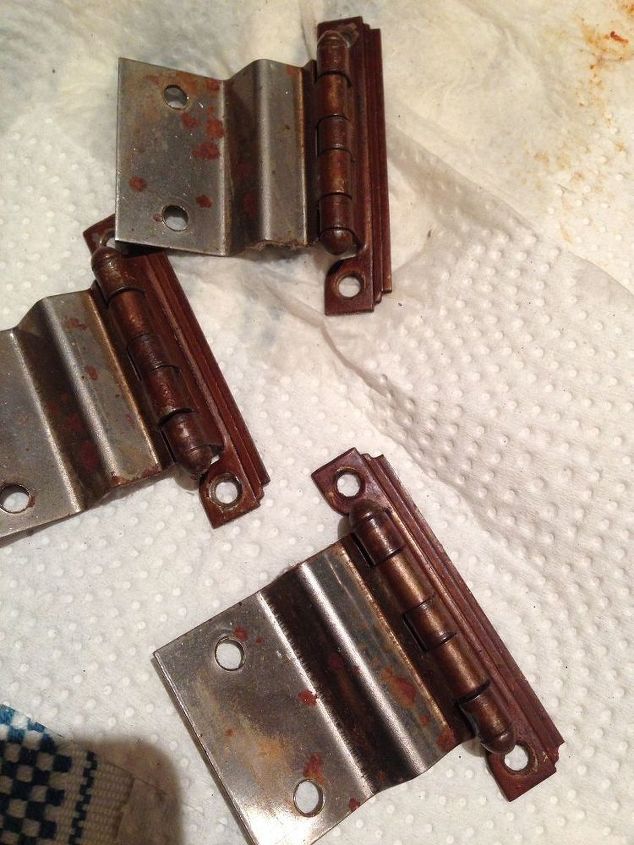
At first I thought these hinges were just rusty, but then discovered that someone had slapped on a coat of varnish to the entire piece, right over the hinges! So I soaked them in some water-based gel varnish remover.
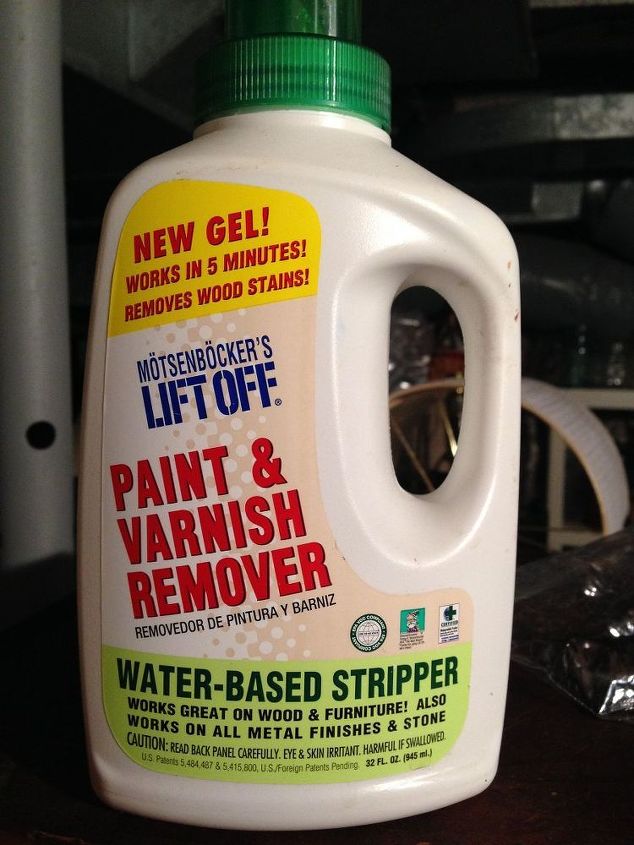
This stuff works great and has very little odor. And, it cleans up with soap and water!
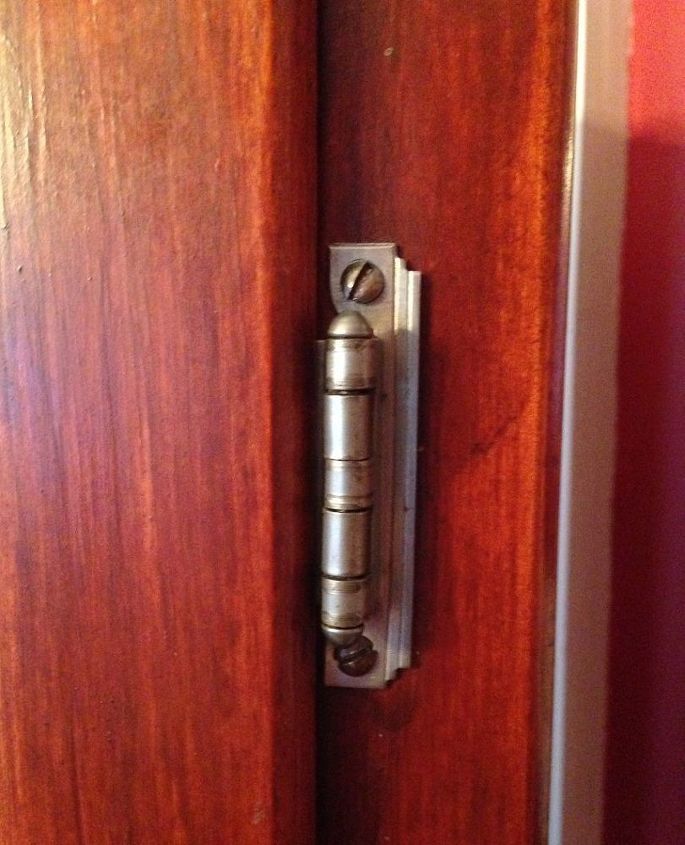
This is the "after" pic of the vintage hinges. Love the art deco style.
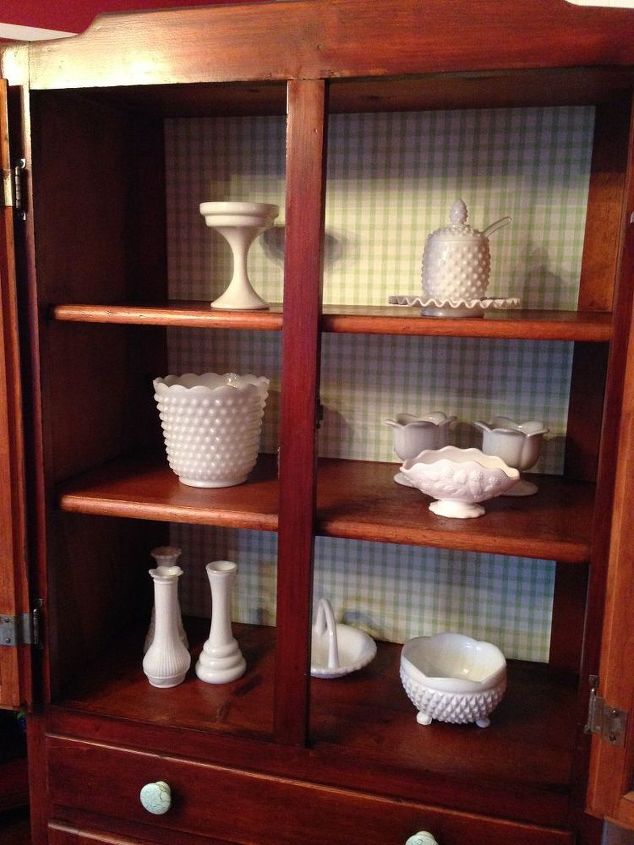
The wallpaper backing was added by using some decoupage medium. Painted it onto the back of the cabinet, then to the wallpaper back. Once it was applied, I painted over it as well just to seal it. This particular wallpaper was not pre-pasted, otherwise I would have just used the glue from the paper. The finished project is a pretty country cupboard that would look perfectly at home in grandmother's kitchen or a vintage remodel. For the complete DIY, click here: http://countrydesignhome.com/2015/01/19/newlifeforanoldcupboardwithoutpaint/

Want more details about this and other DIY projects? Check out my blog post!
Comments
Join the conversation
2 of 8 comments
-
Great job on a cute piece. I like a few painted pieces but with walls and trim painted it is nice to have some natural wood pops! I love the crackle knobs. I have never tried crackle paint - you've inspired me.
-
This is my favorite furniture pieces. Takes up very little floor space and holds a lot. I have 4 of these in my sewing room for fabric and craft supplies. Some I refinished and one I painted. You have added color without paint. I like it.


Frequently asked questions
Have a question about this project?