


Revamping An Old Laminate Table

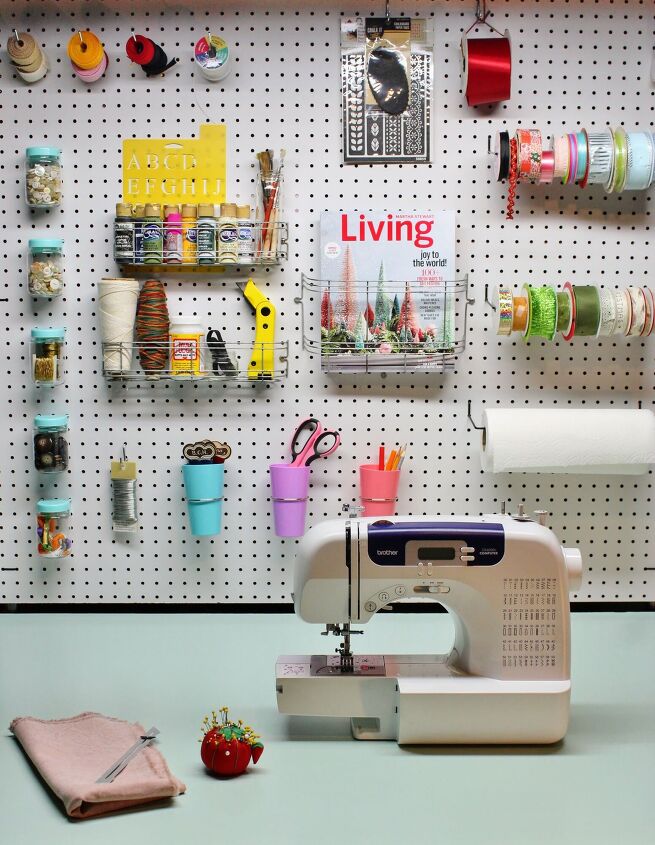
Recently I shared the makeover of my basement craft and sewing area. As part of that makeover, I revamped a large, bland folding table to use as my craft table. I love how that table turned out, so today I’m sharing the details of this simple project.
The Table
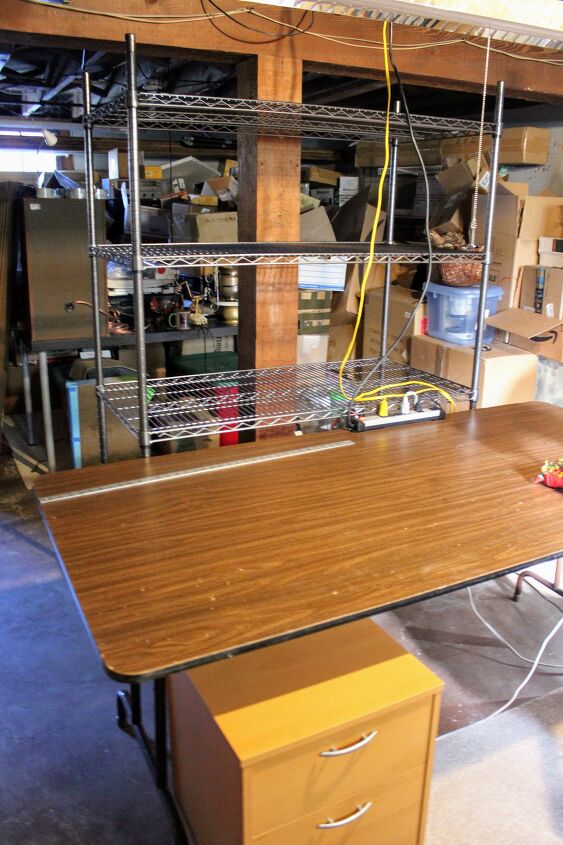
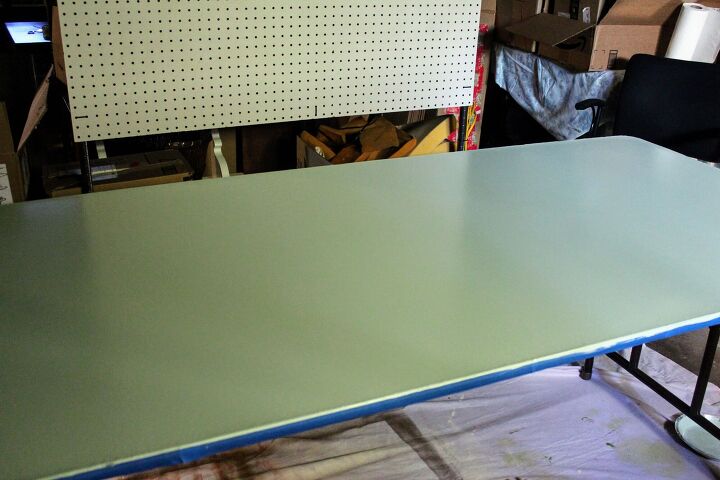
I got this 3′ X 6′ faux wood laminate folding table years ago. It was in used condition and showing some wear when I got it.
We used it for things like parties and yard sales and, most recently, in my basement craft and sewing area. It was great to have such a large table to work on, but the laminate top was scuffed and worn.
I wanted something more cheerful than the tired faux wood look. But that something had to be durable and easy to clean.
So here is what I did.
Sanding The Table
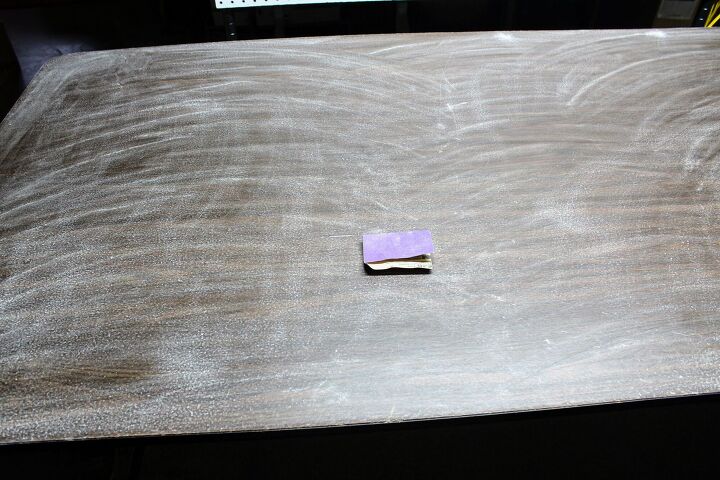
Using the proper safety gear, I started by hand sanding the table with 220-grit sandpaper.
The purpose was to scuff the laminate just enough to make the primer adhere. With the fine, 220-grit sandpaper, there would be no obvious sanding marks.
Vacuuming and Wiping
Then I vacuumed the table and wiped it with a damp cloth to make sure all sanding residue was gone.
Masking the Edges
The rim of the tabletop is some sort of rubber. I doubt any paint would adhere to that very well, so I masked it off with one-inch blue painter’s tape and left it alone.
As you can see from the photo below, the table was literally rough around the edges. I thought about sanding the edges more, but that could have led to more chipping. Maybe there was something else I could have done with that, but it was so minor that I chose to just let it be.

Applying Primer
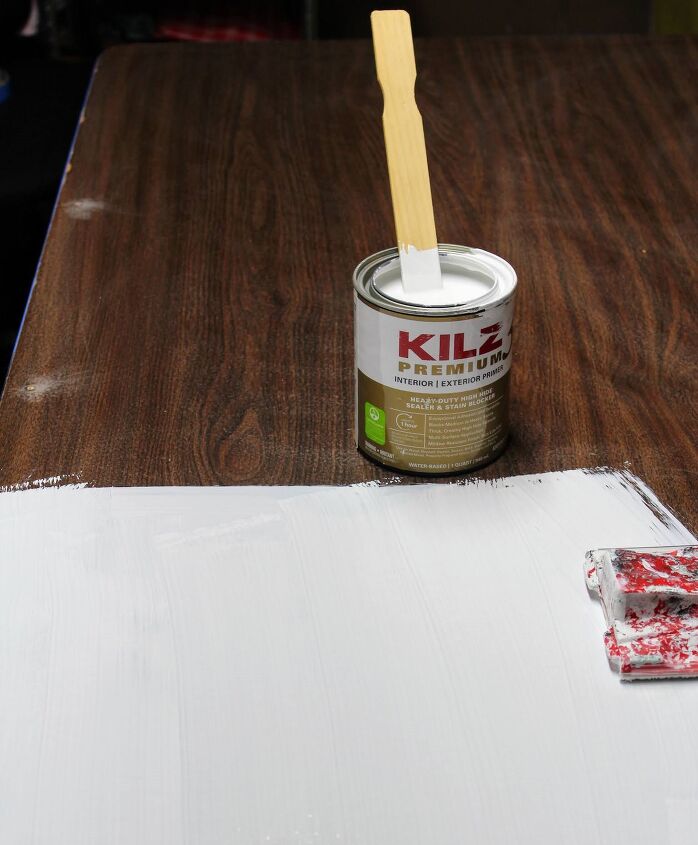
I wanted a smooth finish and I didn’t trust a paint brush to give me that. So, I used a paint edger in light, broad strokes to apply three coats of Kilz Premium Primer, which is water-based.
Was three coats of primer overkill? Not when painting over laminate. And not when the paint I wanted to use next was a much lighter color than the faux wood.
I let the primer dry thoroughly between coats.
Applying Paint
I went through our paint stash and came up with the paint left over from my master bedroom refresh: Benjamin Moore “Galt Blue” (also water based). It was exactly the clean, airy color that I was looking for in my craft room.
Again using the paint edger, I applied two coats.
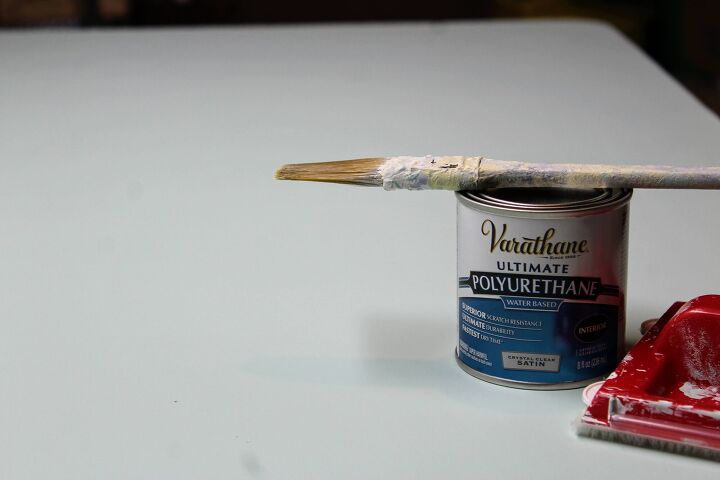
Applying Finish
Since this was to be a worktable, applying finish would be a very important step in protecting the table – and hopefully keeping the paint from chipping and exposing the laminate underneath.
With my trusty paint edger, I applied two coats of Verathane Ultimate Polyurethane in Satin (also water based).
The last step was to remove the masking tape.
This entire process was very similar to the process I used to create the stenciled floor in my dressing room.
I’m happy to report that the floor has held up well, so I’m hoping to have the same result with this table.
The Result
This cheerful, smooth-surfaced table works well in my craft area.
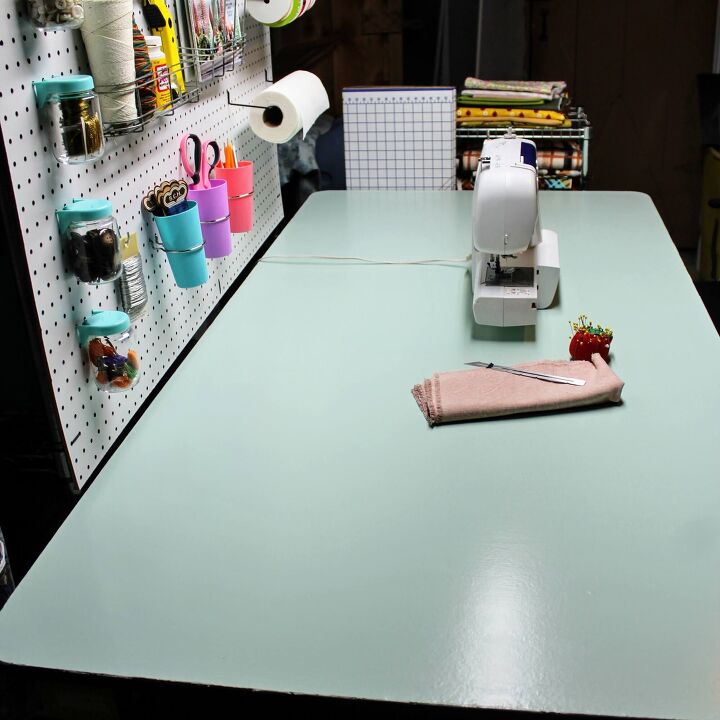
When we first thought about hanging the pegboard, I wanted to paint it. But, after painting the table, and with the colorful pegboard accesssories I used, it turned out that painting the pegboard wasn’t necessary.
It’s early days but, so far, the table finish is holding up well and it is very easy to keep clean.

To see my entire sewing/craft area revamp, check out this post. And to see my stenciled floor project, check out this post.
I'm listing the cot of this project at $50. The cost of this project really depends on what you already have onhand. I already had the paint, sandpaper and blue tape. The estimate of my time does not, of course, including drying time.
Comments
Join the conversation
-
That's one of those folding banquet tables. Great upgrade. Looks better than new and that ugly fake woodgrain laminate is gone. Great share


Frequently asked questions
Have a question about this project?