


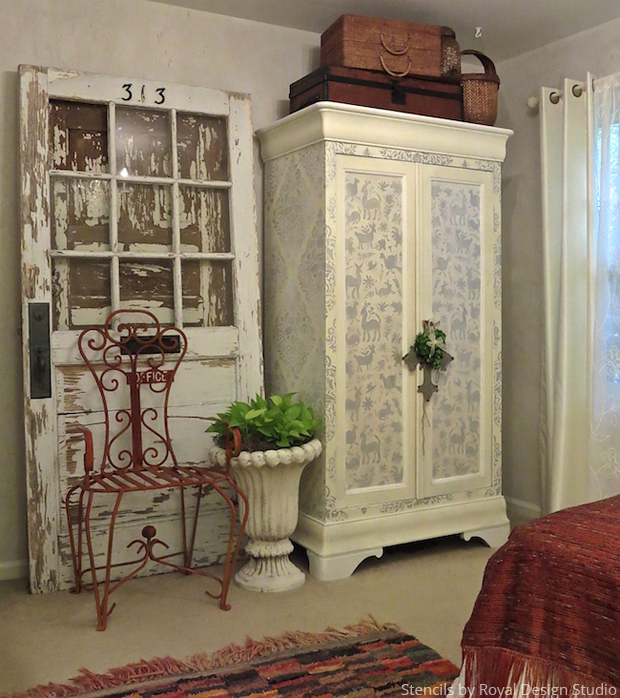
A Shabby Chic DIY Stenciled Cabinet With a Surprise!

This cabinet has been painted twice and I can't believe I was not happy with it both times. Has that ever happened to you? Finally, I painted it out in Old White Chalk Paint® by Annie Sloan and just let it be. For months. Just waiting for inspiration to strike. And strike it did. I laid eyes on these two new Royal Design Studio stencils and I was ready to create some magic!
STEP ONE: Paint the outside of your cabinet with two coats of Old White Chalk Paint(R). For the red interior, mix one-third Barcelona Orange with two-thirds Emperor Silk Chalk Paint(R). Paint two coats and let dry overnight.
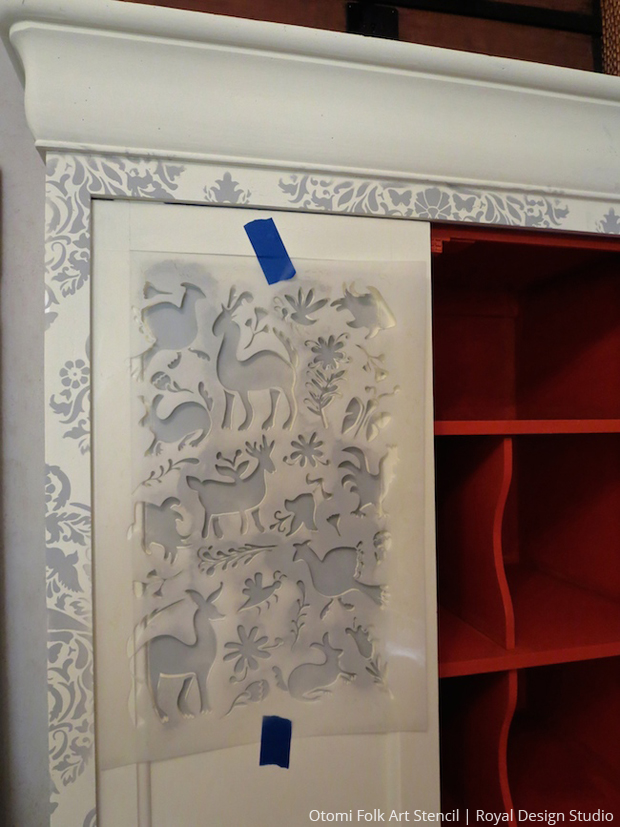
STEP TWO: Find the center of the side panels and mark lightly with a pencil dot at the top. Align and tape the center of the Love Birds Lace damask stencil with the pencil mark and level it. Using the Paris Grey Chalk Paint(R), stencil the patterns on either side of the cabinet. You can also stencil the front border of the cabinet as shown in the image above. Next, position the Otomi stencil on the front panels and stencil with Paris Grey Chalk Paint(R).
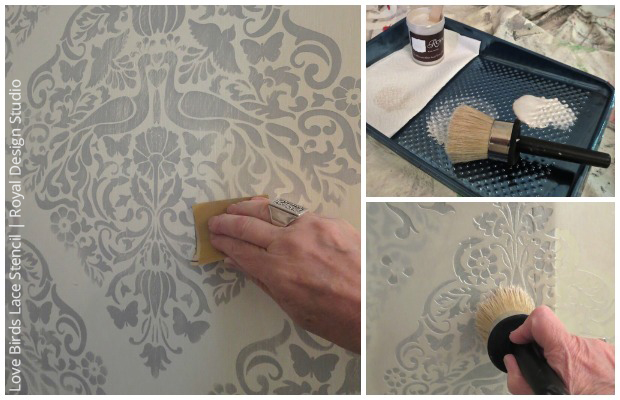
STEP THREE: Sand the stencil patterns on all three sides of the cabinet lightly. Reposition the Love Birds Lace stencil on existing stenciled patterns and stencil a layer of the Pearl Oyster stencil creme using the super large stencil brush. This will help give a distressed look to the cabinet. For the front of the cabinet, brush the Pearl Oyster stencil creme all over the inside panels using the 3 stencil brush.
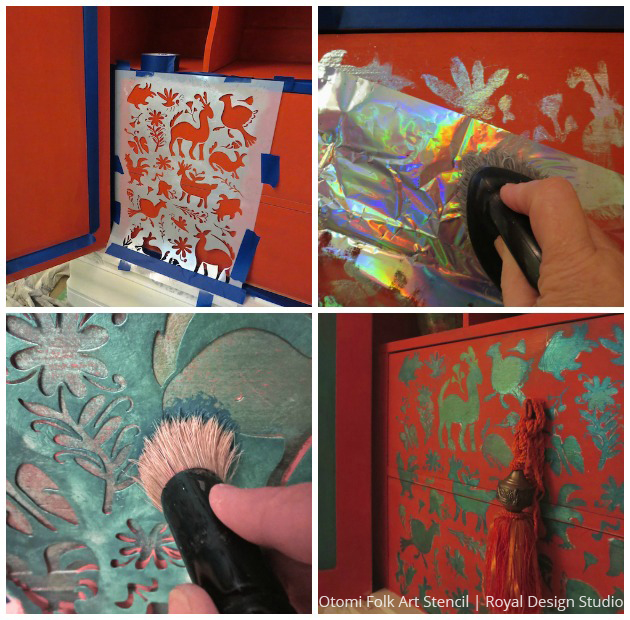
STEP FIVE: Remove the drawer hardware. Find the center of the drawers and mark with a pencil dot. Tape the Otomi stencil and use a stencil brush to tap on Wunda Size. Let it come to tack for about 15 minutes. Remove the stencil and lay the foil down, bright silver side up, and rub with a stiff brush. Move the foil around as needed to cover all of the sticky size. Place the stencil back in position and stencil with the Peacock Fancy stencil crme. I am never too worried about perfection, a little hand-painted look always looks great!
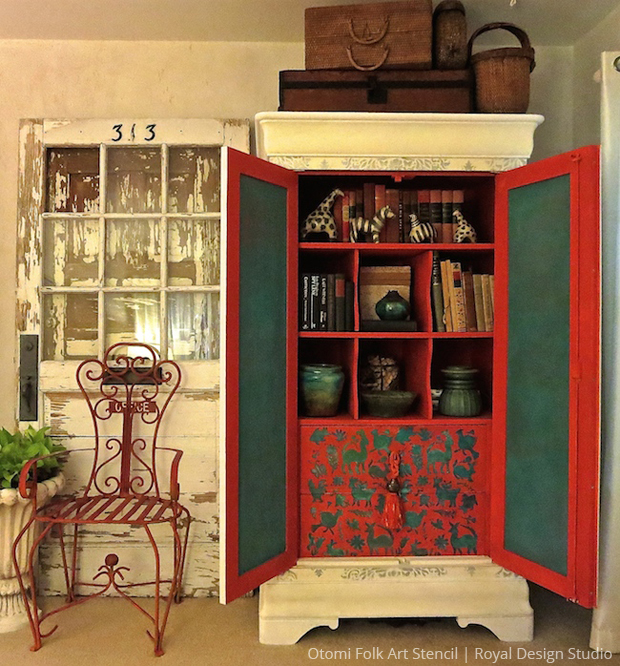
Ta Da!!


Frequently asked questions
Have a question about this project?