


Storage Island/dining Table Combo

Hello my crafty friends! Sorry for the Lack of content! The holidays were busy but life is starting to resume normalcy! We’re finally starting to work on my tiny kitchen! For reference, I currently have 5 upper and 4 lower cabinets not including the inaccessible one over the refrigerator and about 17.5 sqft of countertop space. Sooooo this is how I’m adding not only storage but when needed additional prep space! Today I will be going through how I created my dinning island with storage!
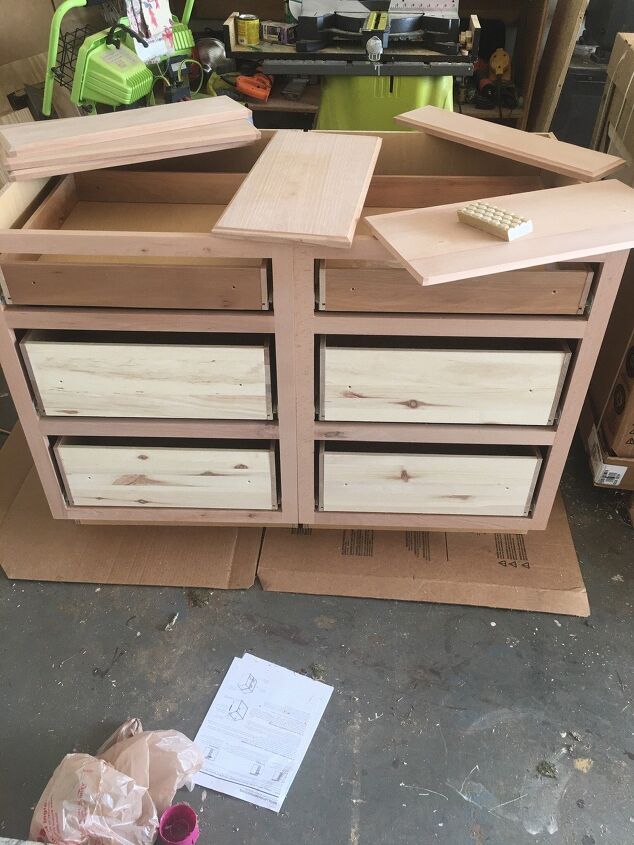
For this island I used stock unfinished cabinetry from home depot. I took the drawer fronts off, gave them a sand, a coat of prestain conditioner, and then used a combo of stains, first went in with flagstone a color by Varathayne, then followed up with antique white. I let that dry for 24 hours prior to reassembling, I also stained the face frames of the cabinets. I will dive into how I finished the back and sides later on, but will use the same stain process.
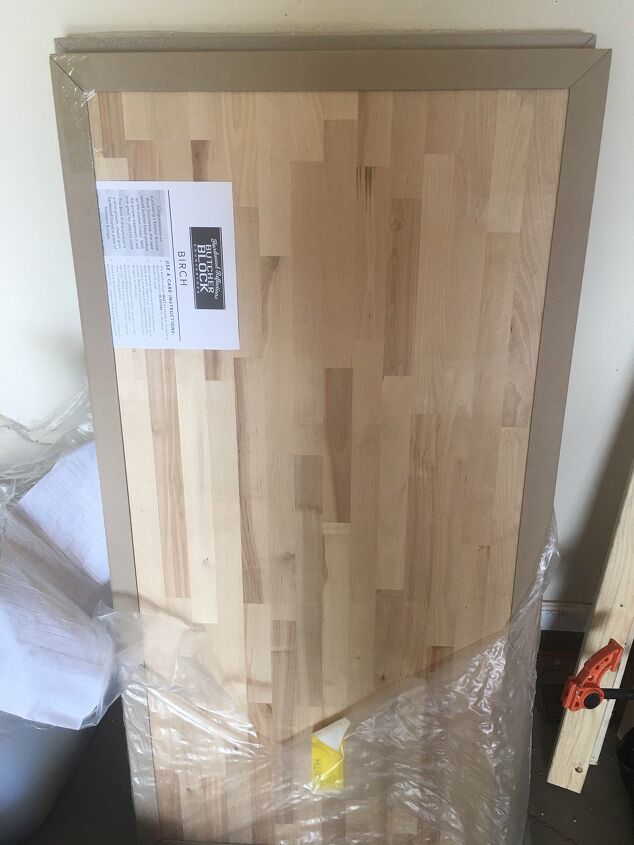
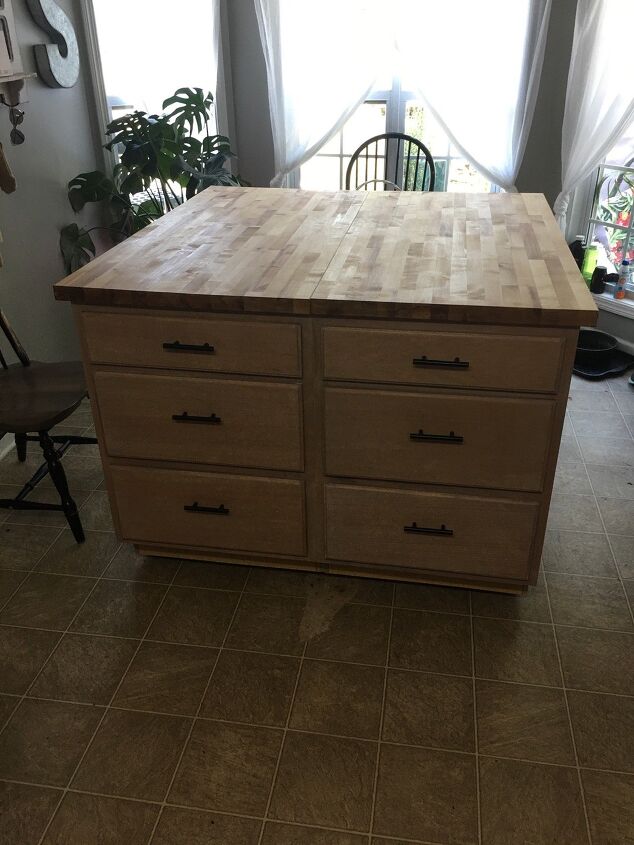
I bought 2 of these butcher blocks also from Home Depot for the top

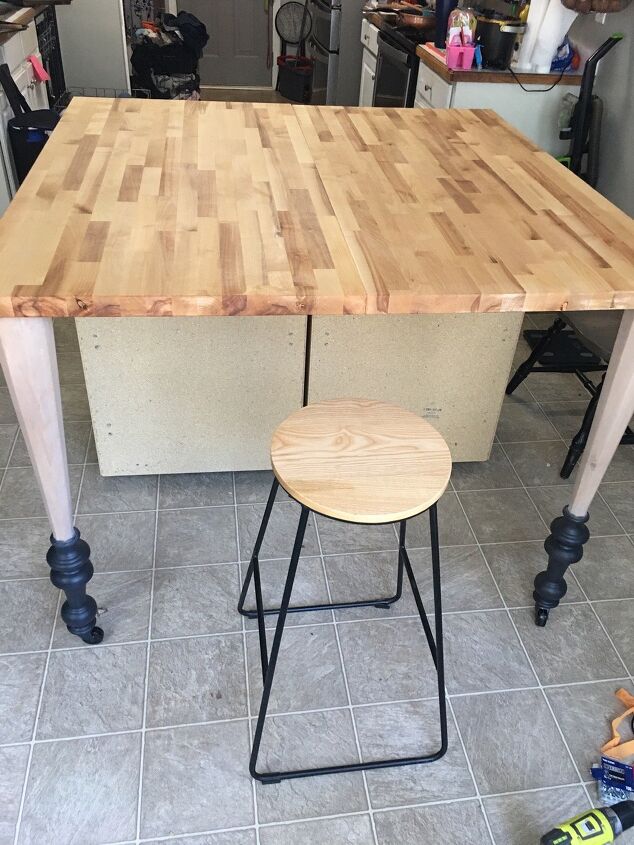
I had 2 spindles from my bed that I kept for a long time begging to be used, so I will use these as the back legs of the island!
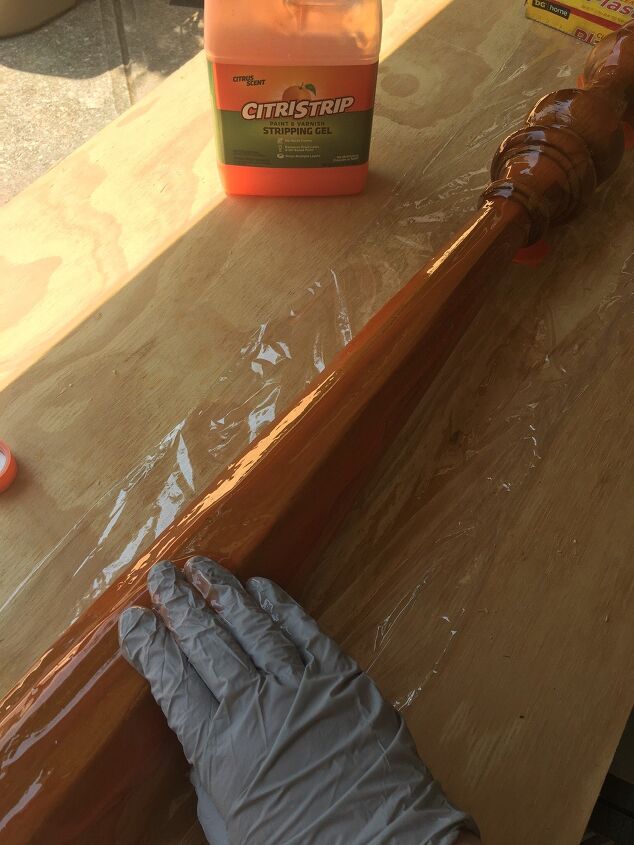
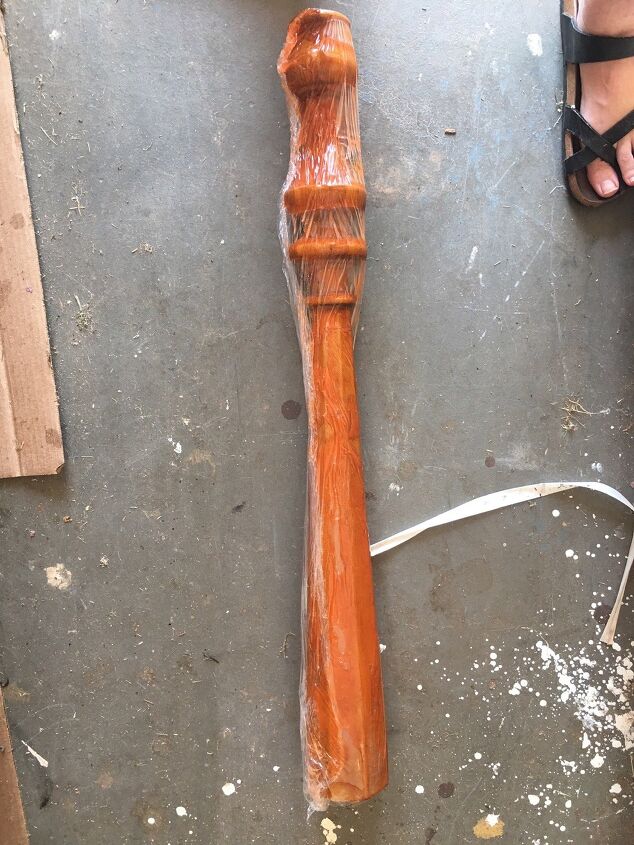
But first I needed to strip the stain. I used citristrip for this. I wrapped it in Saran Wrap and left it alone for a few hours to do it’s thing!
So saucy!

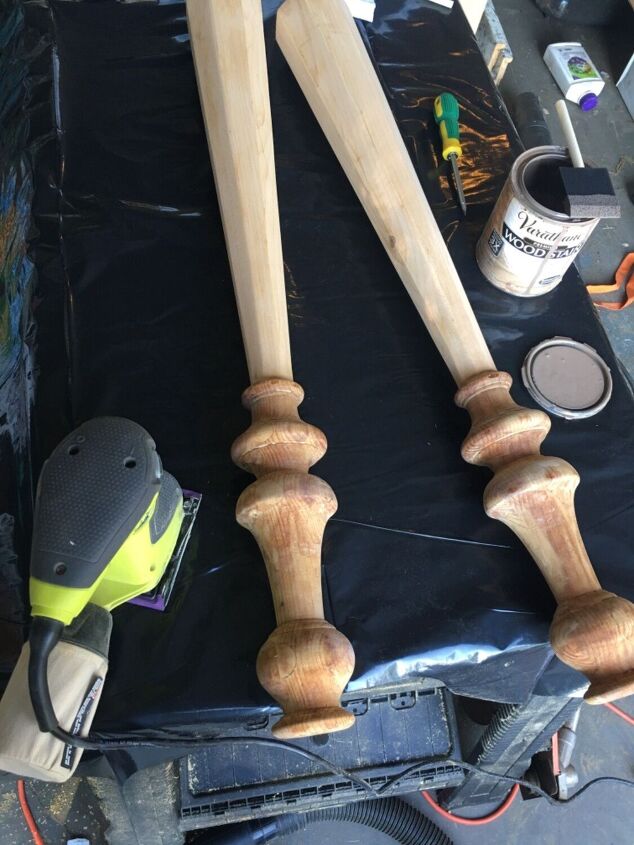
I scrapped off the citristip, and sanded the remaining varnish off, I had a hard time with the bottom bit so decided I would add a little color to the bottoms.
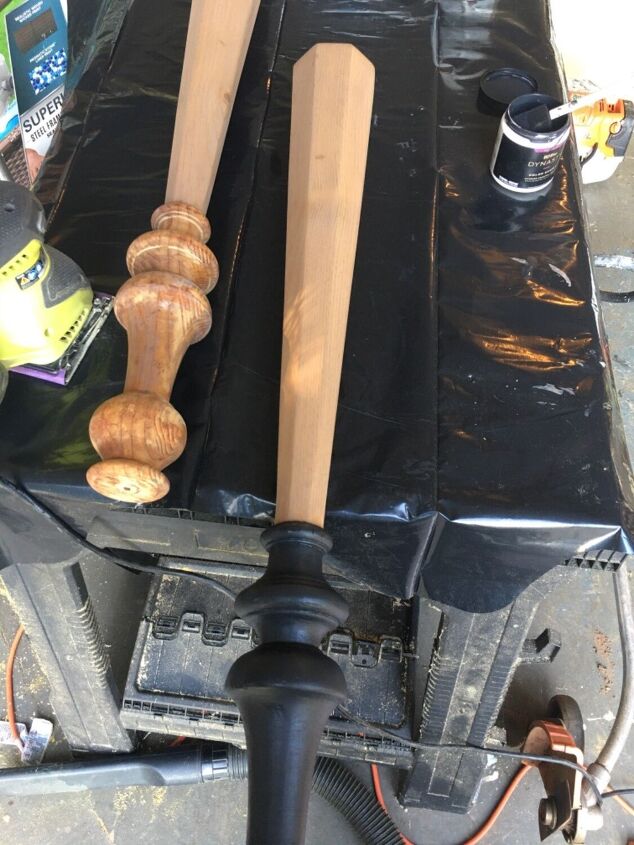
Tricorn black from Sherwin Williams!

I added wheels to the back legs.
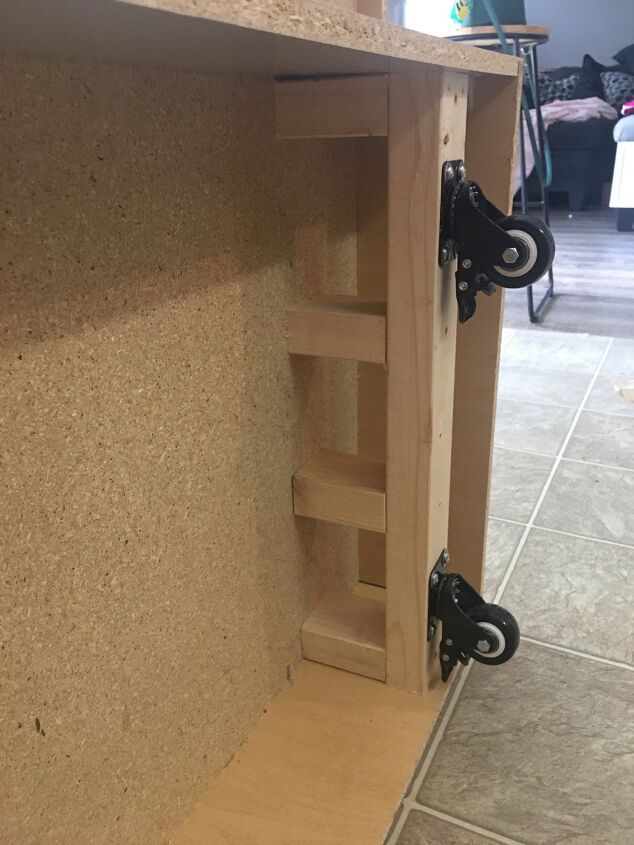
And locking casters to the bottom of the cabinet. I made a little frame to attach them to that would sit slightly under the edge of the cabinet so they were super visible but still accessible to lock so the island only moves when we need it to. We will eventually replace the kitchen flooring and I will likely remove the wheels but wanted to be able to move it to do the floors for now.
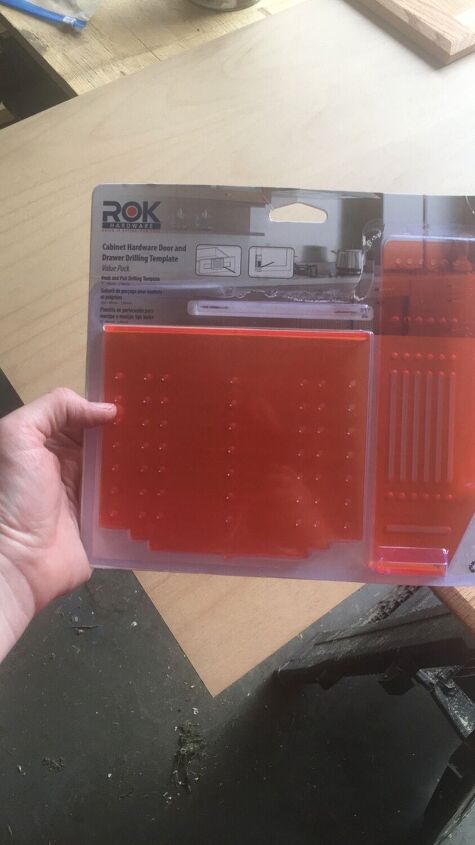
This little jig came in handy to put the pills on the drawer fronts! 10 out of 10 recommend picking one of these up!
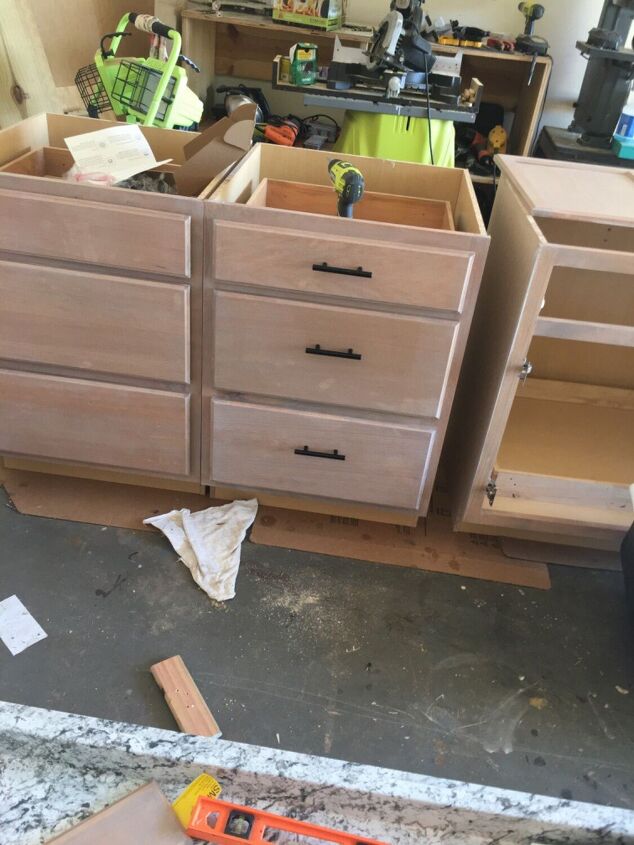
Look how nice and even that placement it!
So. I didn’t get any pictures of the the assembly, it was difficult to do on my own. I attached a the two cabinets on the face frame with 2.5 inch screws from both sides, shimmed the back so it was square and attached them on the back side with the shims. I used butcher block oil on the top, 3 coats to protect the wood. I attached the butcher blocks together with flat steel ties and it to the cabinet base with steel “L” brackets. I’ve seen them attached with pocket holes but I was scared. I don’t have a lot of experience with pocket holes and was worried I would ruin the top. This option worked well for me.
See the gap there between the cabinets? The face frame gave the front of the cabinets a little lip, so the back has this gap, I used a couple premade wood shims that I bought from Home Depot to give support and keep the spacing consistent enough to attach the backs of the cabinets together.
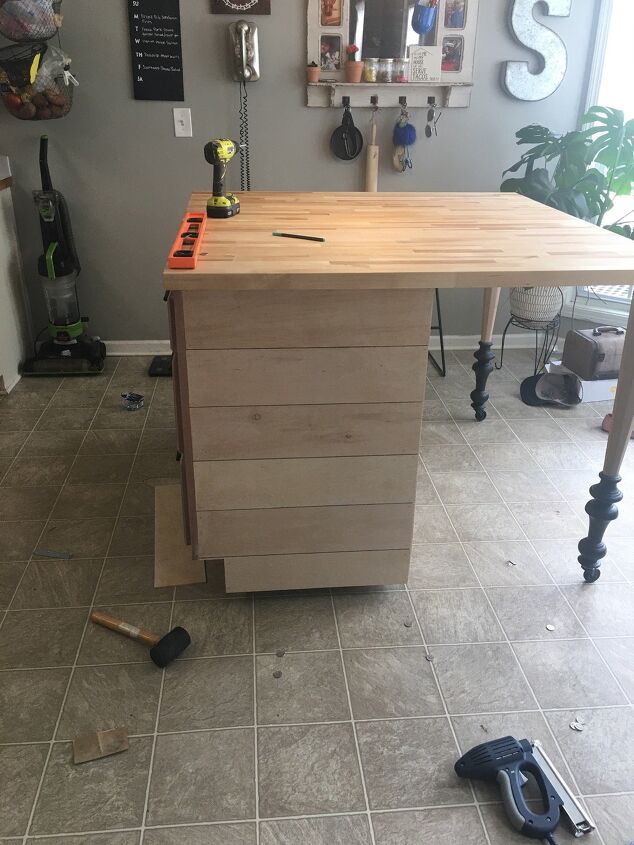
To finish the sides and back I used 5mm underlayment ripped down into 6 inch strips with my table saw, I attached them to the sides with 5/8 inch brad nails. I used nickels to space the board to give it the look and feel of shiplap. I stained these using the same process as the front and drawers, I used the same process for the back!
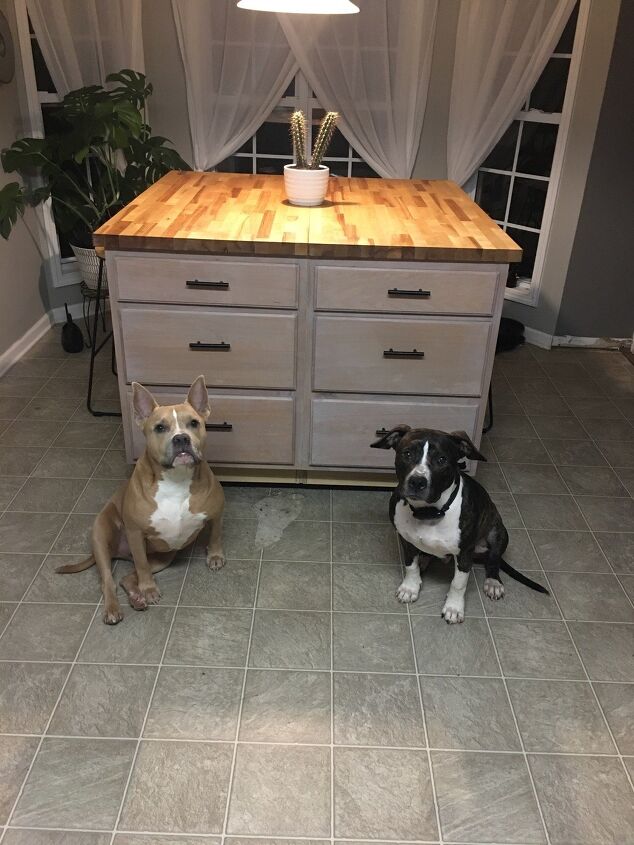
And guys! Isn’t she lovely!! And my fur babies to demonstrate how large and in charge this project is! I’m already thinking about painting it a bolder color! But for now I’m thrilled with the space, 6 drawers and a 50x50 top! Space to eat dinner on the back side and storage on the front, how’s the saying go? Business in the front party in the back?! Hah! I know I left a lot of the construction detail photos out, I was learning as I went and it was very frustrating at times, but I’m so pleased with the outcome and will gladly answer questions in the comments! Thanks for coming on this journey! Next up! The kitchen! Hopefully soon! Stay tuned and stay crafty!
Comments
Join the conversation
-
Great job! The island looks amazing. Very good information and tips. Your doggos approve
-
You go girl, nice job and great dual purpose! Puppers are so sweet modeling there for us!


Frequently asked questions
Have a question about this project?