


Updated Table With Layered Paint

This little side table was listed in the local Craigslist ads and I liked its bones. For people who care about knowing the name of the particular style of their furniture, this would be considered "Chinese Chippendale" style. The fretwork, corner pieces and rope embellishments along the front legs are taken from Chinese influence during the industrial revolution period.
I wanted to give it a new look, since the finish was in pretty bad shape. I could have gone with traditional Black and gold or Red and Gold, but went with layered teal, blue and purple instead. An experiment, if you will :)
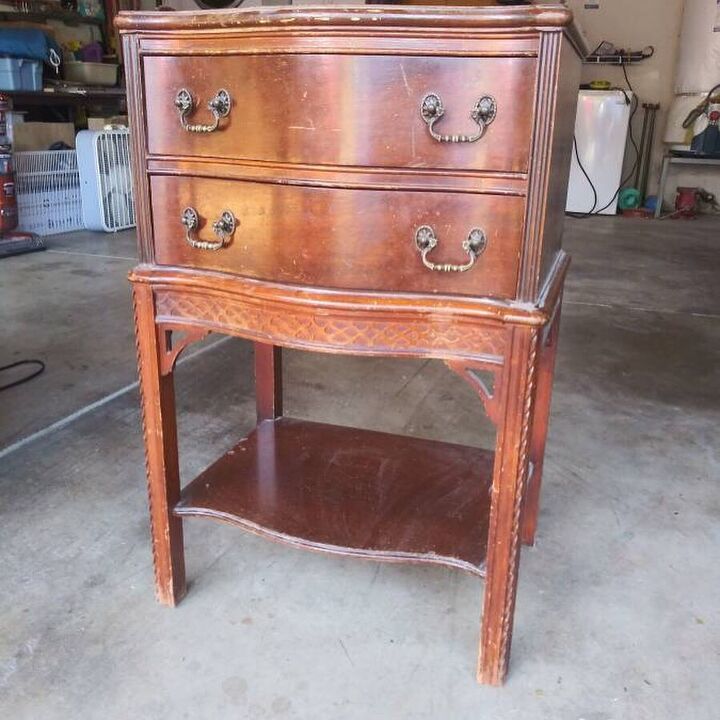
A very well-made table but neglected. Structurally sound with elegant lines. I gave this a good bath of water, Dawn dish detergent and white vinegar and let dry. It was then thoroughly wiped down with Liquid Sandpaper/Deglosser to prepare the surface for paint adhesion.
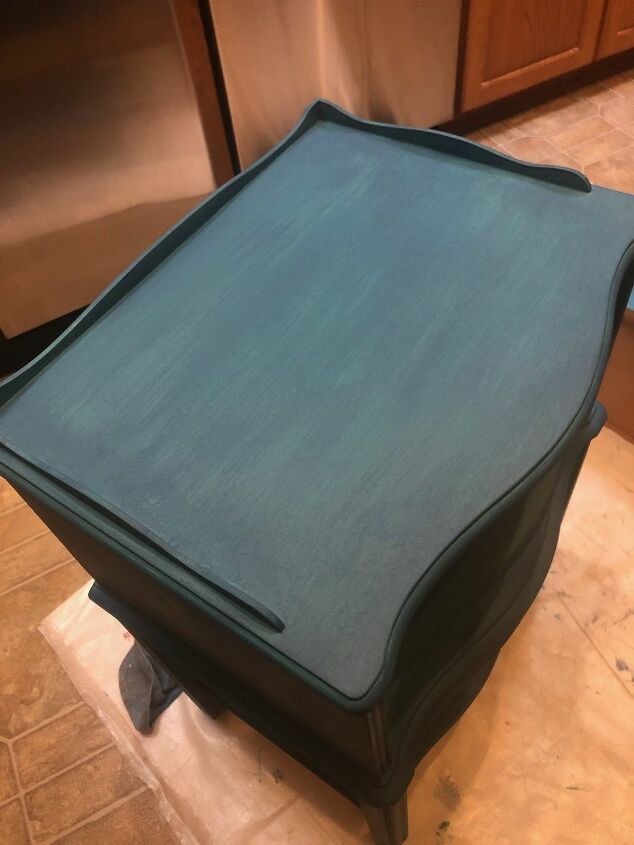
I painted one light coat of the first paint color, followed by an even lighter coat (almost dry-brushed) of the second. As seen here, it looks rather streaky.
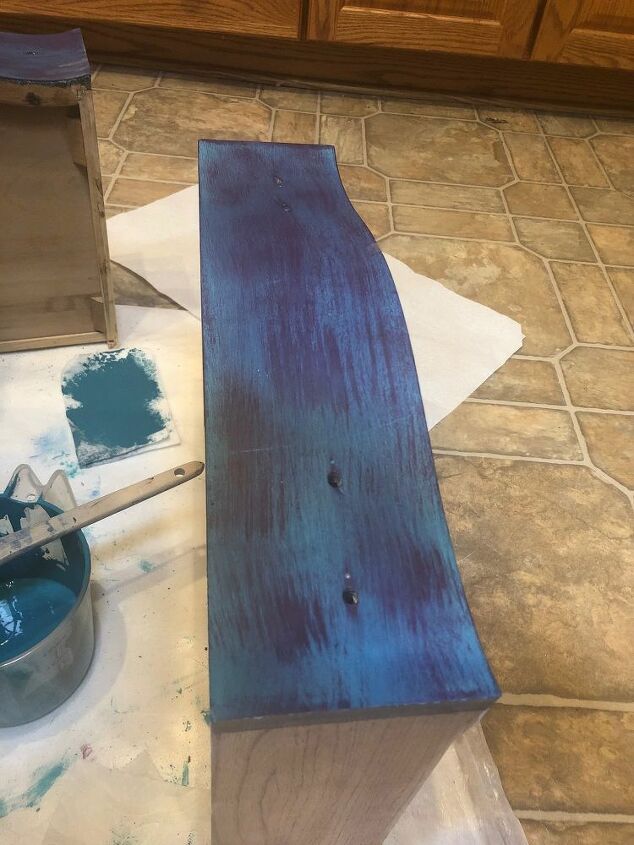
Experimenting with a drawer first, I added a third paint color, which was a deep wine color (Aubergine or Eggplant). I could have stopped here for a very different look, but wanted to end up with a mostly teal color in the end.
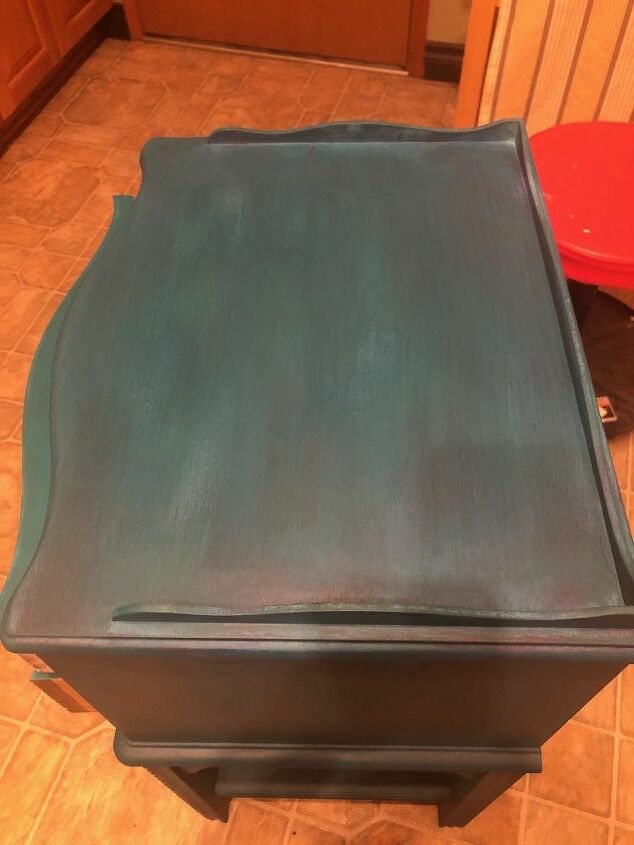
The final color is applied over the purple streaks. I have shared all the paint colors used for this project in a photo below :)
My house doesn't offer much natural light and I often paint in the evenings after I get home from work but I was anxious to see how this was going to look in a photo. I had not yet applied PolyUrethane.
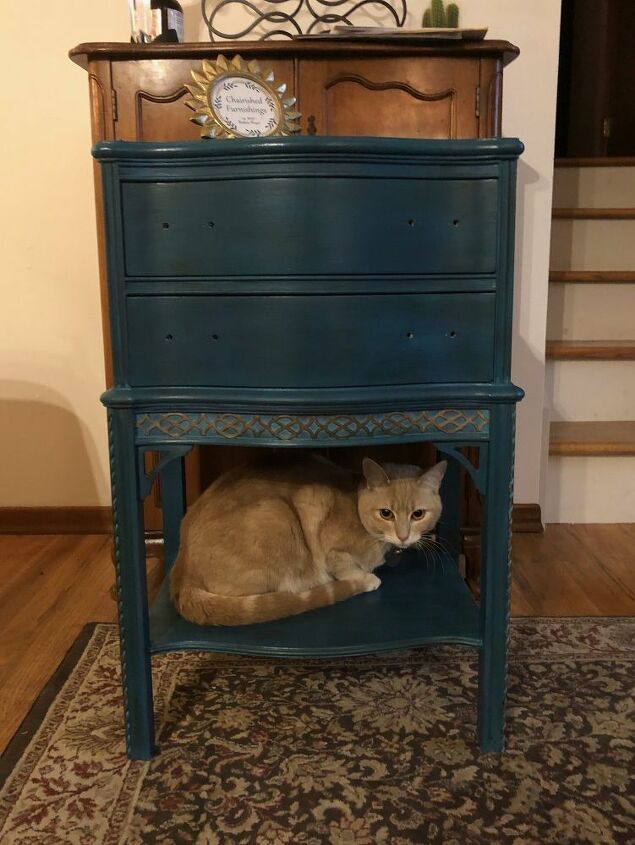
And of course - our most mischievous kitty thought I put this out just for her to perch upon :)
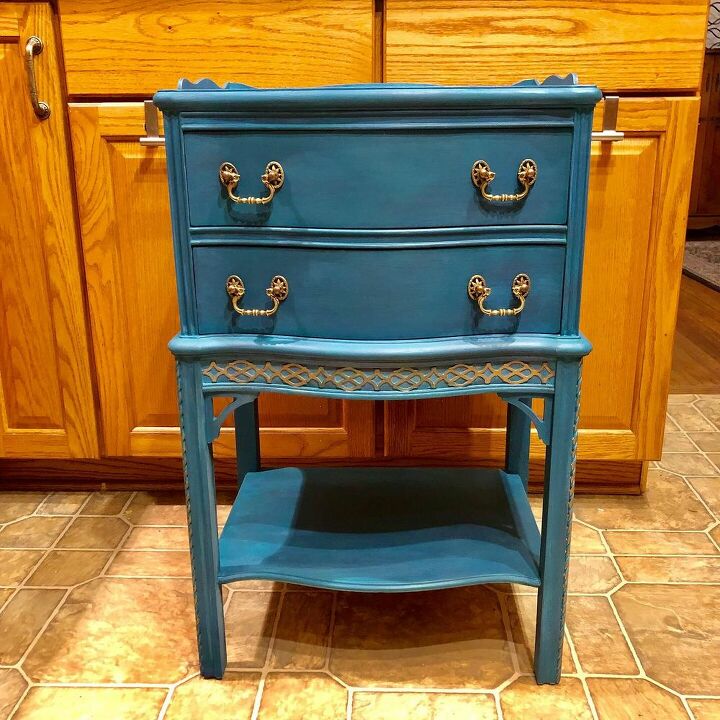
After three coats of clear coat has been applied. I used a photography lighting kit to get better lighting
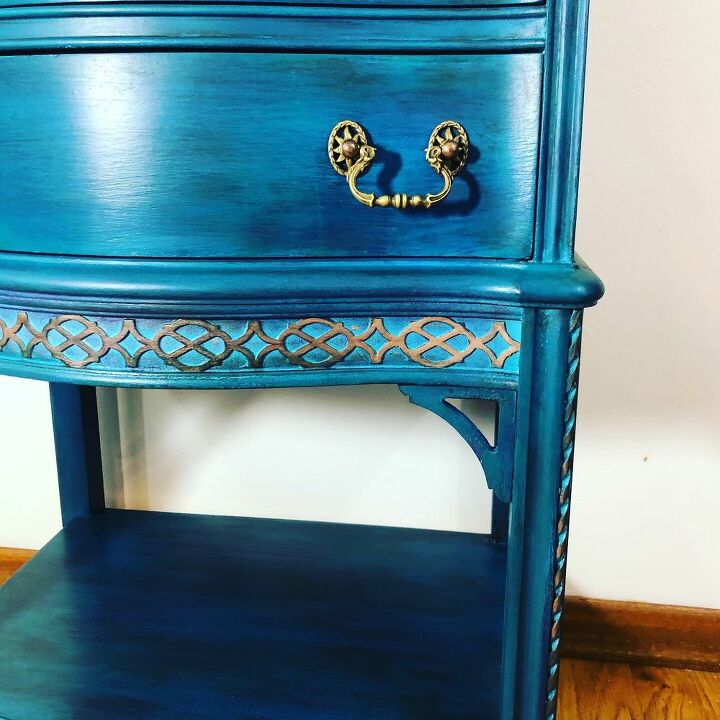
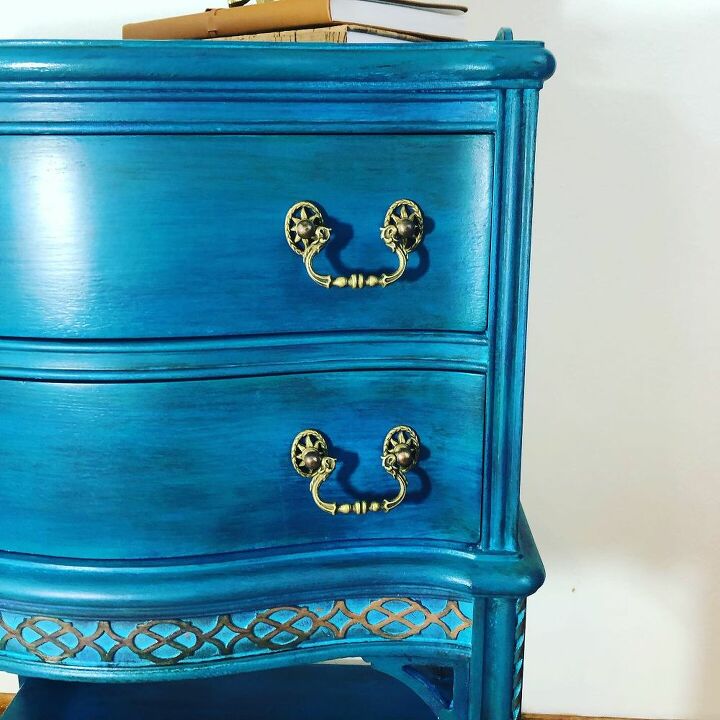
The fretwork... I layered all four colors of paint, then used a Pentel oil-based metallic paint pen to paint the raised details. Hardware was cleaned by soaking a few hours in a solution of Water, Dawn dish soap and white vinegar. I used a tooth brush to loosen the dirt from the hardware then let air dry.
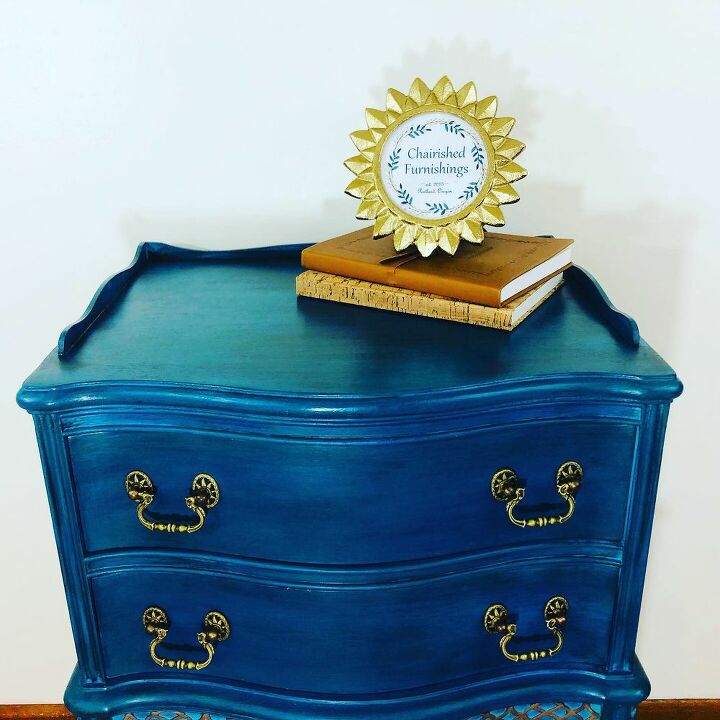
Top view.
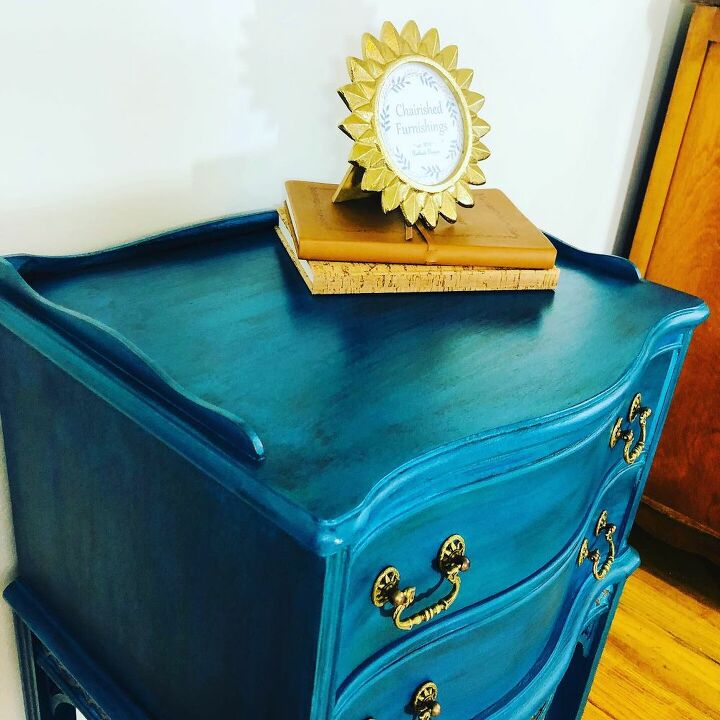
At this angle, you can see more of the layered colors.
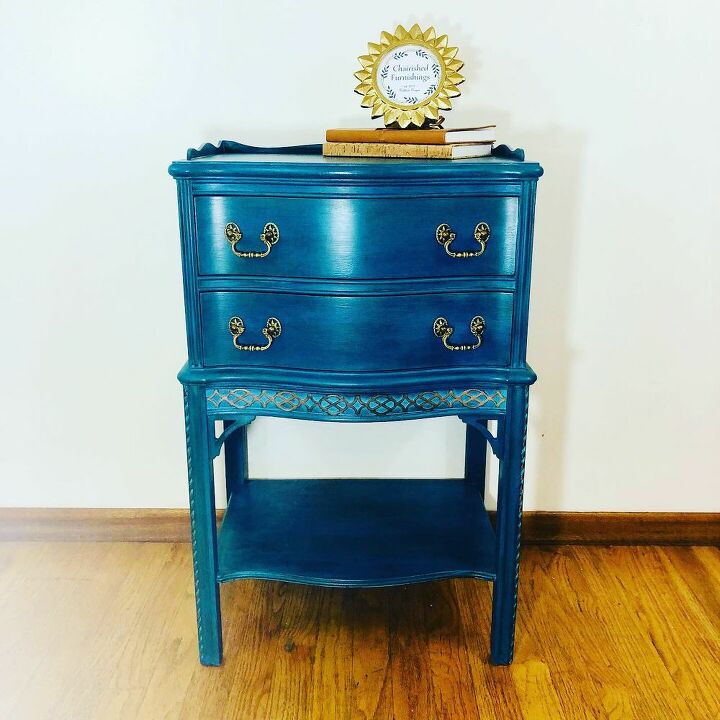
The final product. I was really pleased with how it turned out, as it is out of my comfort zone with respect to painted furniture. It isn't everyone's cup of tea, but I'm hoping someone will have exactly the right space for this sweet table.
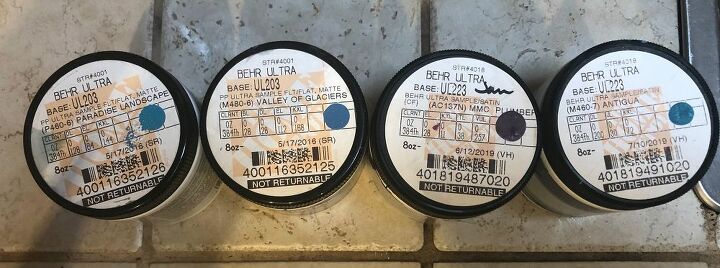
I mix my own 'chalk style paint' by blending about 4 Tbsp Calcium Carbonate with 2 Tbsp water. Blend until a smooth pastes develops, then pour in one sample pot (8 oz) of your choice of ordinary paint. I happen to use Behr mostly, since they are close to home and can mix any color I choose into a sample pot size.
Apply with a high quality brush in very thin layers, lightly sanding with 220 grit sand paper between coats. Wipe with a clean, damp rag to remove dust, then a dry microfiber cloth before applying the next layer of paint. Prior to applying PolyUrethane (Varathane - Satin finish is what I use mostly), wipe with a tack cloth to remove all bits of dust and debris. I use a craft sponge/foam brush to apply PolyUrethane in very thin coats. Do not overwork! If you see a spot you missed or a streak, let it dry and cover it with the next coat. I always apply at least three coats and 5 or more coats on the top surface if it is a table that will get heavy use.


Frequently asked questions
Have a question about this project?