


Vintage Romantic Style Cabinet Re-Do
Hi, I'm Liz from the DIY blog SimpleDecoratingTips.com! I also have a fun DIY shop FrameandFrills.com where you can buy in person or online, (USA only). The products I used to re-do this cabinet are all found in my shop.

Re-doing this tall cabinet in a vintage romantic style was so much fun! I tried a new, (new to me that is) product to glaze it with to achieve an overall layered aged finish. Here are all the steps and products I used to create this vintage romantic style cabinet redo:
All of the products will be listed with shopping links to my shop at the end of this post!
There were a lot of steps to this project and I thought about splitting this post into a few posts. If that is something you’d prefer, please let me know for next time!!
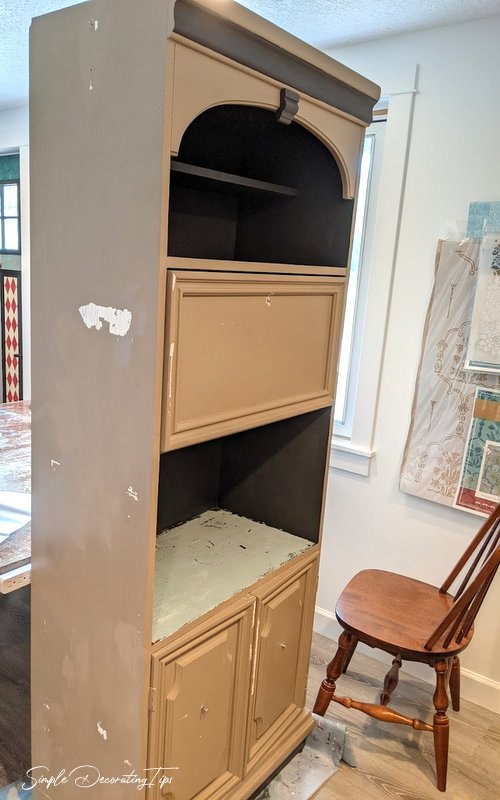
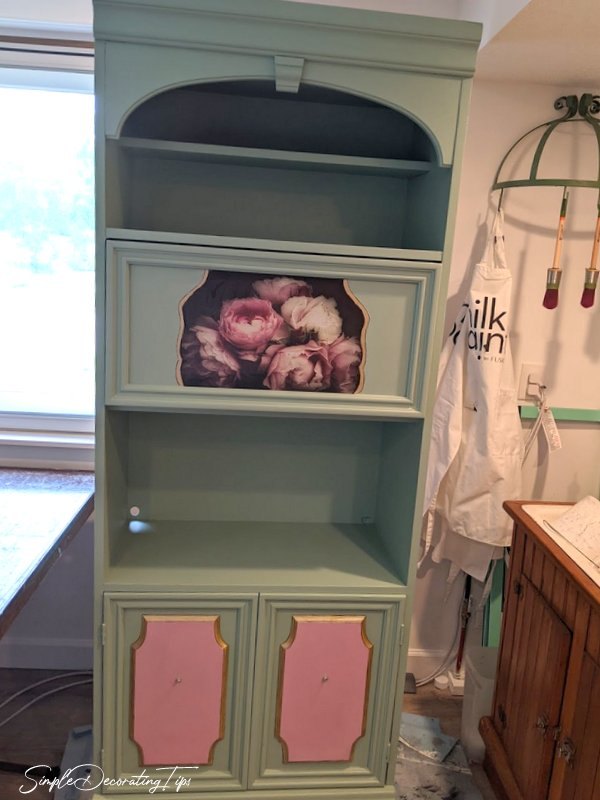
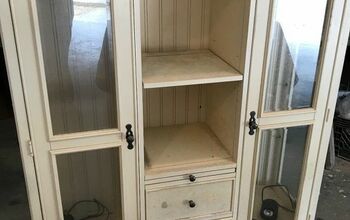
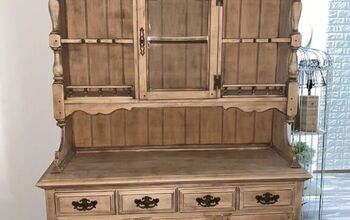
I needed a cabinet to use for storage in the shop, to hold extra back stock of Fusion Mineral Paint tester sizes, and this cabinet would work perfect. It was the right size for the narrow hallway I wanted to put it. I’m sure when it was new, it was quite expensive, but 2nd hand, this found piece was only $25, and was ready for a re-do!
PREP:
All painting projects need the piece prepped properly so that the surface will allow paint to adhere. Depending on the piece of furniture and what the prior finish and environment it’s been in, that prep can differ.
For this tall cabinet piece, the previous owner had painted over a waxed surface, without cleaning it off and unfortunately that doesn’t work very well. Wax is a resist, which means it will resist paint from sticking to it. Most of the cabinet was ok, but the shelf above the cabinet doors was not… I peeled half of the paint off just using my fingernail, and the rest I scraped off with a trowel.
To fix that waxed surface, and create a surface that would allow paint to adhere to it, I scrubbed it with Fusion Odorless Solvent, (it’s a mineral spirit type product, just not quite as stinky!) and will soften the wax so it can be scrubbed off. After 2 soakings and scrubbings, the wax was removed. (FYI: Trying to just sand the wax off can lead to bigger problems… it can actually force some of the wax into the grain of the wood continuing the resist to paint adhesion.)
Next, I washed the entire cabinet with Fusion TSP Alternative. Just a couple teaspoons in a quart of water and it cuts through dirt, grime and grease beautifully! Fusion TSP Alternative is NOT Trisodium Phosphate, it is an alternative to it. Regular TSP is a harsh chemical and needs to be thoroughly rinsed off. Fusion TSP Alternative doesn’t need rinsing and isn’t a harmful chemical! (That’s what I love about Fusion, their commitment to create fantastic quality and healthy products.)
Finally, just in case, after it was all scrubbed clean and dry, I did paint a quick coat of Fusion Ultra Grip to that part where the paint had peeled off. Ultra Grip is a bonding agent and has AMAZING adhesion power. It’s important to allow Ultra Grip to cure for at least 12 hours before painting over.
TIP: Did you notice that the hardware was missing but the bolts were sticking out in its place? I removed the hardware then put it in backwards so that the paint wouldn’t mess up the lovely knobs, but so that I could still open the doors as I was painting!
INSPIRATION:
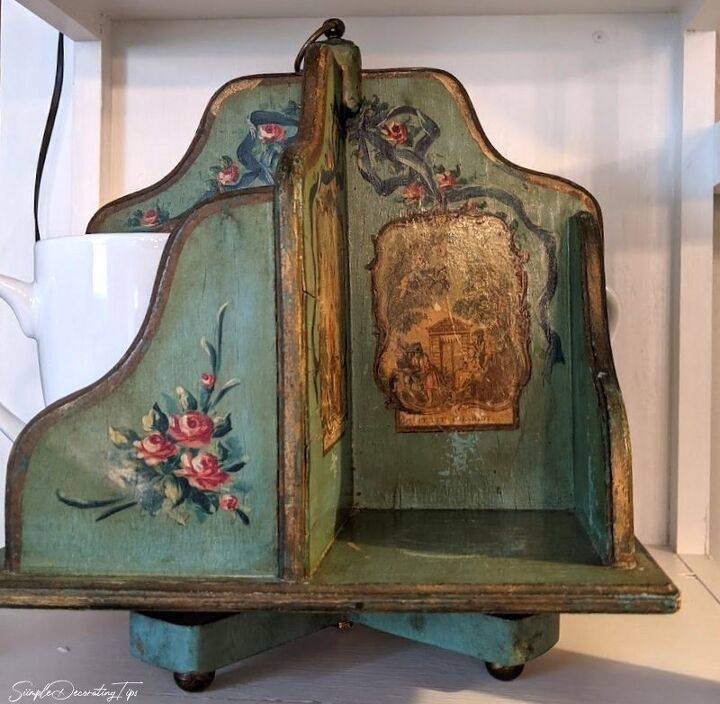
I found this sweet little rotating piece a few years ago and love the detail of it. In the shop I use it above the coffee machine to hold mugs. The tall cabinet will actually be placed close to this, so I thought what a great piece to use for inspiration for the vintage romantic style cabinet re-do!
PRODUCTS:
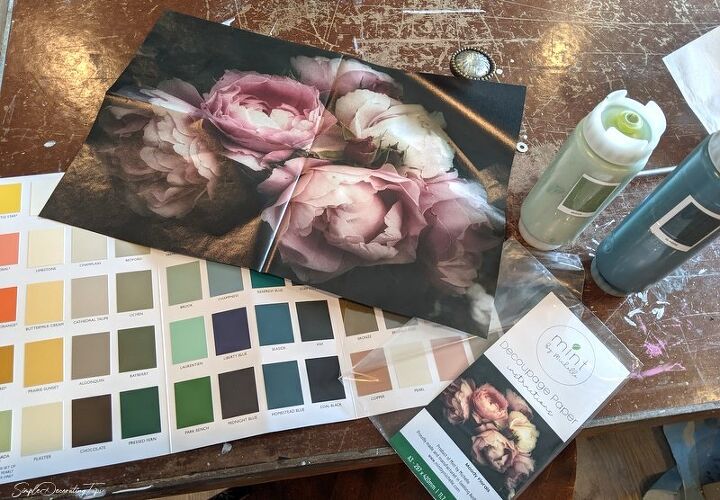
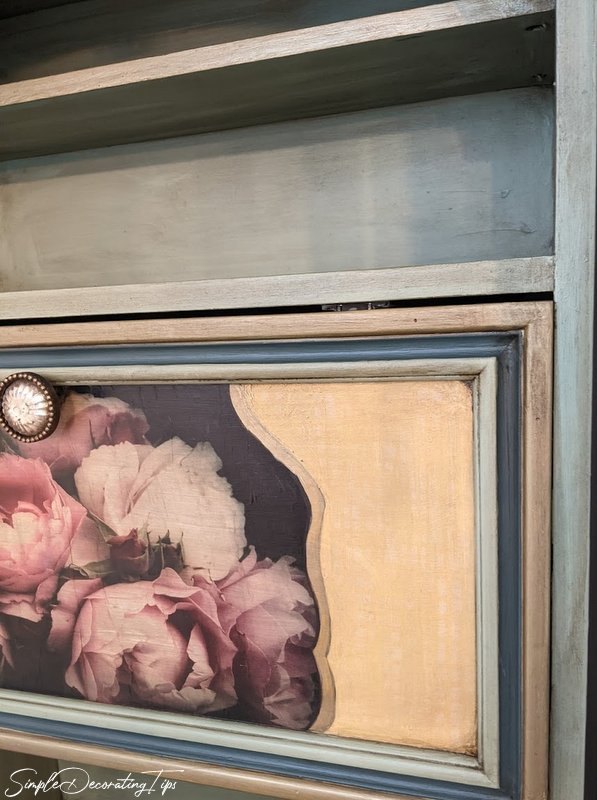
Instead of trying to learn how to paint beautiful roses and ribbon, which actually would be fun, but a bit too ‘matchy-smatchy’, I thought this romantic floral Mint decoupage paper would be much better!
All of the products I used in this project, I stock at FrameandFrills.com, available online or in the shop in person. I used Fusion Mineral Paint and Fusion products, Mint Decoupage Papers, and RDS Stencils.
FIRST LAYER:
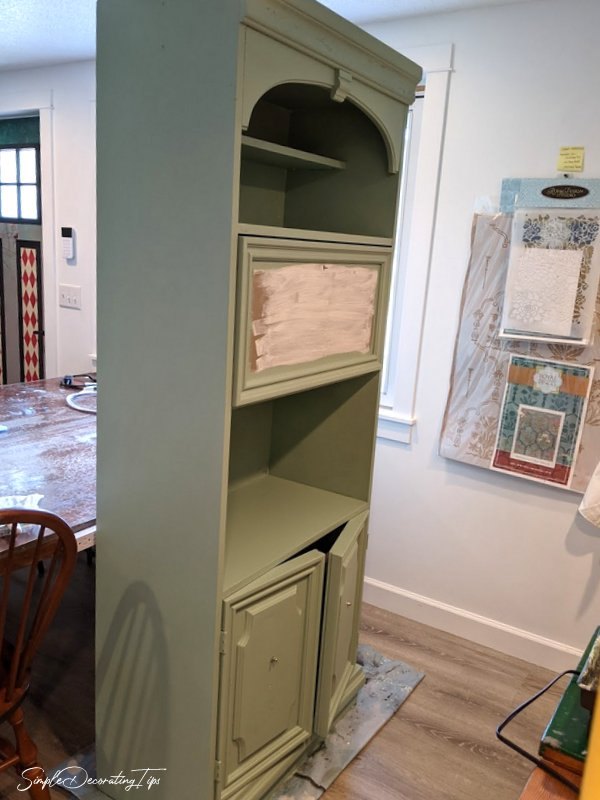
The first layer was covering the entire cabinet with Fusion Mineral Paint color ‘Brook’. All except the drop front door which would be getting the decoupage.
Mint decoupage papers are slightly translucent, so to get the colors of the paper to show the best, a light background works great. Therefore, for that spot where the decoupage paper would be going, I painted a quick coat of ‘Buttermilk Cream’.
TIP: If you can let that light base color paint dry at least overnight is best. That way when the decoupage gel is applied it, it won’t soften the fresh paint and peel it off if you need to move or adjust the paper as you’re applying it.
DECOUPAGE:
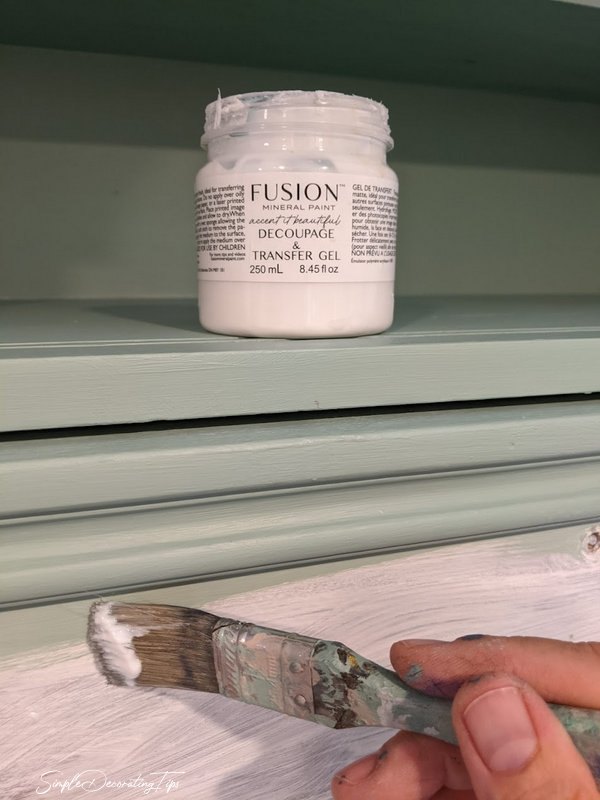
Working from the top, I applied a thin layer of Fusion Decoupage Gel to the area on the drop front door where the paper was to be applied. I used wadded up cling wrap to smooth it, then went over it with a brayer roller to smooth it even more.
Unfortunately, my brayer was loose and I didn’t notice that, so it fell apart mid-roll. In one fell swoop the handle frame poked and scraped the wet and very tender decoupage paper and ripped it!

SHOOT!
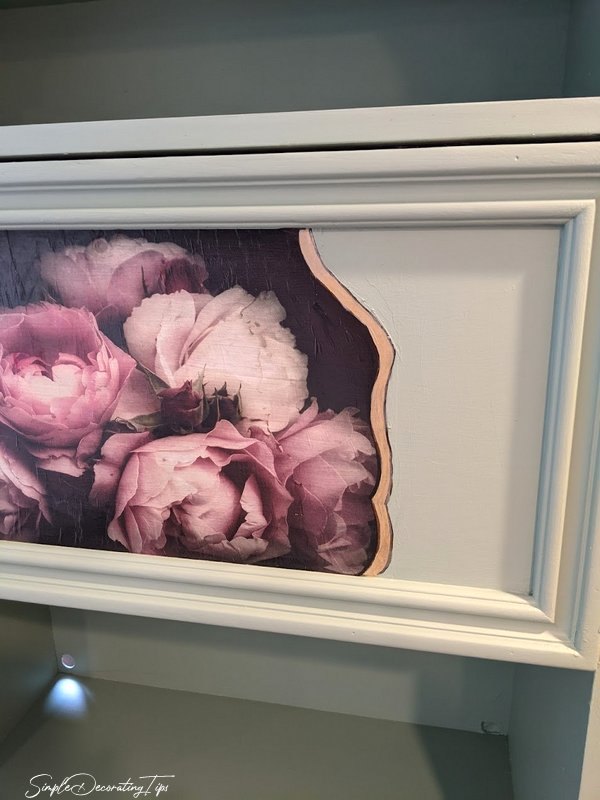
I reapplied some gel and ever so carefully pulled the paper back up to try to cover the area with it. By this point the paper was quite saturated and super tender so I didn’t want to tug it too hard to try to get the wrinkles out. Instead, I left it and would patch in the telltale white with some custom mixed pink paint.
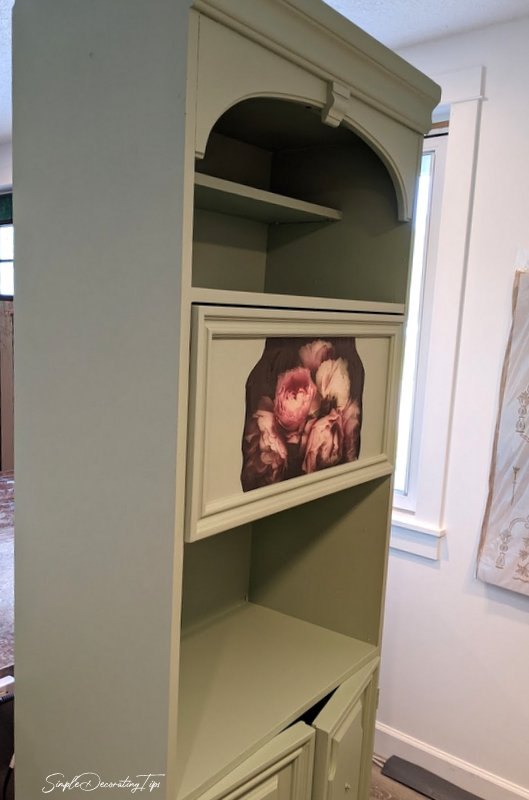
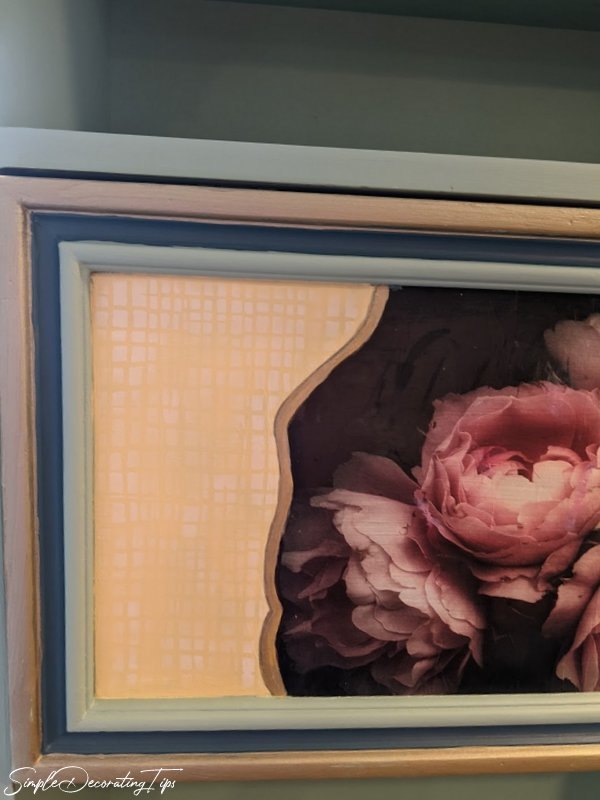
After I got the full piece of decoupage paper on, instead of painting out the sides to blend with the paper, which I’ve done HERE and HERE, I decided to cut the sides in a scalloped arch, emphasizing the paper design as a separate entity.
ACCENTS AND DETAILS:
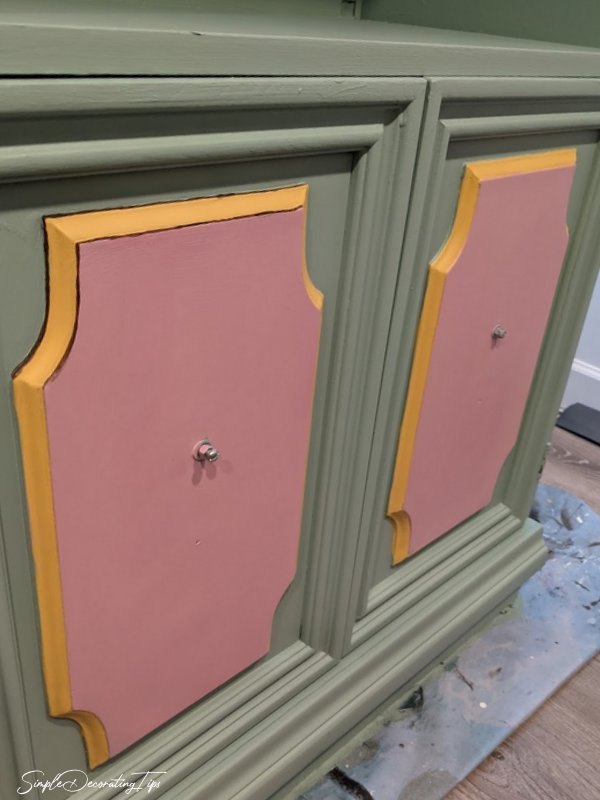
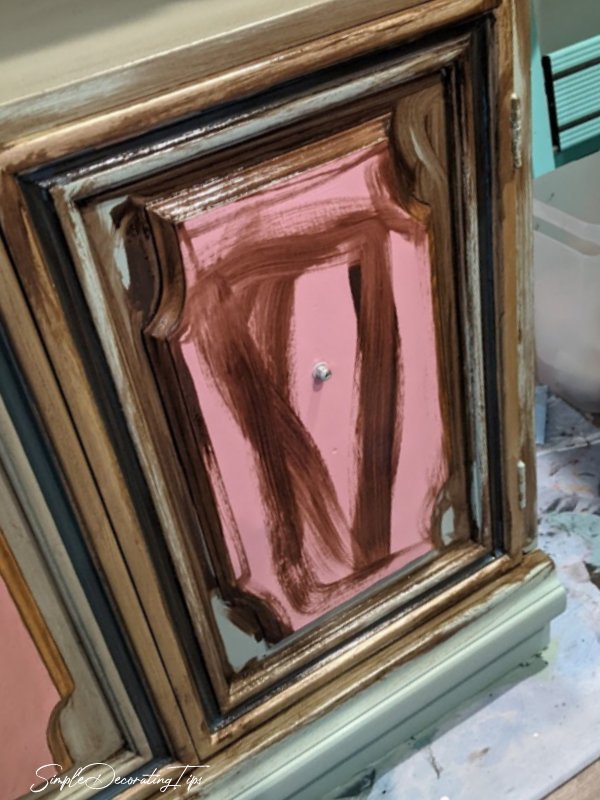
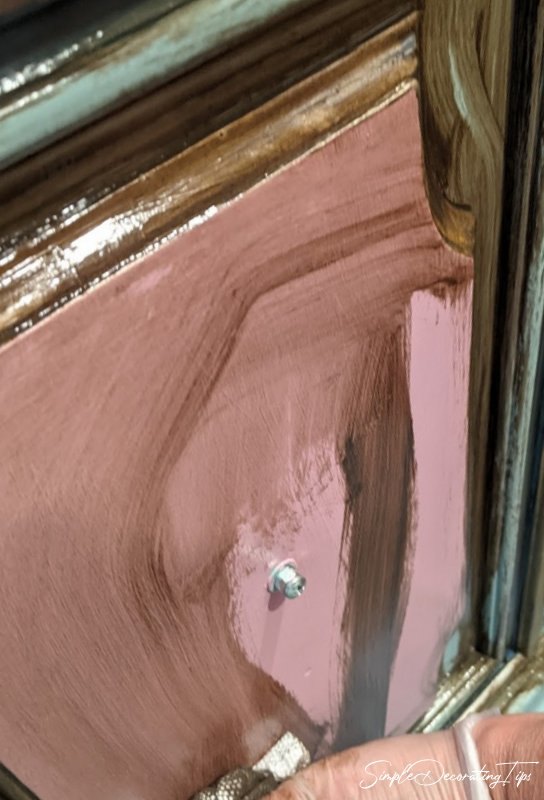
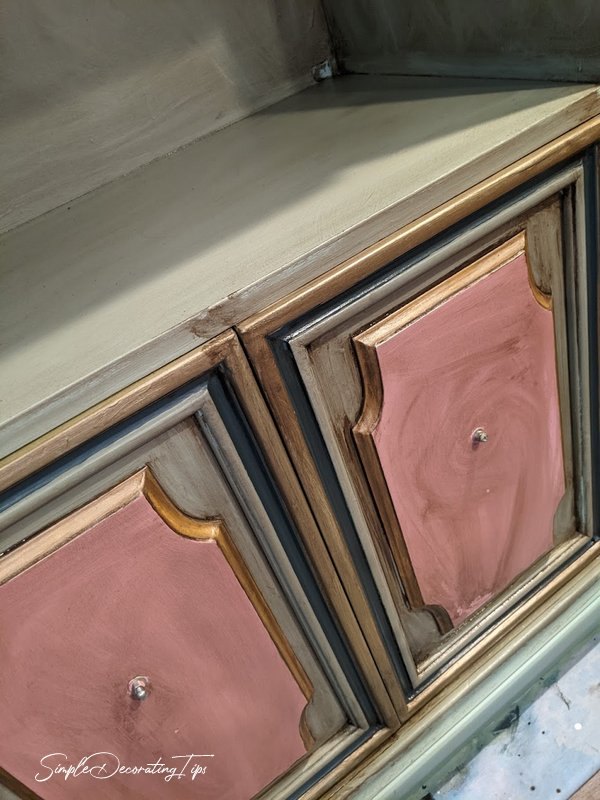
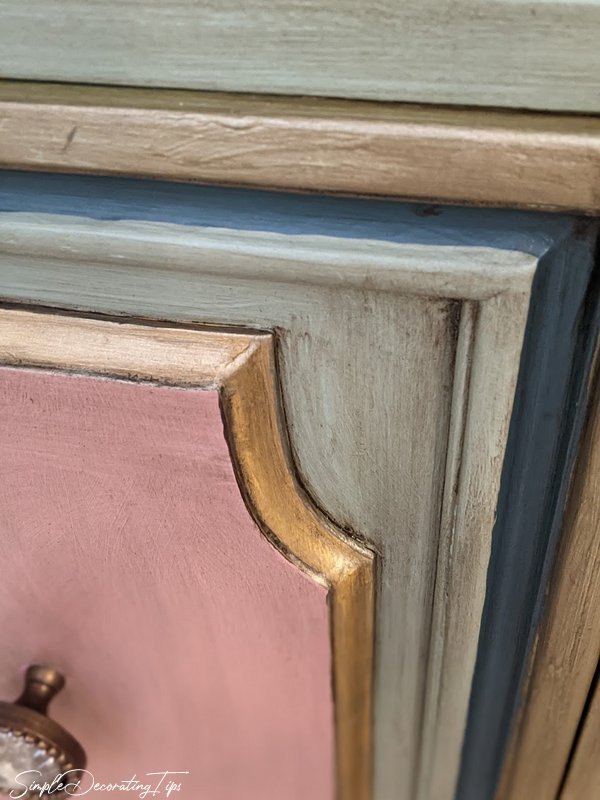
To coordinate with the tone of pink in the decoupage paper, I mixed 2 colors of Fusion Mineral Paint together. About 3 parts of Rose Water and 1 part Cranberry gave me this lovely pink shade.
On the inspiration piece, all the edges are painted with a vintage gold color. When painting Fusion metallic paints, it’s best to use a base color under the metallics similar because the metallics tend to be somewhat transparent. I used the color ‘Little Star’ for the base color with the edges in ‘Chocolate’ for under the ‘Vintage Gold’ metallic top coat.
Once the ‘Vintage Gold’ metallic paint was on and dry, I went back over the edges with another top layer of ‘Chocolate’
After each addition, I would step back and try to see what color or treatment the cabinet needed.
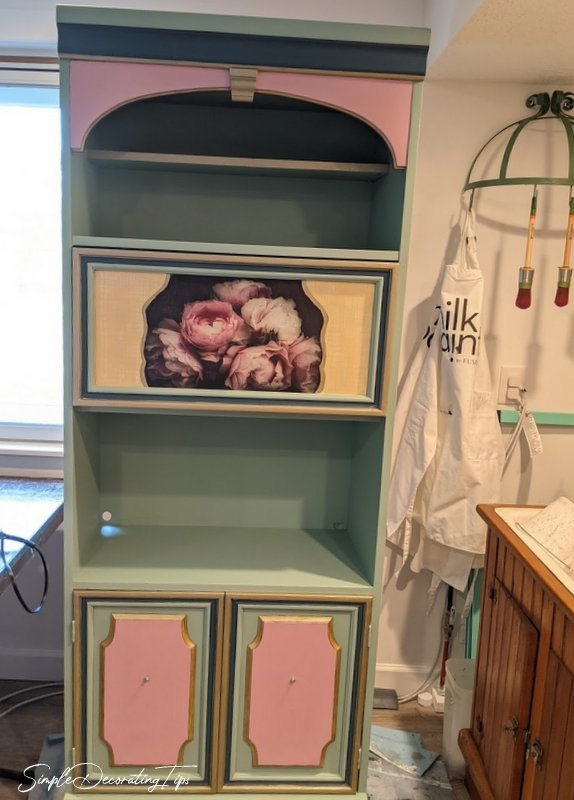
For the sides of the inset panel of the drop front flaking the decoupaged flowers, I started with a base color of ‘Prairie Sunset’ followed with a woven pattern stencil done in ‘Buttermilk Cream’, giving that panel a look of texture like woven sisal.
Taking more direction from the blue ribbons on the inspiration piece, I painted a strip of ‘Seaside’ color on the inset frames of the doors and a bit on top.
GLAZING:

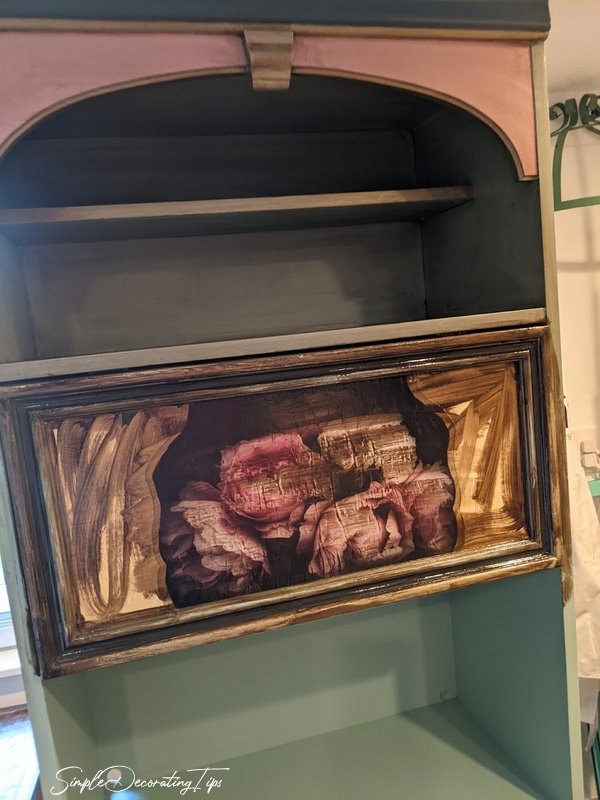
After the paint thoroughly dried, overnight is best, it was time to glaze. I loved the overall design and color choices of the piece, but it definitely looked too ‘new’ and ‘fresh’ to coordinate with the vintage style of the inspiration piece. Glazing it would add that layer of ‘faux grime’ to create an aged look. It would also tone down the bright fresh shades of colors.
Fusion makes a product people in ‘the Fusion know’ refer to as ‘SFO’. It is a stain and finishing oil. Fusion Stain and Finishing Oil is a very intensely pigmented stain finish, so a little goes a long way. It is also oil based, thus the gloves and open window!
To use SFO as a glaze, I simply, brushed it onto the piece, working one section at a time.
Nothing fancy about getting it applied to the piece. Just needed to get some up there to wipe it around with a rag.
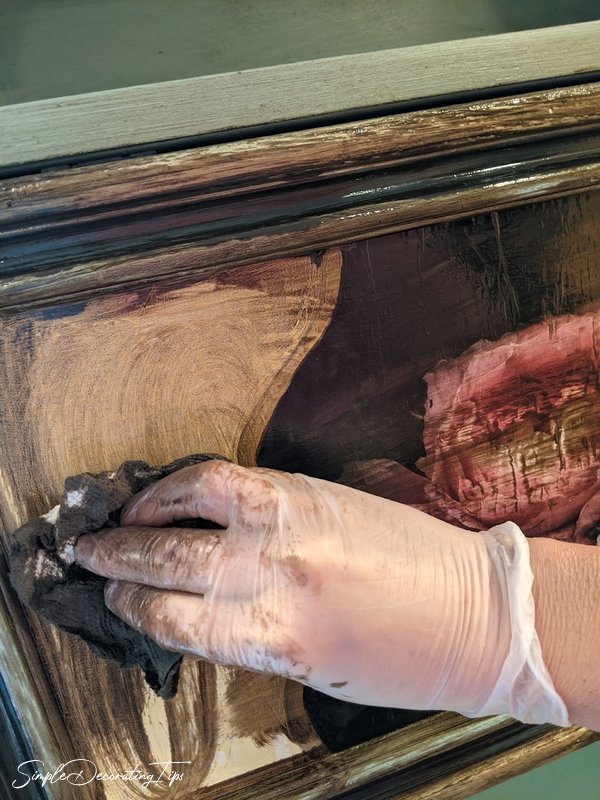
It wipes easy and as I started working with it, the amount of pigment in the finish was very apparent… a little goes a long way!
I continued to wipe it back off, changing out the rag with a fresh one as the old one became saturated with finish, until I had the amount of ‘glaze’ on the piece that I felt I wanted.
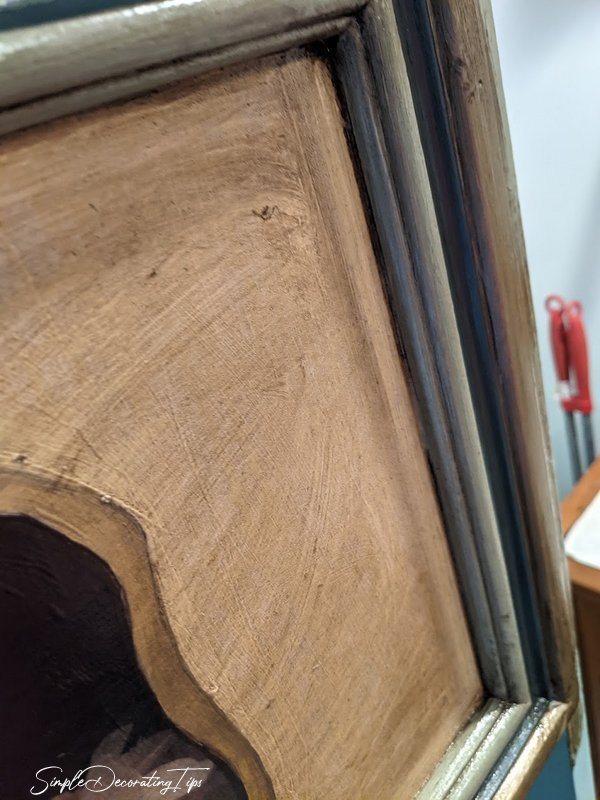
Repeating this technique on each section at a time. Apply, (A/K/A ‘slop’) the SFO on the section.
Wipe it around with a rag, removing desired amount. Leaving an aged finish on top of the paint.
The great thing about using SFO for a glaze is it’s a super durable finish. In fact Fusion SFO is so durable, it’s recommended for floors!

The ripped part of the flower paper, was highlighted as the SFO was wiped into the depressions, but I decided I actually liked the way that looked. It totally coordinates with the other dark lines in the paper.
Couple of tips using a product like SFO… it is oil based and good ventilation is a must. All rags must be disposed of immediately according to directions on can. (If left in a clump as is, they can self-combust!) And finally, SFO can take a few days to dry… 30 days to fully cure. This cabinet was tacky for a couple days, so keep that in mind when you’re starting your project… have it somewhere it can sit undisturbed for a while.
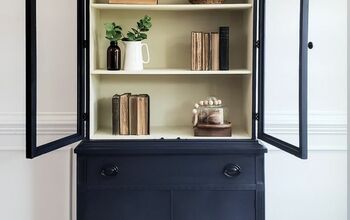
THE FINISHED ROMANTIC STYLE CABINET RE-DO:

It was a blast to re-do! I just love seeing the results of what some paint and DIY products can make to a found $25 piece of furniture!
The very subtle stenciled woven texture of the drop front door next to the the gold framed decoupage paper was a bit of step-by-step process to figure out what I was going to create.
On the doors, the yellow base color and chocolate add to the metallic Vintage Gold top coat.
Comparing the inspiration piece to the newly redone piece:
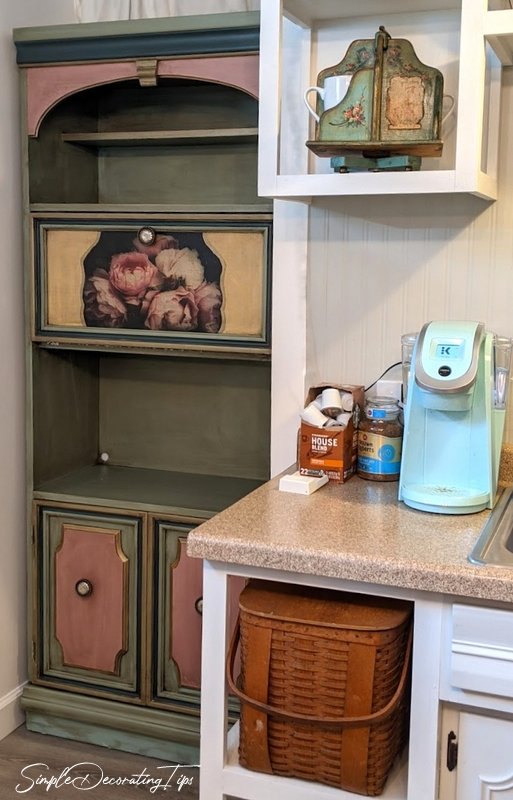
It works, right?! I love that it’s not a perfect match, but for sure gives a nod to the inspiration piece and compliments it well.
If you want the complete shopping list for this project, with each paint color etc. pop over to my DIY blog HERE and scroll to the bottom of the post for that list.


Comments
Join the conversation
-
Gorgeous!!!
-
What IS that "style", since I'm always drawn to it?


Frequently asked questions
Have a question about this project?
Just Beautiful !!!! It’s not my style either…but I could make it work !!