


Hanging Lights Made Using Metal Fruit Baskets

I love my apartment, but there were places where I wished there were more light fixtures. I solved this issue by picking up some metal fruit baskets from Dollarama and pairing them with remote controlled puck lights and metal plant hangers from Dollar Tree.
Before I go further, credit where credit is due! I got the basic idea for this idea from a fellow Hometalker, Melanie. Click the link to see the cute outdoor lights she made!
Read on to see my take on hanging lights made using metal fruit baskets.
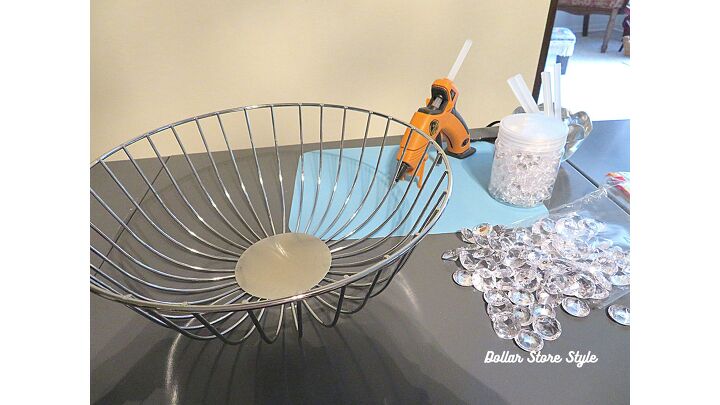
Supplies Used:
- metal fruit basket in silver (Dollarama)
- metal plant pot hanger (Dollar Tree)
- 2 packages 3/4-inch clear acrylic gems (Dollar Tree)
- 1 jar of 1/2-inch clear acrylic gems (Dollarama)
- spray paint
- remote control puck light (Dollarama or Amazon)
- hot glue
These metal fruit baskets come in three colours; gold, rose gold and silver. Because this light was going to be in proximity to another light fixture that was silver and hung with clear acrylic gems, I chose the silver basket for this project.
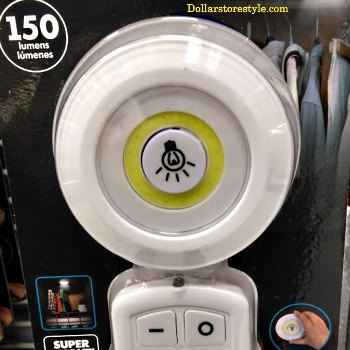
This is the remote controlled puck light I used for the hanging lights made using metal fruit baskets . This one came from Dollarama, but similar ones are available on Amazon.
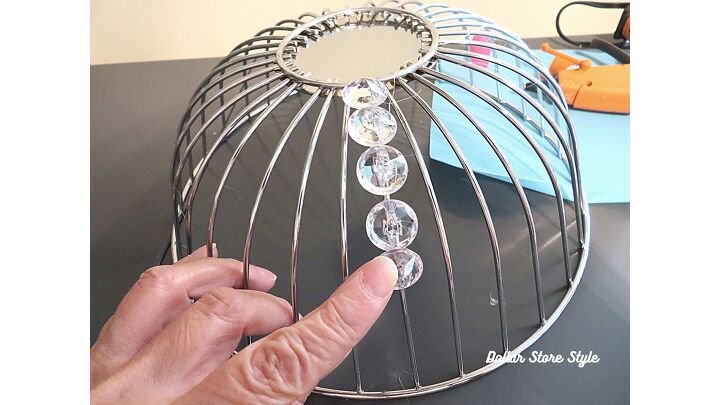
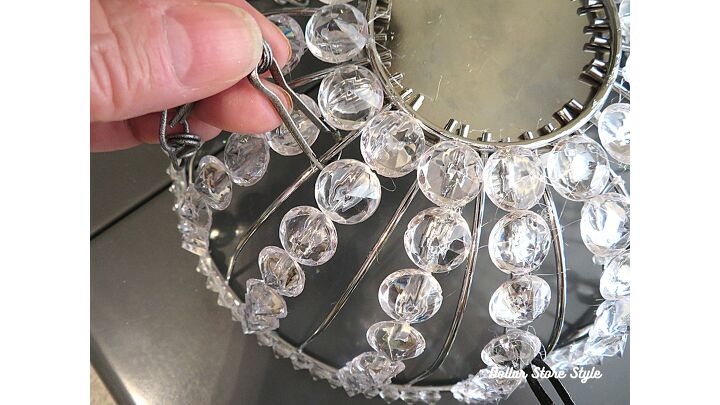
When hot gluing the gems to the basket, make sure your glue gun is set on “high” temperature. I forgot and ended up having to re-glue some of the gems. These gems have a flat side as well as a faceted one, which makes it easy to glue them onto the basket. I started out thinking that I was going to add gems to every line on the basket but soon realized that wouldn’t be possible or even necessary.
Each of 16 sections held 8 gems each. It took about an hour to do.
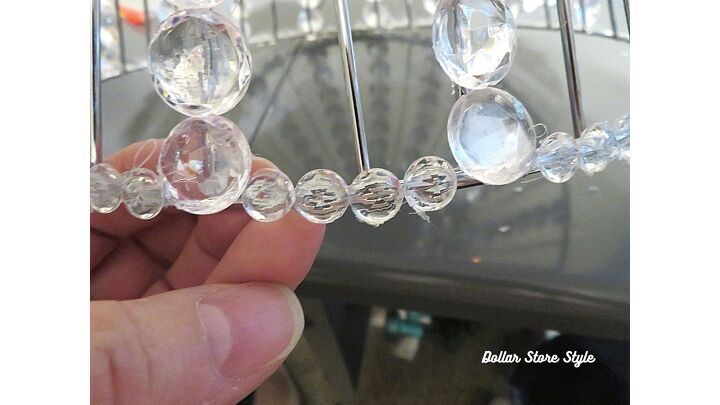
Next, I glued the 1/2-inch acrylic gems to the bottom rim of my light fixture. This took another 1/2 hour. I don’t know how many of these I used, but I didn’t use even a quarter of the amount in the jar they came in.
I spray painted the plant pot hanger silver and attached each of the three hooks near the top on the bare sections. If you count ten sections over from each hook, the light should hang more or less evenly. By placing the hooks near the top of the light, rather that on the bottom rim, it hangs down a bit lower over my dining room table.
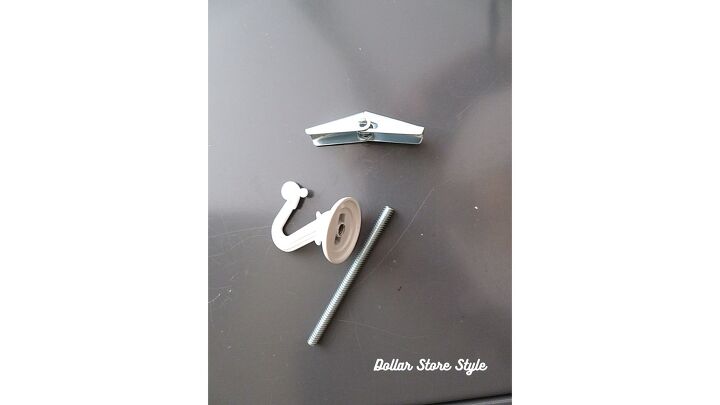
Because the acrylic gems made my light heavier than it would normally be, I wanted to be sure I hung it securely from the ceiling. I got a package of two hooks with butterfly anchors for under five bucks at my local hardware store.
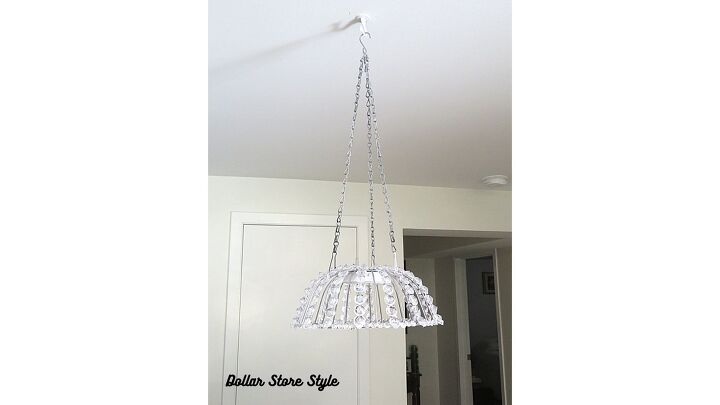
Here’s what my new light fixture looks like after I hung it up.

It’s hard to see in this picture, but when it’s lit up, the gems sparkle, as you would expect them to. I’m really quite pleased with how this project turned out!
You can see how I made two more hanging lights for my craft area by clicking on the link below.
***
If you enjoyed this article, please sign up to my newsletter. Every month you’ll get a new article, tips, my pick for a Find of the Month, and much more.
Resources for this project:
See all materials


Comments
Join the conversation
-
Very cute. I need something like this.Thanks
-
Hi Patty. Glad you find the ìdea useful.


Frequently asked questions
Have a question about this project?
Cute inexpensive idea. Was it only the chains you used from the hanging planter? For $1.25 at Dollar Tree it would be cheap enough to do.
I happen to have leftover chain and will probably just repurpose that, especially since it is August & Dollar Tree has been out of hanging baskets.
This is gorgeous! I can't believe your ingenuity; you should be proud.
I also like the silver bars in between the crystal-covered ones. It gives a bit of organization to the glitz.
Have you done much dusting on this? Do the crystals stay on securely?