


DIY Pantry

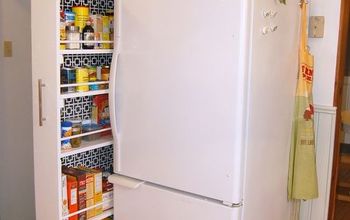
Hello there! I recently turned our cleaning closet that we were not utilizing very well into our pantry, which our small kitchen does not have!
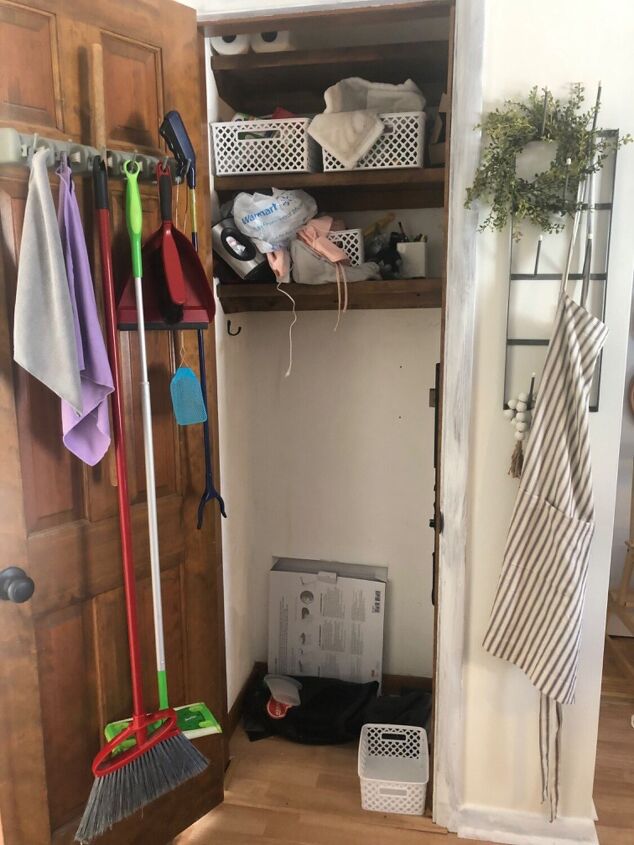
See what I mean? I also had our vacuum and steam mop in here, but moved it before the photo. This closet is located in our dining room, so it's the perfect place for a pantry too! I got rid of most everything that was in this closet before, except for a few things, which I relocated to our now dual purpose coat/cleaning closet.
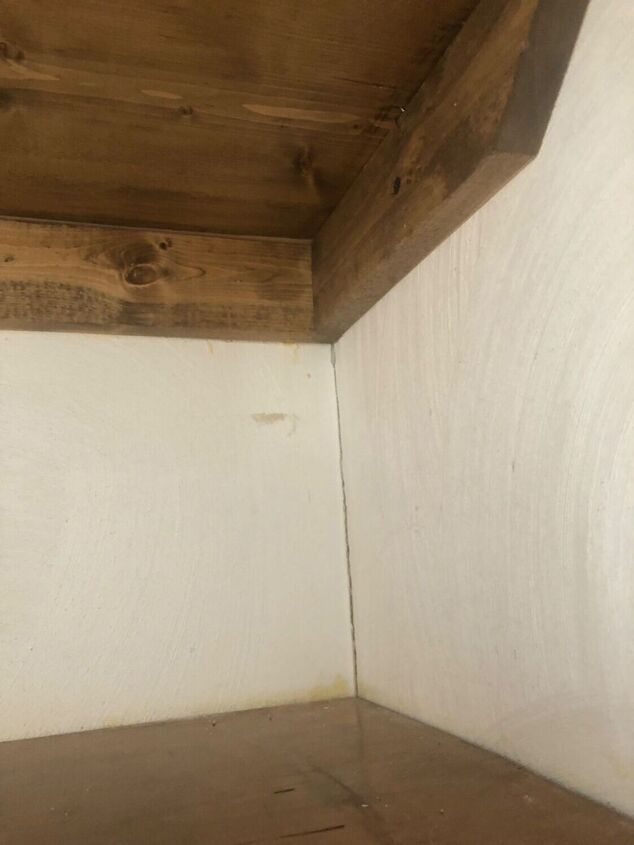
The closets in our home all have this swirl texture on the walls, which has started to crack in the corners over time. So, the first thing I did was empty the closet and caulk all the cracks.

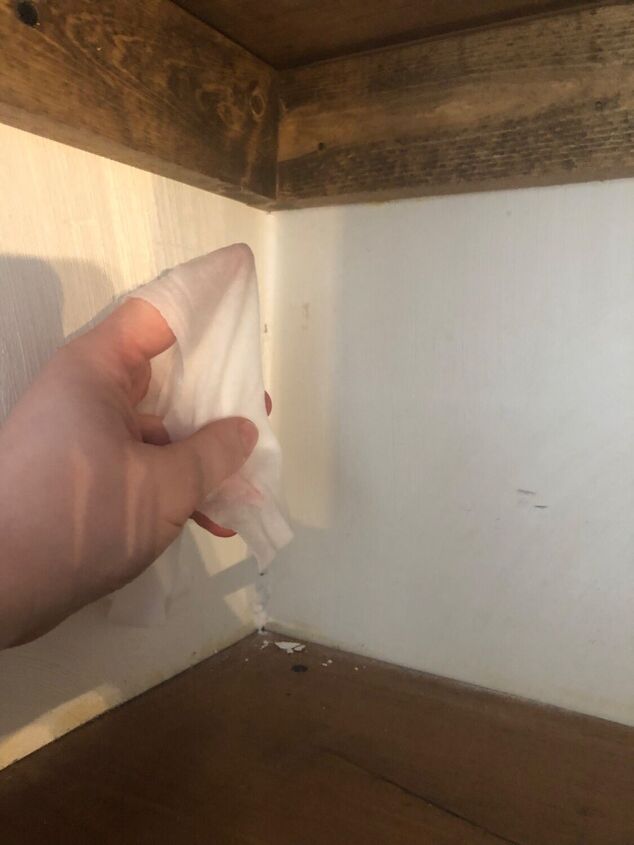
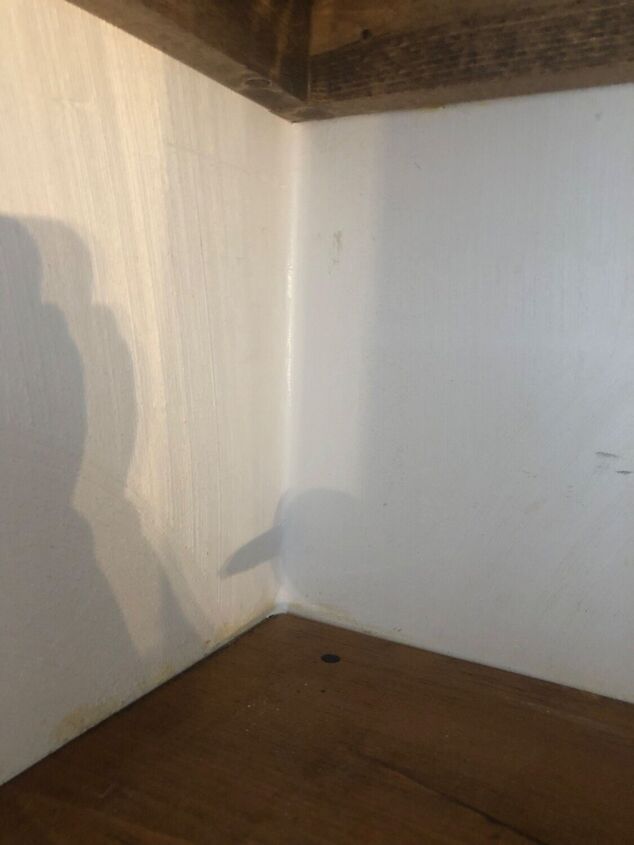
For anyone who is intimidated by caulk, the easiest process I have found is to run your bead of caulk where you want it to go (shown above), then wrap a baby wipe over your index finger and go over the bead to smooth it out (shown below).
You could also wet your finger to keep the caulk from sticking to your finger, but the baby wipe is a little less messy.
So much better!
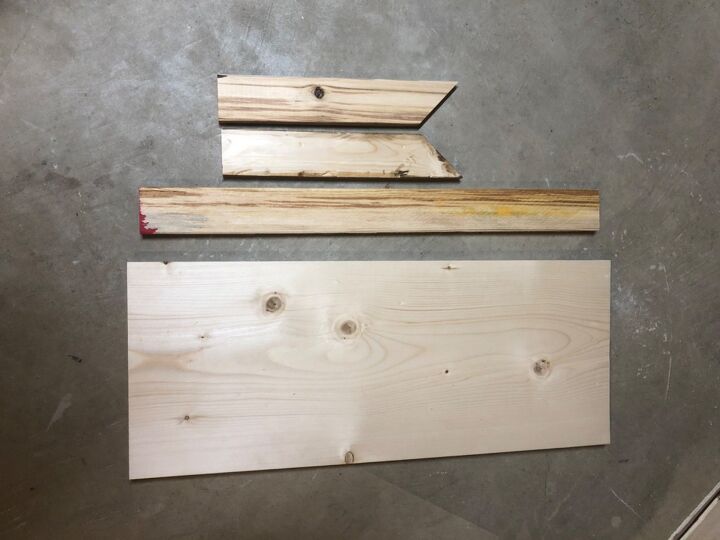
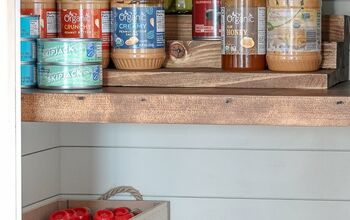
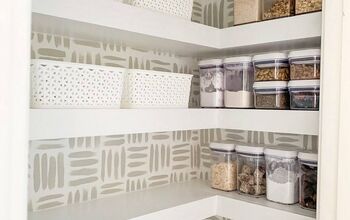
My next step was to add more shelves to my closet to turn it into a pantry. I mimicked the existing shelf design, which was 1x3s attached to the studs on the sides and back wall and then a 1x12 on top.
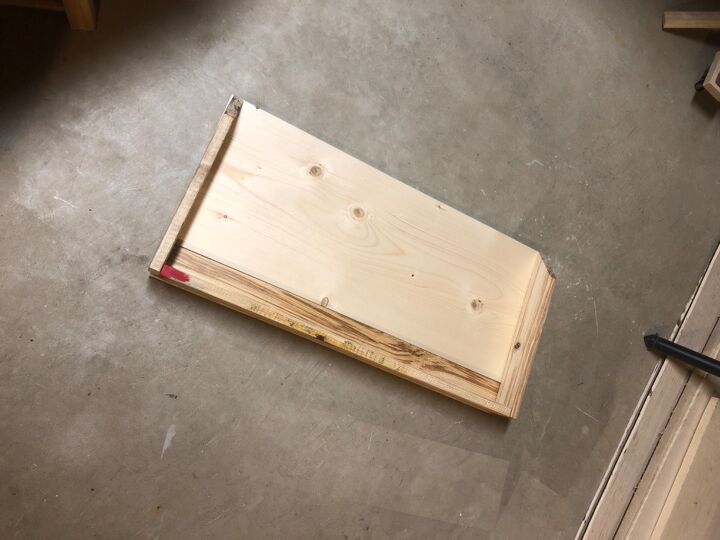
Then for the bottom shelf, I wanted it to be a little deeper than all the others so I could put my mixer on it. To do this, I added an extra 1x3 behind my 1x12.
To install the shelves, I used a stud finder and marked the studs on the walls. I attached the 1x3 support pieces to the walls where the studs were with 2" screws. Then I just set my 1x12 on top and secured it into place with a few brad nails from the top with my nail gun.
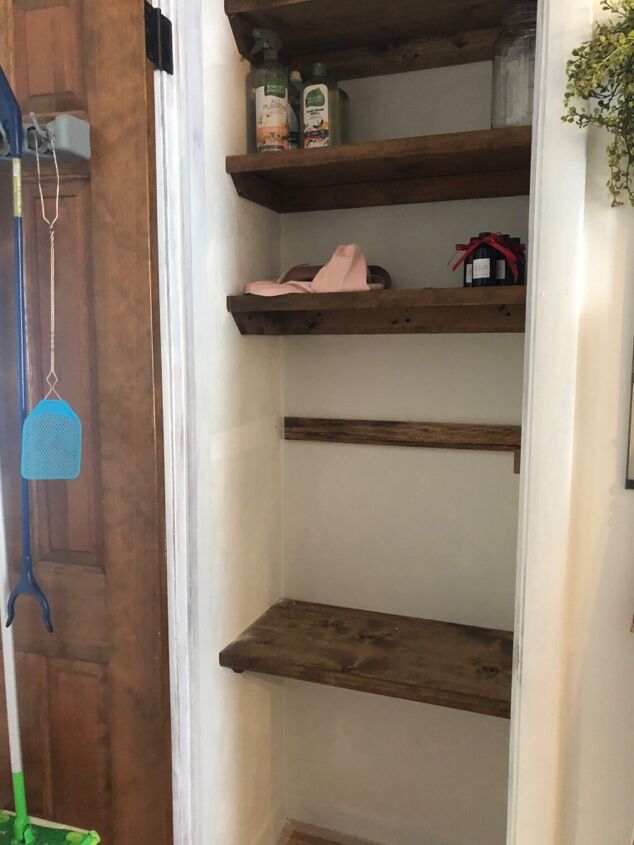
As you can see from the above photo, the front of the top 3 shelves have a small piece of trim on them. I was able to find the same type of trim at Lowe's to add to my new shelves as well. I also gave the whole inside of the closet and trim a fresh coat of the paint. Sherwin Williams Alabaster is my favorite white!
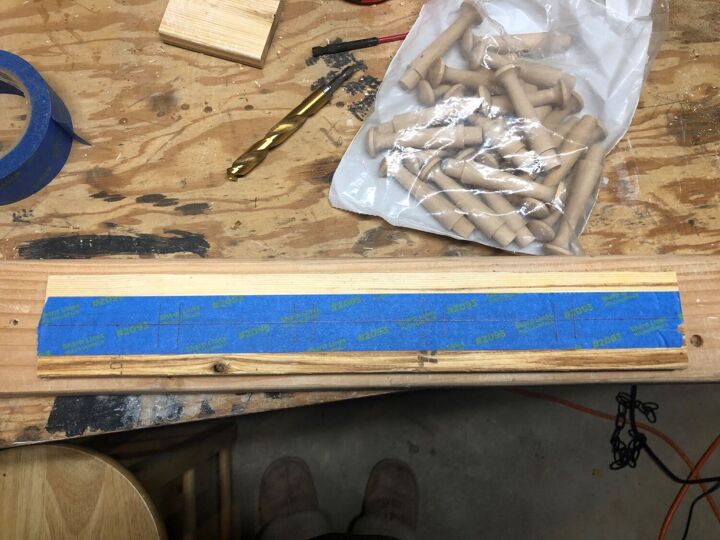
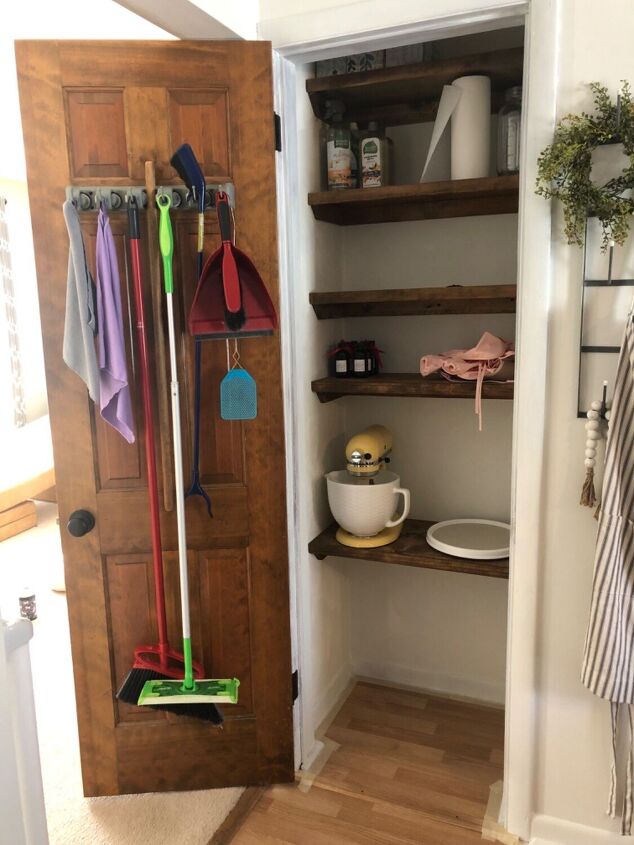
For the inside of the door, I made 2 peg racks with leftover pegs I had from a previous project. I used a 1x3 and cut it to the size I wanted, then marked out where I wanted my pegs to go.
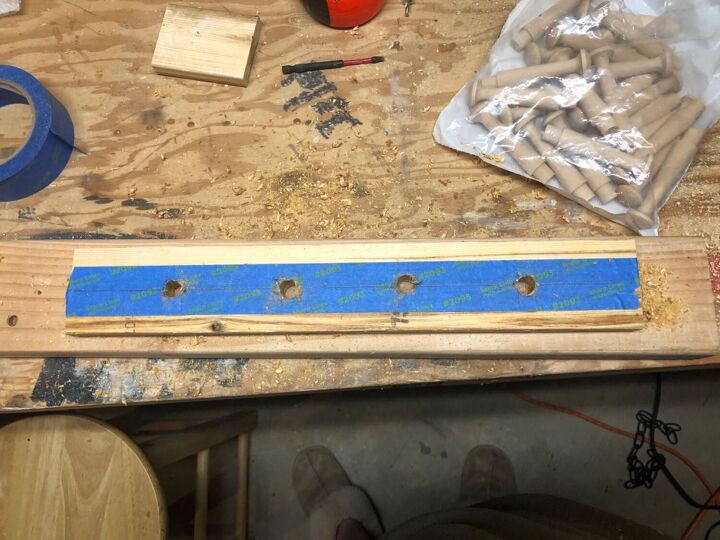
My pegs are 1/2", so I used a 1/2" drill bit to drill on each of my markings.

Then I gave the board a good sanding with 120 grit sand paper.
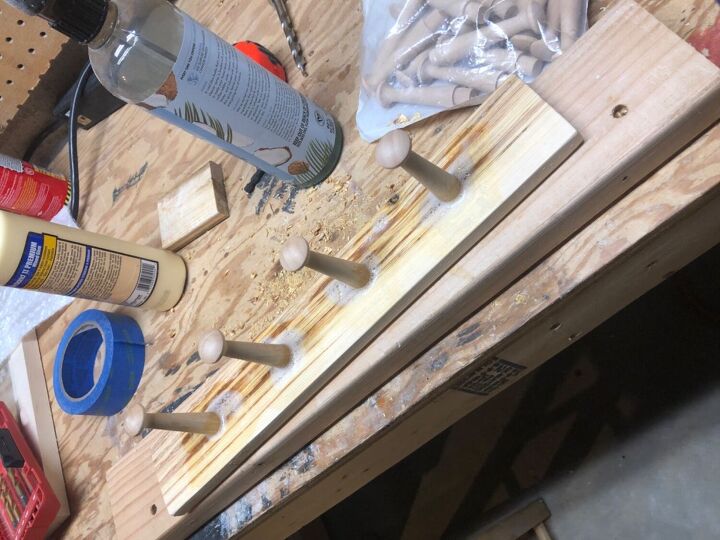
I put a little wood glue in each of the holes I drilled, followed by the pegs. To remove the excess glue, I just sprayed soapy water around each peg and wiped it down with a clean cloth.
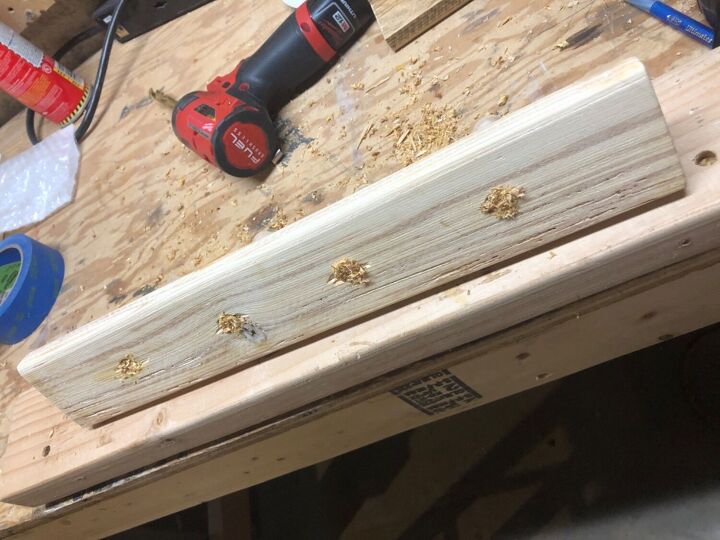
To avoid waiting for the wood glue to dry before I could move on, I used my wood shavings from drilling the holes to plug the holes in the back of the peg rack.
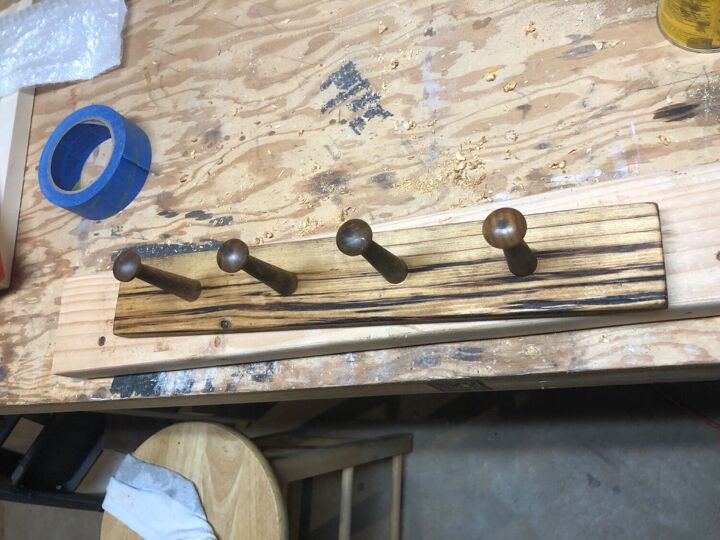
I stained the peg racks and new shelves Minwax Provincial, which is the closest color I could find to the existing shelves.
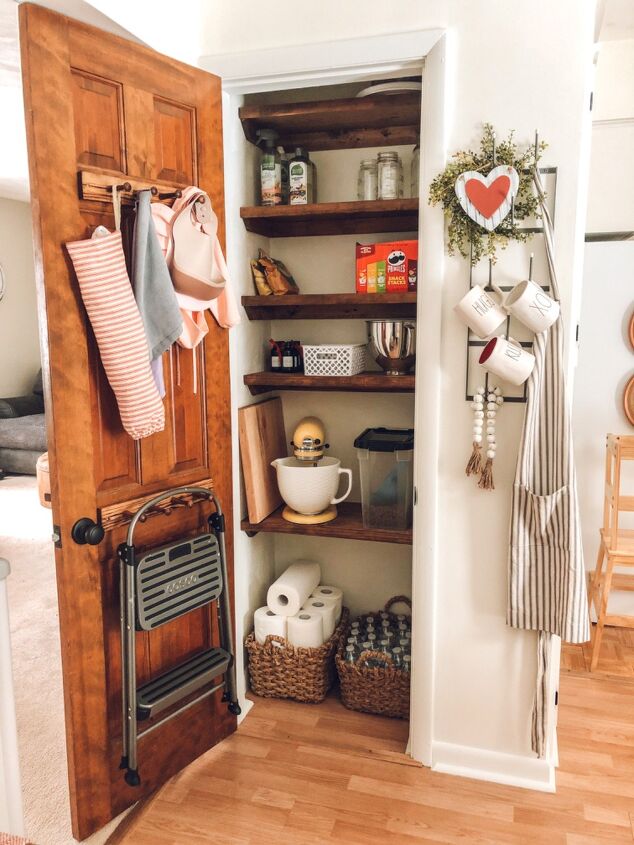
I'm still figuring out what to put in here, but I'm so excited to have this extra space for storage now! Follow me on Instagram to see more DIY projects!
Comments
Join the conversation
-
Looks great. Love the pegs to hold step stool i think its prettier than hooks. Tyfs
-
Thank you for sharing as I’m moving and without knowing yet where I’m going lol this give me great tips!


Frequently asked questions
Have a question about this project?