


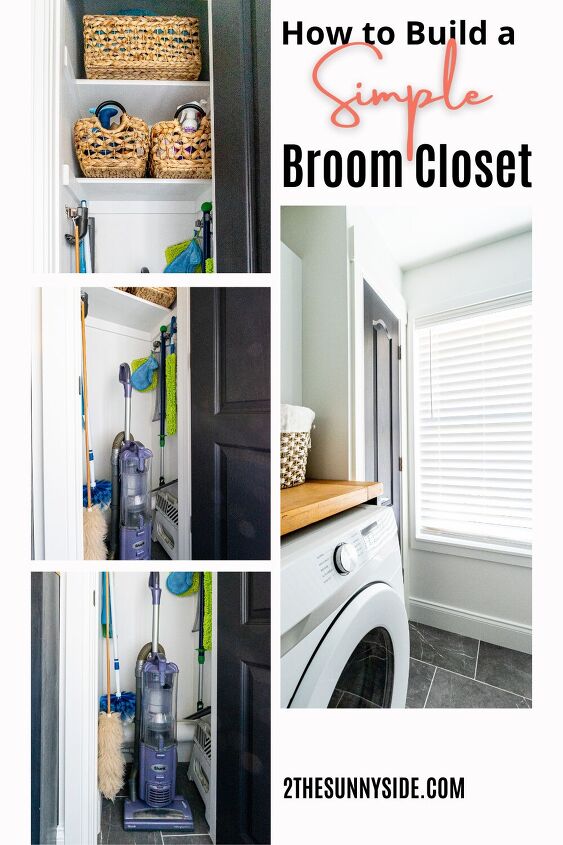
How to Make a Broom Closet in the Laundry Room
If you’re like me, you’re always looking for ideas to add organization and storage to your home.
It seems to me that many newer homes are lacking storage for brooms, mops, vacuums and cleaning supplies.
Many older homes seem to have a broom closet.
In fact, I remember my grandmother’s home having a small broom closet in her kitchen.
That’s exactly what my home was lacking, a utility or broom closet.
So when I started making plans to remodel my laundry room, I decided to add a small broom closet.
For years, I’ve had to keep my vacuum, sweeper, and mop in my pantry or coat closet.
Can you relate?
It’s not the ideal place for storing cleaning equipment and supplies.
It’s week 4 of the One Room challenge and this week we’ll share how we increased the functionality of my laundry room by adding a small broom closet.
Not only did we create a storage area for the broom, mop and vacuum, but we also added shelves for even more organization.
Scroll down and see how we did it.
Just as a reminder, you can easily navigate through each week of this Modern Cottage Laundry Room project.
- Week 1: 12 Ideas for Creating a Functional Laundry Room You’ll Love
- Week 2: Installing Tile: Practical Tips for the Beginner
- Week 3: How to Make a Simple Laundry Room Fold Table
- Week 4: You are here!
- Week 5: How to Update a Laundry Room Light Fixture
- Week 6: 8 Tips for Beginners: Installing a Simple Tile Backsplash
- Week 7: 14 Useful Laundry Room Organization Ideas You Need to See
- Week 8: The Best Laundry Room Makeover on a Budget
While the standard height of a broom is about 65″, a general good height for a broom closet is 72″, with a width and depth of 16″
Depending on where you locate your broom closet, I think it’s a good idea to make it as large as possible.
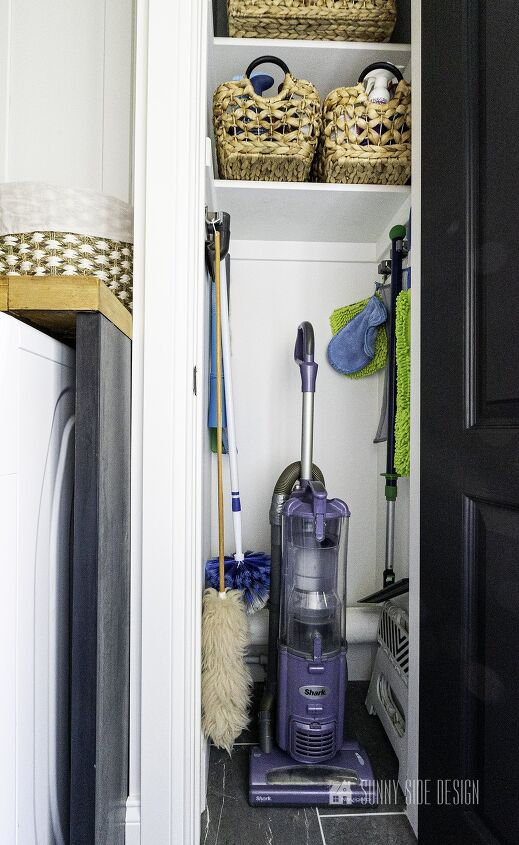
In our situation, we are using an unused corner of my laundry room.
With our allotted space we were able to make a broom closet that’s 22″ wide, 18″ deep and 8′ tall.
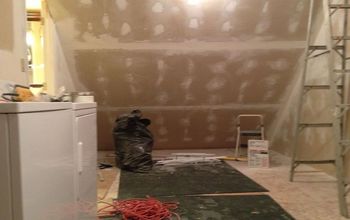
At the far end of my laundry room, I had an upper and lower cabinet with a countertop.
While I could use the cupboards for storage, I felt that a broom closet would be far more functional for me.
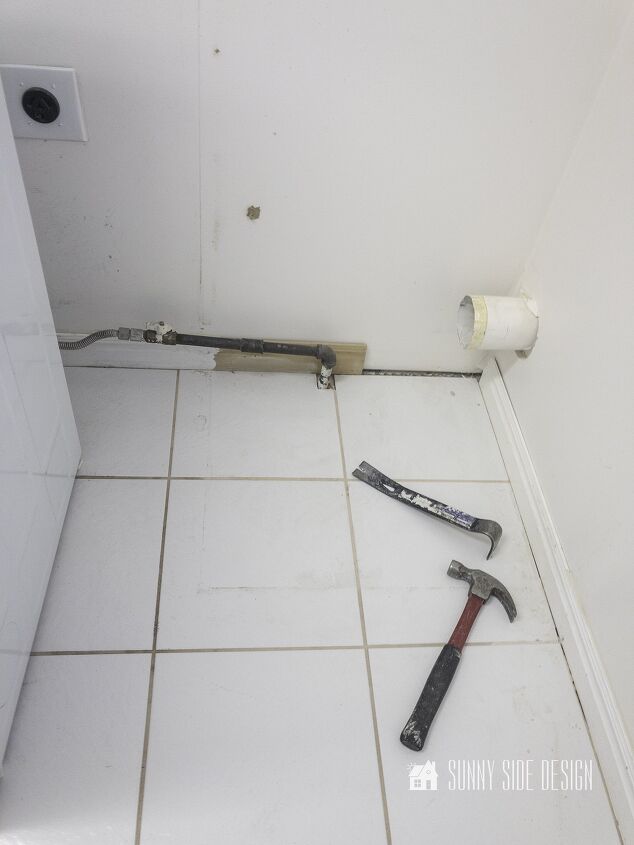
First on the agenda was to remove the cabinets.
In addition, we also removed the baseboards and tile preparing the space for my new broom closet.
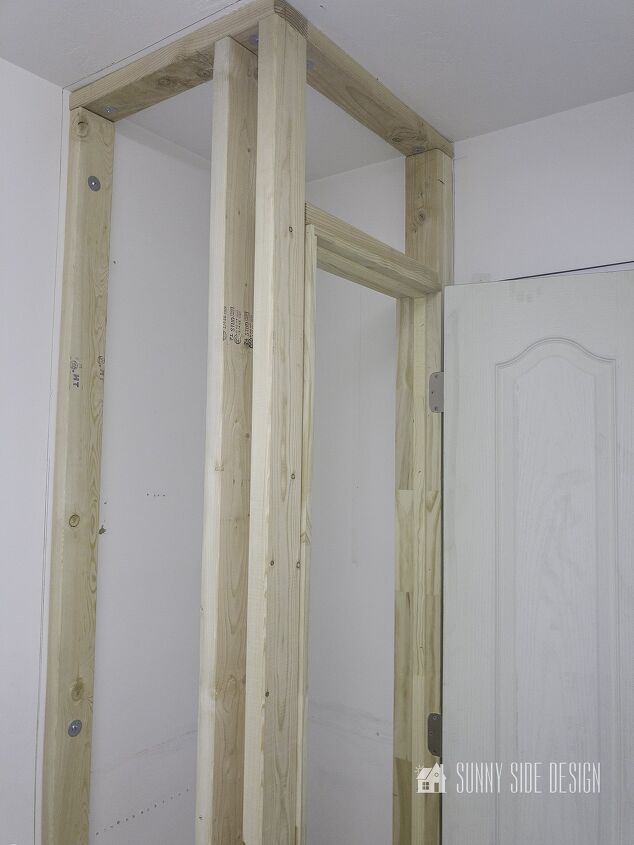
Once the space is all cleared, you can begin framing out the utility closet.
First, we marked the wall with a pencil line showing the location of the studs.
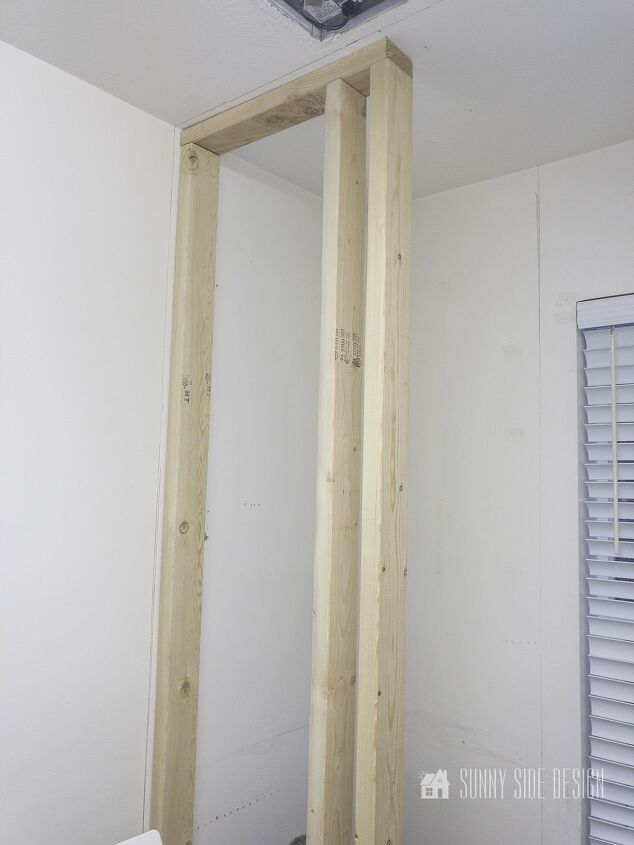
We then cut the header and footer pieces the length of the wall.
Then cut studs to fit the heights of the wall.
The wall is put together flat on the floor by placing nails through the header and footer pieces into each stud.
Once the wall is built it is lifted, aligning the wall with the pencil markings.
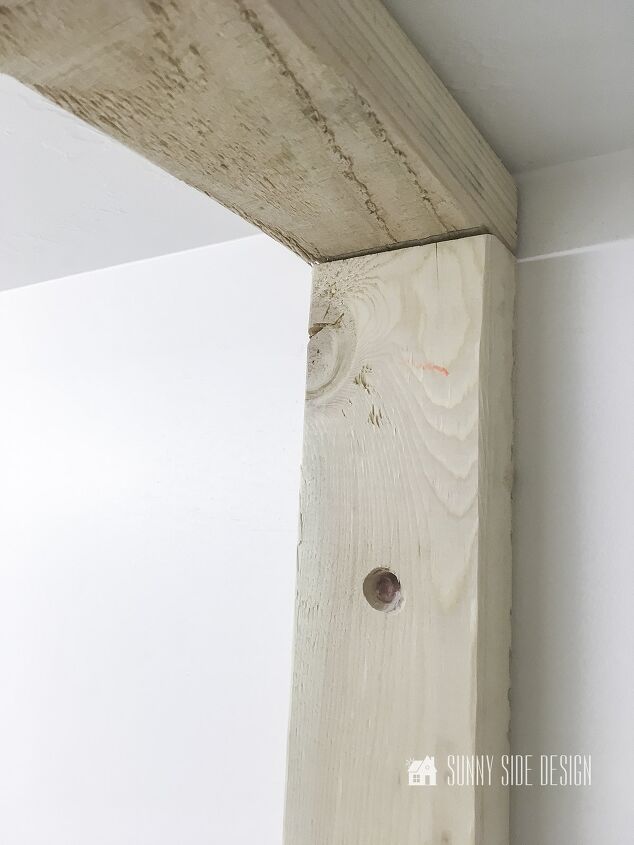
At this time, we are ready to secure the studs to the existing wall.
Usually a wall like this is secured into a stud.
But because we are adding a wall to an existing room, we did not have a stud at the location of our wall.
Therefore we will be securing our stud to the existing wall with mollies.
First we drilled a hole into the 2×4 stud and into the wall.
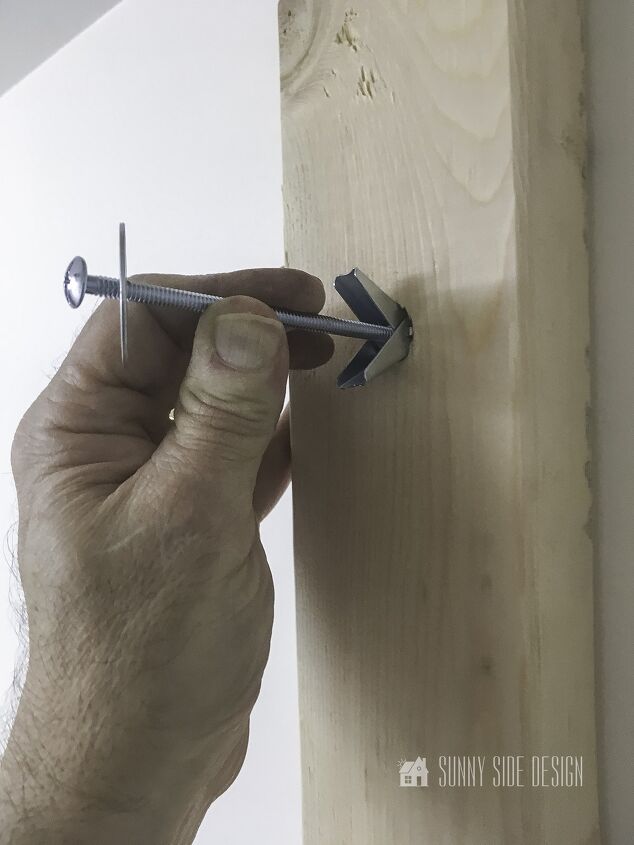
Then the molly or wall anchor along with a washer is placed into the hole.
Using a screwdriver tighten the bolt until snug and secure.
We placed 3 wall anchors along the stud as well as 4 wall anchors along the header boards.
In addition, we purchased a pre-hung door and framed it into position as well.
Also we were able to secure the footer section to the floor with screws.
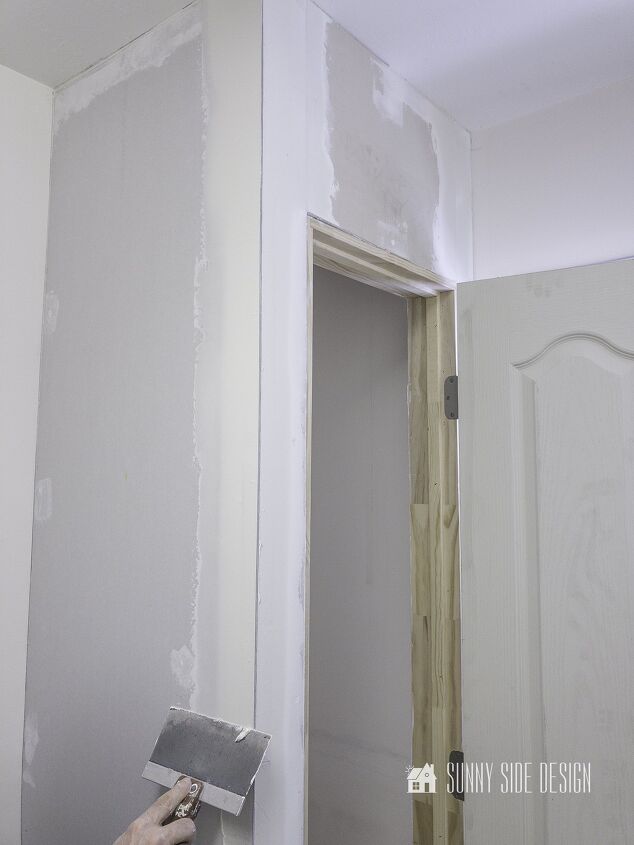
Now that the framing is complete, you are ready to install the drywall and mud the corners and screws.
The drywall mud is applied in a series of layers.
It requires a lot of patience.
You smooth it on, let it dry, sand and repeat until you have a smooth wall finish.
Next install the door casings and baseboards.
Then caulk the seams and fill in the nail holes with putty.
Finally sand until smooth.
Now you’re ready to paint.
Apply one coat of primer and two coats of paint.
As a rule I like to paint a small area like a closet before I install the shelves.
It just makes the entire process easier than trying to fit yourself into a small and confined area to get the job done.
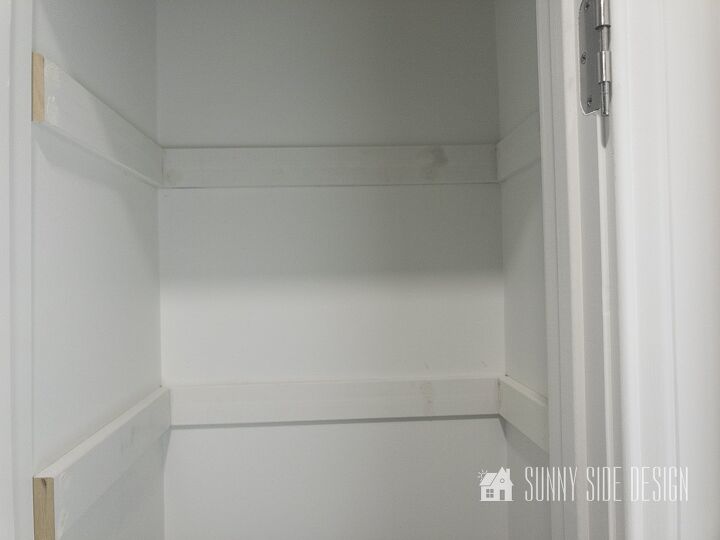
Now it’s time to install the cleats for the shelves.
First determine the location for your shelves.
I first marked mine with a pencil and used a level to make sure they were the same height on each of the 3 walls.
Then cut the wood for the cleats to the desired length for each wall.
Next find the studs in the wall and secure the cleats to the wall at each stud.
Finally, fill the nail holes with putty, caulk the seams and paint.
Once again, I think it’s easier to paint the cleats before the shelf is secure into position.
In fact, I like to cut the shelf to length and prime and paint it before I install it.
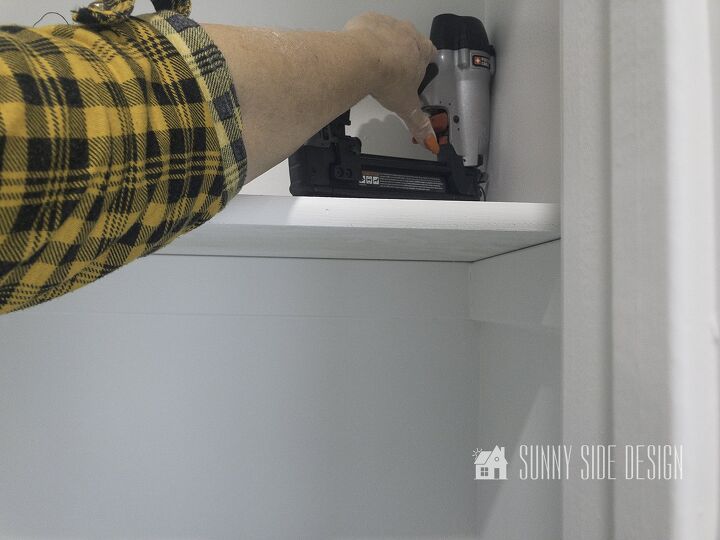
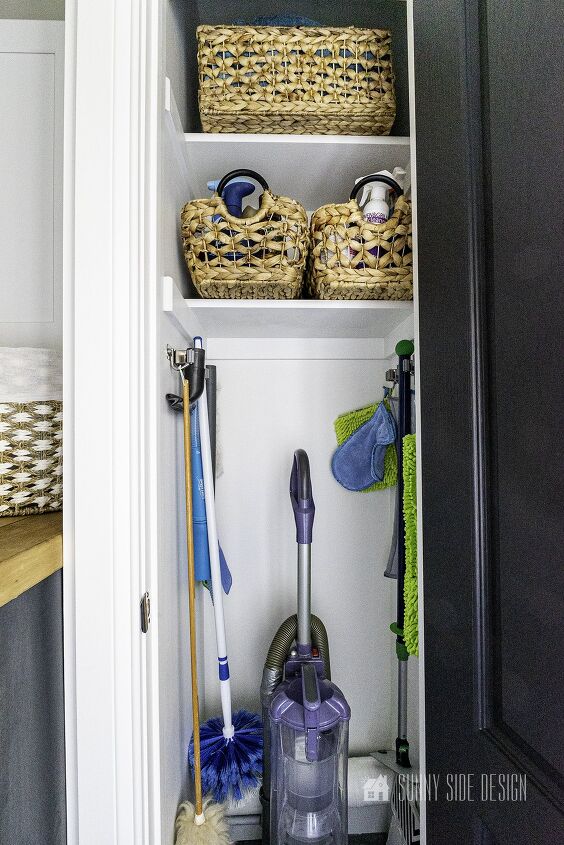
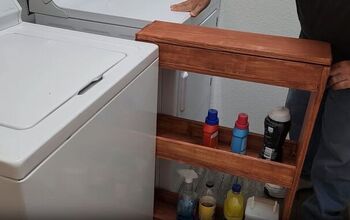
It’s now time to place the shelves on top of the cleat and secure with the brad nailer to the cleat.
Note: Place the lower shelf in first and secure into place. Then add the next shelf that will go on top. This will make it easier to fit the nail gun into a tight space.
Believe me I learned that out the hard way.
Finally caulk around the edges of the shelves, fill in the nail holes with putty and follow up with paint.
Let’s stay connected! Follow us on social media!
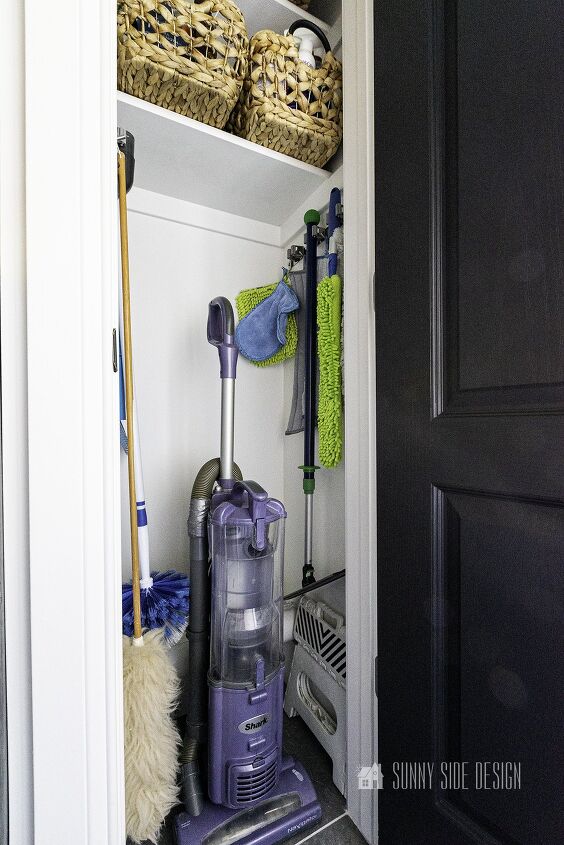
Add any remaining hangers or hooks to make your broom closet more functional.
Then sit back and enjoy all of that amazing organization.
That completes week 4 of the One Room Challenge.
I am loving the way my laundry room is coming together.
Most of all I am loving all of this added storage and organization!
Of course, you will find more amazing ideas from other bloggers participating in the One Room Challenge.
Click on the link and get inspired!

If you’re new here, WELCOME! We love having new readers and friends!
You can learn more about us here.
Let’s stay connected! Subscribe to our free newsletter so you don’t miss any inspiration for your home.
Please PIN and save for later, and share with your friends! Sharing helps grow our following!
Thanks for stopping by and as always here at Sunny Side Design
WE HOPE TO BRING YOUR HOME TO THE SUNNY SIDE OF THE STREET!
Be sure to follow us on Pinterest for even more home decor and DIY ideas.
To see what we are working on before it’s on our blog, follow us on Instagram.
You can also find our video tutorials on our YouTube channel.


Comments
Join the conversation
-
The workmanship is very professionally done 💕
-
Thank you. I love this additional storage.


Frequently asked questions
Have a question about this project?
Did you change the floor tile too? Looks white in first photo and last it looks dark brown or black?