


DIY Lint Bin, Easy Dollar Tree Farmhouse Decor Craft
Don’t you just love this farmhouse lint bin? They are so many options that are both pretty and functional.
But then, I can’t help but say to myself…does a container for dryer lint really have to cost $26??
We are in week 3 of the $100 Room Challenge, and spending that much on a lint receptacle is just not in my plans!
I’m sure you can relate to seeing an item while shopping, and thinking…I could make that, right?
So today, I’m sharing my latest Dollar Tree DIY experiment with you!
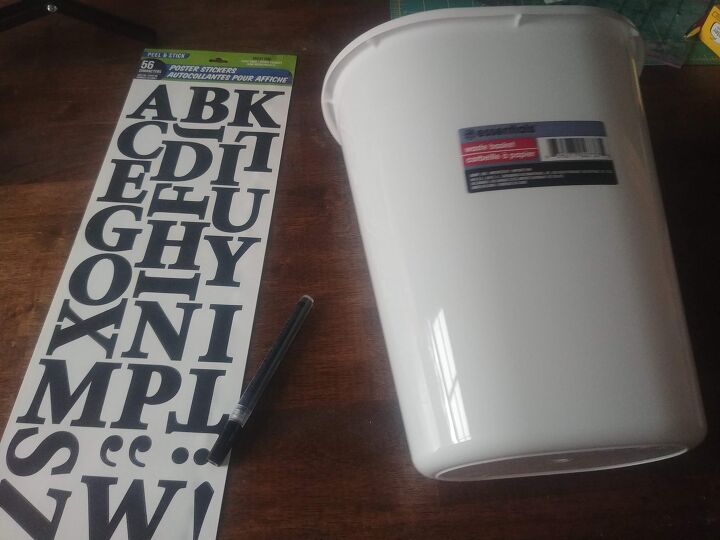
To complete this laundry room lint bin craft, you only need three items.
- A white Dollar Tree trash can
- black poster stickers (from Dollar Tree)
- black sharpie paint pen (or any paint pen designated for plastic)
I already had a black paint pen on hand from a set of pens for rock painting. (In retrospect, I think a sharpie paint pen would have went on more smoothly, so that is the paint pen I listed above.)
Friends, this project is SO simple… It might even win the award for the easiest project I have ever shared. (No complaints here!)
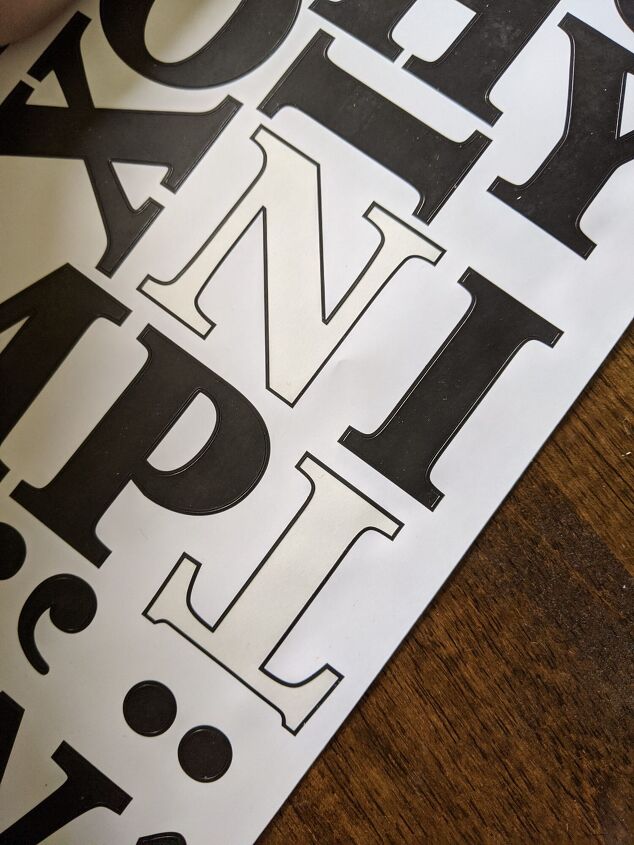
The first thing I did was remove the sticker. It came off easily with no residue.
Then, I just peeled the poster sticker letters L I N T and positioned them evenly on the front of the trashcan.
I made a quick one minute YouTube video showing the process! (Please excuse my terrible video skills, I am still learning!)
I considered that stenciling the letters, or tracing and coloring in with the paint pen might be an even better option. But, these stickers seem to do the job… and they really seem “stuck” on the trashcan!
Since the bin will rarely be handled aside from dumping lint every so often, I think these stickers will work perfectly.
Luckily, I can always stencil them later if need be! In fact, I think cutting and using the sticker backing outline of the letters would make a wonderful “stencil”.
The final step is to take the paint pen, and create a black band around the top of the trashcan. I started with a thin line, but kept adding until I was happy. For me, a nice bold line looked the best!
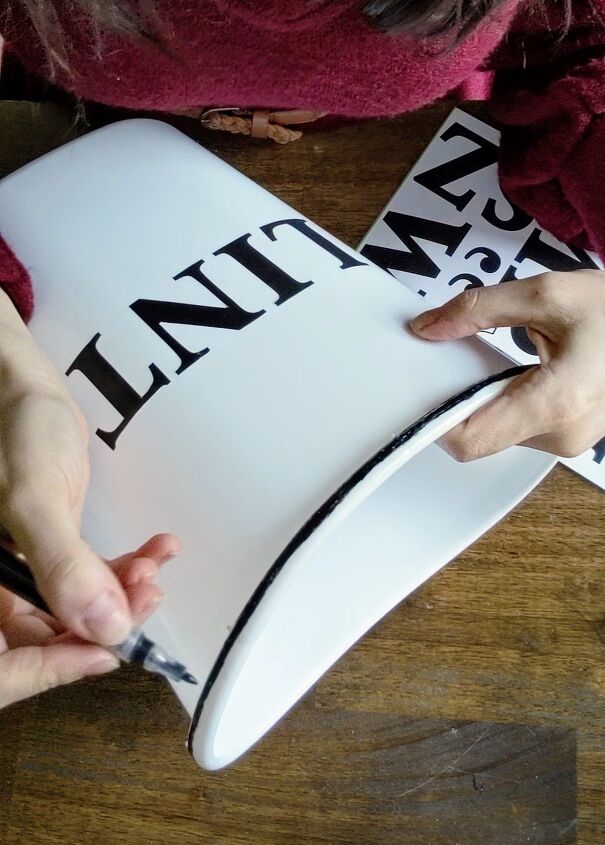
I think adding the simple rim along the top makes it look more farmhouse vintage style, and hopefully a little less plastic!
Because the trashcan has a lip around the top, hanging it is simple. The trashcan (and the lint) are super lightweight, so you could hang it with command hooks, small nails, or even a couple thumb tacs!
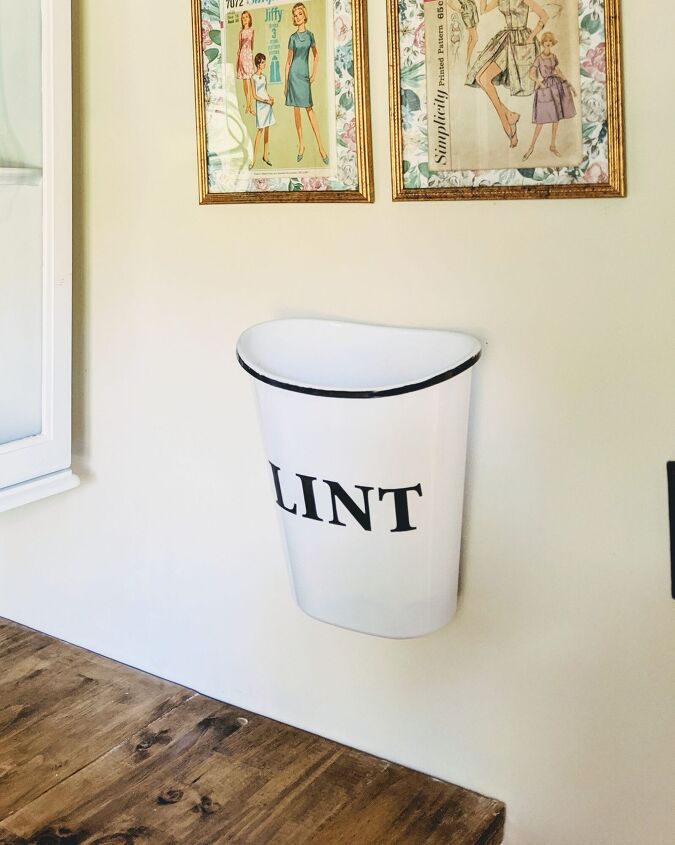
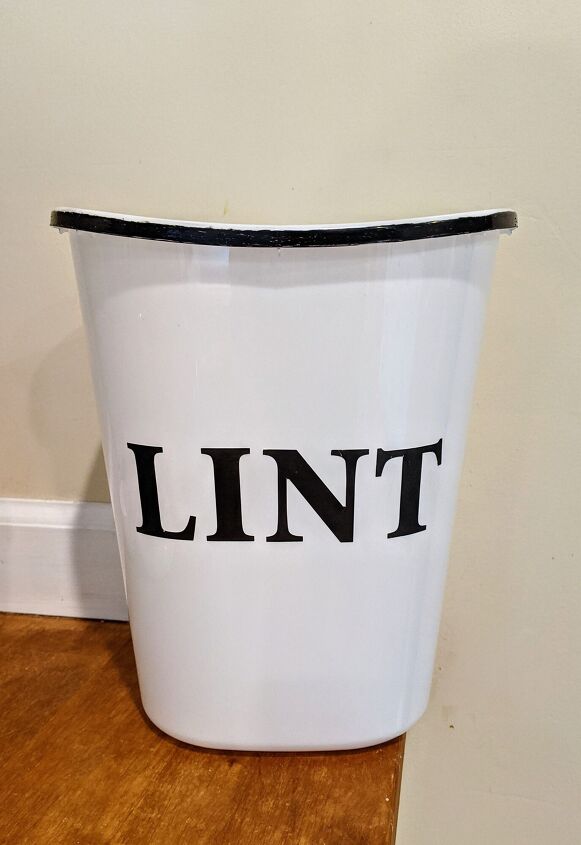
I am really happy with this little bin. For $2, it will be a great addition to our $100 laundry room makeover.
In the link to my blog below, you can check out the post sharing all the details on this $100 laundry room makeover!


Comments
Join the conversation
-
Such an easy project! Why did I not think of this before?!
-
Excellent timing! Our laundry room is in the midst of a small remodel and this is a fabulous idea! And so simple--thank you so much for sharing!!


Frequently asked questions
Have a question about this project?
This is such a cute idea. I've been using a plastic grocery bag, but this adds some character to the laundry room.
We use the lint, combined with that little bit of wax that's always left over from candles, and place both in a paper egg carton. We divide it into 12 firestarters. However, thanks to Dog26006953, I may place some lint out for birds and squirrels. Anyone have an ideas as to a container that protects the lint, is accessible to the animals, and is decorative? That would be brilliant!
Love this idea but how do I add a magnet?