


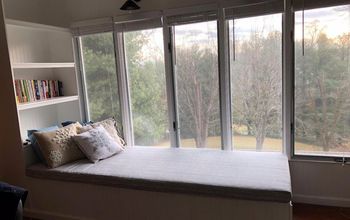
Alcove Transformed Into Reading Nook
If you love this project, grab your quick start DIY guide & subscribe to our blog!
See how this awkward alcove is transformed into a farmhouse style DIY reading nook with storage!! This shiplap wrapped nook with seating will make you want to cozy up and read a good book.
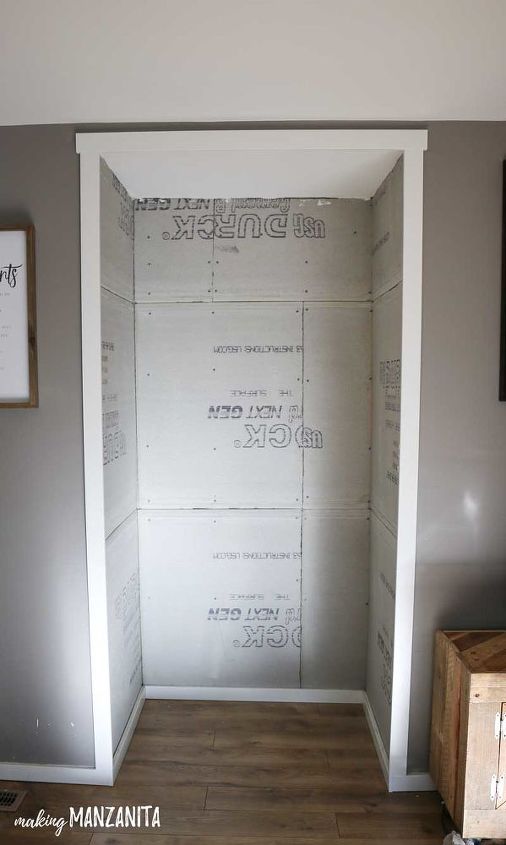
We’ve always been at a loss on what to do with this weird and awkward alcove in our living room. Turns out it was originally a fireplace, but at some point in the past the fireplace was removed (along with the chimney and everything else that went along with it). We talked about putting in a new fireplace someday, but needed to wait until we could budget for it because it’s a pretty expensive thing to add.
Here’s how the alcove space started before we began building our farmhouse reading nook. The reason we have the concrete backing is because we originally put it up long ago when we were still planning on someday putting back in a fireplace. It is not a necessary part of this tutorial. You can build this reading nook directly on top of your existing drywall.
STEP 1: DECIDE HOW HIGH YOU WANT YOUR DIY READING NOOK.
19” is the approximate height of a standard couch, which is what we used. If you want to add a seat cushion to your reading nook, subtract the cushion height.
STEP 2: MARK WALL FOR SEAT HEIGHT.
Measure and mark your wall for the height of your desired seat. The measure the balance, the height from your first mark to the ceiling. Divide height to ceiling by width of your shiplap board (we made our own shiplap with plywood, you can check out the full tutorial).
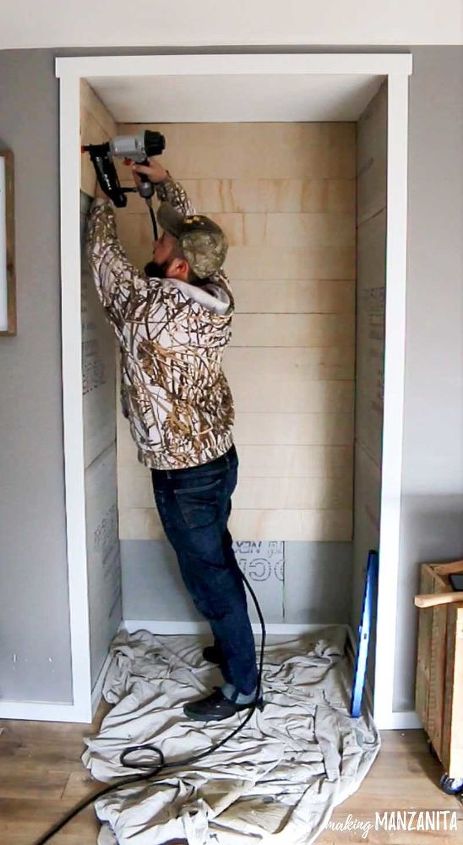
STEP 3: START HANGING SHIPLAP ON WALL.
Use a level for the first row. Then check periodically to make sure everything is level as you hang the rest of your shiplap boards.
STEP 4: START BUILDING BOX STORAGE OPENING.
Measure your alcove width. Cut the back panel of your box first from plywood. We wanted the inside of the box to be finished. Alternatively, you could use 2×4’s to building the box seat if you wanted.
STEP 5: BUILD SIDE PANELS OF STORAGE BOX.
Measure your side panels of your alcove against the wall. Subtract 1.5 inches to account for plywood width on the back and trim width.
Cut out the side panels from the plywood.
Attach the side panels to the back of the box. You should have a “U” shaped box now.
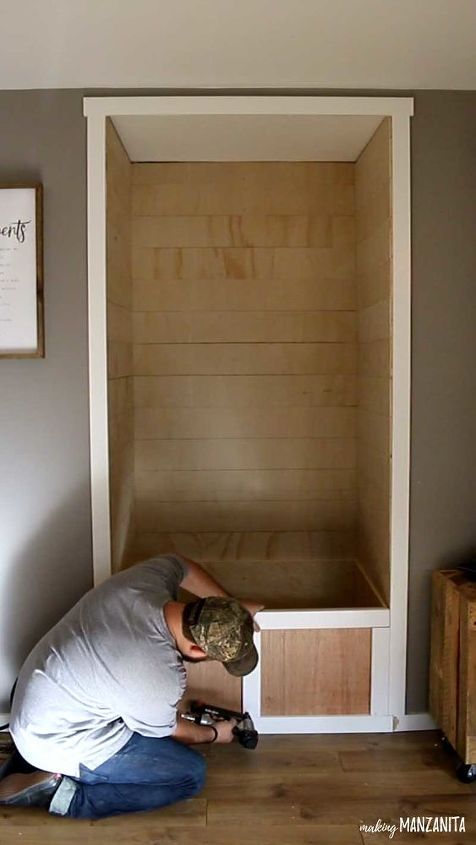
STEP 6: HANG U SHAPED BOX INSIDE READING NOOK.
Gently slide your U shaped box into the reading nook. Find and mark where the studs are in your wall. We used wood screws and drilled them into the wall through the plywood where there were studs.
STEP 7: MEASURE AND CUT THE FRONT PANEL.
Measure the area on the front of the reading nook and cut plywood for the front panel and attach.
STEP 8: ADD TRIM.
We wanted to add trim to the front of the storage box on the reading nook to give it a little more farmhouse charm.
STEP 9: MAKE STORAGE BOX LID/SEAT.
Measure your lid to fit on the top of your box. We made our lid about 1/2” deeper than the seat so there is a little lip on the front. This makes it easier to open. Cut the plywood down to size and set on top of the box. Slide the lid up to make sure it will open all the way and fit between the shiplap walls.
STEP 10. ROUTER FRONT OF LID.
We used a palm router to round the front of the lid to make it look more finished.
STEP 11. FILL HOLES AND MARKS MADE FROM NAILERS.
Your shiplap or box may have gotten bumped or damaged during the install. Use wood putty to file any holes or marks. We decided to leave our nails holes on the shiplap. It gives the shiplap wall a more rustic look.
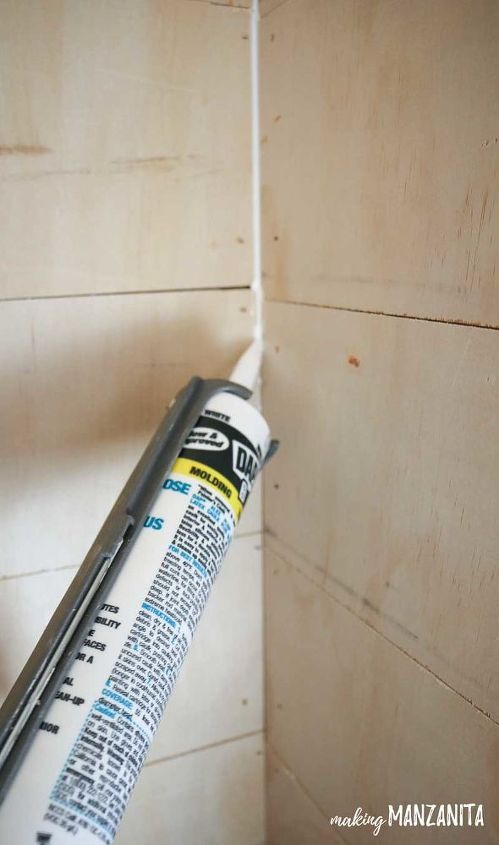
STEP 12: CAULK SHIPLAP WALL CORNERS, EDGES AND CEILING.
Run a thin bead of caulk in all the corners and crannies of the nook.
STEP 12: PAINT FARMHOUSE STYLE READING NOOK.
We used Snowy Pine by Behr for our reading nook color, which is what the trim color is in our entire home. Let everything dry 24 hours before moving on.
STEP 13. ATTACH LID TO STORAGE BOX.
Attach the lid to the box with piano hinge or hardware you purchased.
STEP 14: INSTALL SOFT CLOSE HARDWARE (OPTIONAL).
We purchased soft close hardware (check out blog post for a link to the product). This helps the seat close slowly and not slam shut.

To see more photos & details for this tutorial of this farmhouse style reading nook, hop over to the blog post (link below)!


Frequently asked questions
Have a question about this project?
Can you tell me how deep your alcove is? I have a closet that I plan to do this to but am wondering if it worth while if not as deep..