


How to Deconstruct a Sofa: Part 1
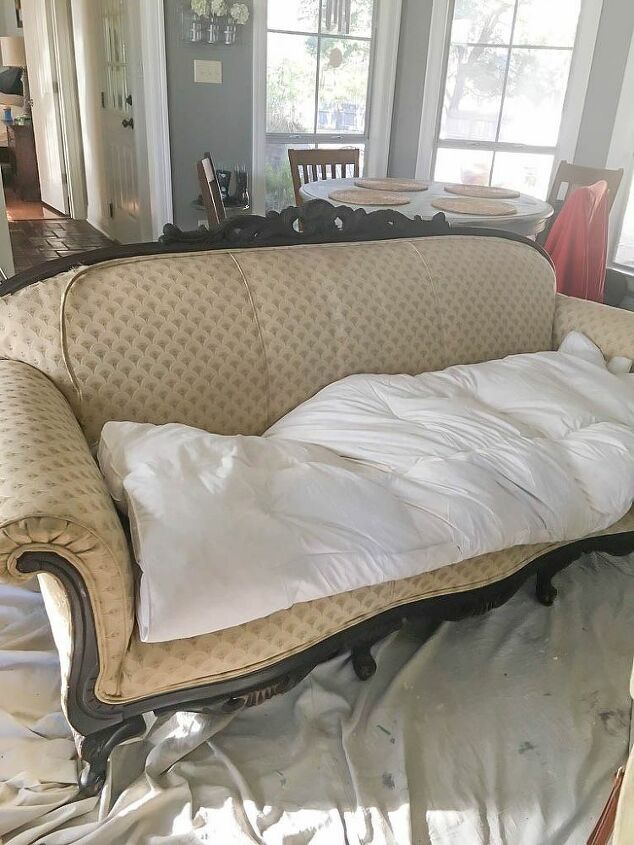
Several months ago, I was browsing a local antique store and came across the style sofa that would be perfect for the deconstructed look. It was missing the seat cushion so I got it for a pretty good price. I loved the shape and the wood details. This is what it looked like when I purchased it.
I’m going to be honest, this project caused me lots of blood, sweat and tears. Literary all three. I want you to know the commitment you are getting in to before you get started. Honestly, I had no clue what was involved to deconstruct a sofa. I searched and searched for DIYs on how to deconstruct a sofa, but there is little to nothing out there.
This tutorial is going to be a two part series because it is such a lengthy process. This first part will focus on tearing down the sofa to its “bones” and getting it ready to recover with a deconstructed look. The next series is How to Deconstruct a Sofa: Part 2, which will include the steps to recover it and photos of the final look.
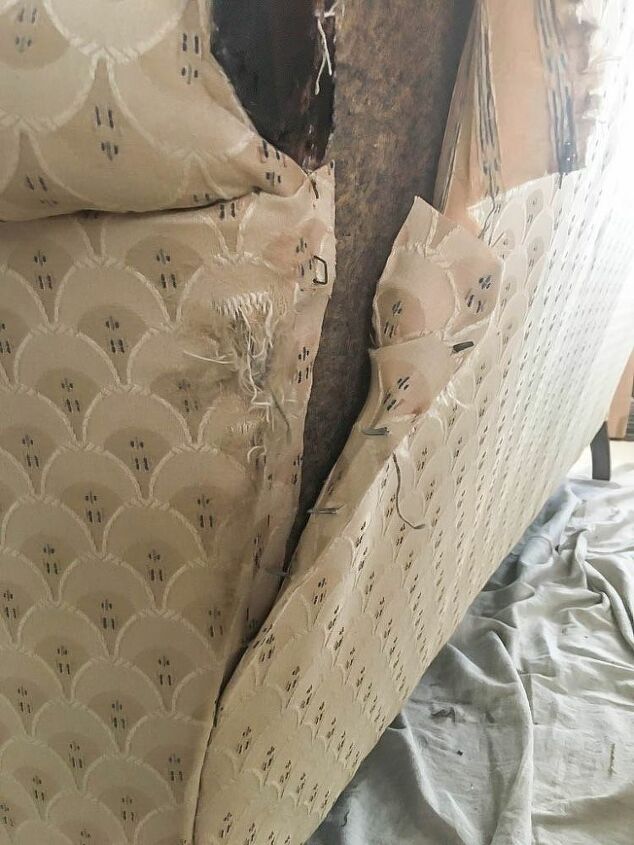
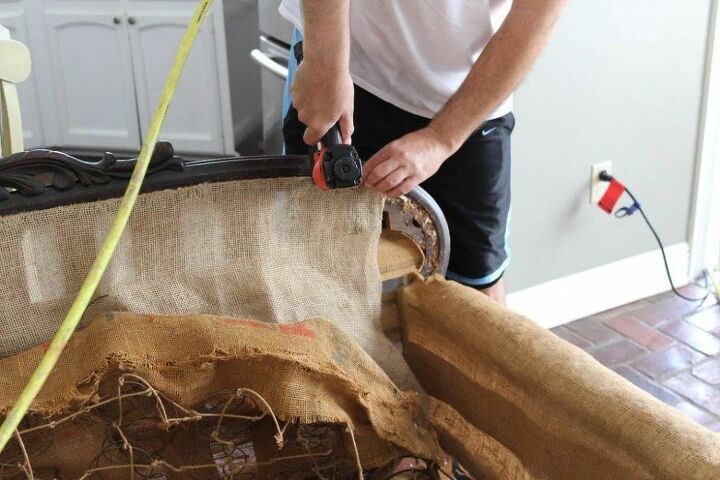
After bringing the sofa into my kitchen, I got to work tearing it apart. The first thing I did was remove all of the old fabric. That sounds pretty easy, but I can assure you, it’s not quite as simple as it sounds. Most of it was either stapled or nailed in so make sure you have the tools you need to remove this. I used pliers, a hammer, a flathead screwdriver (to get under the staples), a razor knife and every bit of strength in my body that I could muster up. The one thing that I did not use that I should have was gloves. I got blisters from all of the yanking and pulling.
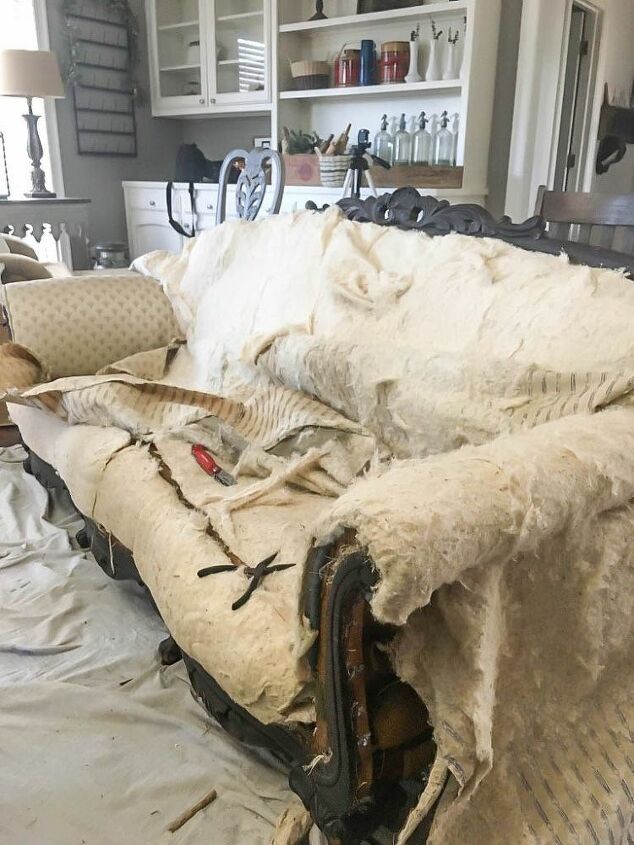
Once I removed all of the fabric, there were a few layers of batting that I had to remove. This pulled off pretty easily, but I should’ve worn a mask because it was pretty dusty. Also, I really should have done this outside because it was such a messy project, but I did this in December when it was cold and yucky outdoors.
Okay guys, I want to prepare you before you lay your eyes on these next few pics. It was a hot mess and I still can’t believe I did this inside of my house. With my bare hands. And without a face mask. Actually, I probably could’ve used a hazmat suit and respirator. It was that bad!
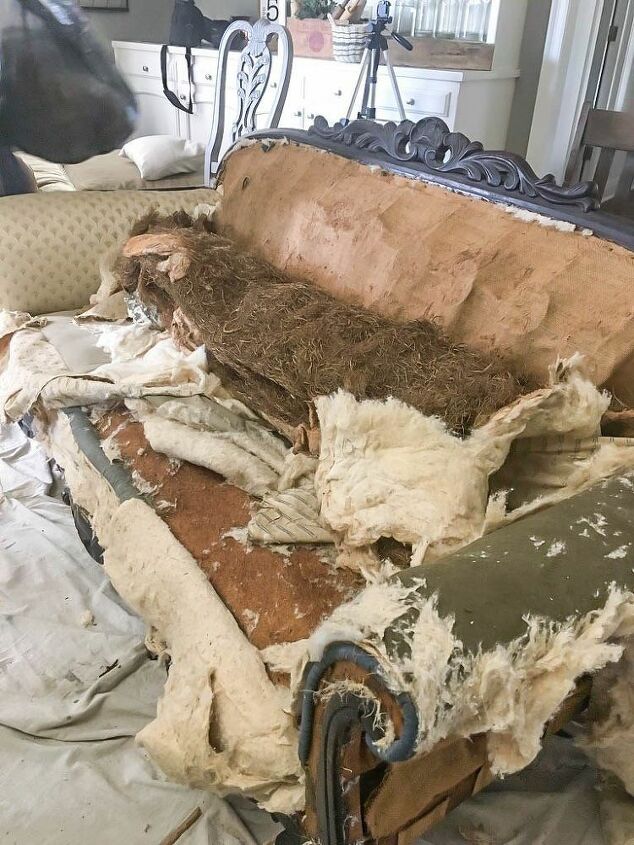
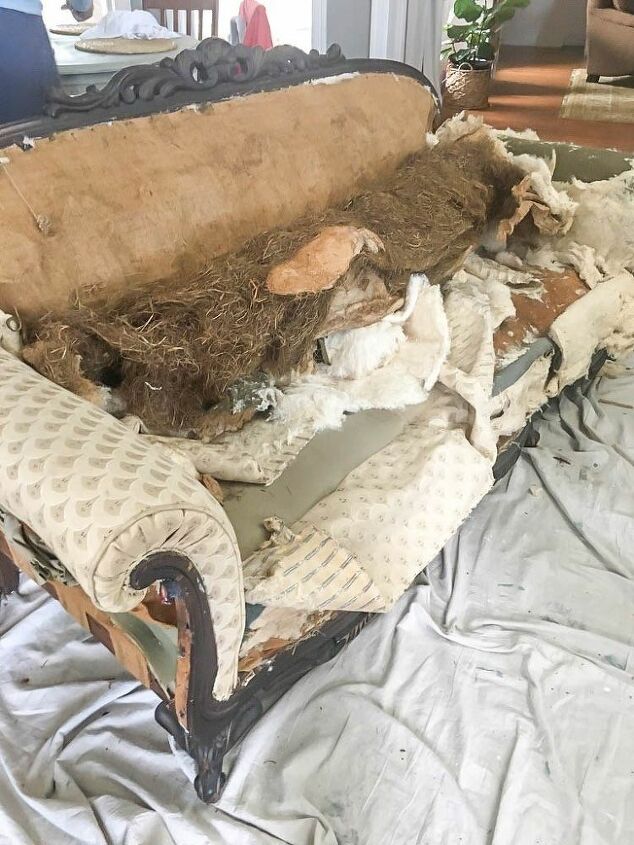
Um, yeah! Were you expecting that? I had no idea what to expect when I started tearing this thing apart. But I certainly didn’t expect to see hay or pine straw or whatever that is that was stuffed in this sofa. But I was all in at this point and just had to keep going. I just kept pulling and tugging and removing everything that I could, filling trash bag after trash bag. I had muscles hurting in every area of my body and blisters all over my hands.
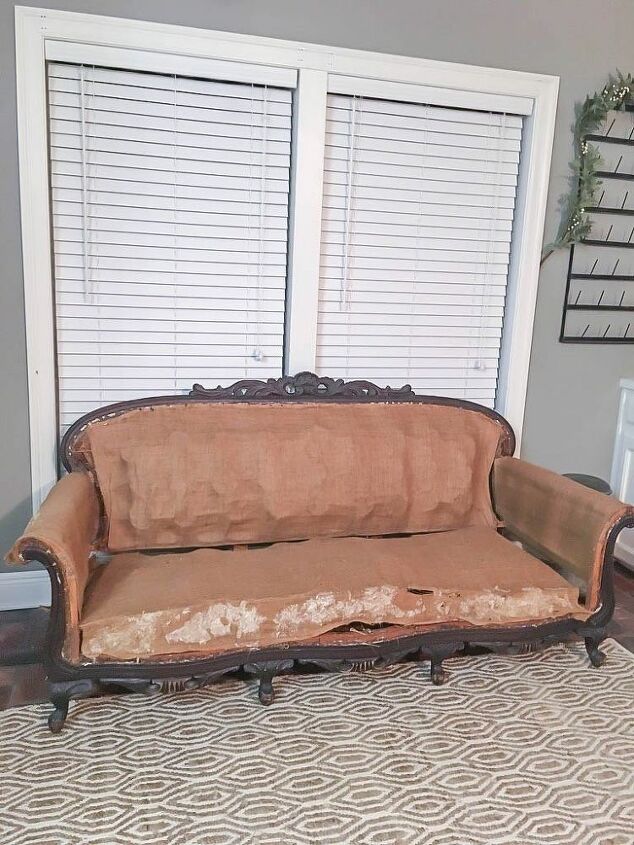
Alrighty folks, after many agonizing hours and days, I finally got it down to just the burlap that was covering the springs. At this point, I used a shop vac to thoroughly clean all areas of the sofa. I also sprayed the sofa with Febreze and wiped it with a damp cloth.
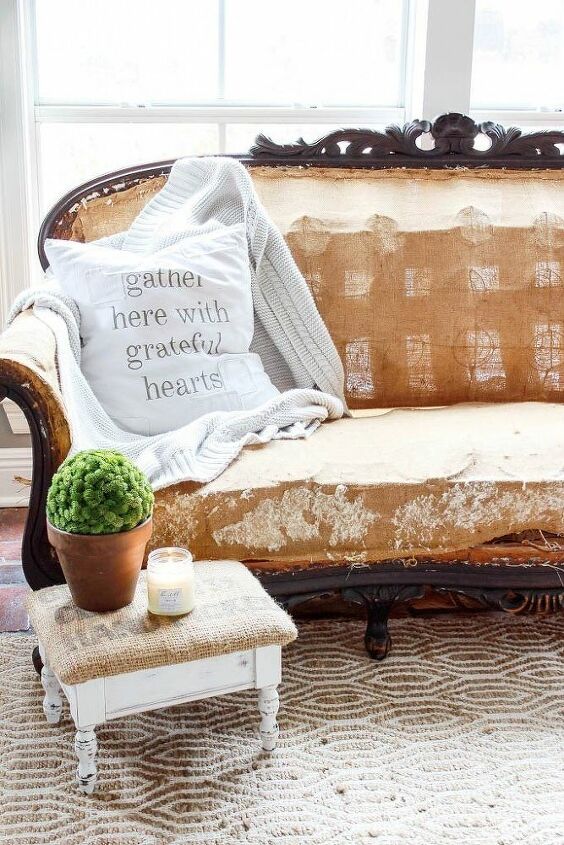
Honestly, by the time I got to this point, I was exhausted and not really sure what to do next. Soooo, I styled a cute little pillow on the sofa and left it like this for several months.
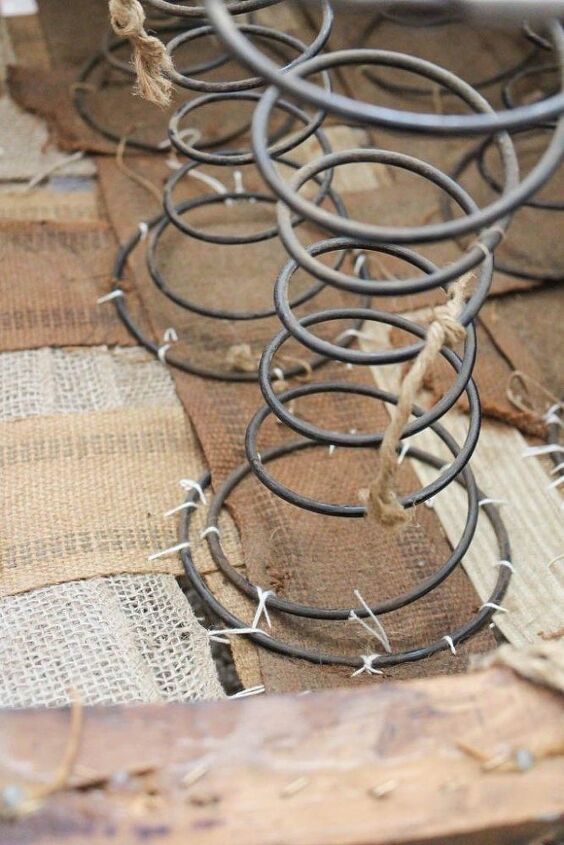
I asked my MIL to help me out this next part because I was a bit overwhelmed. She informed me that the first thing we needed to do was remove the burlap and make sure all the springs were okay. Nooooo! I loved the original burlap and had no plans to remove it.
Much to my dismay, we removed the burlap. But we did it ever so carefully so that we could preserve it and put it back over the springs. I’m so glad my MIL talked me into doing this. Many of the springs were not even stitched down, so they could’ve easily fallen over after we covered the sofa. Then we would’ve had to pull the whole thing apart again to fix it.
To stitch the springs, we used an upholstery needle and craft thread.
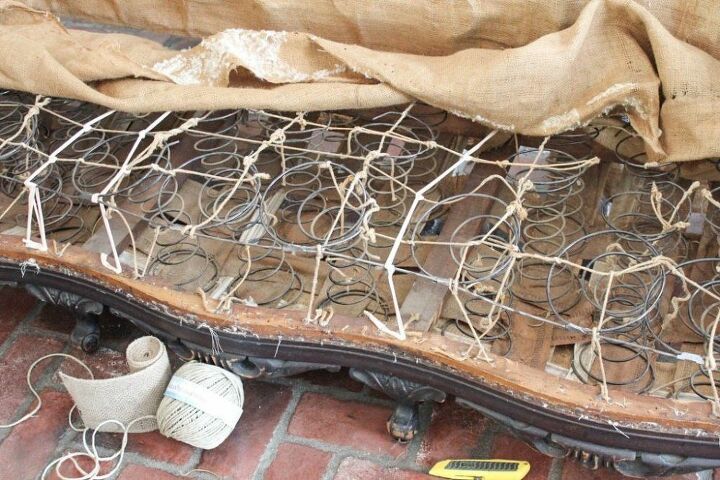
Once we made sure all of the springs were securely stitched down, we secured each of them together using a heavy duty hemp rope. I nailed the end of each rope to the sofa frame to hold it securely in place.
We did the same thing to the back of the sofa. We did have to add a piece of new burlap behind the springs on the back of the sofa because the old one was dry rotted and the stitches weren’t holding.
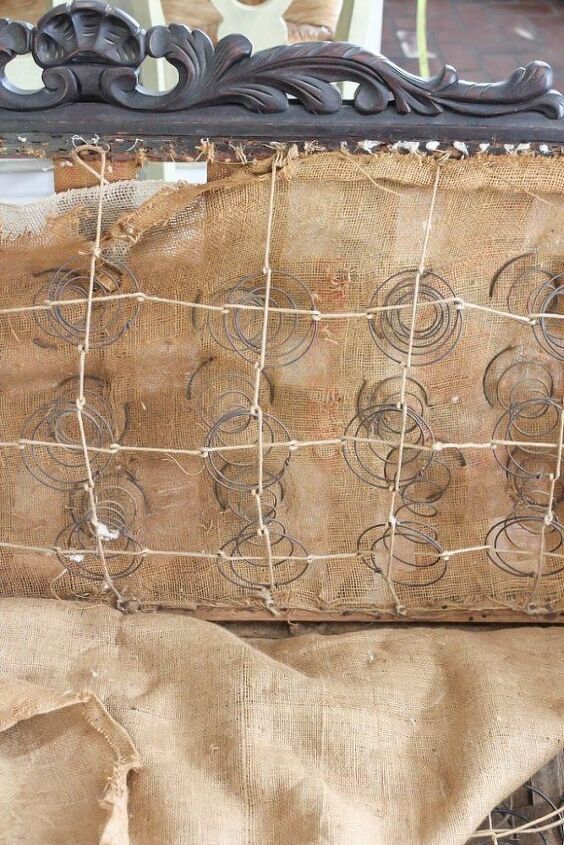
Once all of the springs were secured in place, we recovered them with the original burlap. We stapled the burlap to the sofa frame to hold it in place.
Now that we have all of the hard and dirty parts out of the way, we will start recovering the sofa. But we will save that for next week because I’m sure your eyes are starting to cross by now.
You can check out the final look below, but make sure to check out PART 2 to see how I completed the project!
Resources for this project:
See all materials


Frequently asked questions
Have a question about this project?