


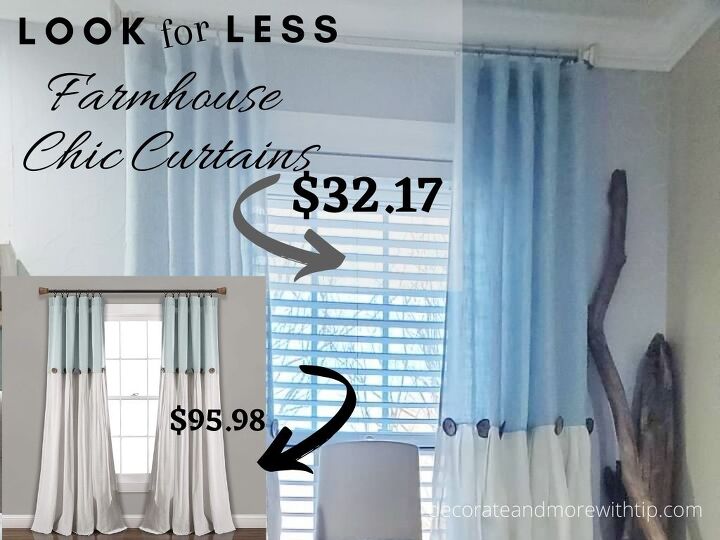
LOOK FOR LESS – FARMHOUSE CHIC CURTAINS
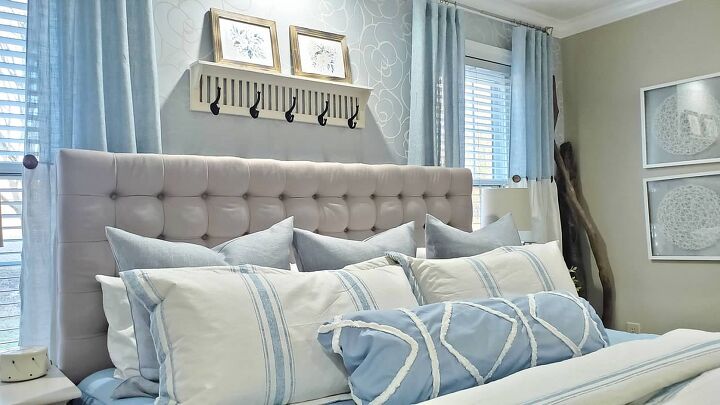
Hey there! Today on the blog is a Look for Less project! I am showing you my new curtains in our Master bedroom.
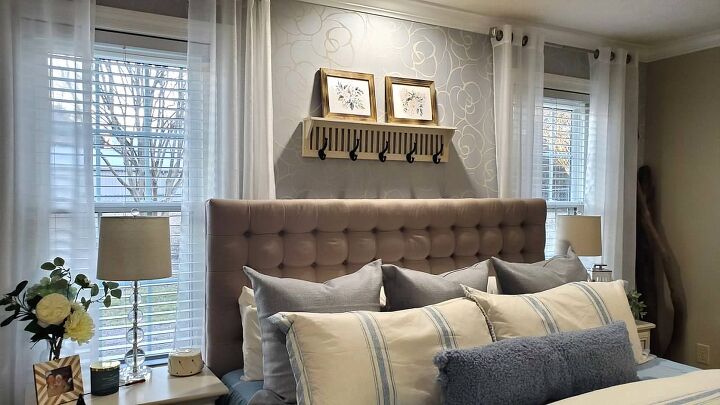
Although, the white sheers were nice they didn’t go with the off white and blue I added to the space.
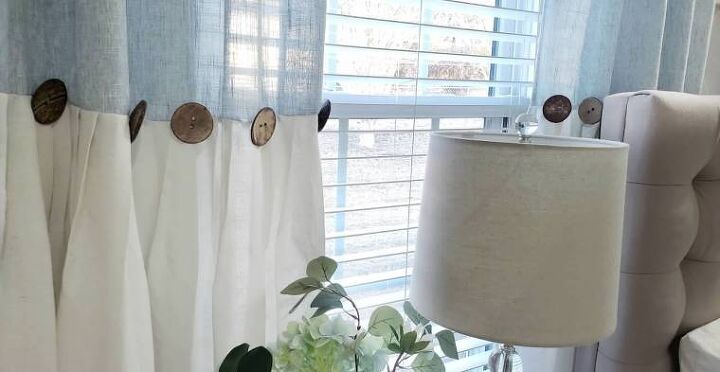
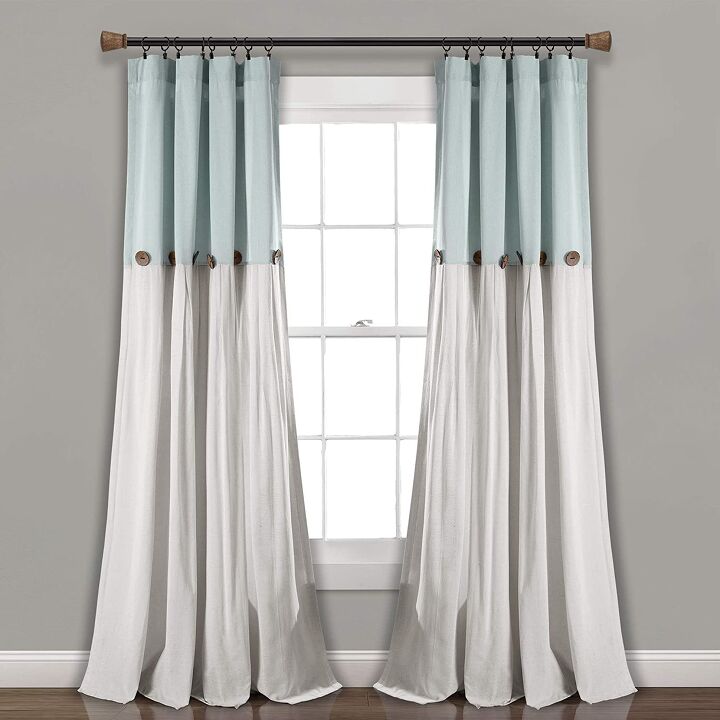
While searching Amazon I came to a picture of curtains that is a perfect style for our master bedroom. The curtains had me at the wooden buttons.
This post may contain affiliate links. Click {{ HERE}} for full disclosure.
I added 2 panels to my cart when I realized the price was for a single panel…. And I had two windows to dress. 🙁 so, I removed the 2 panels I placed in my cart. I took a closer look at the curtains and thought I could make them for a fraction of the cost. So that’s what I decided to do. Now, I don’t have a pattern so this might be a little crazy for those that sew curtain.
Supplies to make my curtains:
- neutral material – 4 panels at 92″x 59″
- colored material – 4 panels at 45″ x 39″
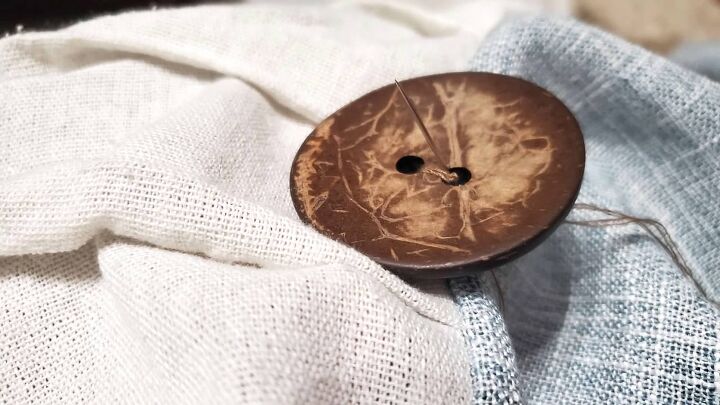
- 24 large wooden buttons
- sewing machine
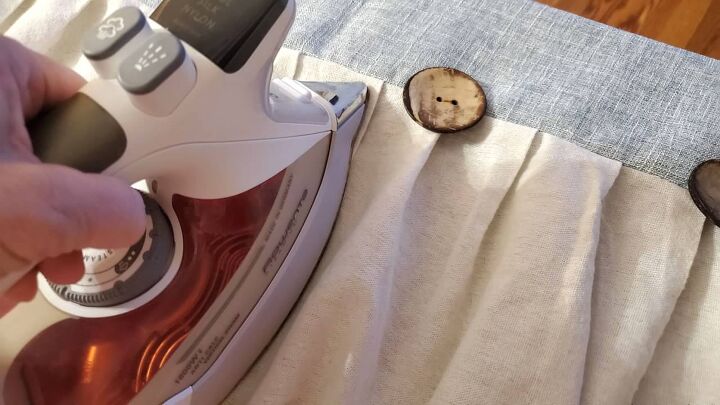
- iron and ironing board
- straight pins
- ruler
- scissors
I tucked away neutral curtains I made for our back porch years ago. I brought the panels down from the attic and added some bleach to the wash.
For the color part of the curtains, I purchased a pair of 40″ x 84″ curtains in Old Time Pottery. The panel was the perfect shade of blue and the material was close to the neutral material I have.
I was in luck with the buttons, I found them in Hobby Lobby at 50% off. Having to get 24 of them, I was happy to see they were 50% off.
Now I have all the items I needed; I am ready to start designing the curtains.
LOOK FOR LESS – FARMHOUSE CHIC CURTAINS
First step – size of panel
I am going with the same size as the Amazon panel. 95″ x 40″.
I cut 4 pieces of the neutral material to 92″ x 59″. Create a hem to each side of the panels, (I folded down 1/2″ and then folded over another 1/2″). Did the same to one 59″ edge to create a hem at the bottom of the panel. I now have four 90″ x 58″ sections.
I cut the two Old Time Pottery panels in half. Giving me 4 sections. I measured 39″ down from the hemmed edge of all 4 pieces, marked and cut. This gave me four 40″x 39″ pieces.
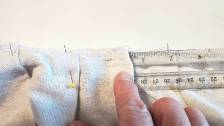
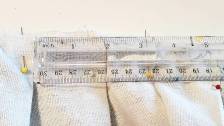
Second step – forming pleats
To create pleats to the unhemmed edge of the neutral material
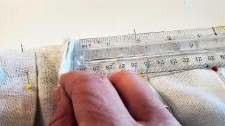
- first pleat; measure 2″ from the edge
- folded over 1/2 inch of material
- pinned in place
- measured 2″ make another pleat
- continue all the way across the 90″ panel.
I did this to all 4 panels. After pleating, the edge should be 40″ wide.
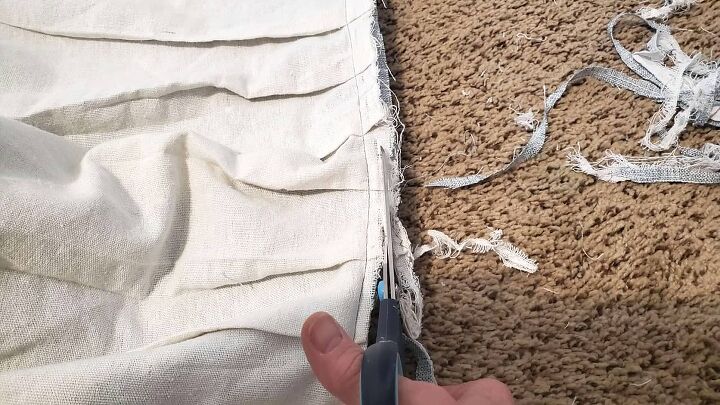
Third step – adding panels together
Pin one pleated panel together with a blue panel, right sides together. Sew the two panels together using 1″ seam allowance. Cut excess seam, finish with a zigzag stitch.
Forth step – add buttons
For each panel attach 6 buttons
- measure 1 1/2″ from the edge, place a mark for the first button
- every 5″ mark for the next button

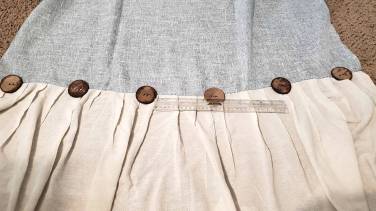
With a needle and thread, attach a button at each mark point.
Last step – press your panels
Let’s take a look at how much I spent for my curtains.
Remember how much the Lush single panel drape on Amazon were- $47.99 each panel.
My cost:
- Neutral material – had on hand – $0
- Curtains – Purchased a pair of 84″x 40″ curtains in Old Time Pottery for $24.99
- Buttons – 24 wooden buttons in Hobby Lobby for $39.36
- Total cost for my 4 panels = $64.35
- Total cost for 4 panels of the Lush curtains on Amazon = $191.96
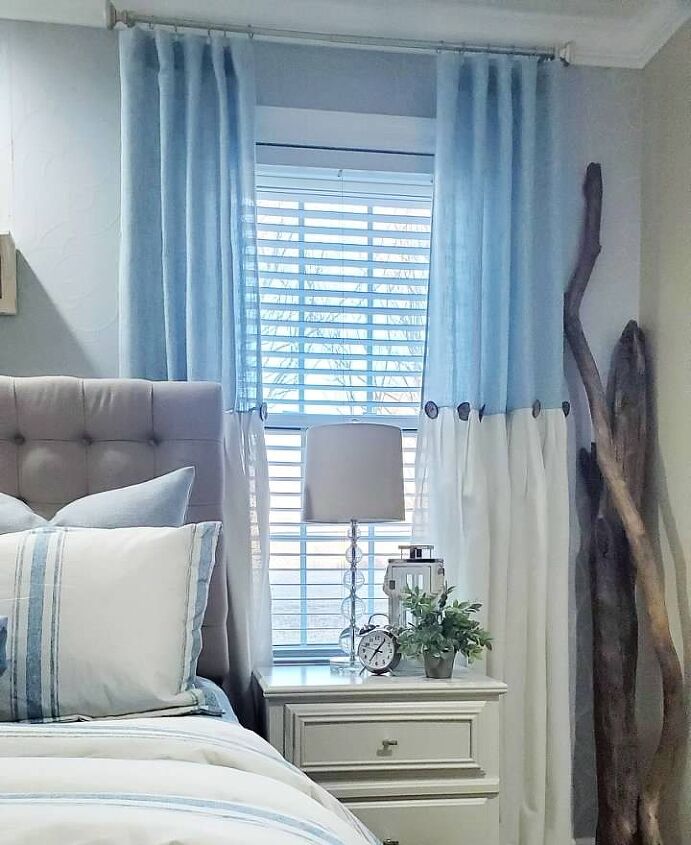
This was a better way for me to make sure the color blue matches and save money to boot!
Follow Decorate and More with Tip!!
↓ To find all of my inspiration ↓
Facebook ◊ Pinterest◊ Instagram ◊ HomeTalk ◊ YouTube
God bless you! ♥
Resources for this project:


Comments
Join the conversation
-
Your bedroom has the same set up as mine…..windows on either side of the bed…..LOVE the look of your room before and after. However, I am not a seamstress. As I was looking for a shower curtain the other day, I ran across one that has the same look as tour after curtains….wheels are spinning now.THANK YOU!
-
WOW! I have a vintage button collection that I've been struggling to display, this is just the perfect solution! Thank you on so many levels for this beautiful idea!


Frequently asked questions
Have a question about this project?
Can you please tell me where you purchased the long pillow with blue stripe . You did a wonderful job on the curtains. Love your room.
I am intrigued by the branch-like wood in the far right in your pictures. Could you share what it is and any project information about it please? It looks as unique as your stunning curtains! Thanks.
These are incredible! Great job! I went to link fir buttons but didn’t see in like yours. I know you said you got at HL. Do recall size?