


Fireplace Remodel

We covered up our fireplace because it was in our cabin that we moved to and it wasn’t working properly. I know, some of you think we are crazy, but it was what we wanted to do. We had a ductless heat pump put in and didn’t need the fireplace anymore. So here is our journey.
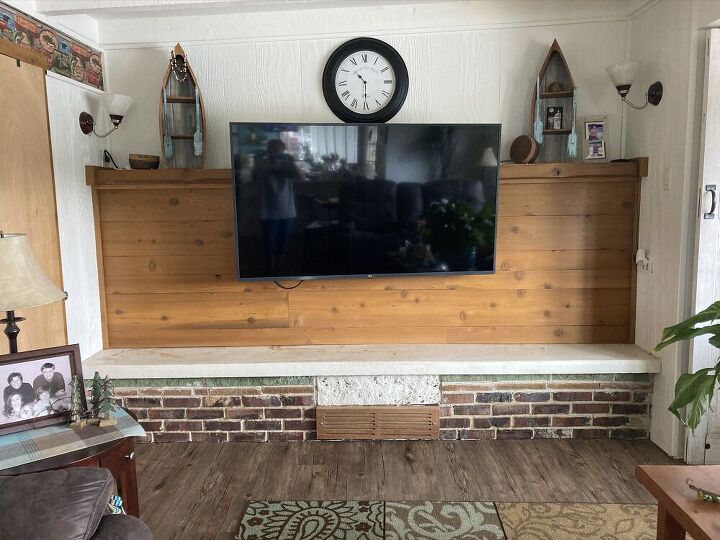
Here is the fireplace wall. The space was huge to cover up. So, we took the logs that supported our old dock and cut them into planks. We dried the logs out for about 7 years. After they were milled they sat for another 3 years. We then made a frame and attached them on the fireplace. But, I didn’t like the brick work down below. This cabin was built in 1959 and there were 3 different types of brick. We remodeled the cabin recently and painted
the walls white. The kitchen/ living room are all one. The kitchen is white cabinets with black handles and this theme is continuing into this room also. So the brick just wasn’t cutting it for me anymore. There is a really cool fossil stone that I did like though. It’s in the middle. I wanted to still keep that.
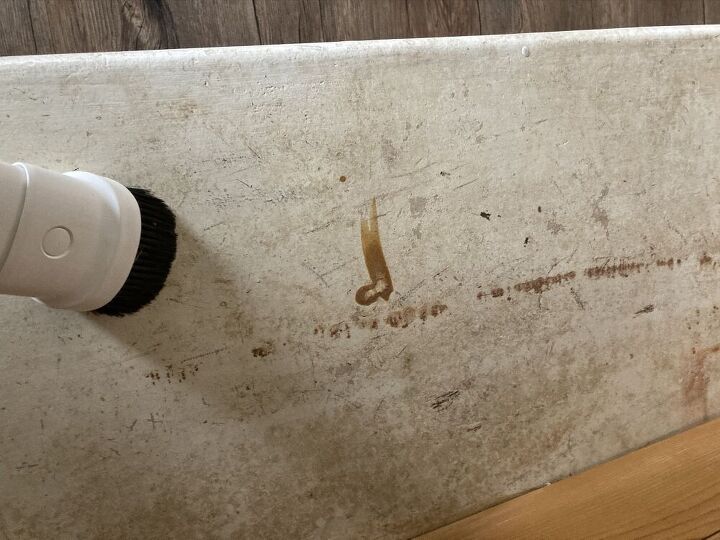
I began by cleaning and then painting out the concrete mantle black. It definitely had seen better days!

I taped it off first.
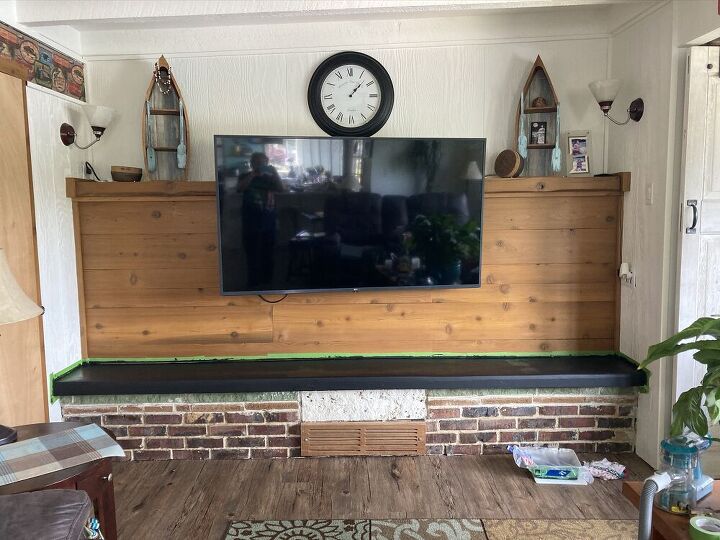
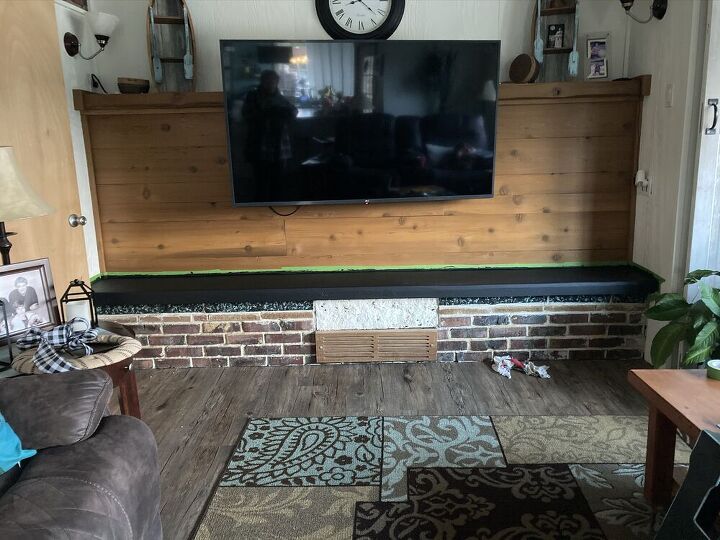
Then painted it black. I liked it but the brick right below the mantle was a green color that just didn’t go with my theme.

So I tried sponge painting it with an Aqua color that an accent wall in my kitchen is painted with.

Didn’t like that either!
I thought, okay let’s try sponging black over that. That was better, but then the rest of the brick looked out of place.
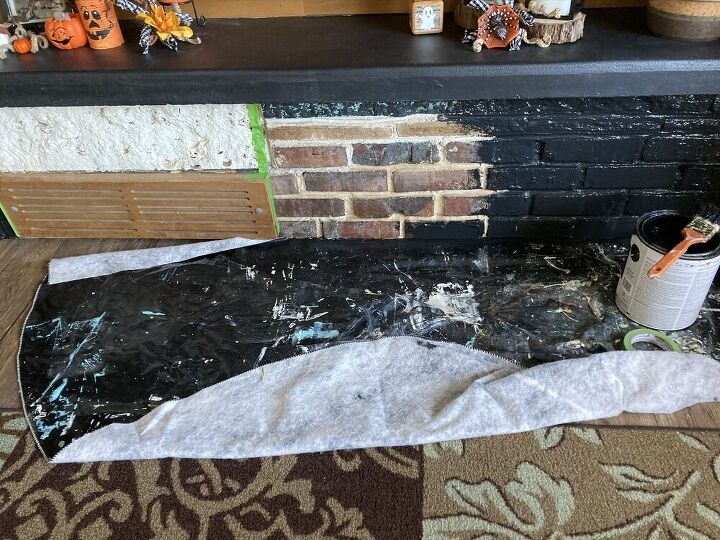
So everything got painted black except the fossil stone. The brick is very jagged so I used a brush to get in all the nooks and crannies. I gave it 2 coats.
You’re probably wondering what the wood panel is. It was a vent from the Franklin stove in the basement that originally helped heat the cabin.
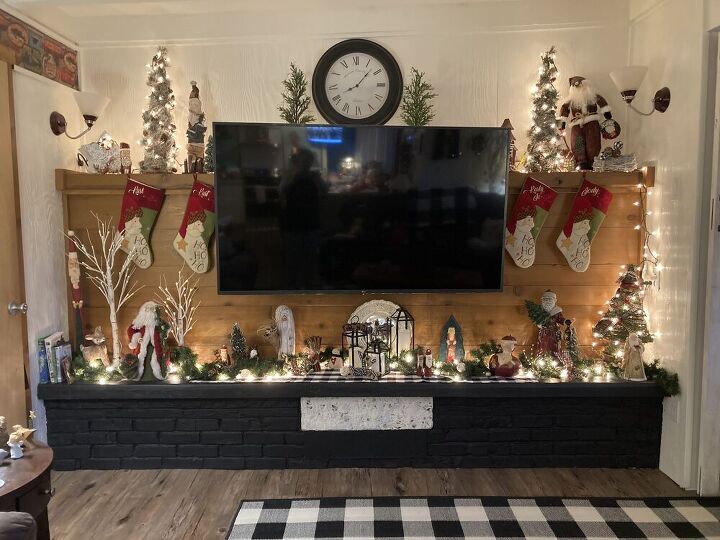
Ahhh, much better. I love it and it blends in with my decor now!


Comments
Join the conversation
-
Looks fab but I would have whitewashed the back wood wall so the tv would look more cohesive.
-
What if you don’t wish to wait years to dry out weather wood? Great up-cycle for those in this position. I’m huge fan of repurposing when ever possible. Looks nice and open to enjoy year round. Still “blank” enough to add what makes you happy and enough interest if you wish to leave plain. For faux designers, form follows function; so if tv bothers some, the function of room is family gathering and tv is part of many gatherings (sports or movie nights)


Frequently asked questions
Have a question about this project?
You did a great job. Showing your options and the final makeover helps a lot of members that it doesn't always go right the first time. Have you considered white washing the wood same as the wall color to soften the wood grain.
It is very beautiful - with all the Christmas decor. But what are you gonna do with it once you take it all down? You'll still be stuck with all that blank wall space.
I agree the odd placement of the TV is off. Could you cut out enough wood to frame the TV, bringing the TV all the way to the top of the step? Then frame it in and it looks like it would conceal the cords. You could still flank it with non seasonal decorations on either side and on top. I know we are use to our TVs being higher but when we all had conceals the picture was almost on the floor. If you try this please post it so I can see it. Your Christmas decorating is very pretty, and I love the black brick.