


Gorgeous Fireplace Makeover on a Budget!

I’m always talking about how much painting I knew I would have to do when we purchased our current home. It was builder beige EVERYwhere. And what wasn’t builder beige was just not quite right (but that’s a story for another post).
One of the 1st rooms that really needed a change was the family room since we’d spend the most time in there. Here’s what it looked like when we viewed the house for the 1st time. It needs a lot – color, a fireplace makeover, better functionality (I’m really not a fan of niches – this designer’s nightmare).
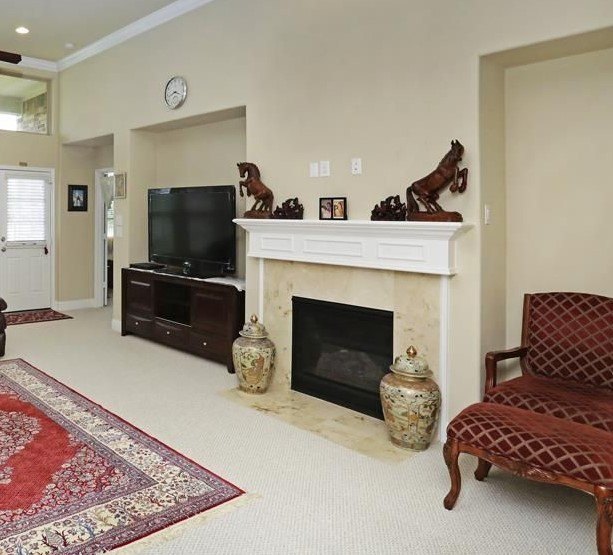
No area of the room needed more work than this fireplace wall so I got to brainstorming how I could make it better without a full tear out & redesign.
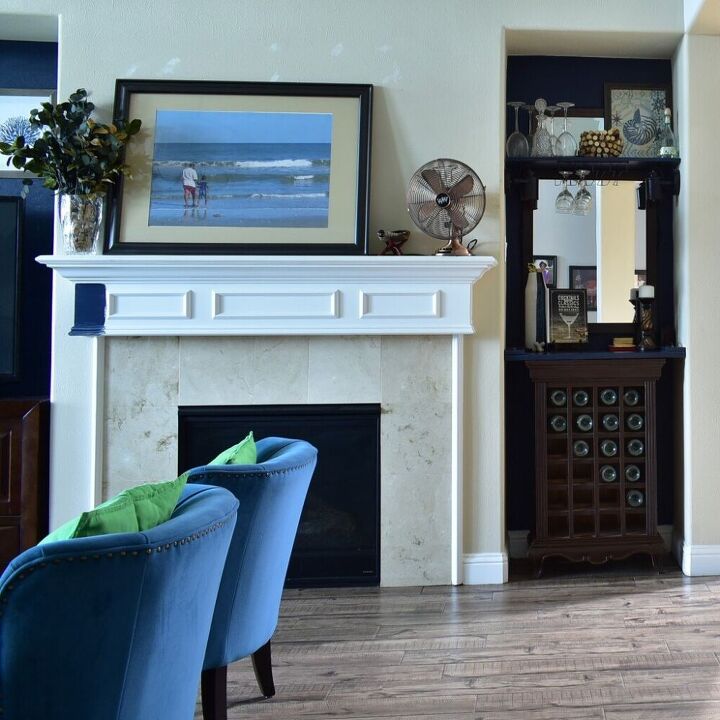
Shortly after moving in, I painted the niches because I wanted the TV to “disappear”. Then I thought “why didn’t I just paint the whole wall? AND give the fireplace a makeover?”
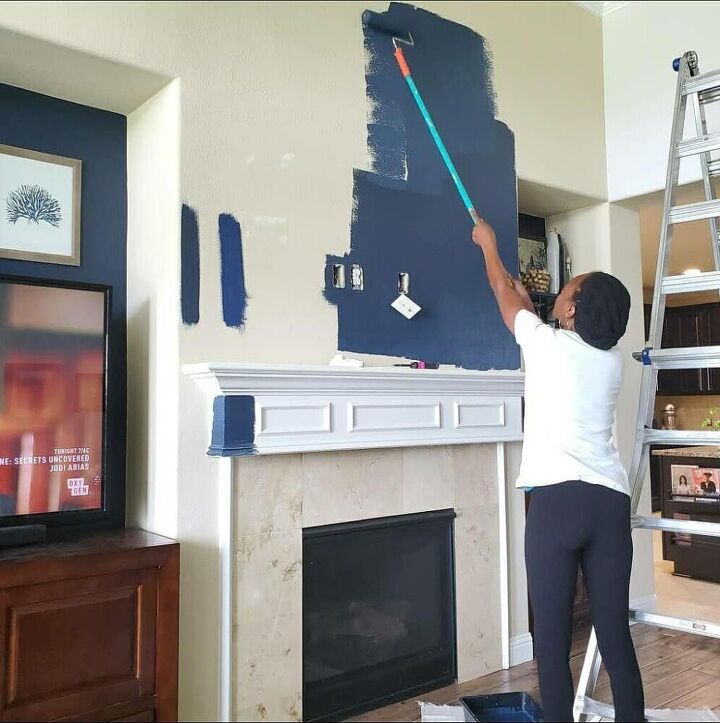
I’ll tell you why. Fear. Painting out trim is always a little scary because there’s no going back. Well there is, but it’s not quite as easy especially if you go dark. We literally had swatches on the fireplace & wall for 2 years! I tried to hide it with décor & garland at Christmas… twice. But that didn’t work AT ALL!
You could still clearly see that something needed to be done. I didn’t bother with it until my BIL – who cares NOT about interior design – finally asked me “Hey Nik, when are you gonna do something with this wall?”
In that moment I decided to just do it! Whatever happened, it would definitely be better than the builder beige that was still there!
And just like that, our budget friendly fireplace makeover had begun.
We were right! Just painting out the wall made a huge difference!
You would think that painting a wall this large in such a richly saturated dark color – SW Naval – would make the room dark & gloomy.
But the exact opposite happened – thanks to a wall of floor to ceiling windows, the room glows and the color shifts throughout the day depending on how the sunlight streams in.
Think this fireplace makeover is done? Not quite!
Honestly we loved this new look. But there was still something missing. The marble tile surround no longer did the fireplace justice. I wasn’t quite sure what I wanted to do about that & wasn’t ready to do a full tear out until I was absolutely sure what I wanted.
Enter Floor Pops! They are peel & stick vinyl floor tiles – this particular pattern is called Sienna & they are 12 x 12 tiles. There are 10 tiles per box & I needed 2 boxes because of the cuts I’d need in the top center & bottom sides of my fireplace surround. More on that later.
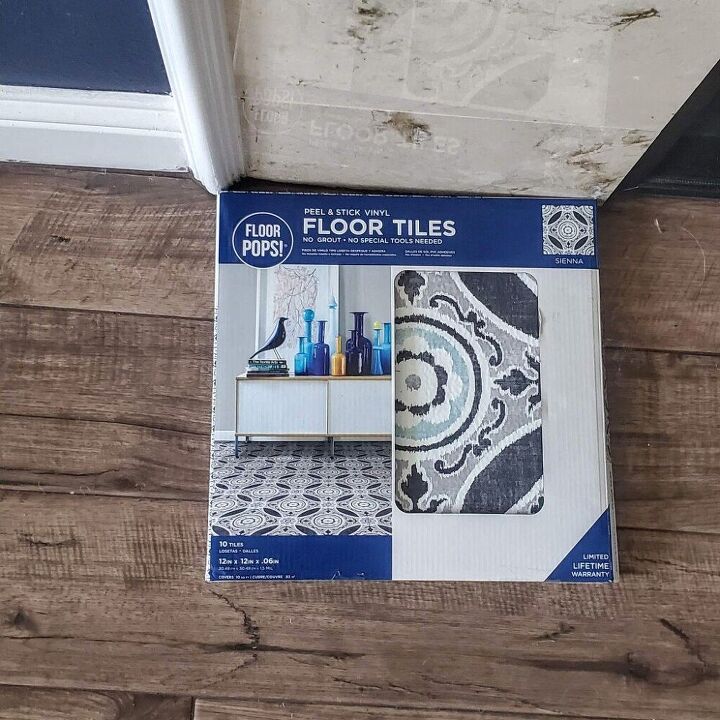
These are perfect because they can be as permanent or as temporary as you want so it’s a great way to test out a look before committing. And if you love it, just make it more permanent by using construction adhesive. Or remove them & install the real thing!
There are multiple other choices & styles – just click here to see all the options.
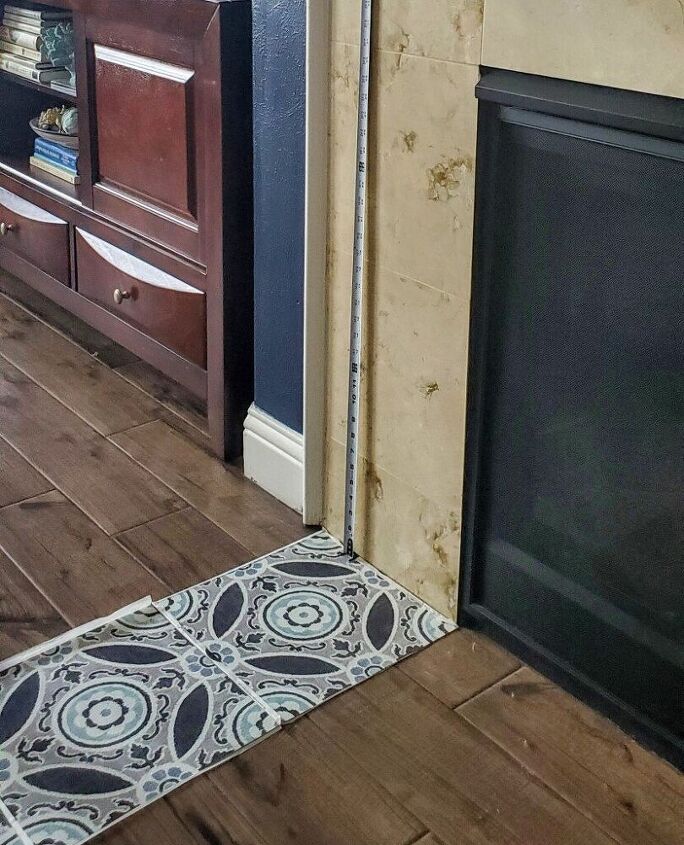
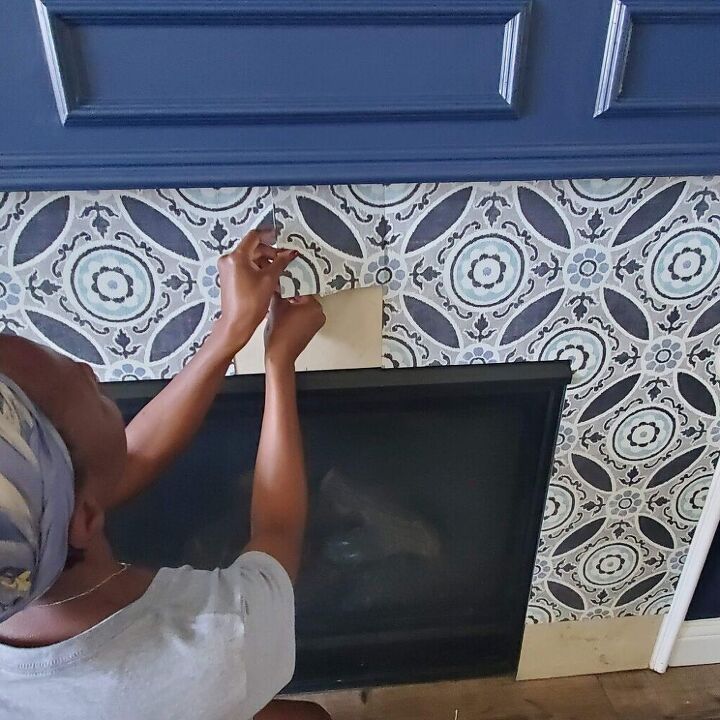
These are super easy to apply & require no special tools. First thing I did was to measure & lay out the tiles how I would apply them to the fireplace. This step was made easier because the existing tile is the same size, 12 x 12, as my Floor Pops. I just followed the same pattern.

Once I had the placement laid out & planned, I started with 1 tile in the top corner of the fireplace.
Pay attention to the pattern because it will need to be matched going across & down the entire fireplace surround.
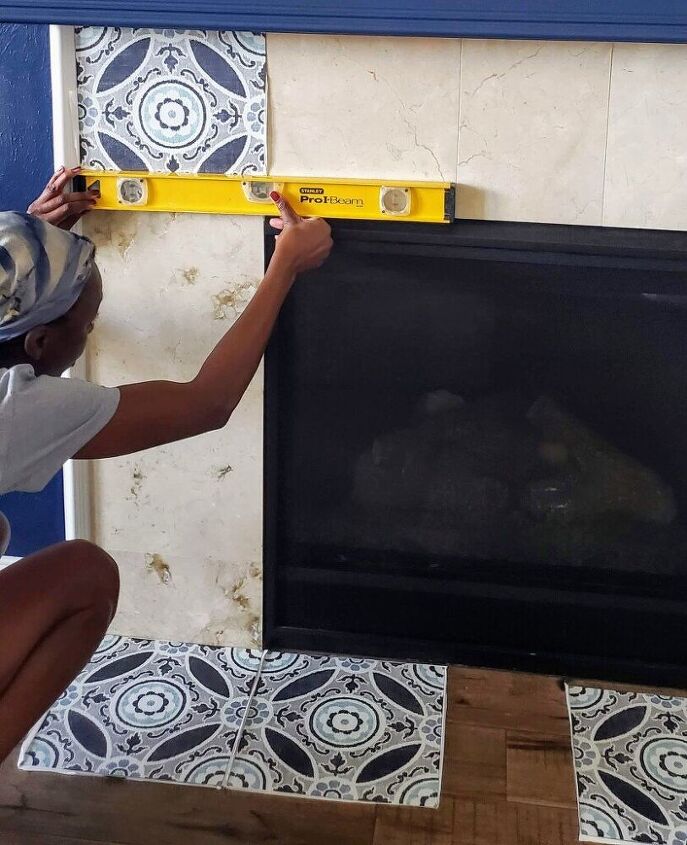
Make sure the 1st tile is in the exact position & level so that every tile after this will go up quickly & easily.
The most difficult part of the entire installation was matching up the pattern. And even that was fun! Like a puzzle.
Once the backing is peeled off of a tile, there is a window of about 10-15 minutes to move it around on the surface. That’s enough time to adjust as needed
My fireplace has a center tile at the top that is smaller than the other tiles, about half the size. To keep my pattern consistent, I worked from the outside in.
In other words, I placed my tiles on the left side of the fireplace all the way down then across toward the middle.
I then did the same on the right side, trimming any excess as I went along.
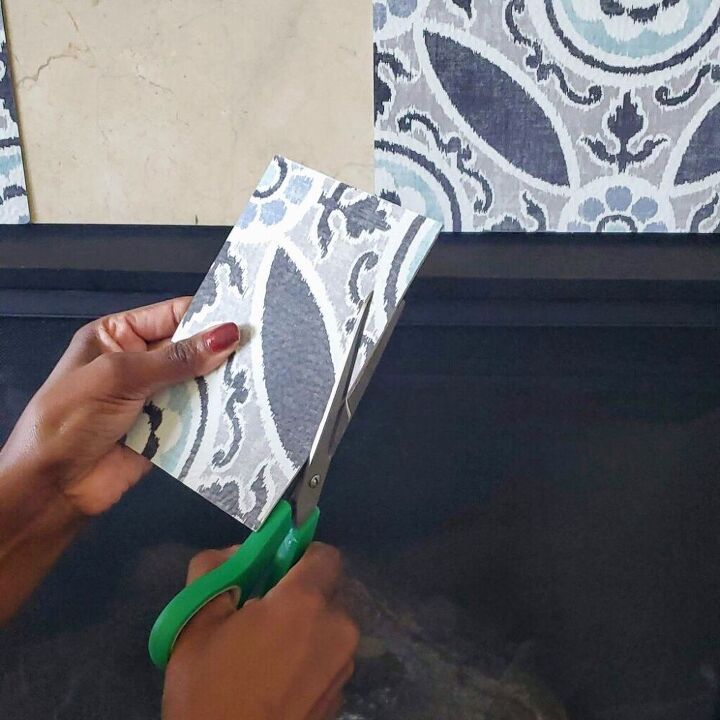
When I got to the center, I used scissors to cut 1 tile down to size.
I created the center pattern & glued it in place.
As you can see from the photos above, I also had to repeat this process at the bottom of the fireplace.

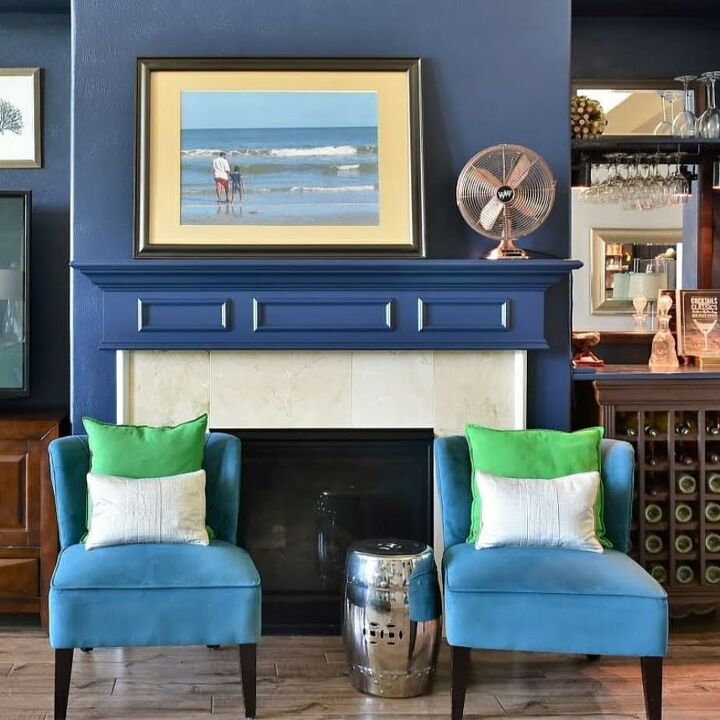
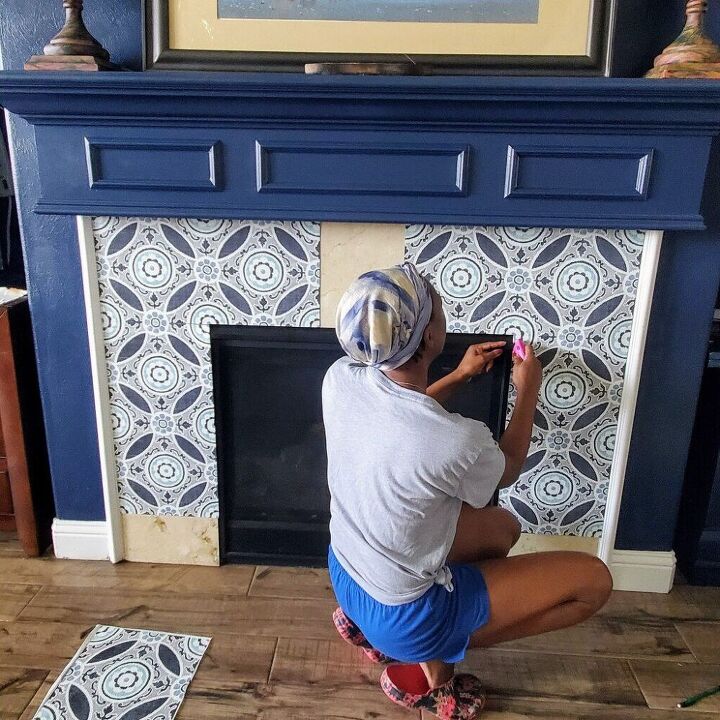
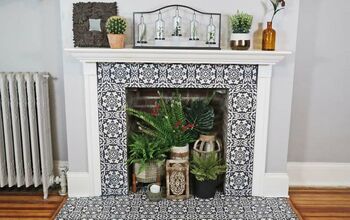
And now the fireplace makeover is “in the books”. Done & done!
And just in case you were wondering, yes these are meant to be used on the floor, but how often do we use things purposes other than intended? Me! All. The. Time.
The biggest concern I had was whether these would stand up to the heat of the fireplace. And boy did THAT get put to a serious test during winter storm Uri! We had no power for the better part of a week so the fireplace was our only source of heat. It was on constantly for days at a time & we had no issues!
Have a look at the full fireplace makeover 1 last time! And remember that this was done on a budget! Literally less than $50 since we already had most of the paint. Even with that, you could do this for less than $100! TOTAL! I’d say that’s well worth it. What do you think?
Resources for this project:
See all materials


Comments
Join the conversation
-
It’s beautiful but peel and stick tiles around something that generates heat? It’s probably not code and IF there is a fire, homeowner’s insurance may not cover.
-
You both are hired! We have a gas fireplace and it is ugly. I would love to pry the decorative trim off. Haven't figured it out how to do that. Husband is not too crazy with my ideas. Love the blue and tiles. Thank you for sharing.


Frequently asked questions
Have a question about this project?
Is there need for any trim to make the project look finished?
Will this adhere to granite? That's what is on my fireplace surround. Thanks
My home is over 90 years old. The fireplace(s)(6) have really old ceramic tile, brick size, hearth too. Do you think this would work for them?