


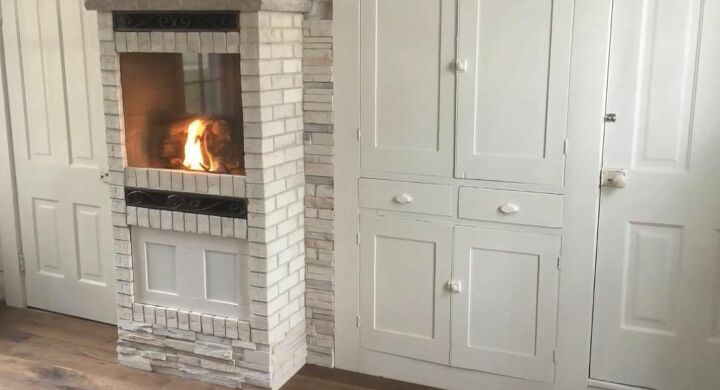
DIY Kitchen Fireplace
We were so drawn to the growing trend of gas fireplaces installed in the kitchen and knew that adding one would not only increase our home’s value, it would increase the ambiance and charm of the room we spend a great deal of our time in. Because materials and professional installation in a kitchen can be very costly, we decided to build our own gas kitchen fireplace from scratch and used a wooden box, firebricks, ceramic glass, and gas logs to create a charming gas fireplace that perfectly matched the look and feel of our old farmhouse kitchen while saving us a great deal of money!
You Will Need:
- One 4x8 sheet of 3/4 inch plywood
- 150 white bricks
- 30x30 inch piece of ceramic glass (or whatever size you want to make your fireplace)
- 40 firebricks 1x4.5x9 inches
- Sheet metal 12x24 inches
- High-temperature fireplace caulk (one tube)
- Limestone mantel/top 45x14x2 inches (or the size of your fireplace)
- Gas piping
- Firestop refractory mortar (one small bag)
- Standard white mortar mix with sand (one large bag)

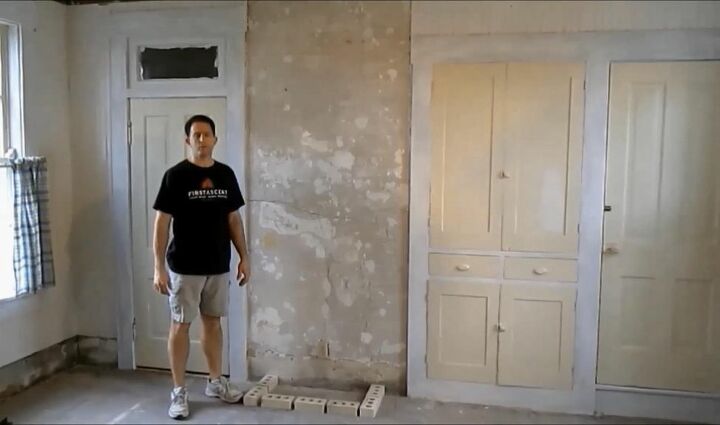
I collected all of the materials I needed for the project. We have an old farmhouse and planned our fireplace to fit inside an empty wall next to built-in cabinets.
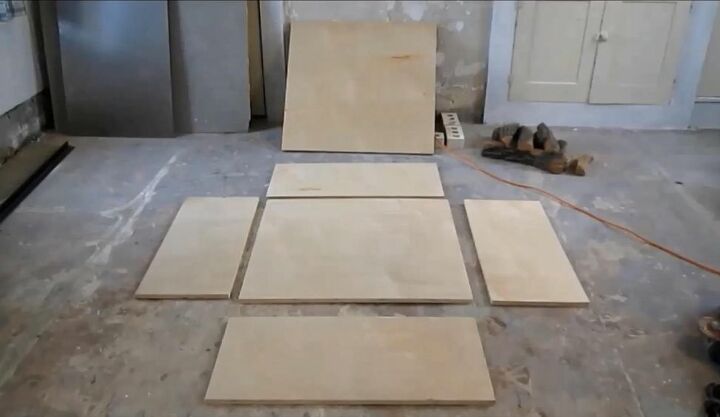
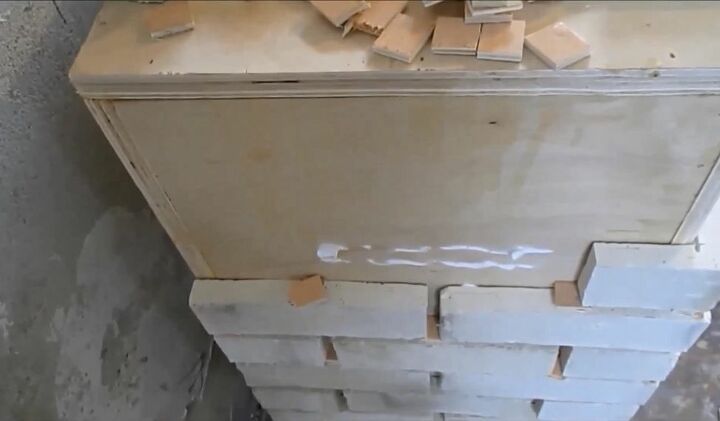
I built a wooden support box for the bottom of the fireplace. I cut plywood for all of the panels and used wood glue and nails to assemble the box. I doubled the top of the box with an extra layer of plywood in order to better support a row of bricks.
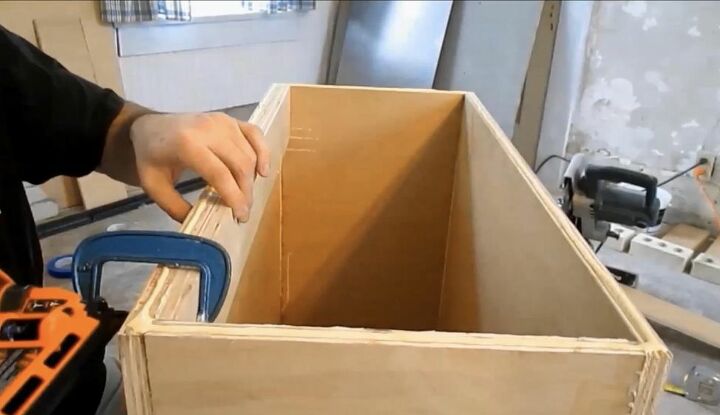

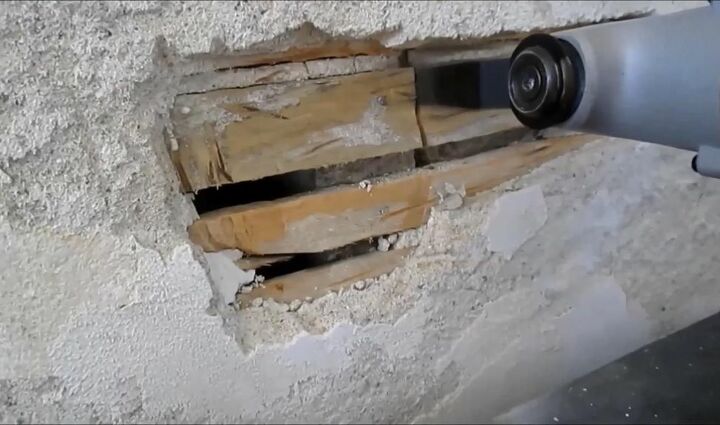
I marked and cut out openings with a saw for the doors and the existing electrical outlet on the wall behind where the box would be going.
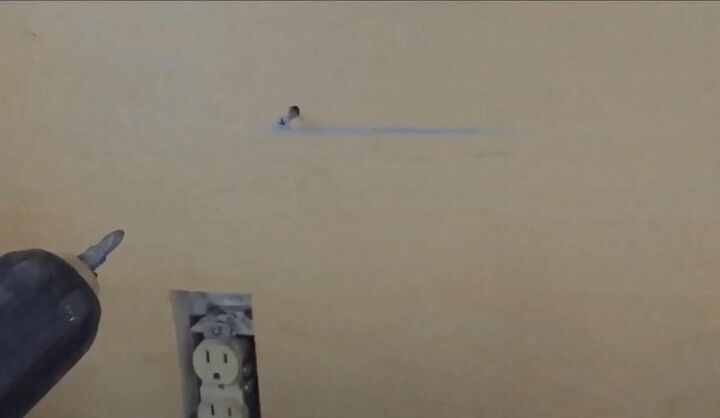
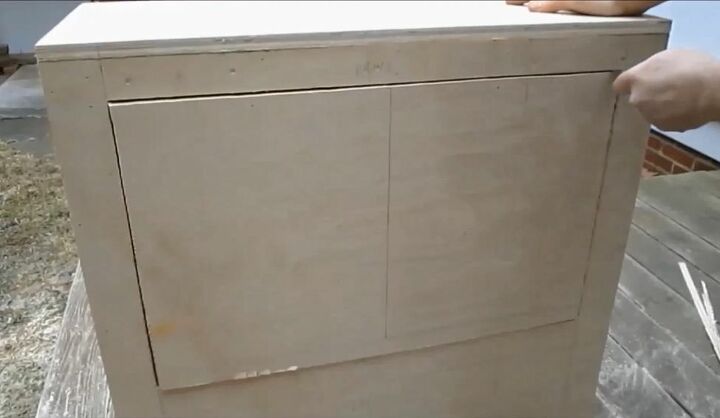
After assembling and cutting openings in the box, I used a drill to attach it to the wall with screws.
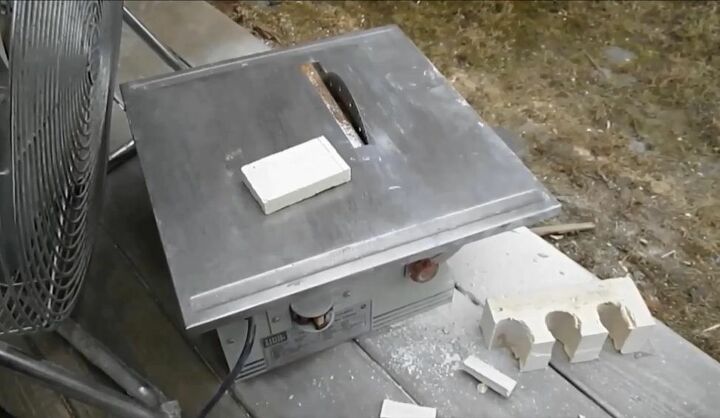
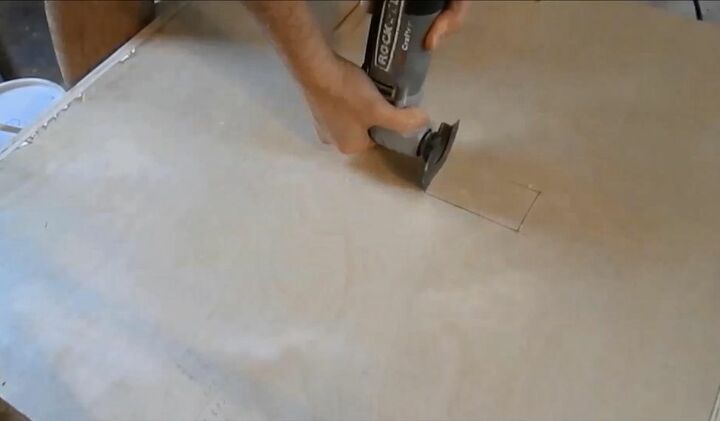
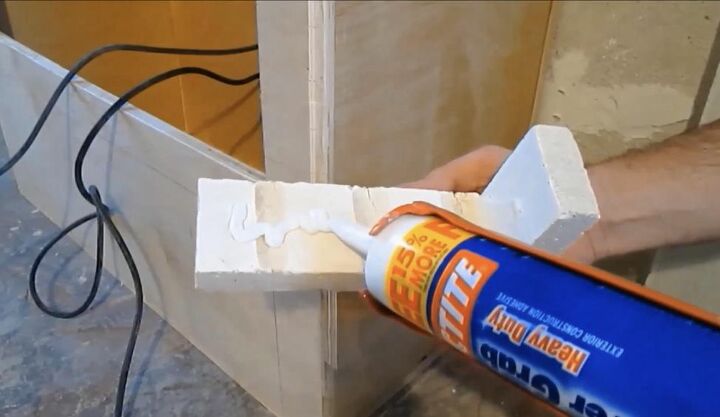
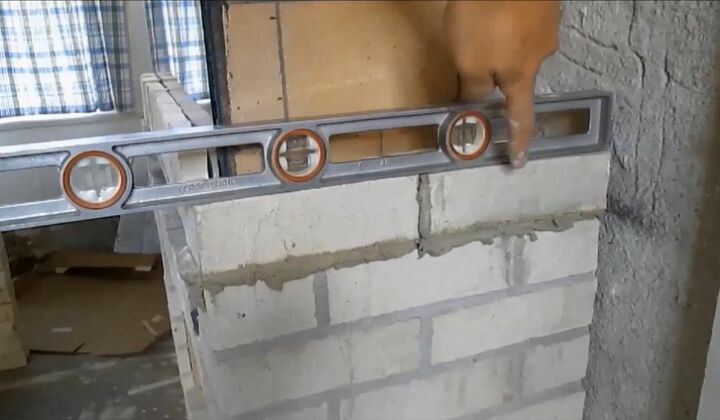
I used a tile saw to create brick veneers for the area surrounding the box. I positioned a fan next to my saw to blow away the dust created by cutting. I applied construction adhesive to the brick veneers and used small wooden blocks as spacers to apply them at the right height.

I inserted screws between the rows of brick veneers to help the grout adhere to the wall better and used a grout bag to apply a slightly thinned mortar. Squeeze the bag and move in a line inside the cracks between the veneers.
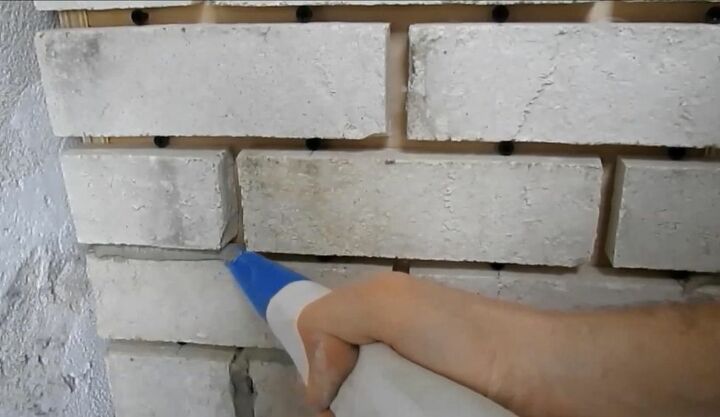
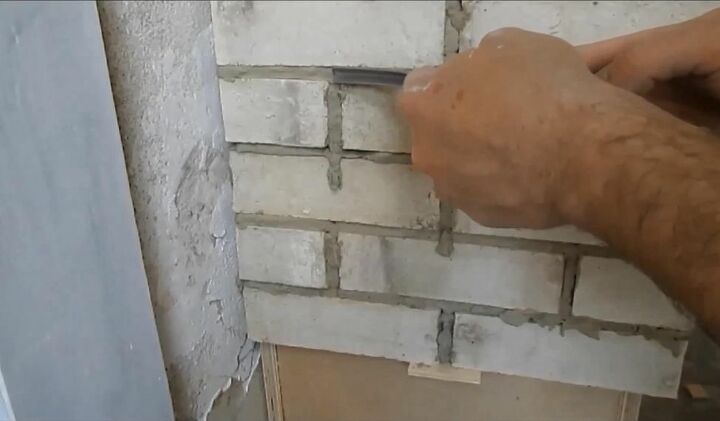
When the grout was dry enough to leave my fingerprint in, I used a curved jointer tool to push and level the grout into the joints for a clean, finished line. When you are finished, use a dry paintbrush to sweep away any crumbs from the surface.
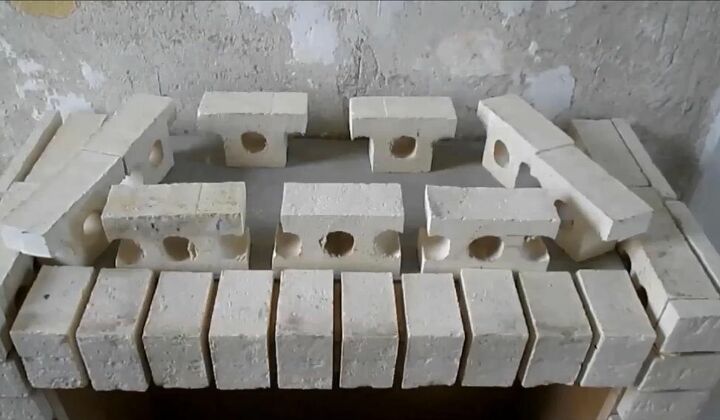
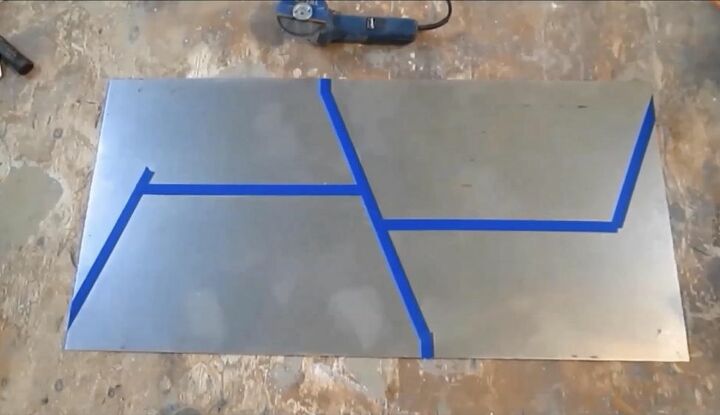
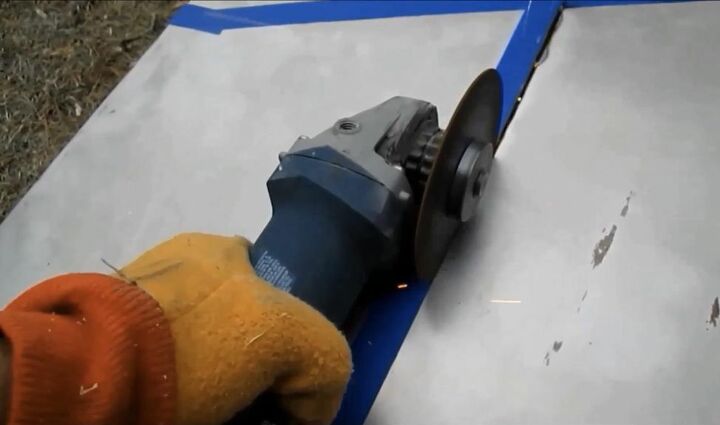
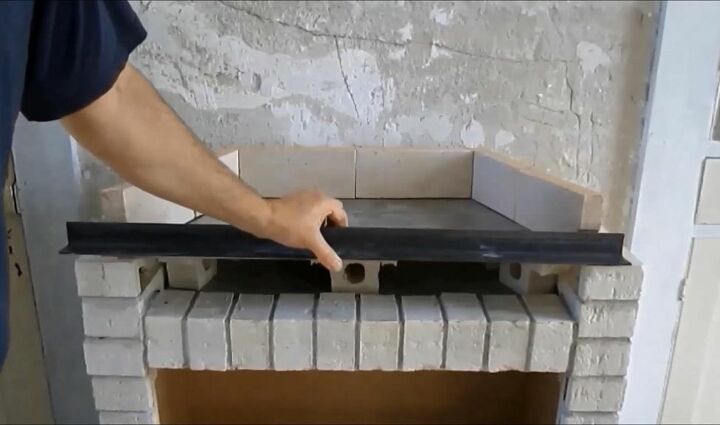
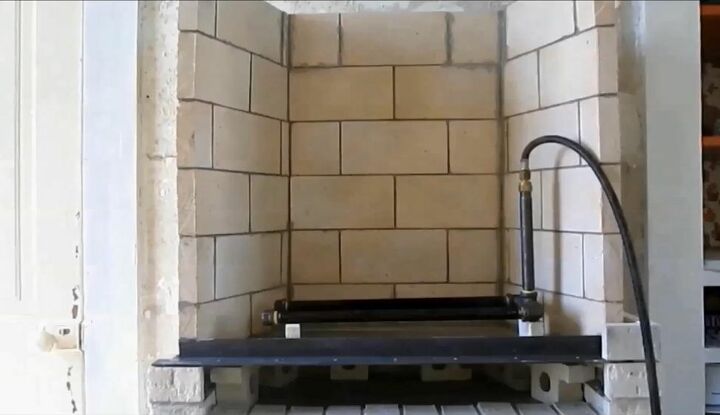
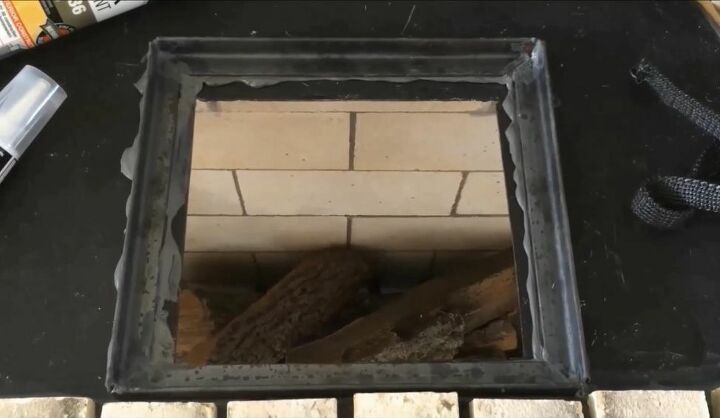
I cut a piece of concrete board to act as a heat shield for the top of the box and added scrap bricks to raise up the firebox to allow for airflow underneath it. I marked metal plates for the top and bottom of the firebox and cut them out with an angle grinder and then lined the sides with firebrick angled by a tile saw and spray painted with high-heat spray paint to match the rest of the brick. I cut a piece of angle iron for the front of the fireplace and anchored the metal base piece to it.
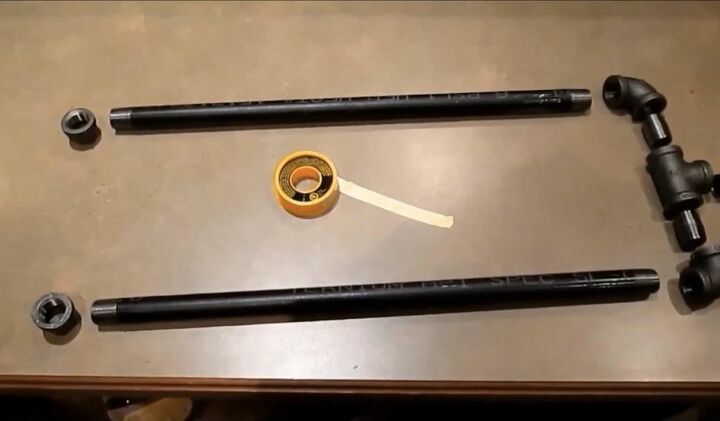
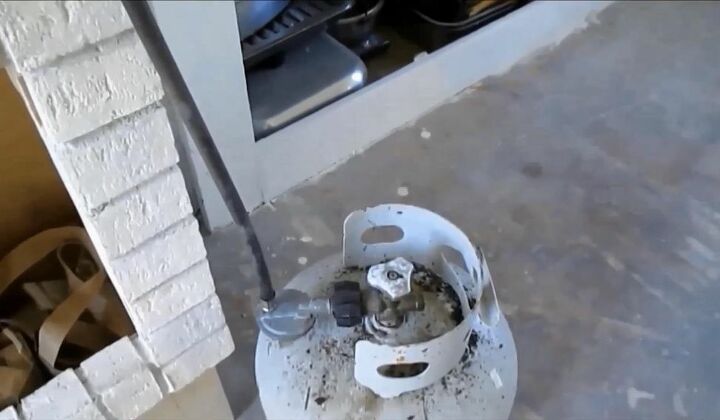
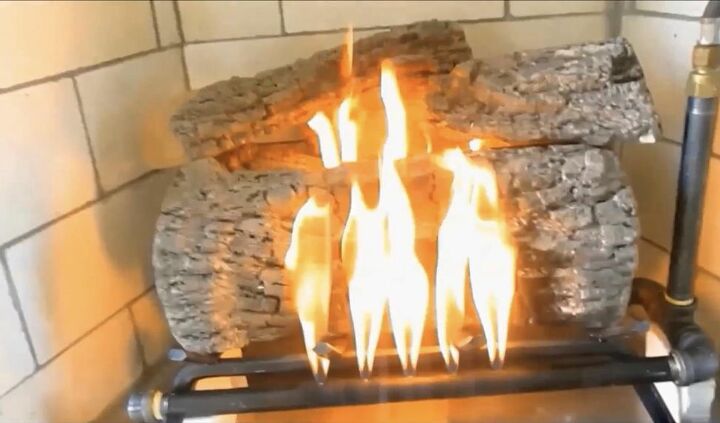
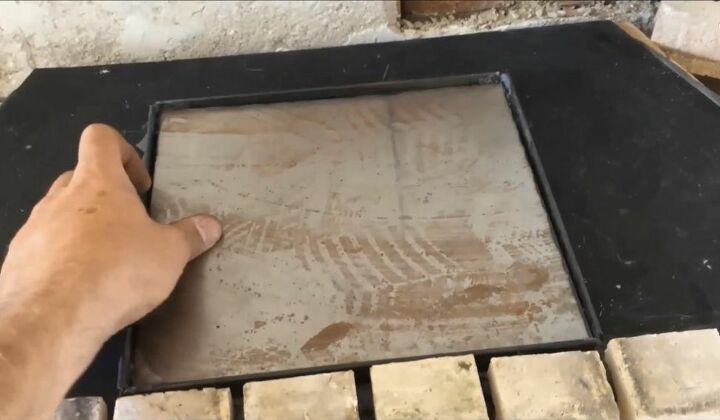
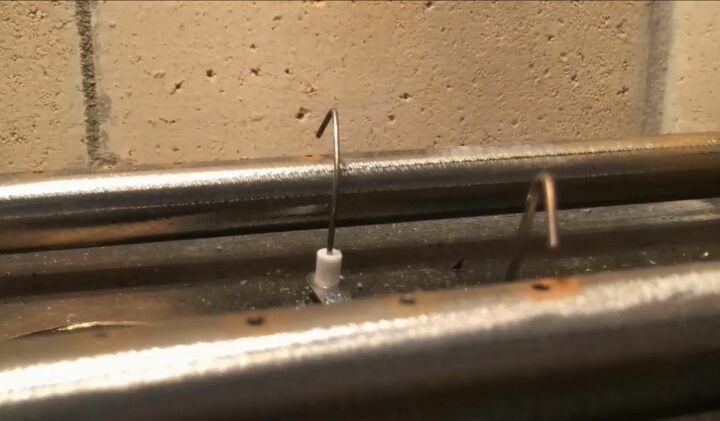
I screwed together gas piping with gas holes drilled into them to make my burner. I tested my burner with gas logs and a propane tank first and then installed my gas line by drilling through the bottom plate, installing an air inlet, and then sealing all of the edges of the firebox by pressing a sheet of ceramic glass into high-temperature silicone sealant.
* Please do not attempt to tackle this part of the project alone if you aren’t experienced with this type of work*
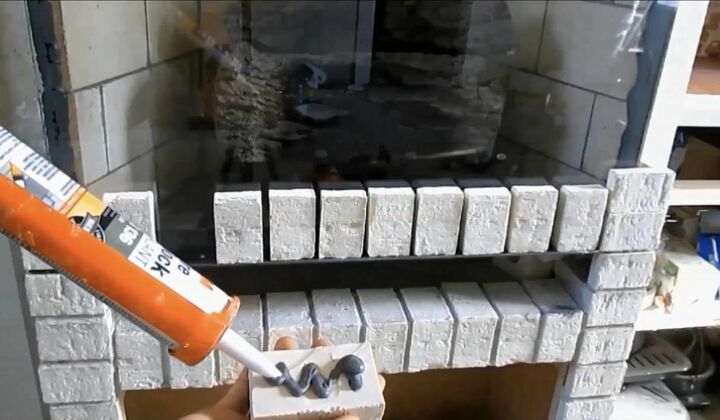
I used the same fireproof caulking to apply veneers to the front of the glass and then measured and marked to continue the veneers up the sides of the firebox. Use a level to check periodically as you go and use a grout bag to fill in between bricks and around the edges of the glass.
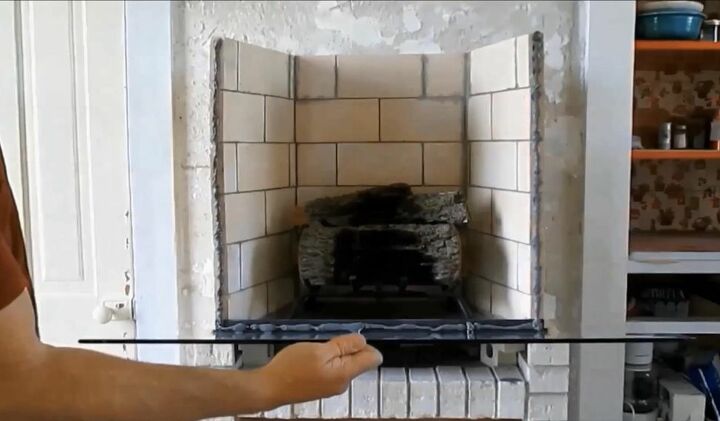
I installed the firebox top in the same fashion as the base with a piece of angle iron that rested on the ceramic glass front.
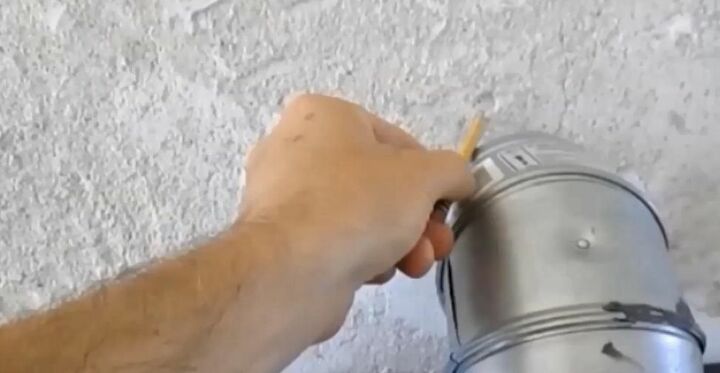
I used B Vent piping to vent the fireplace by cutting a hole in the top of the metal plate and a hole in the wall for the pipe to fit in. I used mortar to seal the pipe in place on the wall and glued a stove gasket all the way around the hole in the firebox top with stove gasket cement then attached the vent to a lid opening that would sit on top of that sealed with fireproof sealant.
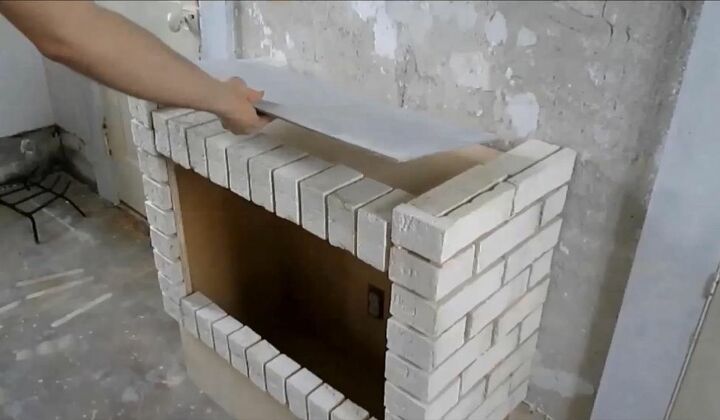
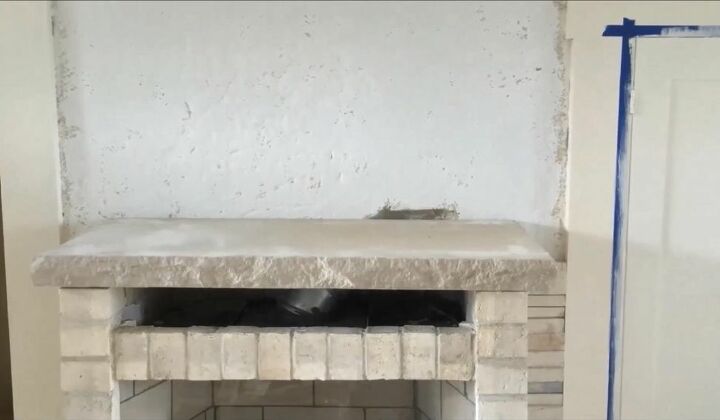
I covered the top of the fireplace with a limestone lid and then glued ledge stone on to the back of the fireplace with construction adhesive.
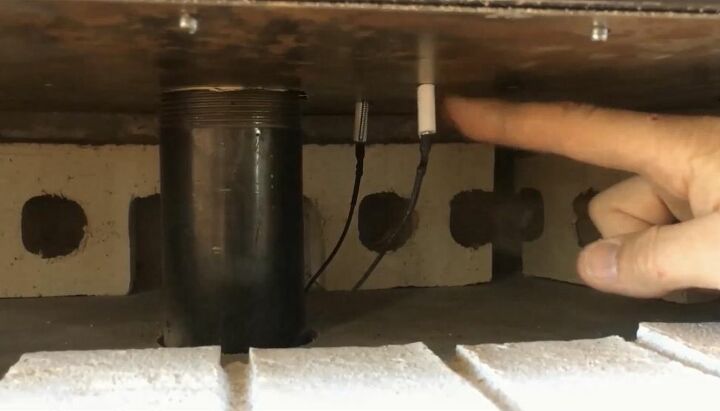
I drilled two holes through the base plate of the firebox and installed igniter wire through it to provide a spark for the gas.
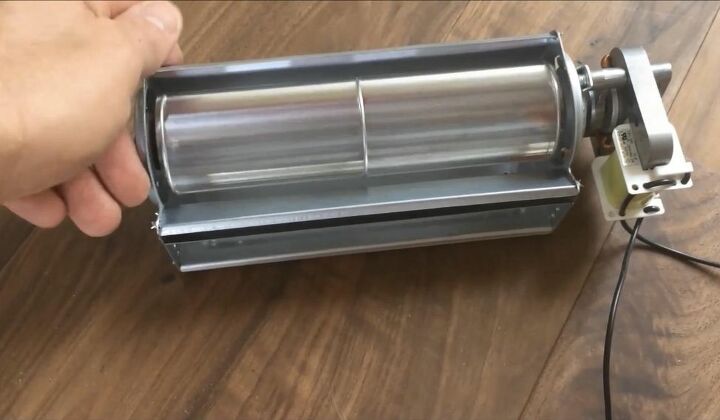
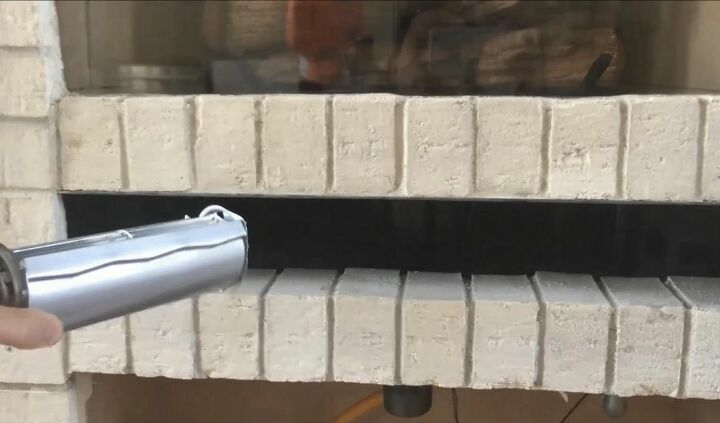
I installed a fireplace blower fan into the back of the lower vent hole.
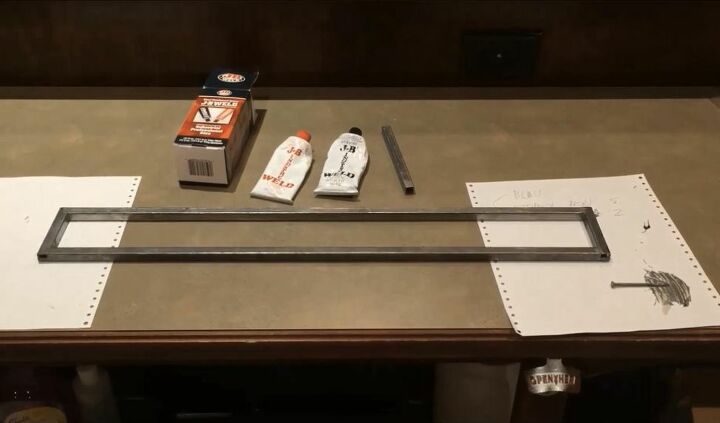
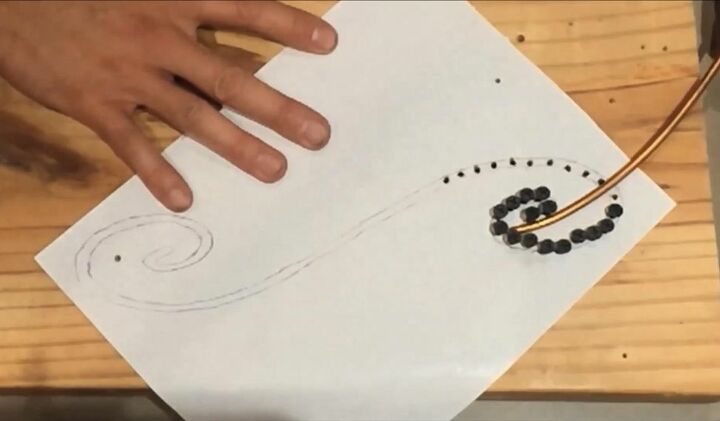
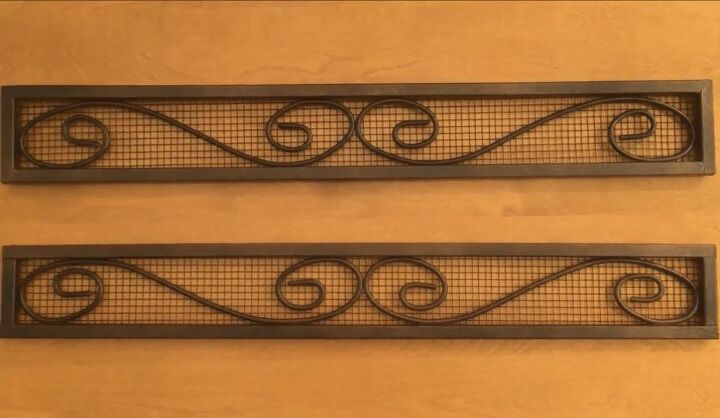
I created vent covers with square metal tubing and JB weld epoxy. I bent wire to create a scroll pattern and cut and spray-painted metal mesh; then used the same epoxy to weld the scrolls and mesh into the metal tubing frame.
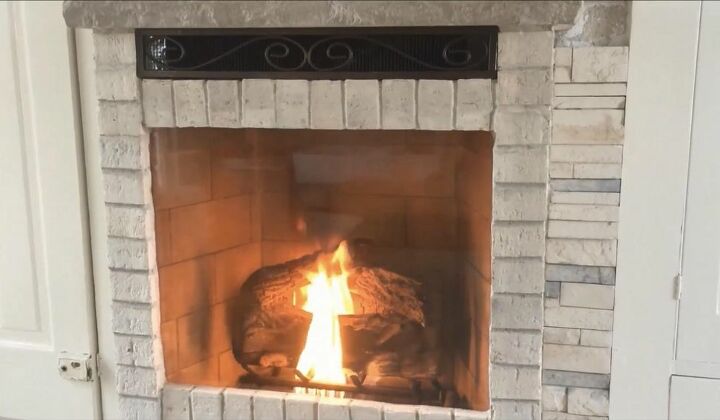
We are thrilled with how much charm and character our DIY kitchen fireplace adds to our home and can’t imagine the space without it now! Our farmhouse already had original built-in cabinets that when combined with new custom matching cabinets and our DIY kitchen fireplace result in a transformed kitchen that we thoroughly enjoy spending our time in.
Have you added a custom-built fireplace to your kitchen or home design? Share your tips and photos or find inspiration for DIY fireplace construction projects at Hometalk!


Comments
Join the conversation
-
Fabulous job! I'm blown away.
-
WOW beautiful!


Frequently asked questions
Have a question about this project?
This is such a cool project! Zero clearance fireplaces are such a great option since they don’t require the masonry “chimney” and can be placed near combustible building materials without having to alter your existing structure.
Does your city/county require building permits to make this type of change to an existing structure? I know different states have different guidelines for building/remodeling due to standards, safety and inspection laws. Some states will allow a non-licensed contractor or homeowner to make changes to their home with the caveat that they occupy the dwelling for a certain period of time after the alterations are completed.
I love the idea, I’d just advise anyone to check with their local building and zoning officials to see if there is anything they have to do before starting a project like this.
Hi...
I have been wanting a fireplace(s) for years but...$$$.
I really like how yours turned out and all of it's attributes to the installation specs...esp. being able to install one in an 'unconventional' room. (kitchen, bedroom, etc.)
Can you tell me how much you use it (ex: daily, just a few hours a day, constantly on during cold temps) and how much propane/natural gas do you use..? I don't mean to pry into your business but, I'm really interested in how much heat they provide to the room and (roughly) how much propane they use for the cold season to see if they could be used as an alternative heat source to the electric furnace.
I would much rather look at and feel the warmth of the pretty fire than feel air blowing from a vent. : )
It came out beautiful. I noticed you glued the glass to the front of the firebox, how would you get back inside if you need to?