


How to Paint a Marble Fireplace Surround With Chalk Paint

Can you paint a marble fireplace surround? Get step-by-step instructions for how to paint marble and update your fireplace surround. This budget-friendly $25 fireplace update can be done in less than a weekend.
For more simple and budget-friendly DIY project ideas, be sure to follow us on HomeTalk and visit our blog!
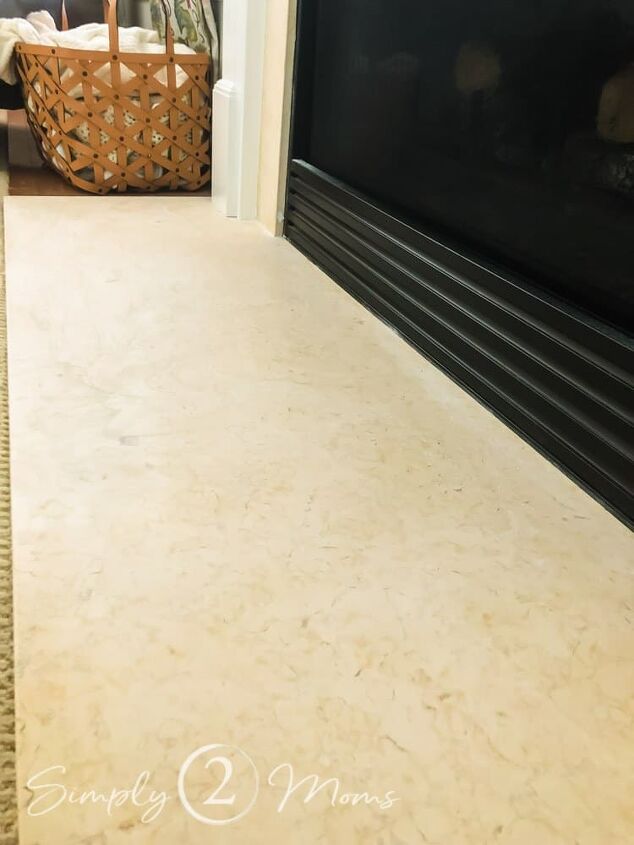
When my family purchased our home in 2005, there weren’t a lot of options for customizing our gas fireplace.So we went neutral.
Or at least, 2005 kinda neutral.We chose a cream marble surround.
It worked perfectly with the warm colors that were popular that decade.
But.
When we painted our downstairs with Benjamin Moore’s Revere Pewter?
That neutral cream surround didn’t feel quite so neutral anymore.
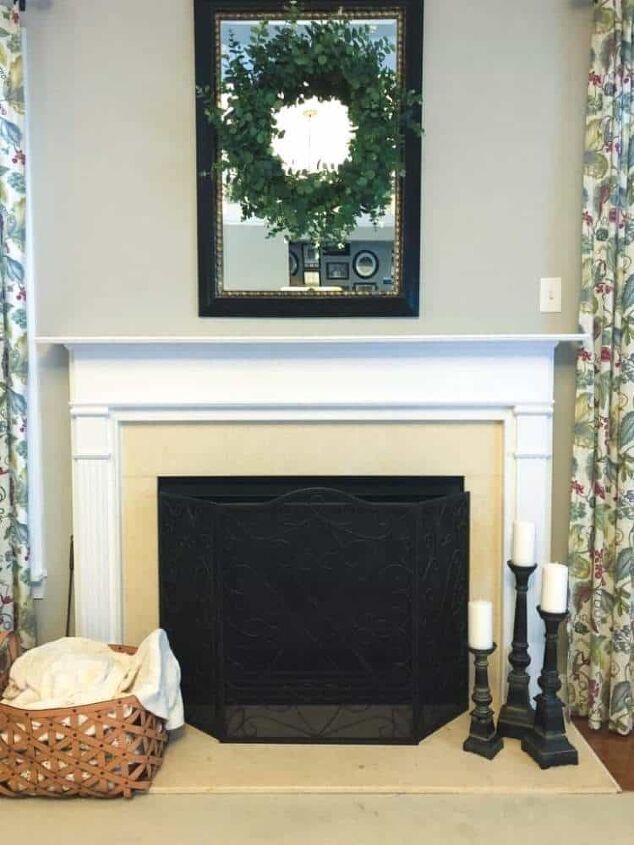
My husband and I debated lots of options to update the fireplace.
Everything from covering over the marble with ceramic tile to removing the marble completely and doing a stone surround.
But every option we liked would cost more than we wanted (or had available!) to spend.
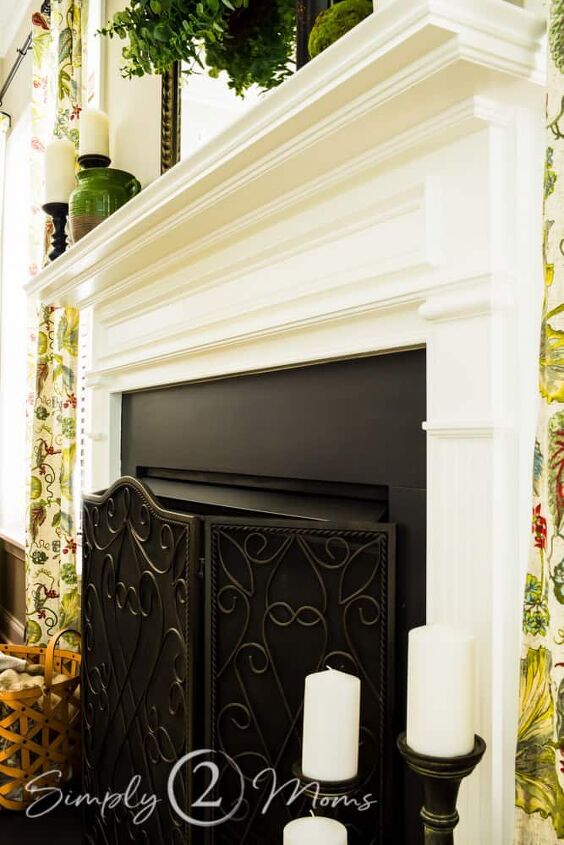
We started upgrading the fireplace by beefing up the mantel. It was never really deep enough, and it looked sort of chintzy.
That new $20 mantel helped make it look more substantial!
Can You Paint Marble?
I began to wonder, can you paint a marble fireplace?
Enter chalk paint.
I started looking into whether it would be an option.
It would only cost us about $25 in supplies, counting tape and a new paintbrush!
It would be easy enough that we could do it ourselves.
And if we didn’t like it? We’d only be out $25.
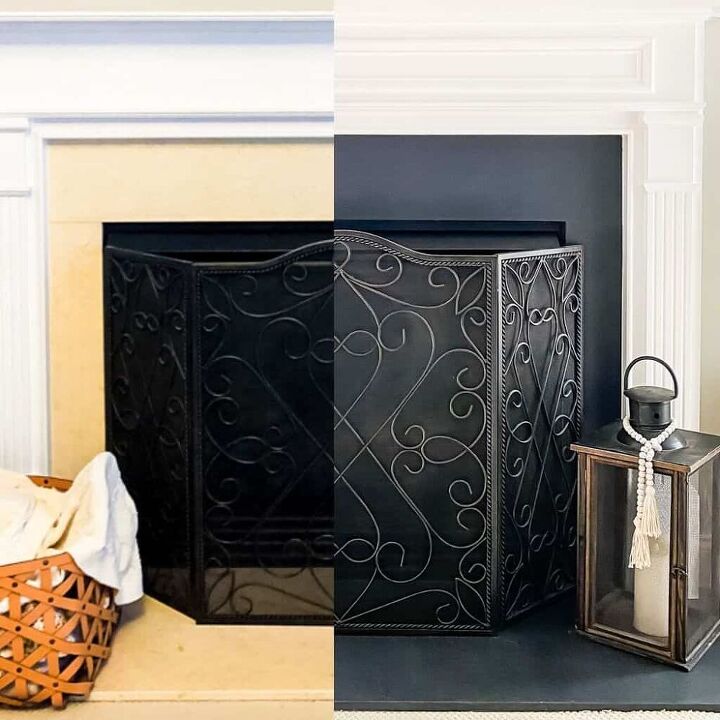
Before you read any further, check out how this project looks after two years of wear and tear.
Before making the decision to paint the surround, I tested out how it would look.
A little black card stock and some tape were all it took to help us visualize the black surround.
The Best Paint for MarbleHave you ever worked with chalk paint?
This stuff is some kind of wonderful, miracle-working paint!
It was developed by Annie Sloan for furniture refinishing and distressing.
It’s very thick, has a matte finish, and it adheres to just about anything.
Without any prep or primer.
After doing some research on different brands, I decided the best fireplace paint for marble was Rustoleum’s Chalked Paint.
Unlike Annie Sloan’s paint, the Rustoleum paint has a protective topcoat to seal the painted marble.
I thought having a protective topcoat would be extra important for the marble fireplace hearth.
It also can withstand the heat from a fireplace.
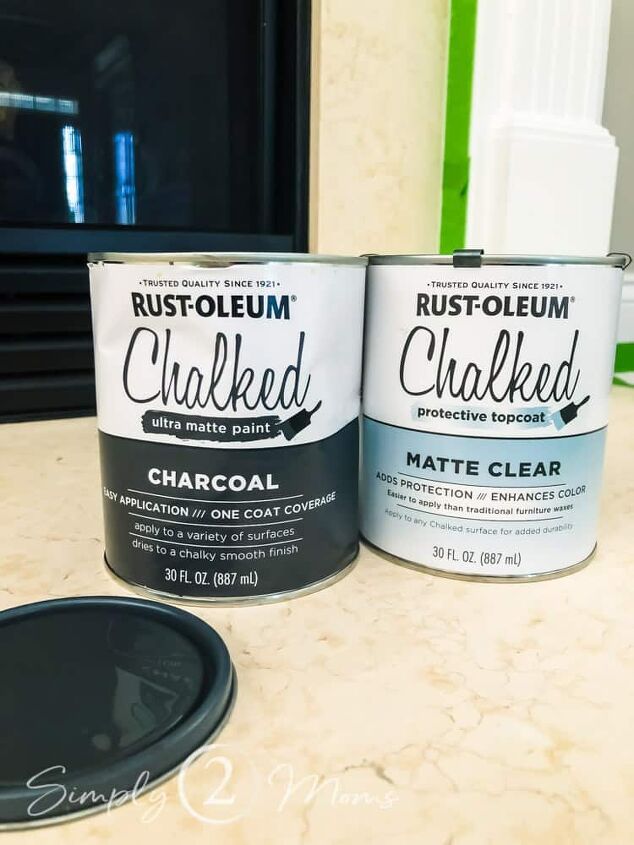
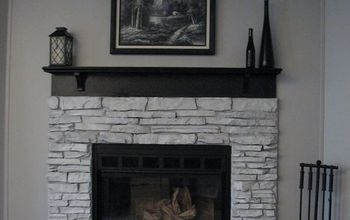
I selected their Charcoal color because I knew a black fireplace surround would give a neutral palette that would work for any decor.
Rustoleum has a nice variety of color options if you prefer something different.
How to Paint Marble
- Rustoleum Chalked Paint in the color of your choice
- Rustoleum Chalked Protective Topcoat
- 1-1/2 inch angled paint brush
- painter’s tape
- 100 grit sandpaper
1. Do You Need to Prepare Marble Before Painting?
One of the best parts of chalky paints is they adhere really well to just about any surface.
Primer is never necessary!
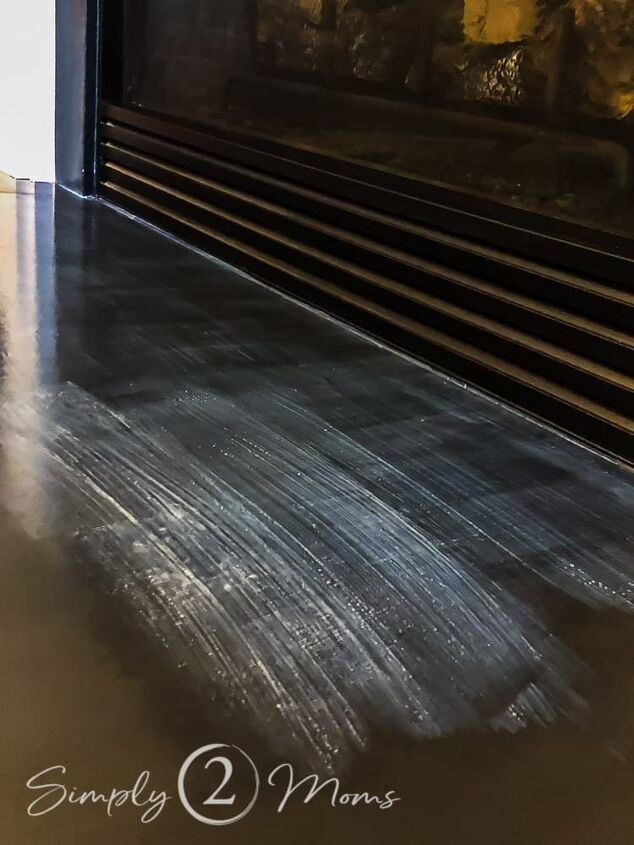
And while sanding is generally not required with chalky paints it will improve adhesion when painting marble
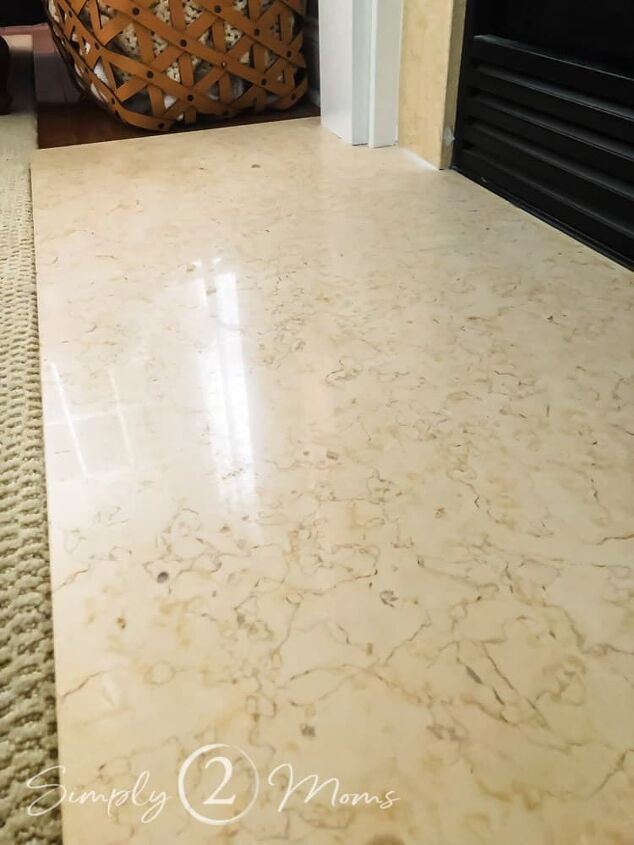
As you can see, the marble was polished to a high gloss.
It was really simple to rough up the surface with 100 grit sand paper.
See the difference?
I used a wet sponge to clean up all the marble dust.
Then went over it with a tack cloth to remove any extra dust I may have missed.
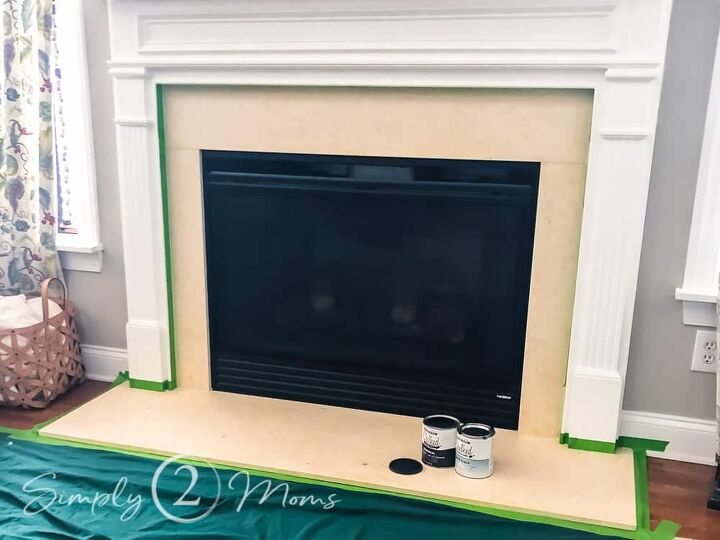
2. Tape the Edges
I used Frogtape to protect the wood mantle and the carpet.
And then a drop cloth for the carpet too.
I’m not the neatest of painters…
3. Paint the Marble Surround
Rustoleum’s Chalked paint is very thick, and it dries very quickly.
You’re going to want to use a stir stick to get the pigment thoroughly mixed into the paint from the bottom of the can.
Shaking just doesn’t do the trick since it’s so thick.
Because it dries quickly, you do need to work quickly.
It does have some self-leveling qualities, but it really does dry fast!
I didn’t mind if some brush strokes were visible. I felt like they could provide some texture to make the surface look somewhat like slate.
But if brush strokes will bother you, you can use a foam roller instead.
Y’all?
I was so nervous!
But as soon as I painted the first little part of the marble, I was in love! It looked so good!
I started with the top section and did short horizontal strokes to cover the surface.
Then I ran the paintbrush lightly over the surface from one end to the next to make the strokes look even.
Next, I painted the two side sections with vertical strokes using the same technique.
I finished with painting the marble hearth.
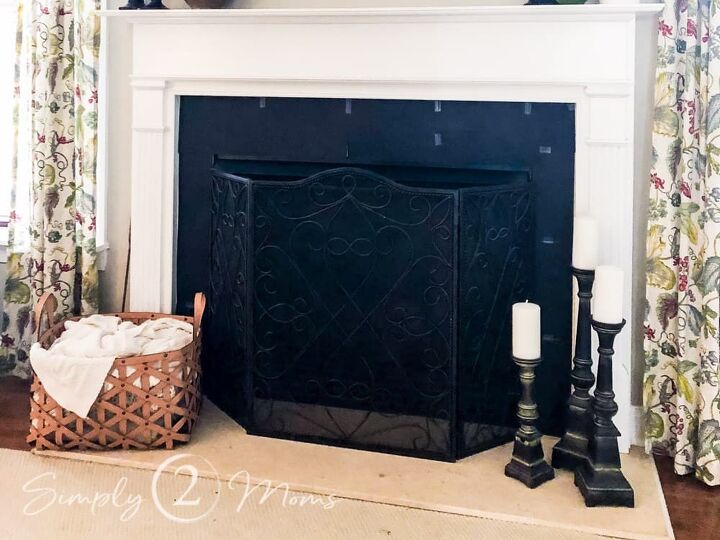
I could not believe what a difference it made!
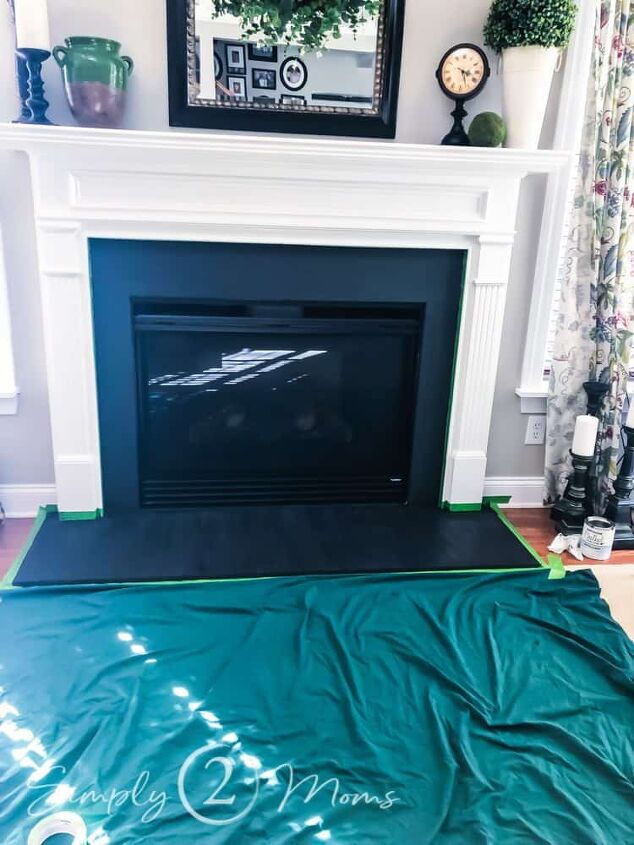
Buh-bye, cream marble, helllllooooo black beauty!
4. Do You Need Two Coats of Chalked Paint?
After the first coat, you can see there were some spots that needed a bit more coverage.
I let it cure for an hour, then added a second coat.
It probably wasn’t necessary to wait that long because have I mentioned this paint dries super quickly?!?
As soon as I finished the second coat of paint I removed the tape.
I didn’t want to risk the paint possibly peeling!
If you don’t remove the tape immediately, you may want to use a razor blade along the edge to make sure it doesn’t pull off any of the paint.
5. Do You Need to Seal Chalk Paint?
Before you seal the surround, clean the surface well.
You don’t want any stray hairs, dust or lint getting sealed in!
Next, make sure you stir the topcoat sealer well.
I was amazed at how much the consistency changed from stirring it!
I applied the sealer using the same process that I used for the paint.
The sealer isn’t nearly as thick as the chalked paint.
It goes on looking gray, but it dries to a completely clear matte finish.
I applied three coats of the sealer, letting it dry for a full day between each coat.
I wanted to make sure my newly painted marble fireplace surround was well-protected!
And that’s it!
I only used about 1/4 of a can of the paint and 1/4 of a can of the sealer for this project, which means I’ve got a beautiful new fireplace surround for less than $15!
Before/After
Everyone loves a good before and after, so let’s take a look back at where we started before upgrading the mantel and painting the marble surround:
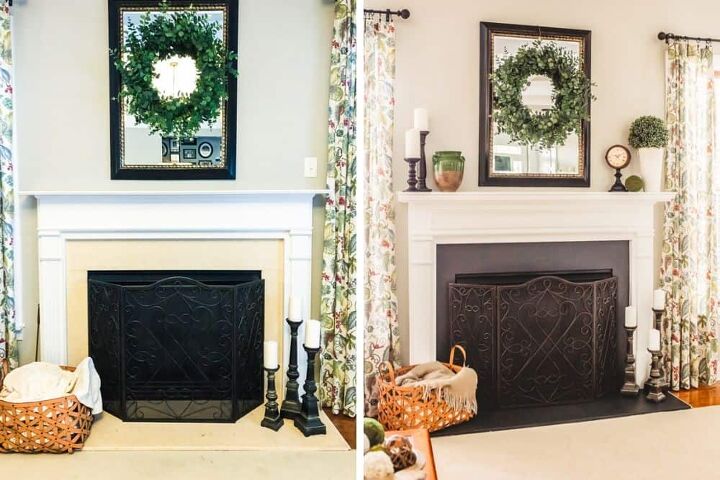
And here it is with a close-up split view. What a difference!
If you have an outdated fireplace, I’m happy to report that chalk painting your marble or tile fireplace is an inexpensive and simple option to give it a face-lift!
What do you think? Will you give it a try?
Comments
Join the conversation
-
I love the charcoal color you chose!


Frequently asked questions
Have a question about this project?
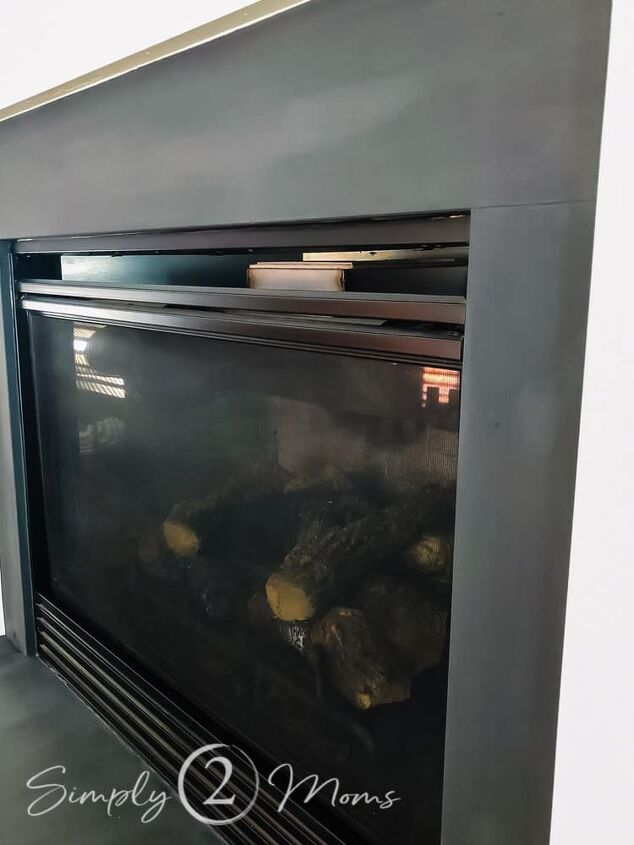
This looks beautiful and I have a lot of faith in Rustoleum products. But how is it holding up to the heat of the fireplace?