


Bland to Grand End Table
5 Materials
2 Days
Easy
 We’ve all seen these end tables – they were a staple of every living room in the '80s, right? When I was “gifted” two of these lovelies, I gladly accepted knowing I could give them a new spin.
 A few simple steps transformed the look from bland to grand.
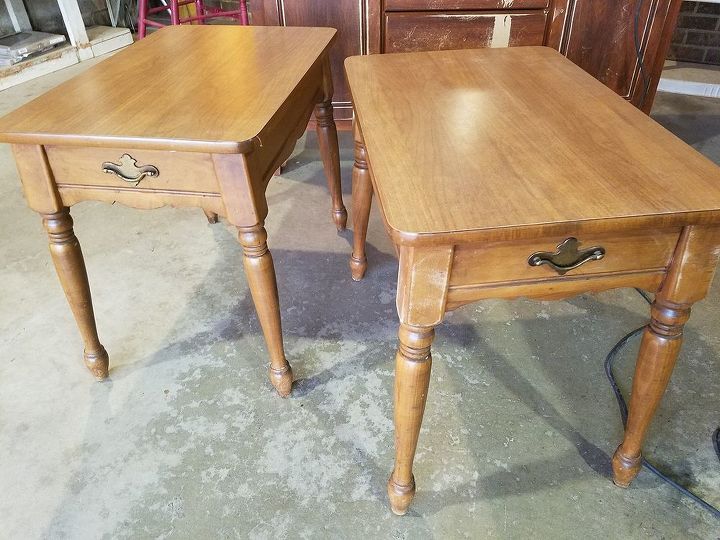
'80s ladies
Products used:
- General Finishes Coastal Blue Milk Paint
- GF Seagull Gray Milk Paint
- GF Pitch Black Glaze Effects
- GF Burnished Pearl Effects
- GF HP Topcoat Flat
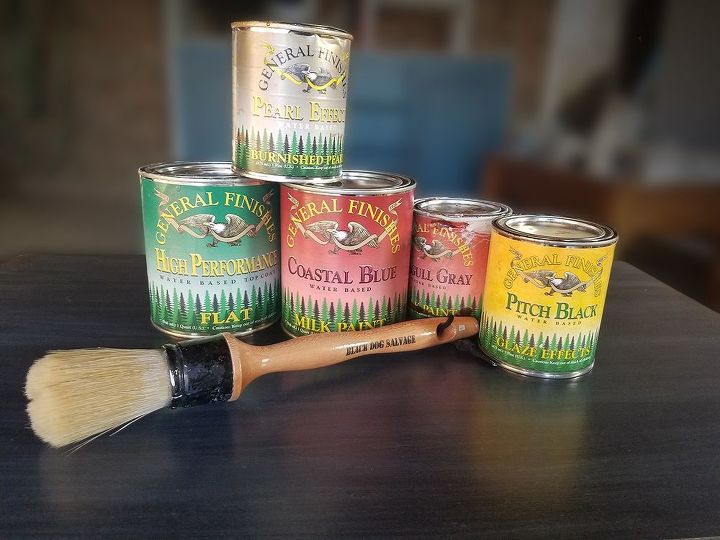
Products Used
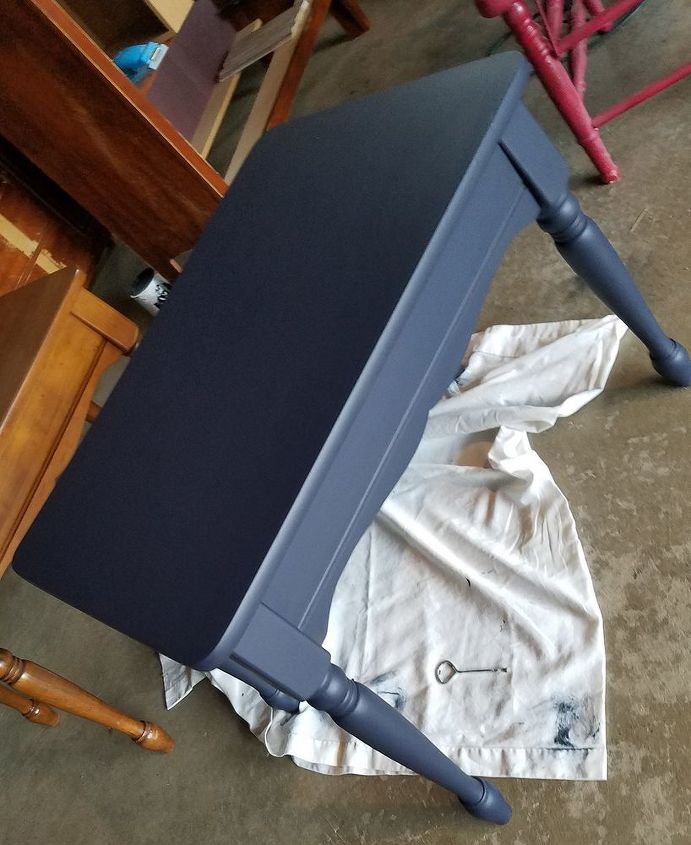
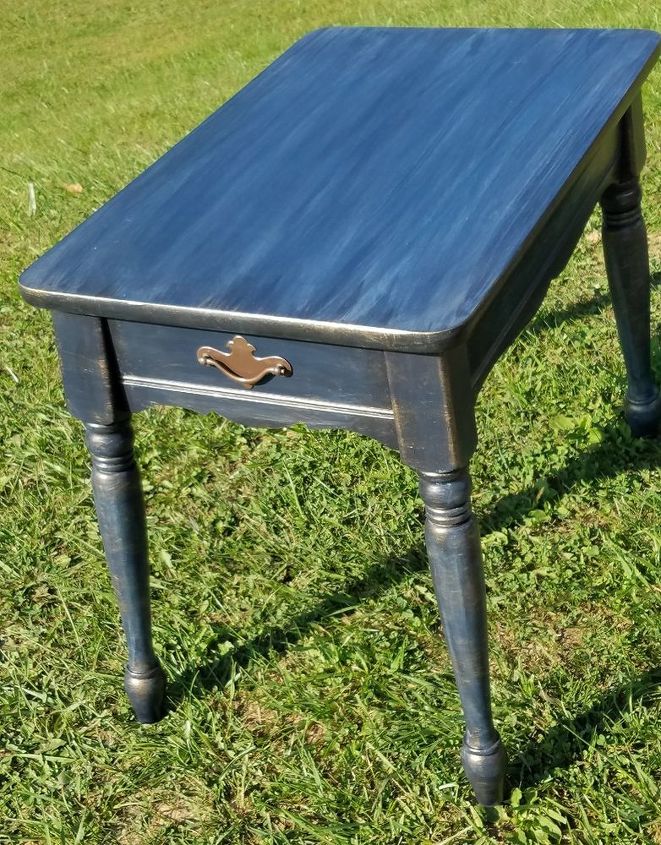
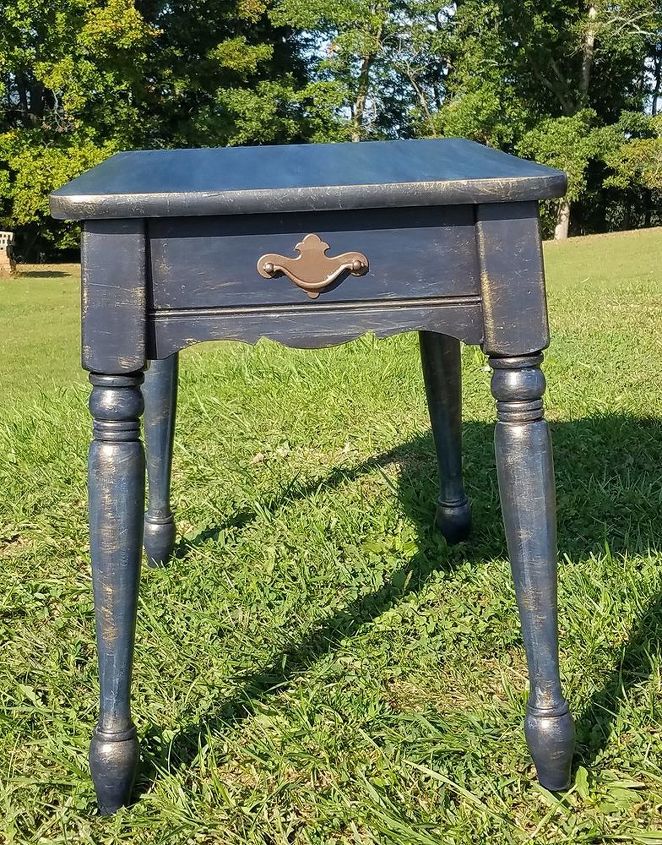
2 coats of GF Coastal Blue
1. Step 1 (after cleaning and a light sanding): 2 coats of Coastal Blue Milk Paint. I used a #10 Round Furniture Brush from Black Dog Salvage. I have found that these brushes are great for getting around table legs and spindles, as well as creating smooth results on large surfaces like tabletops. They are also much less tiring on the hand than gripping a regular paint brush. When I do a lot of painting with the other brushes, my hand cramps up. Not so with the BDS brushes!
2. I didn’t get photos of Steps 2 & 3, so my apologies. Sometimes you just get in the zone! Step 2 was applying GF Pitch Black Glaze with a foam brush. I worked it into the grooves, then wiped it off with a clean rag, leaving remnants of the black to give it a little dimension.
3. Step 3 – Using GF Seagull Gray Milk Paint, I created some light and dark contrast. With a foam brush, I brushed the gray onto the table’s sides and the top, and then quickly wiped it off, blending as I went with a clean rag.
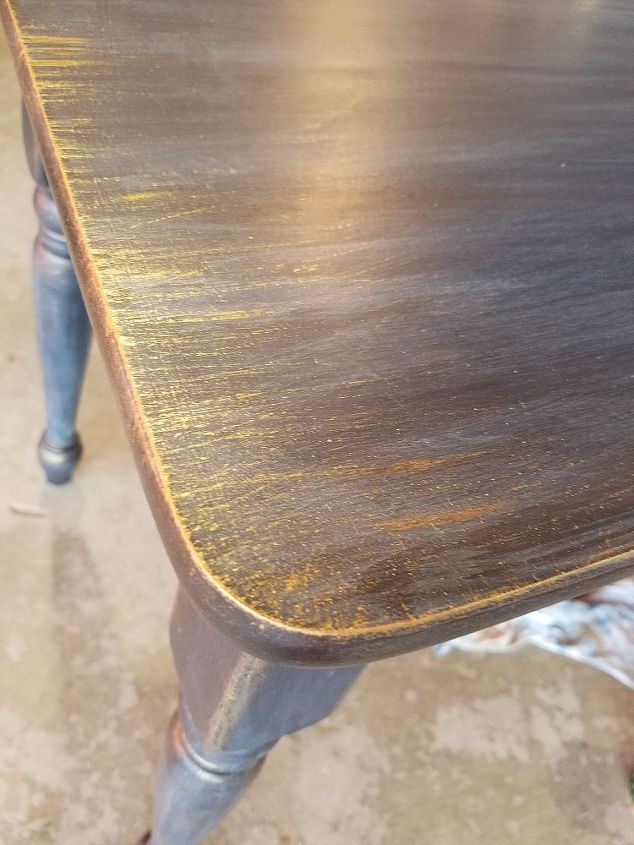
The Midas touch
4. Step 4 – GF Pearl Effects. I think the final “finessing” of a project – those little extra details that make it special – is truly when an artist’s creativity shines. So I really had fun with this part. With a shabby chip brush, I dry brushed some gold accents with Burnished Pearl Effects across the edges, tops, sides and legs of the table. I gradually built up layers until I determined I was finished.

Creating interest with layers of color
5. Lastly, I added three coats of GF HP FlatTopcoat all over the entire table. I had repainted the original hardware with brown Rust-Oleum Hammered Spray. Put that back on and DONE!
Regarding costs and time: The table was given to me, so no cost there. The paint and other products were purchased from Woodcraft but I had them on hand. It took about 2 days to complete this only because of drying times between coats.

Want more details about this and other DIY projects? Check out my blog post!
Comments
Join the conversation
2 of 40 comments
-
Exactly what is milk paint
-
I have to agree about liking the first blue paint best...but thanks for the info...it's great.


Frequently asked questions
Have a question about this project?
Lori, I loved the Coastal Blue in the first pic, too. But, I can see the look you were going for with the Pearl. I was wondering if a dark wax would subdue the Burnished Pearl just a little bit? Going over the entire table and the metal pull with dark wax might unify everything & sort of bring it all together. Good work!
Just gorgeous!
A lot of folks advise chalk or milk paint. What would you recommend if you wanted to try to match the original color of the table?
I have a similar kitchen table and want it to look new-as new as possible!
Thank you!
Thanks for sharing the round paint brush for furniture...my hands often cramp up with a regular brush. You mentioned that you shop at Black Dog Salvage...do you order online or get to go into the magnificent store?