


DIY Upcycled Stool With Chalk Style Paint
With a little chalk style paint and imagination you can turn an old piece of furniture into a showstopper with this simple tutorial to upcycle your outdated furniture!
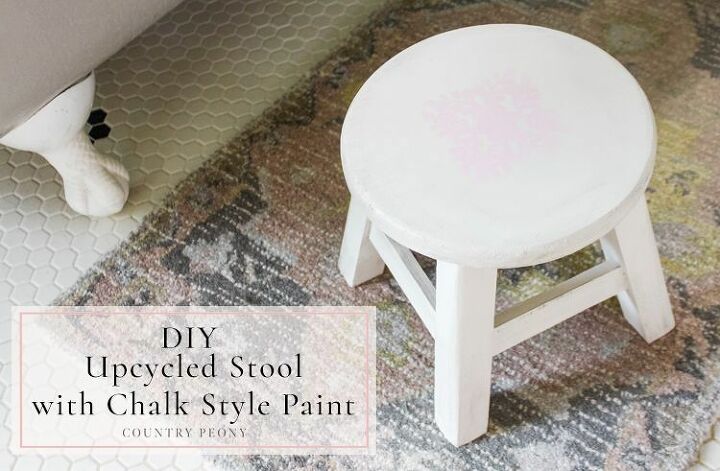
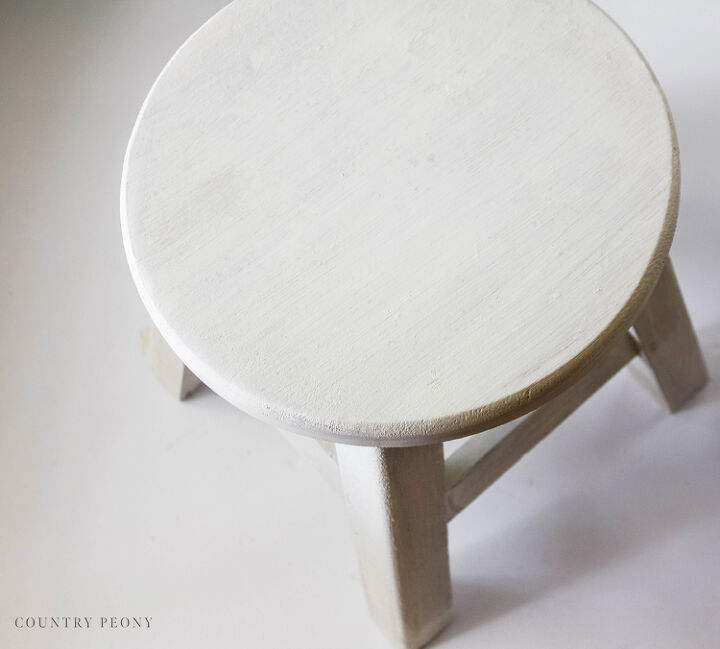
I was on the hunt for a petite stool that could house my favorite bath products since my clawfoot tub doesn’t have storage options. I found this stool at Hobby Lobby for a great price. I loved the size and simplicity of it, but I wasn’t crazy about the color. The distressing seemed overdone and the brown didn’t work with my gray and pink bathroom.
So I used some leftover chalk style Magnolia Home paint from my DIY Terra Cotta pot project (full tutorial found on the blog), some wax, and a stencil, and decided to upcycle my stool one Sunday afternoon. As I was getting ready the next morning, my 3-year-old daughter commented on how pretty it was. I now think it fits perfectly in my bathroom, and was a fun project for an afternoon.
Magnolia Home’s Chalk Style paint in Shiplap (affiliate link) is the star of the show once again. As I mentioned above I originally used the chalk style paint in my DIY Pressed Flower Terra Cotta post. I love chalk style paint because it requires minimal prep and dries quickly. Any project that takes a couple of hours from start to finish in the afternoon or on the weekend is a win in my book, since my “free time” is minimal with my children these days. Even though Magnolia Home’s Chalk Style paint in Shiplap is a bit more expensive than alternative brands, I think it is a great investment because it dries quickly, provides great coverage and a little bit goes a long way. I also used Magnolia Home’s Clear and Dark Wax to seal and add a little texture to the stool.
Follow along below to see how I upcycled my Hobby Lobby stool into a one-of-a-kind stool for my bathroom. I hope you feel inspired to upcycle your own piece that needs some personalization and love.
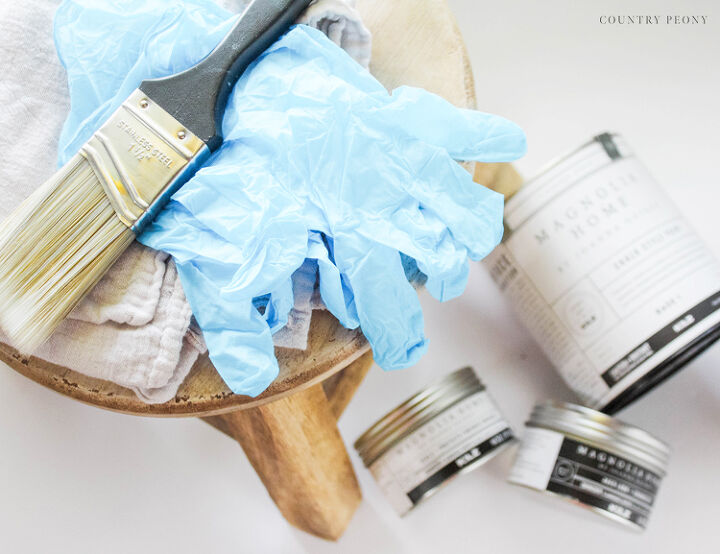
To upcycle your own piece of furniture, you will need:
- Chalk Style Paint. I used Shiplap from Magnolia Home. (link above)
- Angled Paint Brush. I used Magnolia's Home 1.5" Angled Paint Brush.
- Plastic gloves to keep your fingers clean.
- Clear and Dark Wax to seal the project, and to add texture. I used Magnolia Home's Clear and Dark Wax.
- Clean Cloth to Apply and Wipe Off the Wax.
- NOT PICTURED: Stencil
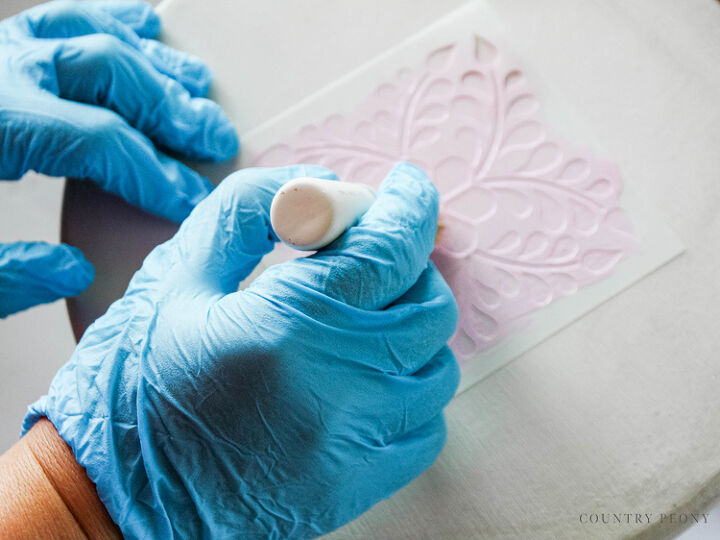
- NOT PICTURED: Stencil Brush
- NOT PICTURED: Craft Paint for the Stencil
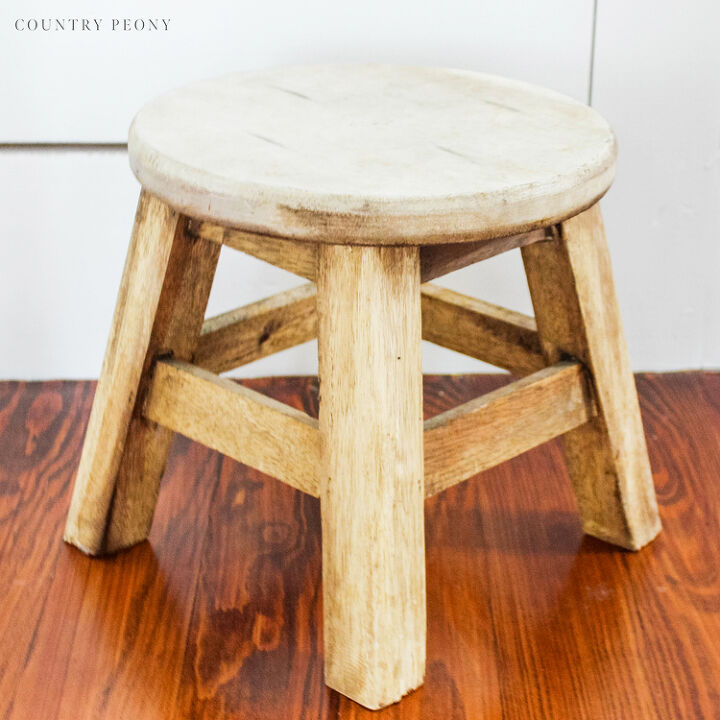
Before I started with an overly aged (in my opinion) stool that needed a little brightening to match my feminine and bright master bathroom.
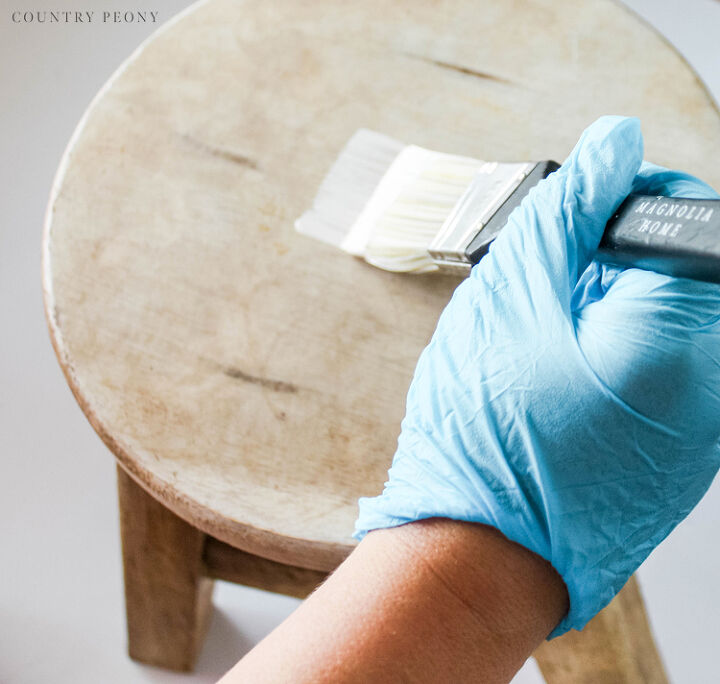
Step 1: Prep the furniture piece that you will be painting: clean it, and sand it to even out any rough edges.
Step 2: Apply one even layer of paint to the entire piece of furniture. Paint the same direction with your brush to achieve a nice, even look.
Step 3: Let the first application dry (about 1-2 hours), then apply a second layer of paint.
Step 4: Apply a third layer of paint once the second layer is dry.
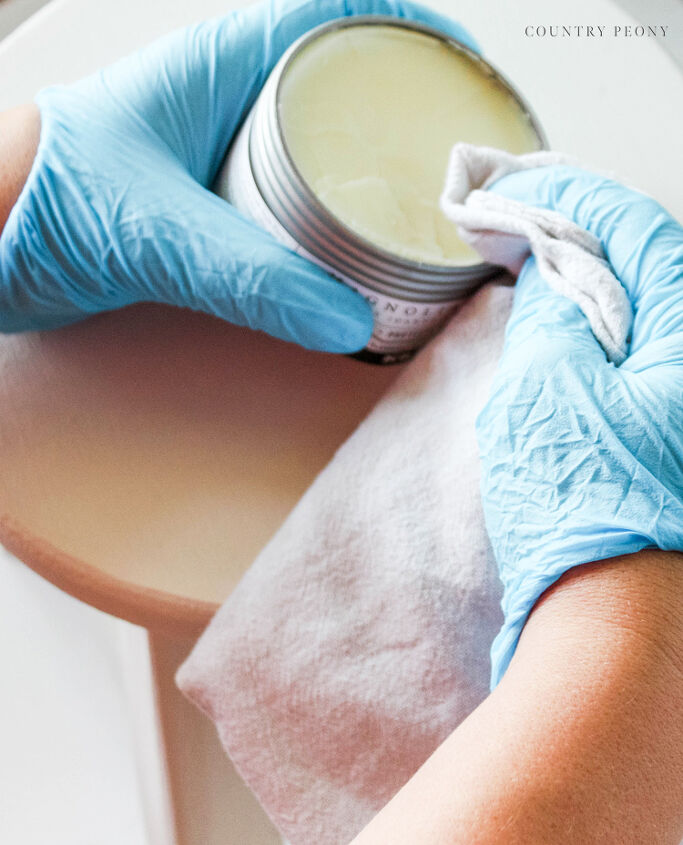
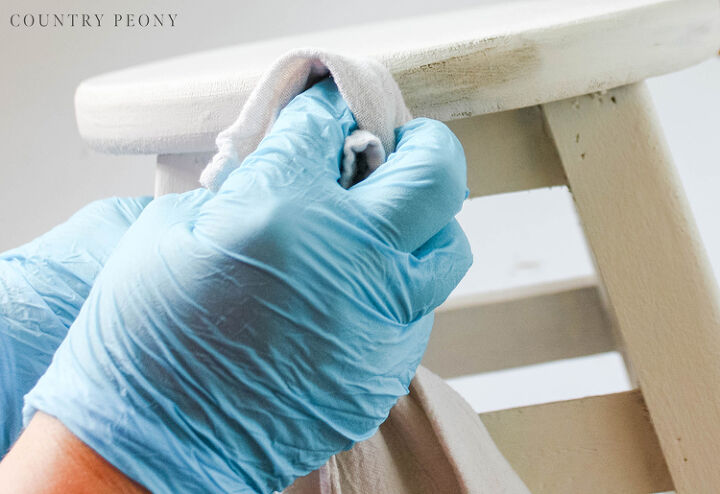
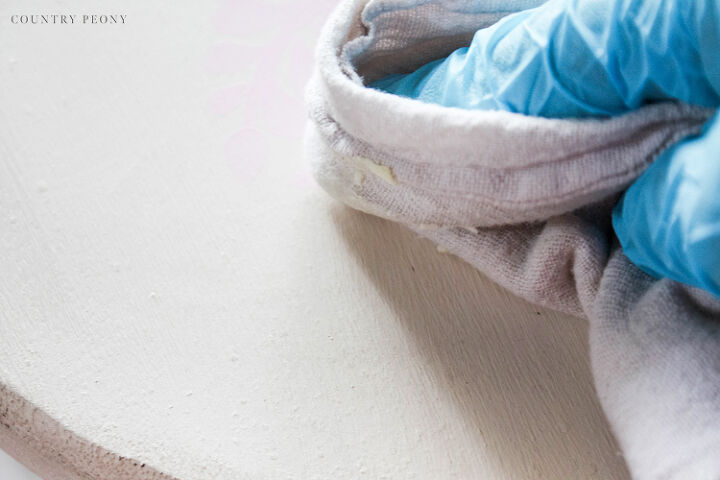
Step 5: Once your third layer of paint is completely dry (about 2 hours), then use your clean cloth and apply clear wax to the entire furniture piece to cure it and protect it. Buff the wax with your clean cloth right after you apply it.
*Since the wax is clear it is hard to see where you applied it. Therefore, I would recommend doing small portions at a time.
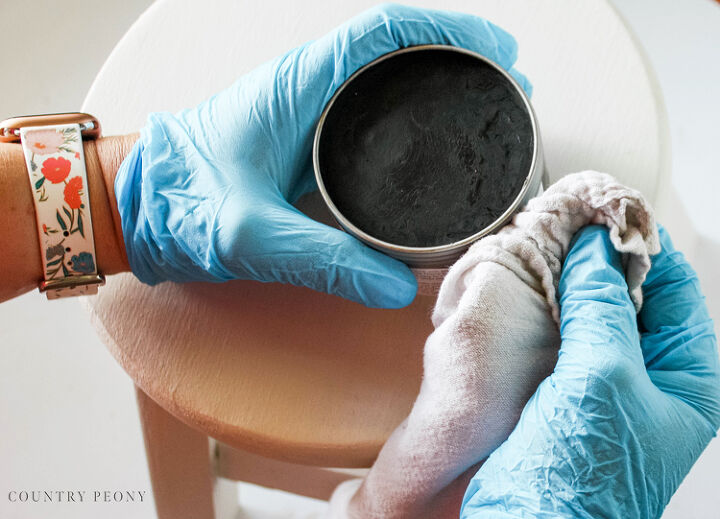
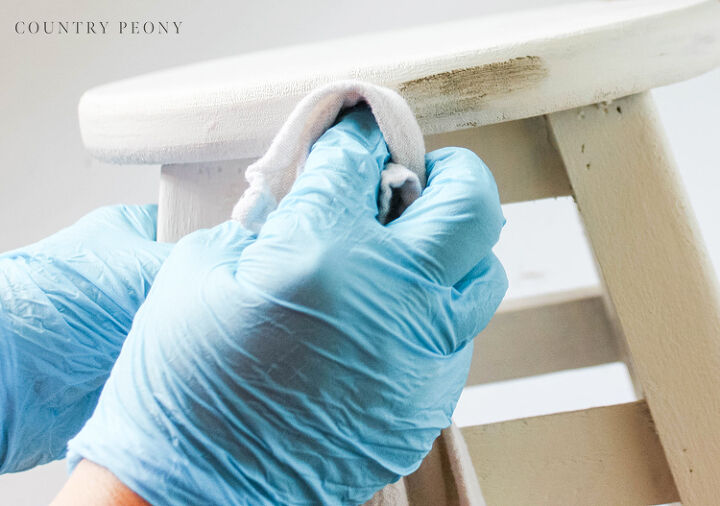
Step 6: You can stop at the clear wax, but I wanted my white stool to have a little patina so I added some dark wax. Use the same cloth and apply a little dark wax directly to the furniture piece.
Remember, a little bit goes a long way with the wax. The application of dark wax is very forgiving. You can always wipe the wax away before it dries. So don’t get scared to play with it.
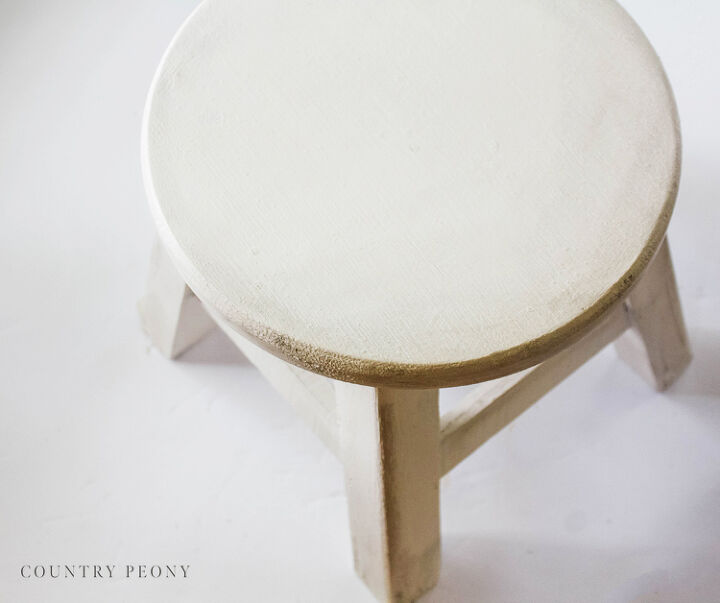
I like how the dark wax adds a subtle depth and texture to the white stool.
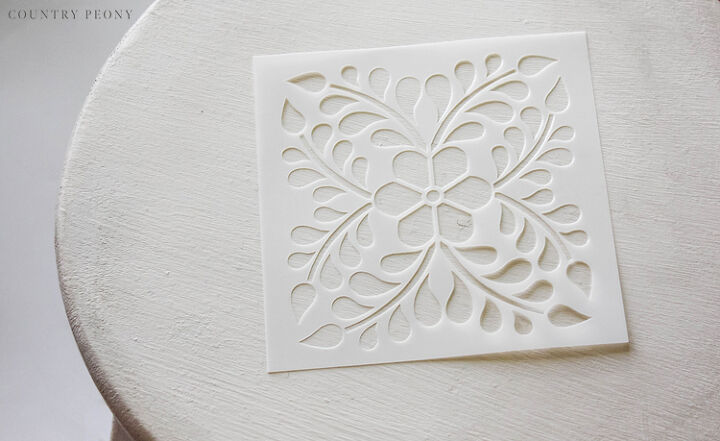
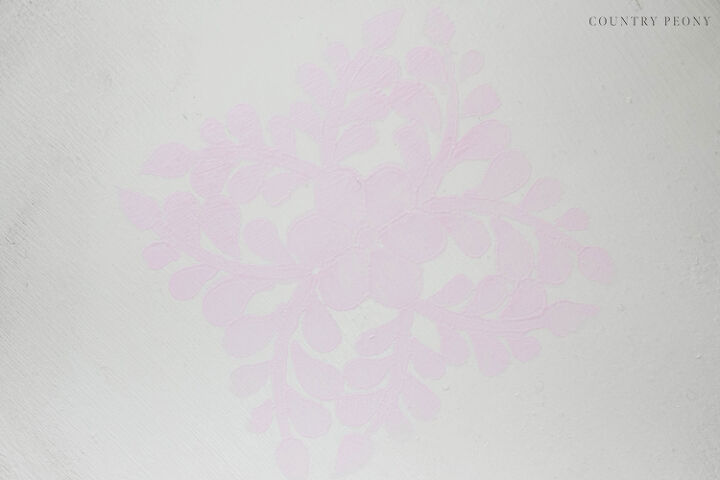
Step 7: Because I am extra, I wanted to add a touch of femininity to the stool that will be in my pretty master bathroom. I knew a touch of pink would do the trick!
Again, have fun with it and do what speaks to you! You can always paint over it, if you don’t like it!
Step 8: Whether or not you choose to add extra paint through a stencil or end at the dark wax, apply a final layer of clear wax to the piece with a cloth to cure it.
Then, enjoy your final product!
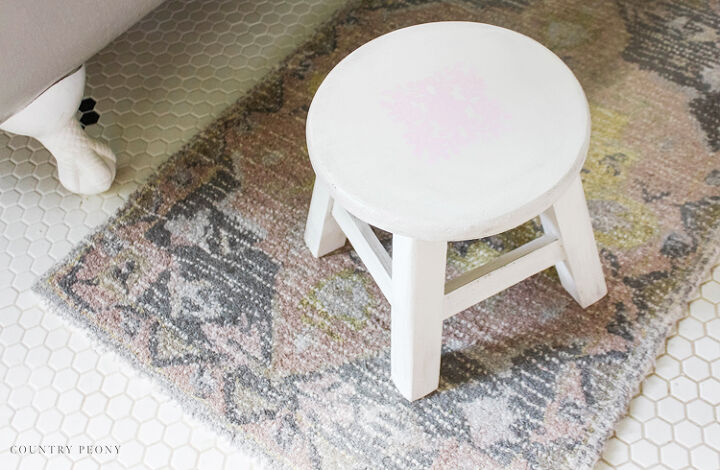
I love how my piece adds a little pizzaz without stealing the show!
Resources for this project:
See all materials


Frequently asked questions
Have a question about this project?