


Don't Hate Your Old Coffee Table - Do THIS Instead!!!
7 Materials
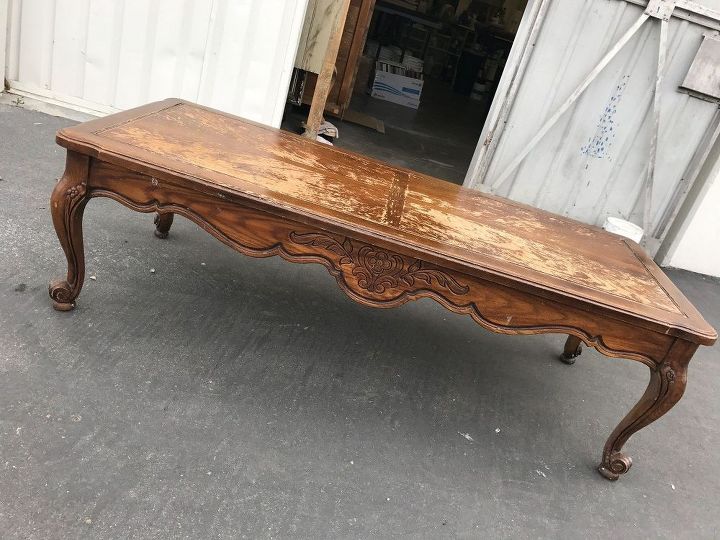
Never give up on that ugly piece of furniture you have - with a little paint and plaster, you can have a masterpiece!!! This was a steal of a deal - yard sale find for $10!!! I personally needed a coffee table for my house - had to buy this and was waiting for the time to create something for myself!!!
Out the back door for sanding :)
I'm a little old-school with my preparation work - I always sand everything, want to get the old layers off (who knows what's on there)! I sanded with 150 and 220 grit sandpaper - tried to remove all the layers of Pledge build-up.
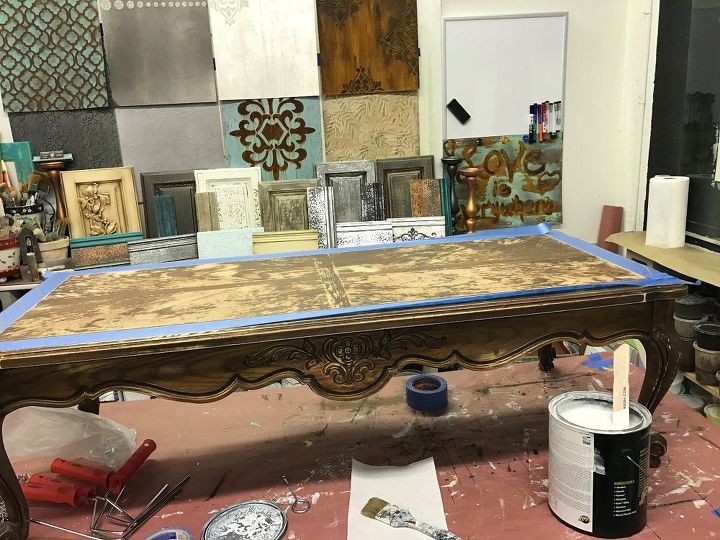
Priming and taping off!
My next step was to prime the entire piece - I used the XIM Primer for adhesion. I was a little worried about the layers of Pledge someone loved - just wanted to make sure all my efforts would last forever! I first taped off the center panel for the Crocodile Roller texture - I primed and then applied the AE Texture Medium with a trowel, keeping it then (1/8" to 1/16" thickness).
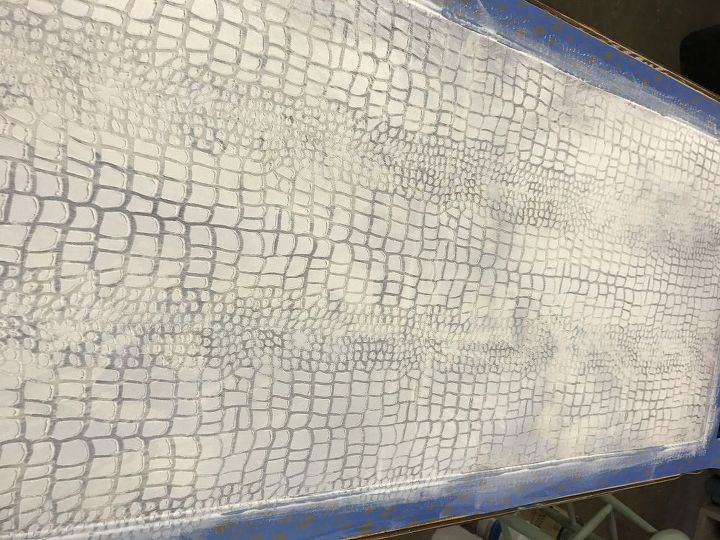
Texture Medium with Crocodile Roller
I troweled the AE Texture Medium onto the surface and while it was wet, I rolled the Crocodile roller through the wet material. I rolled straight down the middle of the panel with my first roll - the wood had a straight line to follow. Then I rolled out the rest of the panel on the right and left side trying to center the design. Once the AE Texture Medium is dry you will want to sand off the "high peaks" that the roller creates.
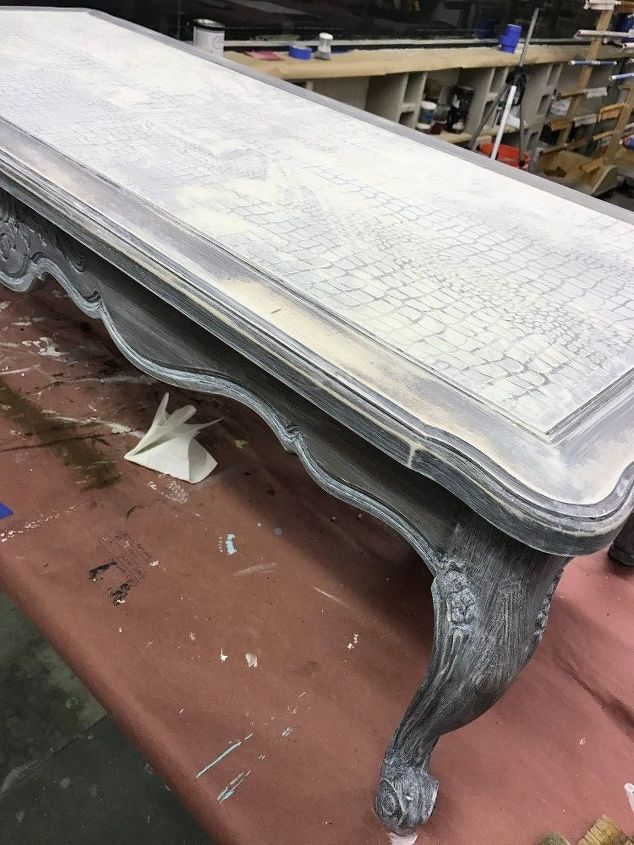
Crocodile Panel and Primed table
Once the panel was done - I removed the tape and finished priming the rest of the table. Allowed this to thoroughly dry and then applied the Debi's Design Diary DIY Paint - Old 57. I applied two layers of the Old 57 - allowing the first layer to dry completely before applying the second layer.
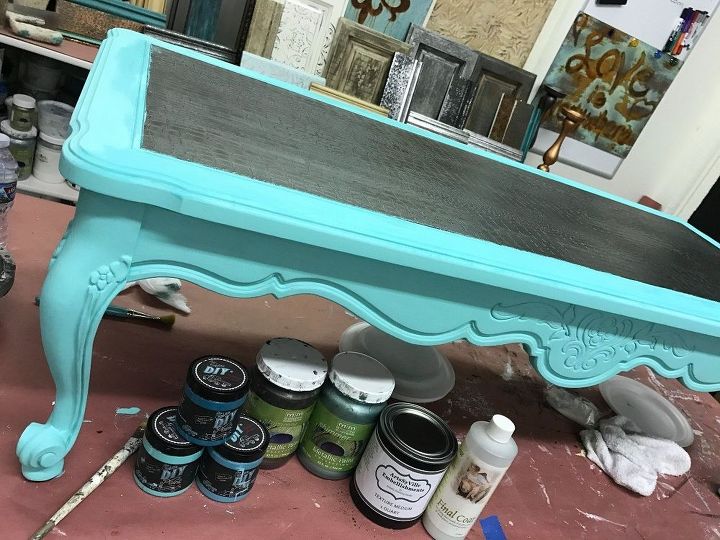
MM Smoke and DIY Paint Old 57
The center panel was painted in Modern Masters Metallic Smoke paint - this covered really well in one coat (but metallics tend to leave brush strokes - this is due to the metal particles in the paint - they will lay down in the direction brushed - which showed in my LIVE, I was worried due to the fact that I was glazing over it and it would disappear) :)

Dry Brushing over the Smoke with Teal
I love adding extra detail that creates layers of depth and dimension! So I Dry Brushed the Modern Masters Metallic Teal over the Smoke to highlight the detail of the Crocodile roller texture. This is done by loading a small amount of paint onto a Filbert Style Stencil Brush or a older stiff Chip Brush - then off-load the excess paint onto a papertowel. This creates a dry brush and allows you to brush over the surface and highlight the details of the texture on the surface.
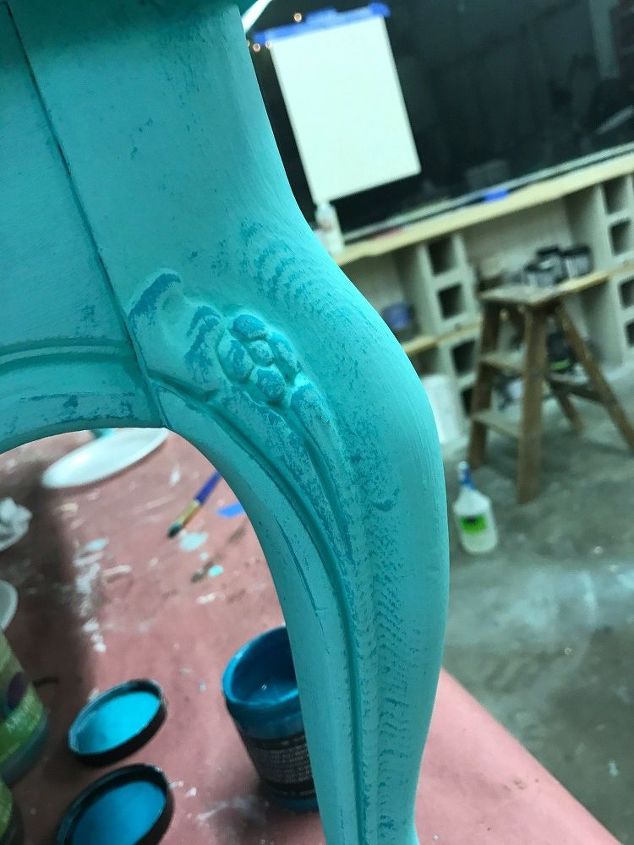
Dry brushed SeaGlass over the Old 57
I also used the same dry brushing technique over the Old 57 with SeaGlass - both of these paints are from the DIY Paint collection. I dry brushed over the entire surface, highlighting all the detail and create a fun color contrast.
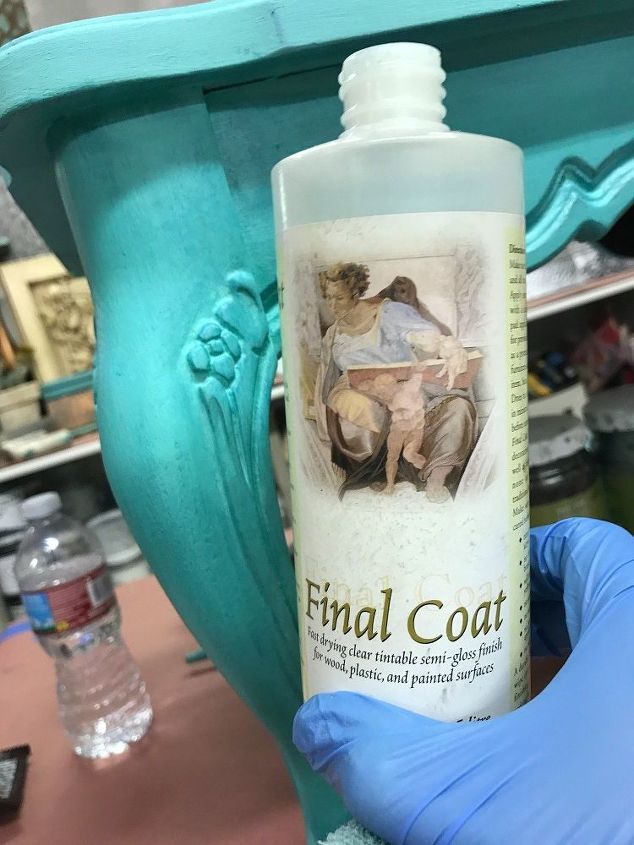
Wipe on Varnish - Final Coat
I used the Final Coat over all the DIY Paint to seal the surface - this being a Chalky type paint, it's too porous to glaze directly over. Just apply with a staining pad by wiping it onto the surface - it's meant to go on paper thin and dries within 10 minutes. I just applied one coat to help with the glazing process.
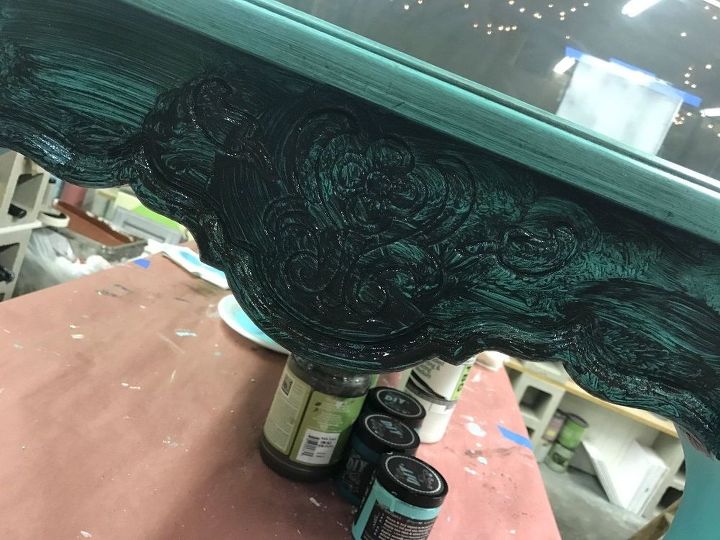
Applying the Black Glaze
The last step was to apply the Black Glaze over the entire piece - I started with the top center panel. Apply the glaze with a Chip Brush and remove excess with Cheesecloth, wipe back most of the glaze to just leave a little in the recessed areas and create more depth. I worked from the top down, doing a section at a time - brushing the glaze on and wiping it back off.
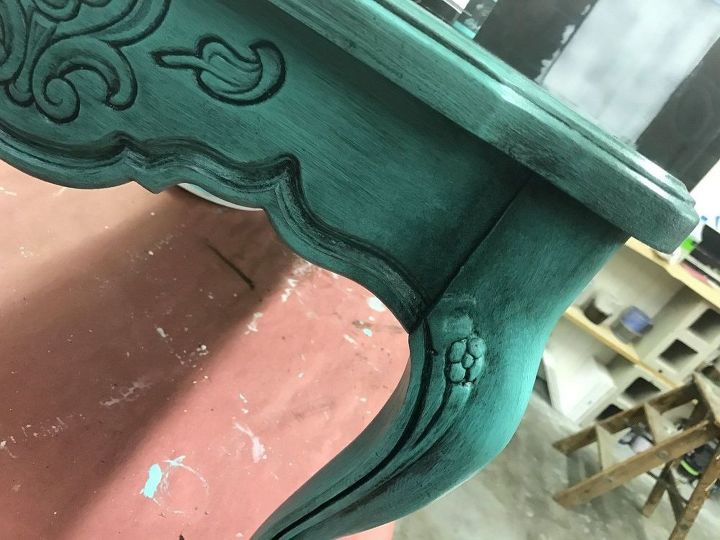
Black Glaze over the Old 57/SeaGlass
The Black Glaze was applied to one section at a time - brushed on and wiped back, leaving it in all the detail areas and creating a distressed look. How much glaze you leave behind is a personal thing - I wanted a distressed aged look, creating it even darker on the edges and corners. Once the glaze is dry - I applied the America Paint Company Hard Coat - creating a durable surface.
{
"id": "3619370",
"alt": "My YouTube Channel - Subscribe!!!",
"title": "My YouTube Channel - Subscribe!!!",
"video_link": "https://www.youtube.com/embed/gXhZnxC8YLg",
"youtube_video_id": "gXhZnxC8YLg"
}
{
"width": 634,
"height": 357,
"showRelated": true
}

Want more details about this and other DIY projects? Check out my blog post!
Comments
Join the conversation
4 of 27 comments
-
That is a Thomasville, Country French coffee table from 1972. Have one in great shape. Have never seen another. Thanks
-
Where do u get crocodile roller? It's beautiful


Frequently asked questions
Have a question about this project?