Easy DIY Book Rails

by
Sarah | Birch Landing Home
(IC: blogger)
4 Materials
$30
4 Hours
Medium
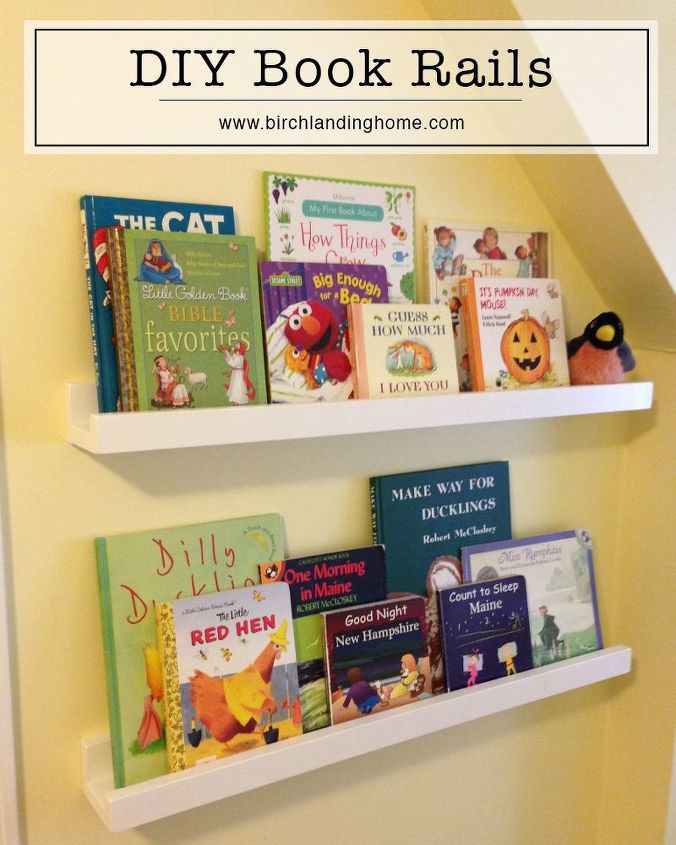
In our daughter's small bedroom, space is at a premium. We try hard to make the most of the space and keep the floor as open as possible to help the room feel a little bigger and give her more area to play. On one wall of her room, there is a very shallow nook I wasn't sure what to do with but wanted to make it an efficient use of space. After some thought, I decided building some custom book storage would be the perfect solution.
Materials:
- 1x3 boards
- 1x2 boards
- screws
- wood glue
- spackle
- level
- painters tape
How-To:
1. Cut the wood the desired length of the rail shelf. You will need two 1x3 boards and one 1x2 board for each rail.
2. Line up the boards as shown below (the wide ones on the bottom and back, and the narrow one at the front). Pre-drill, then glue the edges with wood glue (affiliate link), and secure with screws.
3. Once it's dried and secure, spackle the screw holes (affiliate link), let dry, sand, and then apply 3 coats of paint (I used semi-gloss trim paint).
4. Next mark the location of the studs and the approximate spacing of the book rails. I could have easily put three rails in this space but I didn't want our toddler trying to climb it like a ladder, so I decided to only do two.
5. Center the book rails in the space and use a level to hang the book rails, pre-drilling and screwing the book rails into the wall studs.
6. Decorate and add your books! While these are pretty sturdy, I would recommend being mindful of the weight put on the rails - don't put too many books or large, heavy books on them, especially since your little one will be reaching up to pull books off and you don't want anything heavy to topple off.
And finally I decided to build a simple, sturdy narrow crate to hold our daughter's bigger, heavier books.
Check out the original post on my blog for more photos: http://www.birchlandinghome.com/journal/2016/12/3/easy-diy-book-rails-storage-solution
{ Follow us on Instagram at @birchlandinghome }
Enjoyed the project?
Any price and availability information displayed on [relevant Amazon Site(s), as applicable] at the time of purchase will apply to the purchase of this product.
Hometalk may collect a small share of sales from the links on this page.More info

Want more details about this and other DIY projects? Check out my blog post!
Published March 2nd, 2017 2:28 PM
Comments
Join the conversation
4 of 8 comments
-
 Mike Daley
on Mar 12, 2017
You can tell this was done with love for your child and the wisdom to guide them to read. That project is a credit to you. Wish you lots of blessings to you and your family
-
-
 Anita K
on Mar 13, 2017
Not only does this look awesome, the shelves will be used for years! I am huge fan of encouraging children to read. Super project!
-
Thanks so much!
 Sarah | Birch Landing Home
on Mar 13, 2017
-
-












Frequently asked questions
Have a question about this project?