


French Provincial Couch + Miss Mustard Seed's Milk Paint
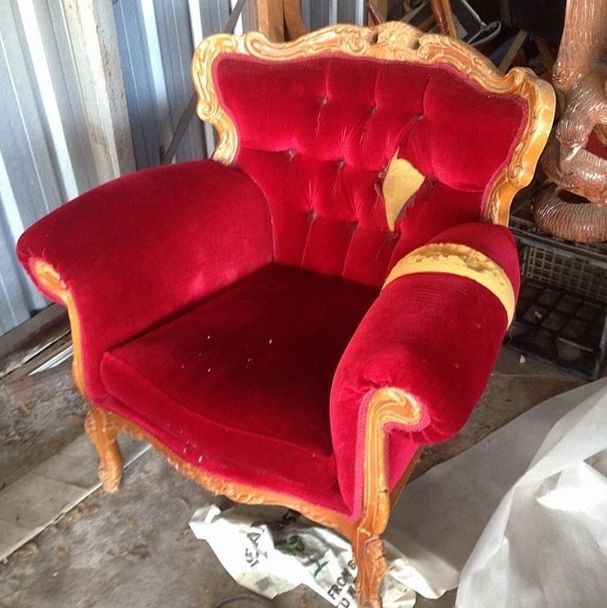
The story of my red velvet, French Provincial style couch began when an Instagram photo popped up on my feed advertising a single seater red velvet armchair for $40 via an antique store.
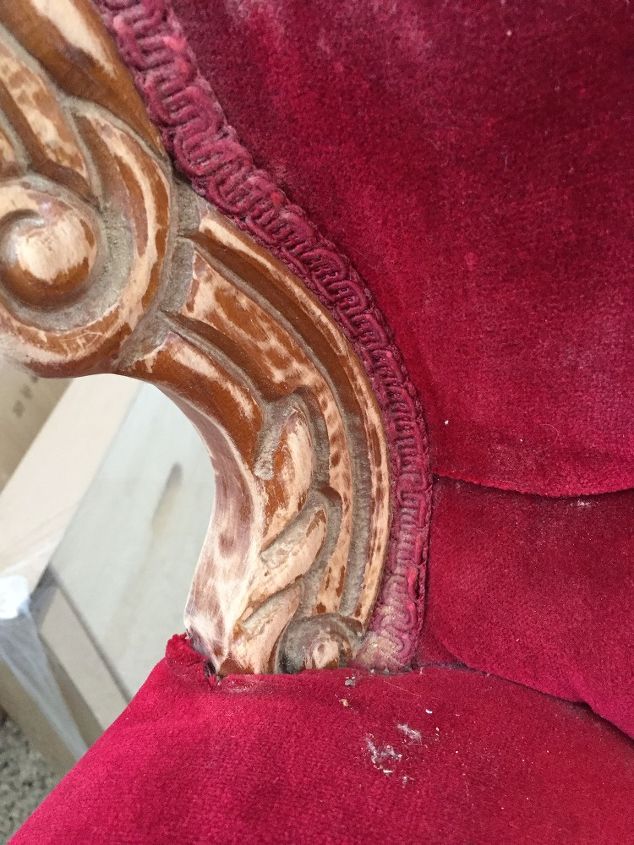
I had just dropped the kids to school and it was one of those days where I didn't have a lot planned apart from coming back home to paint, so I took the drive over to the north side to take a look. The chair was torn on one arm and the foam was damaged a bit, but I couldn't pass it up.
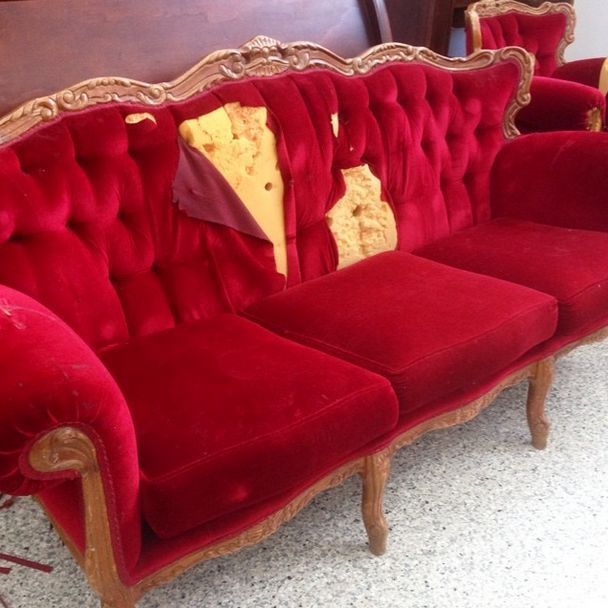
He then showed me this 3 seater he also had in his shed, that he was trying to get rid of - so for a total of $90 for the two chairs I made the call to my husband (my van guy) who picked them up for me.
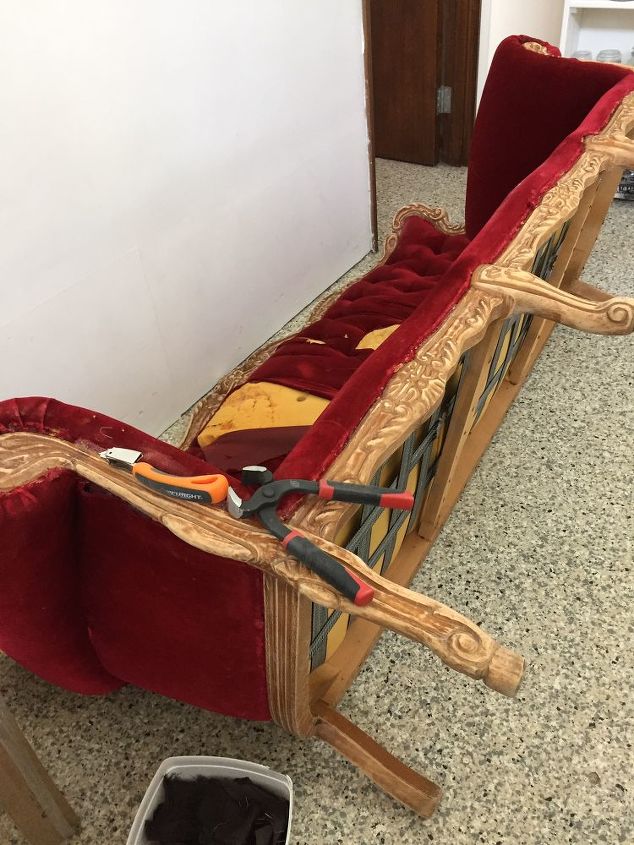
I began by removing staples on the single couch – millions of staples … okay, maybe thousands, but this task became all too much every now and then, so big breaks (like days) became normal! I took photos of the way things all fit together, hoping that I’d figure this whole upholstery thing out – what was I thinking?!
I mean, I’ve done a few basic upholstery jobs, but nothing like this – and look at all that tufting! So I called a lady from our church, who did upholstering, sent her a pic and asked if she was interested in helping me finish my sofas. She loved the ornate detailing of the French Provincial style and loved the idea of the challenge, so basically, she saved my LIFE! LOL.

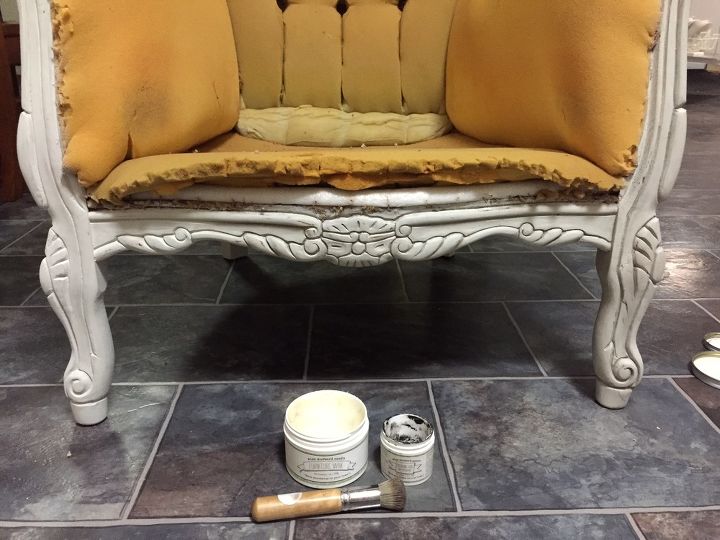
Meet Shar – she is wonderful – the end. She helped pull out LOTS of staples and here is a pic of her with the single seater after I’d painted the frame in Miss Mustard Seed’s Milk Paint – colour, Grainsack. All ready for Shar to do her upholstery magic.
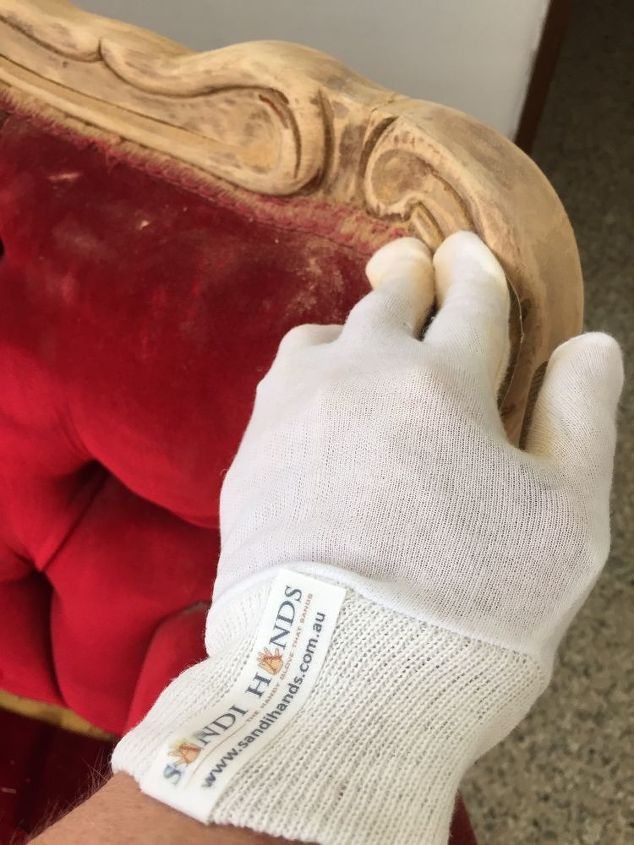
Meanwhile I tackled the 3 seater couch, using Sandi Hands Sanding gloves to easily remove the old varnish which was quite chipped and worn. I didn’t mind a bit of timber showing through after painting, but the sanding prep was important to me to get a nice smooth even finish on the paint work.
Removing the ‘gimp’ or trim, is the easy part. It is usually just glued on and so came off by just pulling it away from the fabric.
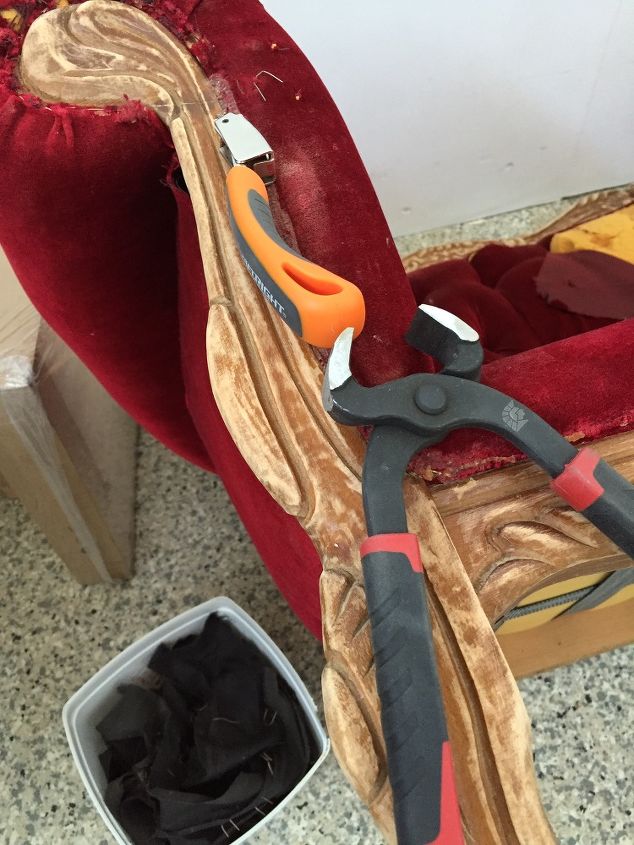
The staples were, like I said, EVERYWHERE. So these two tools were my best friends: A staple remover (top in pic below) and a pair of pincers (bottom in pic below). These, along with a small screwdriver every now and then to dig under staples that were too far embedded for the staple remover to get under, were my tools of trade for this task.
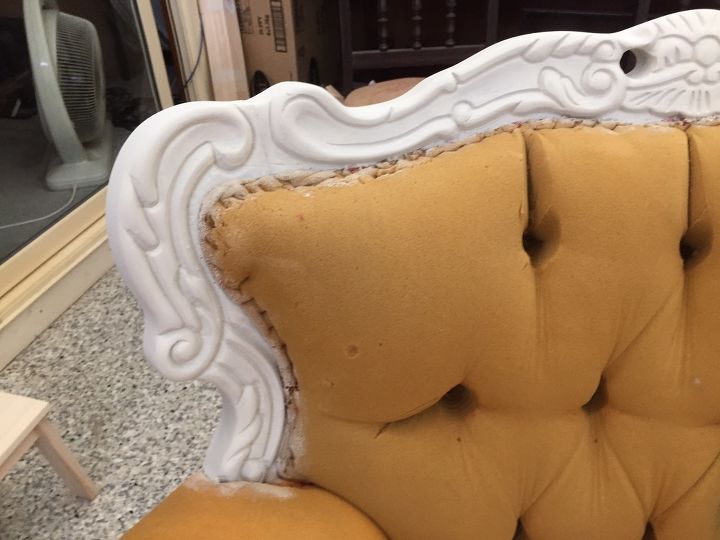
Above is the single seater after two coats of MMSMP Grain Sack, before I sanded back to distress and waxed with Antiquing wax.
In the picture above, you can see I have used MMSMP Antiquing Wax to highlight the details on the right hand side, compared to the left side, which has not been waxed yet. Just a subtle amount of antiquing wax, caught in the crevices, can change the whole look of your piece, highlighting the details. I have a video (below), of how I actually used the Antiquing Wax on this piece of furniture. I'm @irestorestuff on all my social platforms, including Youtube.
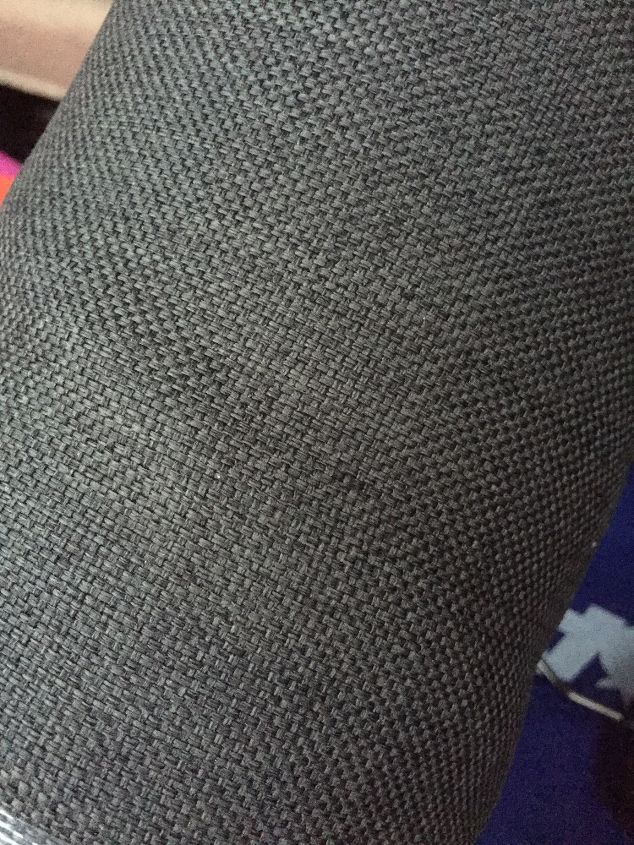
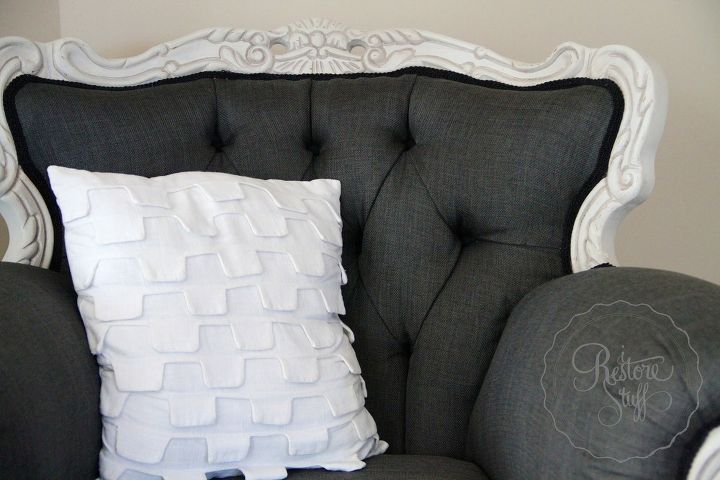
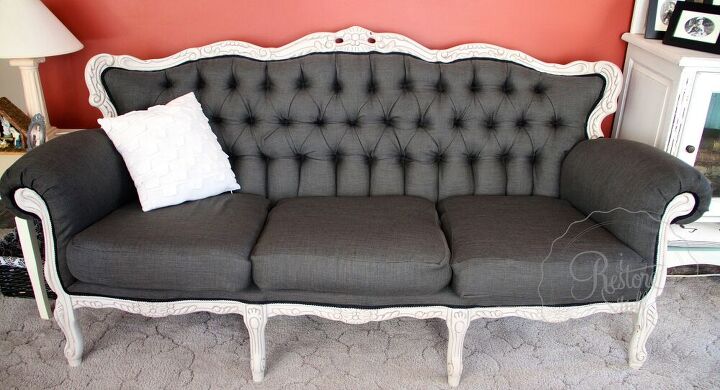
After painting and waxing was finished, I handed over the project to my upholstery expert, who completed the makeover. When picking out fabric, we found a charcoal colour I liked in a fabric she hadn’t used before, but looked as though it might work well, as it was a microfibre type of weave, making it thinner and easier to form around the buttons for the tufting. At the time I went to purchase it, it happened to be on sale! I love it when that happens! However, the fabric did turn out to have some limitations. Shar began to work with it to cover the buttons and called me in a panic – the fabric was fraying like crazy and becoming impossible to use for the self covering buttons we were trying to make. AHH, what to do? She suggested using a contrasting black fabric, since we were using a black gimp trim around the edges anyway. I decided that was a good compromise, as the buttons are so deep you really don’t notice them anyway. Shar ended up having to also use a hot knife to sear the edges of the fabric to stop them from fraying as she worked. So keep this in mind if you do choose to use this type of fabric for anything. But the results are lovely, and here are the finished chairs:
Resources for this project:
See all materials


Comments
Join the conversation
-
I love that red upholstery tho awwwwww
-
This is GORGEOUS! You lucky duck, finding that sofa and chairs, and did a beautiful job on the reno. Years ago I had a friend with sofa like that but covered in brocade, she hated it (the style, not the fabric) but had gotten it for free. I wanted it SOOO BADLY! Unfortunately I had moved far away by the time she "got rid" of it. This inspires me to not give up, I might find one some day.


Frequently asked questions
Have a question about this project?
Did you forget to put on the finished chairs? I don't see them? Hum...
Did you forget to put the pictures up for the finished chairs? I don't see the couch or chair anywhere? Hum...
bravo on your job! I have a similar vintage chair w/ugly ripped fabric. I just cover it w/slipcover… and the wood is brown. Now tell me how many days/ weeks did you spend on reupholstering and painting? Did you replace the cushions or ?
marie