


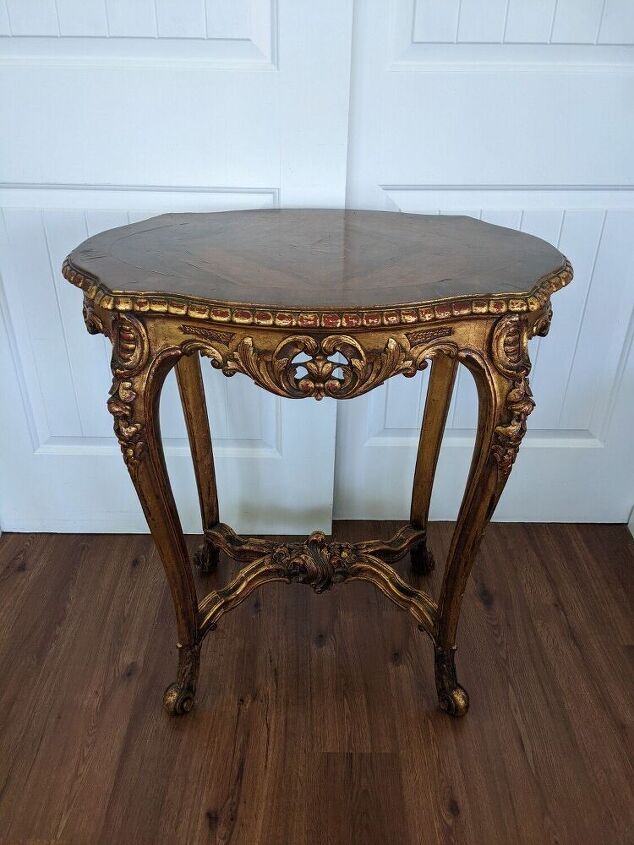
Give An Accent Table New Life With Paint, Metallic Wax And A Transfer

I love these little accent tables! They're extremely versatile and an easy way to add a pop of color to your space 🥰
Here's how I brought this table from drab to fab 🥰
*Time estimate is based off of work time only, does not include dry times
*Price is based off of the amount of product used, not the initial cost of the product

First things first.....prep
I say this in each and every tutorial, prep is the most important step for a long lasting beautiful finish. Even if your paint can says "no prep", you'll regret skipping this step in a year or less.
Clean your piece well with a degreasing cleaner. Tsp substitute is a great choice, as is krud kitter or even totally awesome from the dollar store.
Make any necessary repairs...sand out deep scratches, fill any cracks and sand smooth, ect...
Then take 220 grit sandpaper and do a quick scuff sand everywhere that you're painting. This is a crucial step that will key the surface and give the paint something to really grip onto. You don't have to get down to bare wood and you also don't have to get rid of all the glossiness if using a high quality chalk paint (latex paint users-use a deglosser found in most hardware stores). Simply do a quick scuff sand all over.
Then wipe down with plain water and remove all dust/residue.
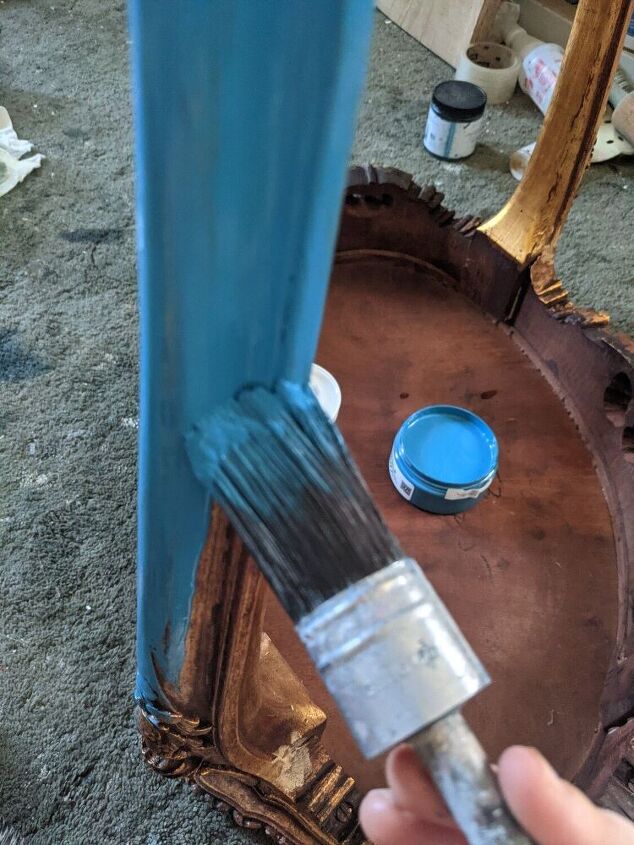
Now, paint 😁
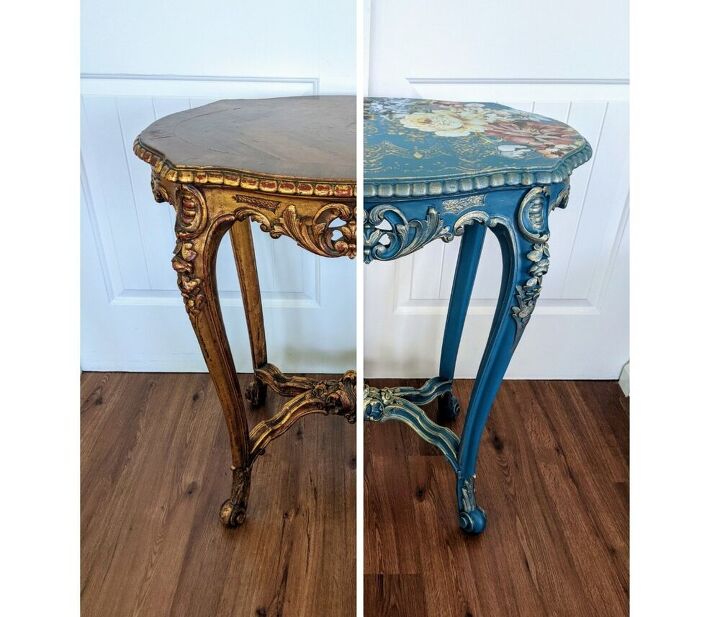
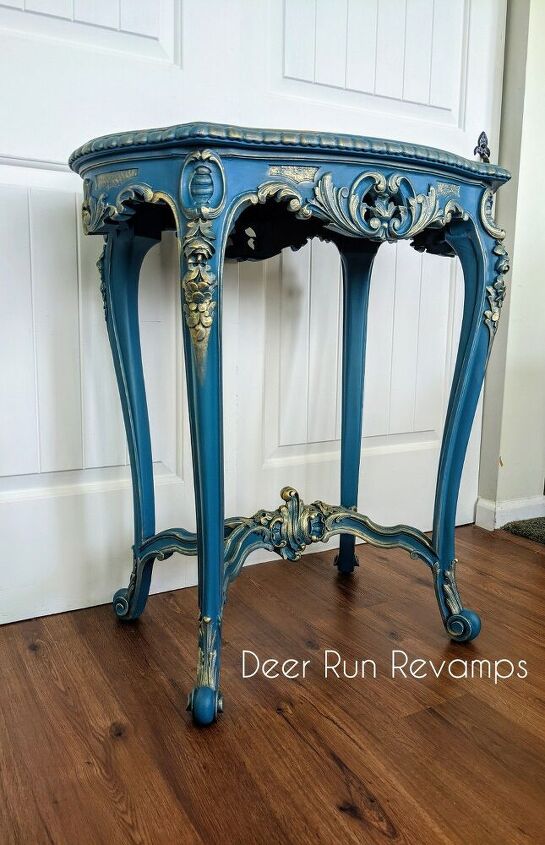
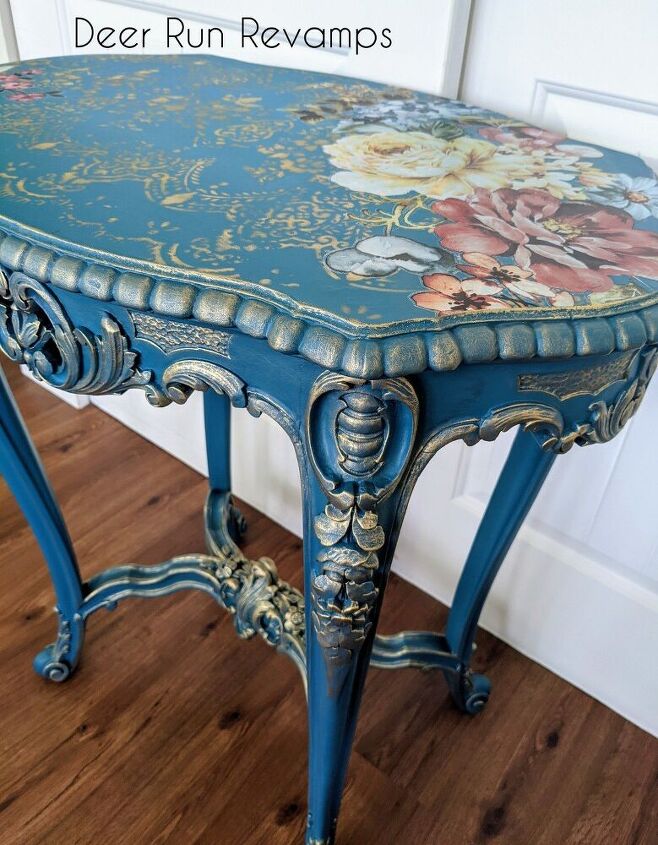
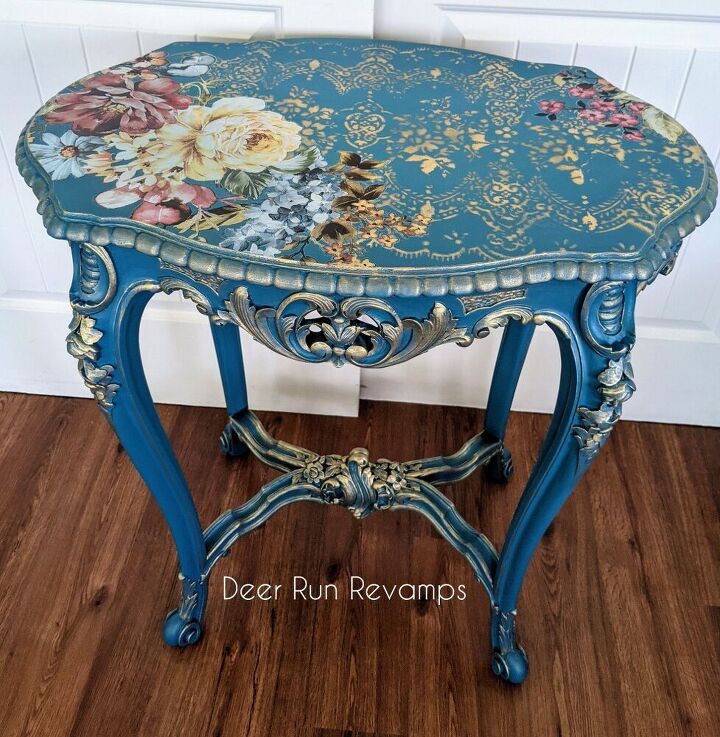
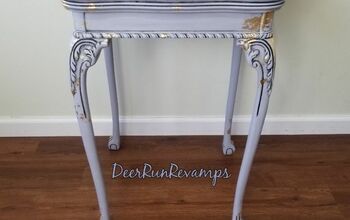
I used mix of Peacock and Notorious B.L.U from paint couture. These 2 colors created a beautiful teal! And this paint is super durable. Took 2 coats for full coverage, allowing to dry completely in between coats
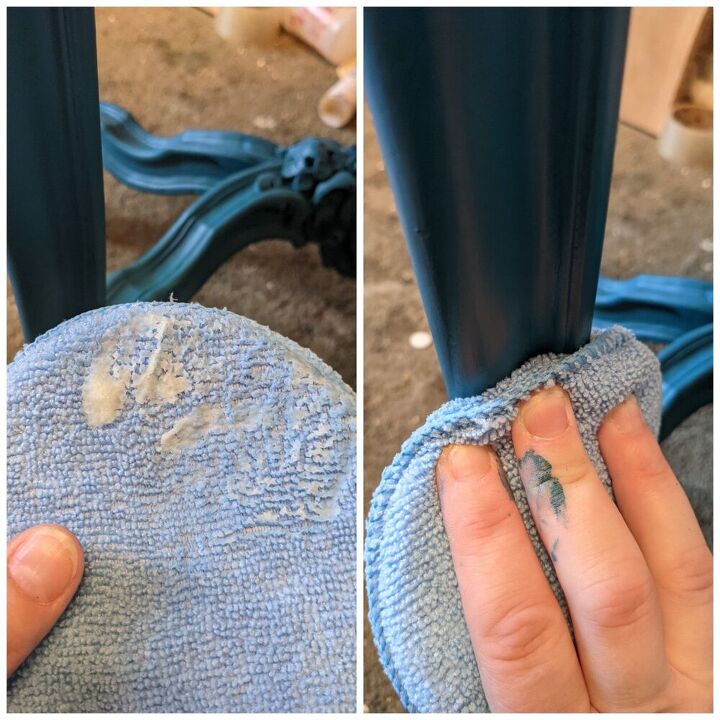
After I left the final coat to dry for 2 hours, I waxed the entire piece, except for the top, to seal the paint. You can use whatever your favorite sealer is, I just prefer wax.
I then grabbed Redesign With Prima's Eternal Decor Wax and and a fluffy detail brush. Add a small amount of wax to the brush and lightly go over any details and edges you'd like to highlight

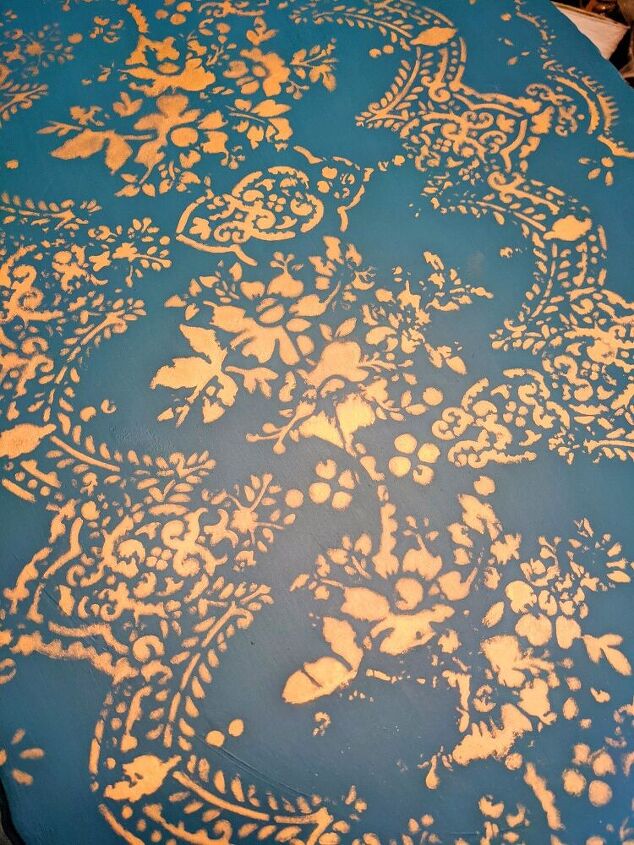
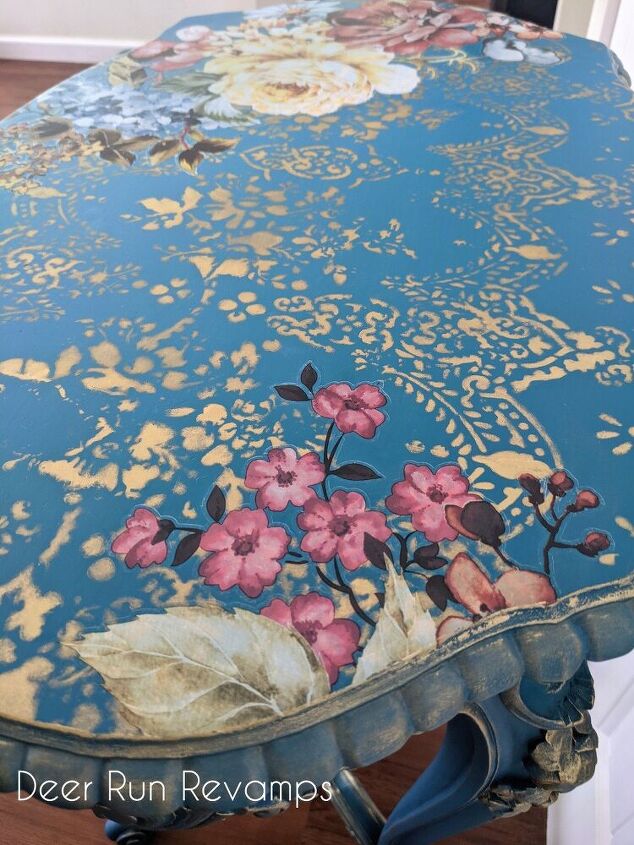
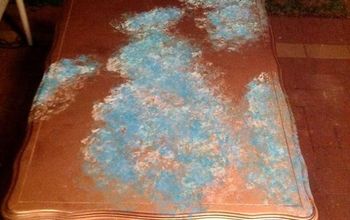
Using Redesign With Prima's stencil called Distressed Wall along with the Eternal Decor Wax, I added the beautiful pattern to the top
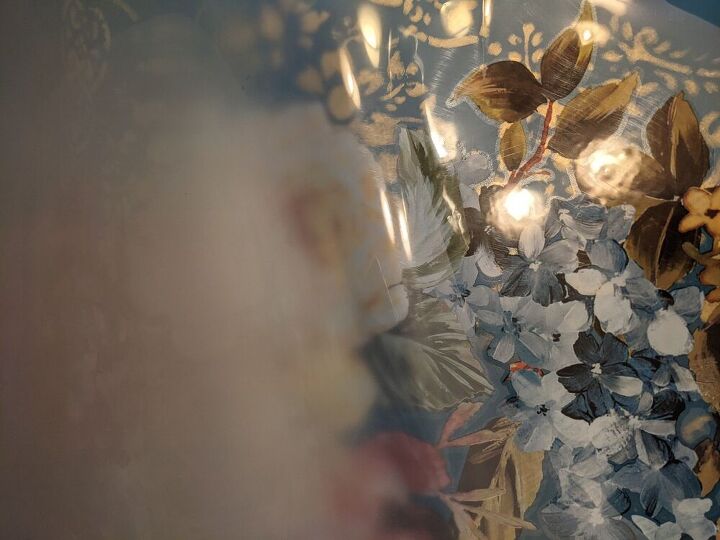
I was going to stop here, but for my personal taste, it just needed something else on the top.....a colorful floral transfer🌺🌸🌼

Allow the decor wax pattern to dry for 48 hours.
I cut out the piece of transfer that I wanted (I used Ruby Rose from Redesign With Prima) and then removed the white backing and pressed the transfer to the surface where I wanted the florals to be. I then used the transfer tool to burnish the design to the surface. Transfers come with a wooden stick that works well for applying transfers, but I just prefer the specific transfer tool (link below in the materials section)
*Transfers are extremely sticky and once they touch something, they can not be moved. So be careful while handling them and do not allow them to touch yourself or any other surface you don't want it adhered to
Continue applying light-medium pressure while going over the transfer with the tool for a few minutes or until you believe the design has transfered to the surface.
Then slowly and carefully start to remove the clear protective layer. If at any time the design has not adhered to the surface, lay the protective layer back down and go over the section again with the tool. Continue this process until you've removed the clear protective layer entirely.
Now go over the transfer with a dry fluffy towel while applying pressure, especially over the edges, and remove any air bubbles you may see.
Now, apply your favorite water based topcoat to the top to seal in the transfer and decor wax pattern (my favorite is Crystalac General all purpose topcoat applied with a damp sponge made for waxing cars)
*Most furniture waxes are the last step and you can not apply a topcoat over top of it, but decor waxes are different and can be sealed with water based products only
Now, sit back and enjoy your creation 😍
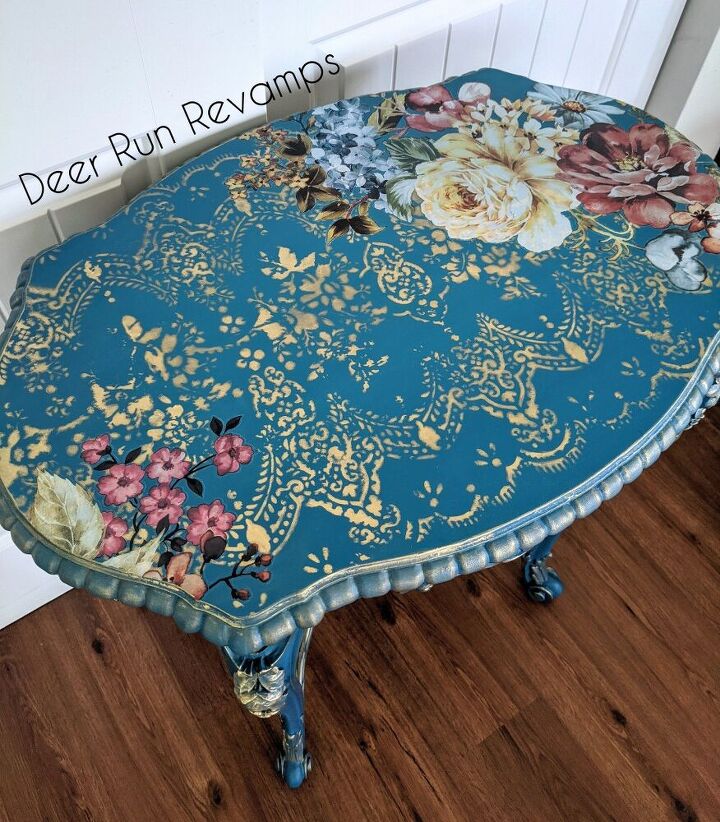
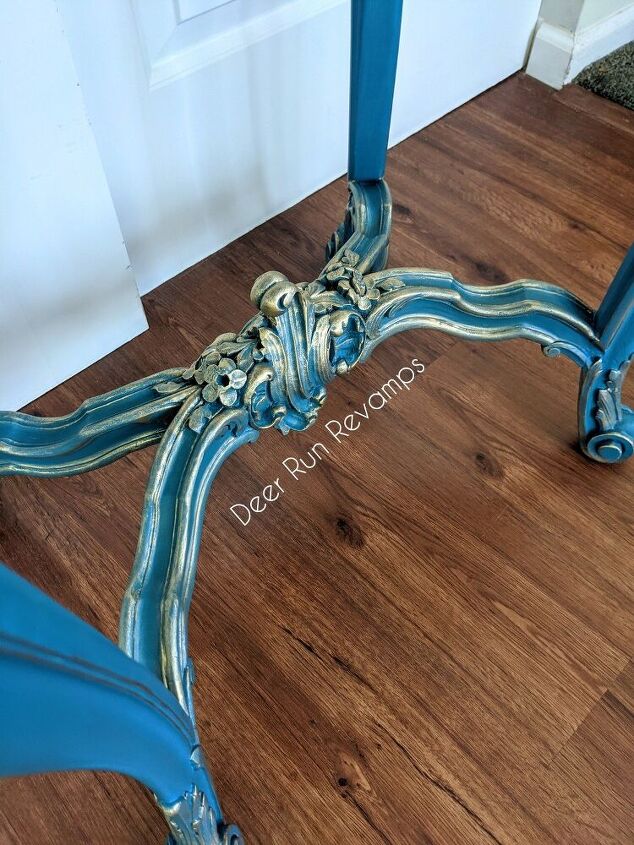
I absolutely love the way the gold decor wax highlights the details and pops against the teal color
All of the Redesign with Prima products used for this project are linked below in the materials section. They are all offered in our Etsy shop along with over 400 other products, designs and colors
You can visit us on Facebook to see more furniture pieces that we've transformed
https://m.facebook.com/deerrunrevamps/
Thank you so much for reading! ❤️
Resources for this project:
See all materials


Comments
Join the conversation
-
This table looks stunning. Well done.
-
Looks very nice, but certainly took longer than the stated 2 hrs.


Frequently asked questions
Have a question about this project?