


How to Build a Bookshelf
My mom just discovered Restoration Hardware. As a side note, she pronounces “restoration” like “registration” so at first, it was a little difficult to know what she was talking about. Registration Hardware?? Mom, I just don’t get it. And then we spent 20 minutes over the phone explaining how to send me a hyperlink via email to what she was talking about.
OHHHHH Restoration Hardware. Why didn’t you say so??
So anyway, she’s been looking at their furniture and you know what that means?? More projects for me. (Because no one in our family actually BUYS furniture anymore…that’s my job 🙂 )
If you’ve been around for a couple months, you may remember that back this fall, Mom’s projects kind of took over the blog. First, there was the dining bench, then the built ins, then I upholstered the bench, then I built a table for the built ins.
Okay, well I made a statement that after the table, that that was probably not the end…there would be more projects. Thankfully, I did not disappoint, and here is yet another “mom project.” This time, for the living room.
I made her a bookshelf to display all her random trinkets and pictures of her amazingly beautiful daughters (me and my sister, of course). And I’m going to show you how to make one for yourself…so you can use it to display pictures of me on it too. Because that’s totally not weird.
To get all the building details and links to the products I used to make the shelf, click the blog link below. But, here is a quick overview:
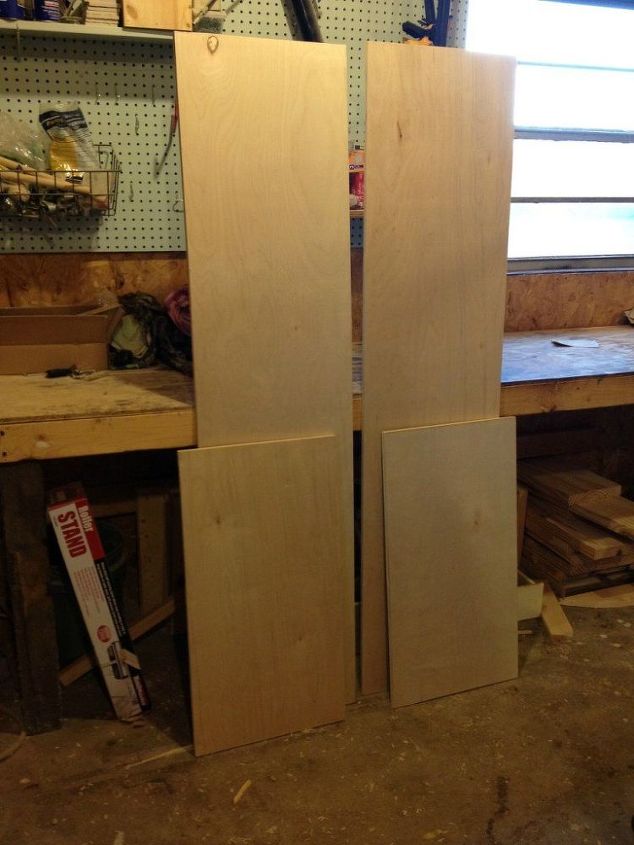
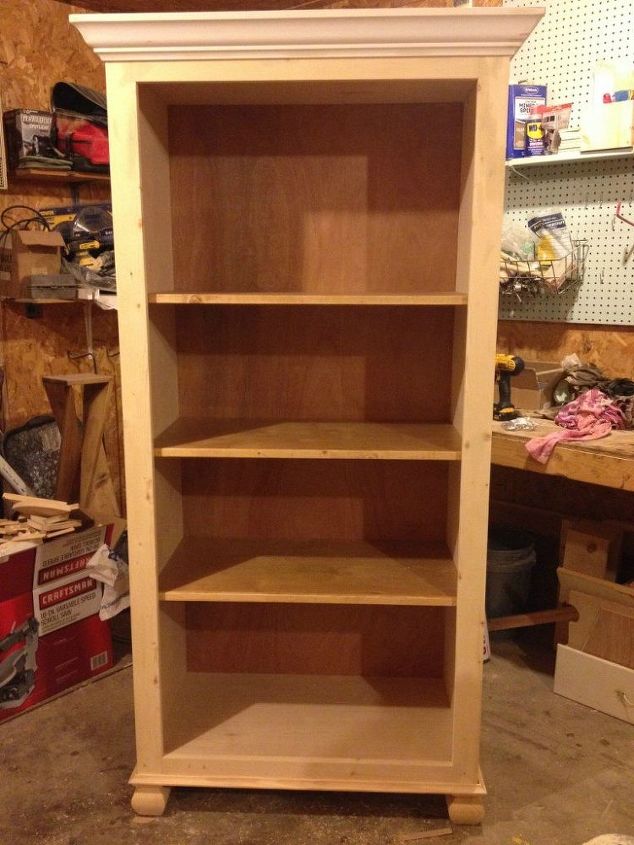
I cut a sheet of 3/4" plywood to size for the sides and bottom.
OHHHHH Restoration Hardware. Why didn’t you say so??
So anyway, she’s been looking at their furniture and you know what that means?? More projects for me. (Because no one in our family actually BUYS furniture anymore…that’s my job 🙂 )
If you’ve been around for a couple months, you may remember that back this fall, Mom’s projects kind of took over the blog. First, there was the dining bench, then the built ins, then I upholstered the bench, then I built a table for the built ins.
Okay, well I made a statement that after the table, that that was probably not the end…there would be more projects. Thankfully, I did not disappoint, and here is yet another “mom project.” This time, for the living room.
I made her a bookshelf to display all her random trinkets and pictures of her amazingly beautiful daughters (me and my sister, of course). And I’m going to show you how to make one for yourself…so you can use it to display pictures of me on it too. Because that’s totally not weird.
To get all the building details and links to the products I used to make the shelf, click the blog link below. But, here is a quick overview:
I cut a sheet of 3/4" plywood to size for the sides and bottom.
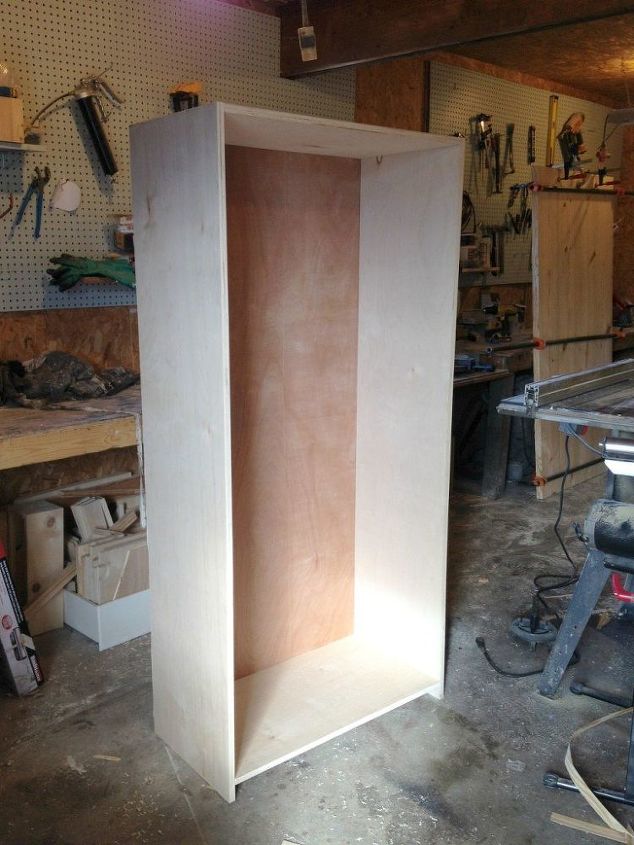
I used pocket holes and screws to put the pieces together to make the "carcass." I nailed 1/4" plywood on the back ones the sides, top and bottom were together.
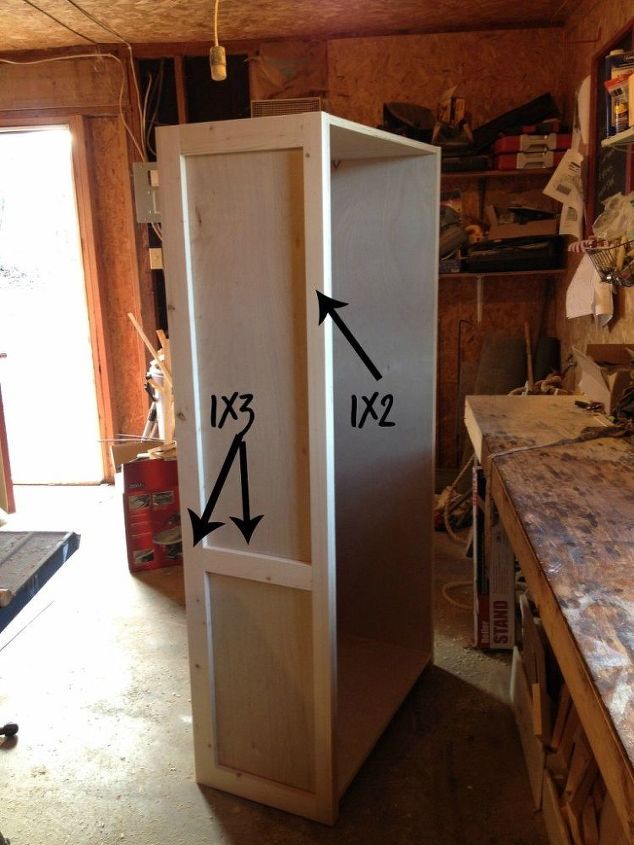
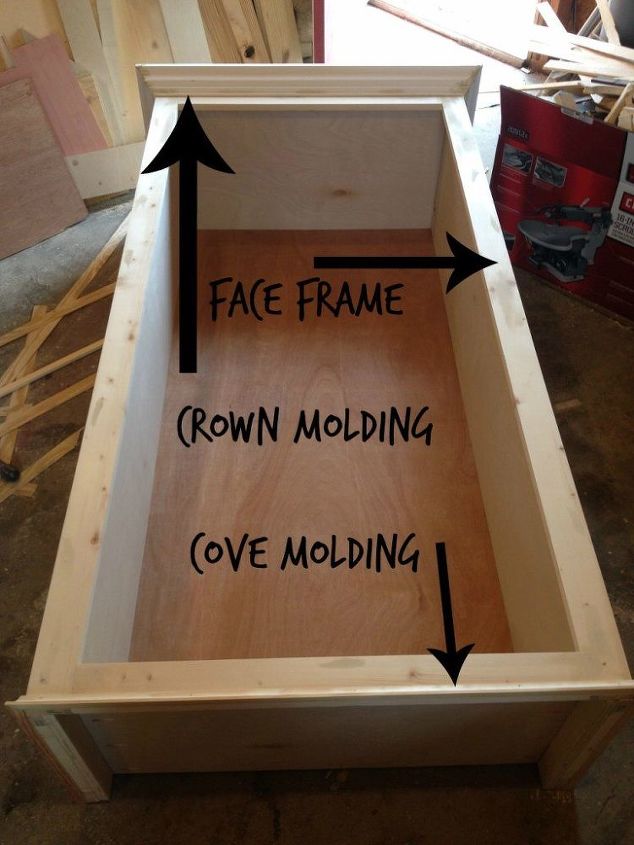
Then I nailed on some trim detail to the sides, top and bottom.
I cut the shelves and drilled shelf pin holes (details on the blog post) to make the shelves adjustable.
Mom painted the cabinet, and I stained the shelves. I thought it turned out really cute!! I really liked how the shelves were adjustable, so she can arrange them however she wants.
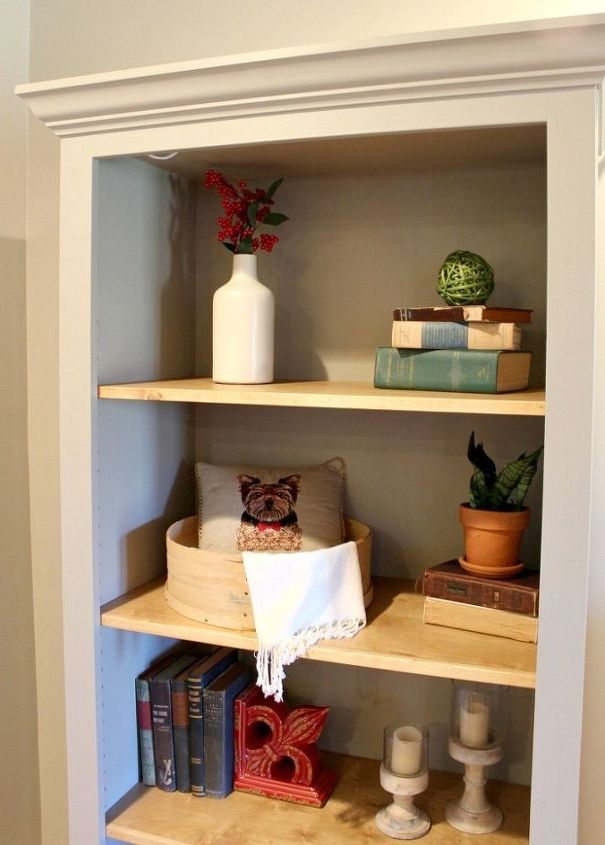
So what do you guys think? Now all she needs is huge pictures of me to display in there haha! ;)

Want more details about this and other DIY projects? Check out my blog post!
Comments
Join the conversation
2 comments
-
WOW! You did a great job!
-
This is awesome!


Frequently asked questions
Have a question about this project?