


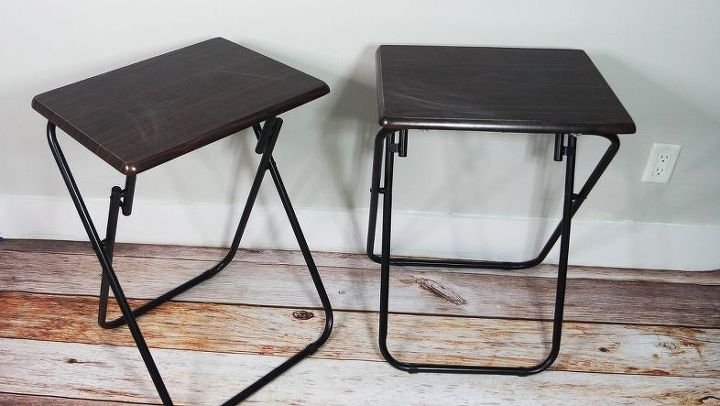
How To Makeover Your TV Tray

I had these two old TV trays that were scratched up and used... instead of throwing them out, I decided to try something new.
OPTION 1:
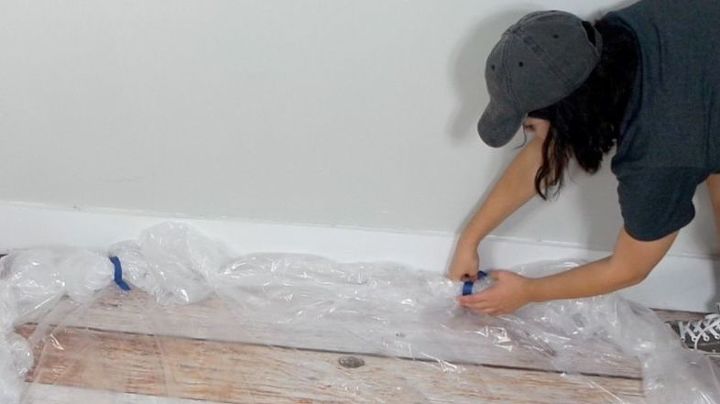
Step 1:
First, lay down a plastic drop cloth to protect your surface. I rolled up the sides and taped it as well so it had raised edges so nothing would spill over.
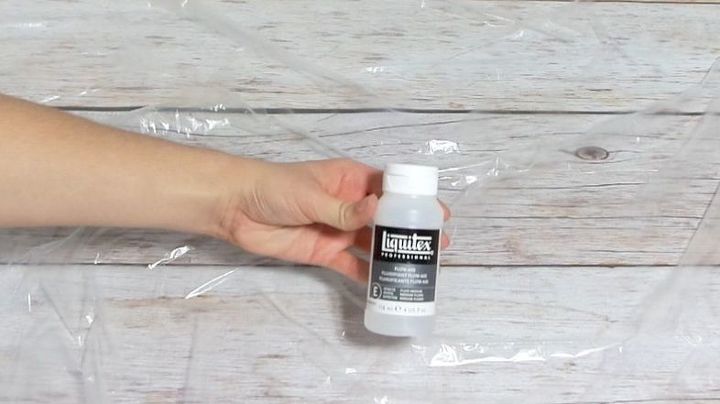
Step 2:
Next, grab some Liquitex flow aid and mix it with water. The bottle said to dilute it at a ratio of 1 part flow aid to 20 parts water.
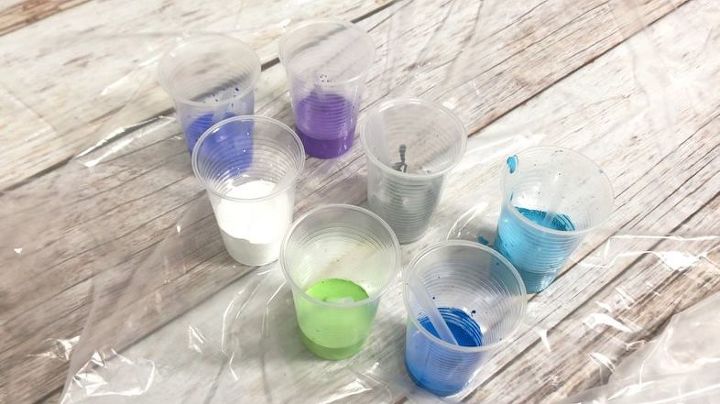
Step 3:
After that, grab your colors and mix with the diluted mixture. You're wanting the paint to thin out without being too watery - more like a glaze or syrup consistency. If your paint is too watery it won't cover as well, however, it will spread further. It all depends on personal preference how thick you want your paint to be.
I learned as I went with this and after pouring the paint it actually helped to have different thicknesses of paint - so they each spread at different rates. But this all depends on personal preference.
Step 4:
After the paint has been mixed. Clean your surface - I wiped mine with some dish soap & water.
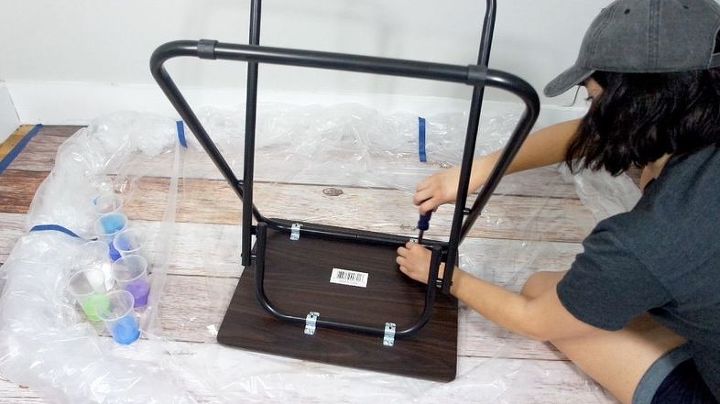
Step 5:
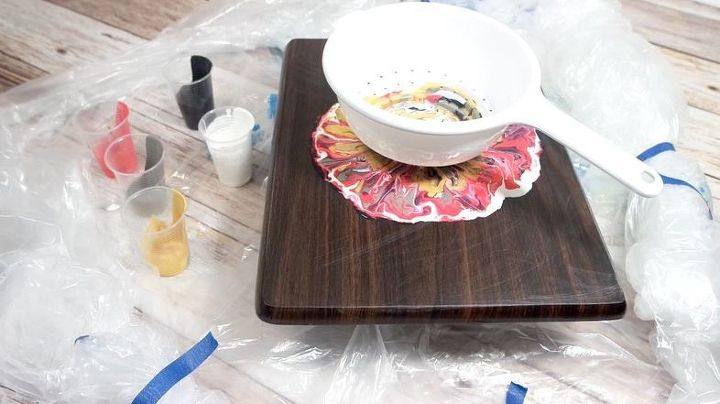
Next, remove the top & place something underneath it so it's raised from your surface.
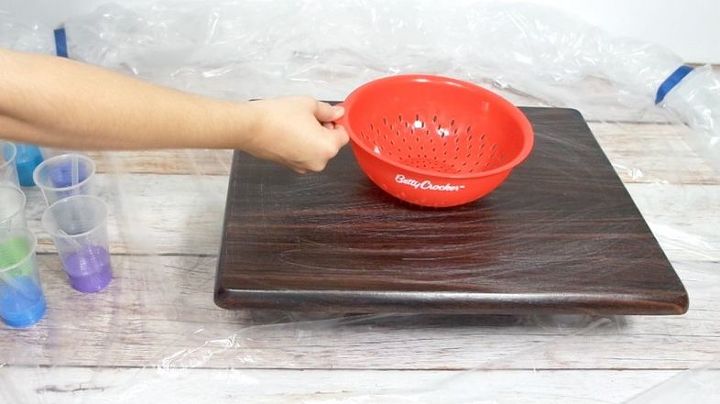
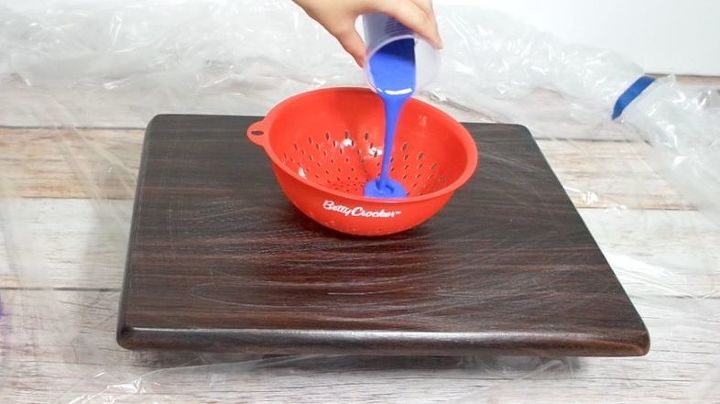
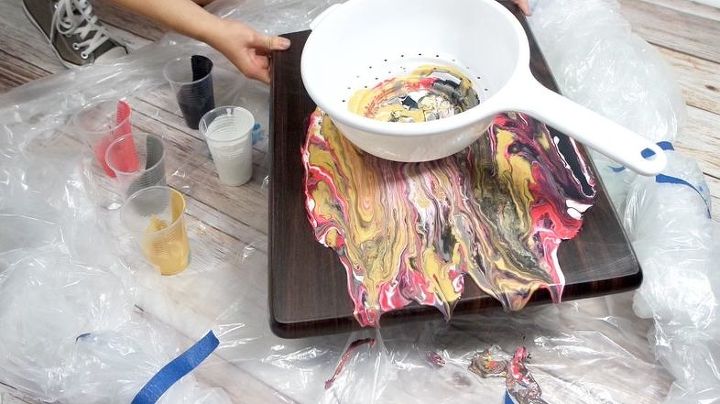
Step 6:
Following that - add a noodle strainer & begin pouring your paint.
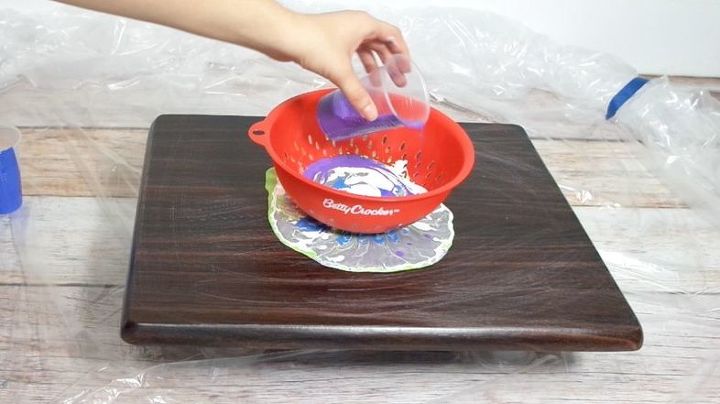
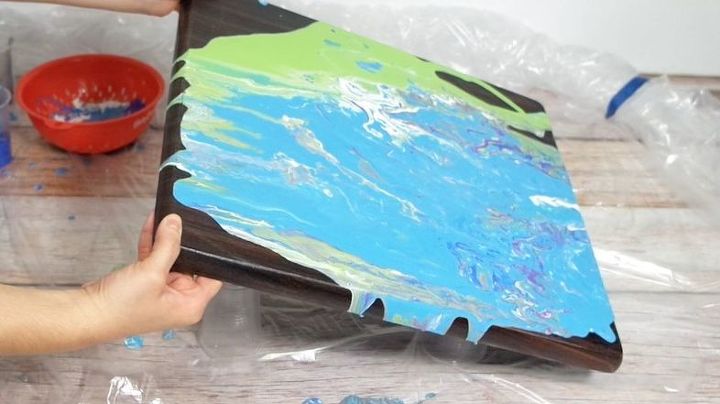
Step 7:
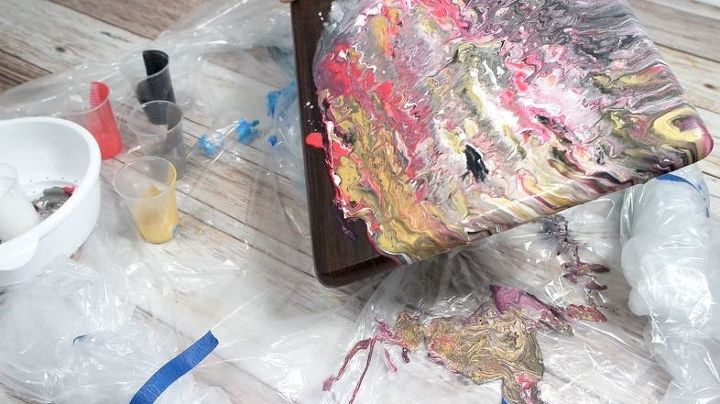
After the paint has been poured, pick up the top and move it around to distribute the paint. To move around your paint you can also use a blow drier. Make sure the top has all been covered as even as possible - including the sides.

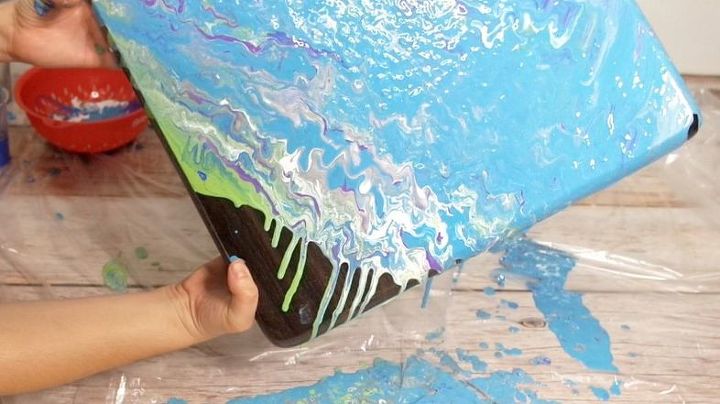
Step 8:
After you're happy with your ratio - allow your top to dry for at least 24 hours before sealing. Once it's dry, seal it with a polyacrylic - and add at least two coats.
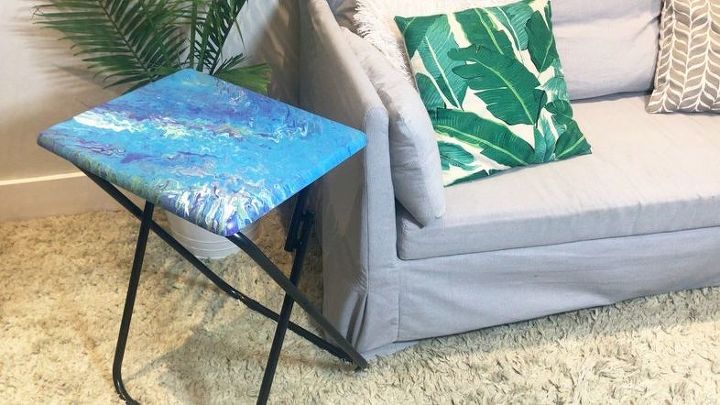
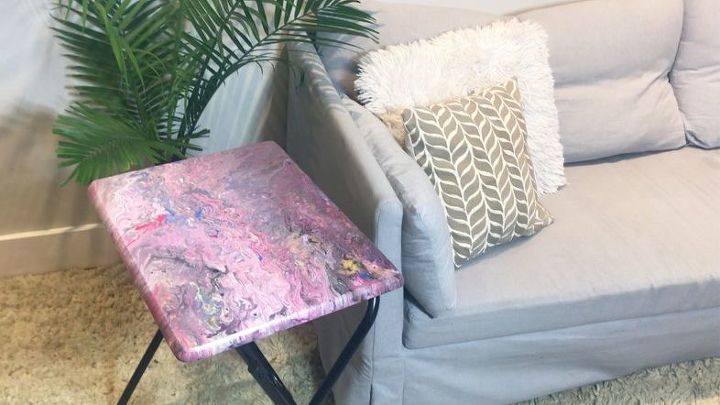
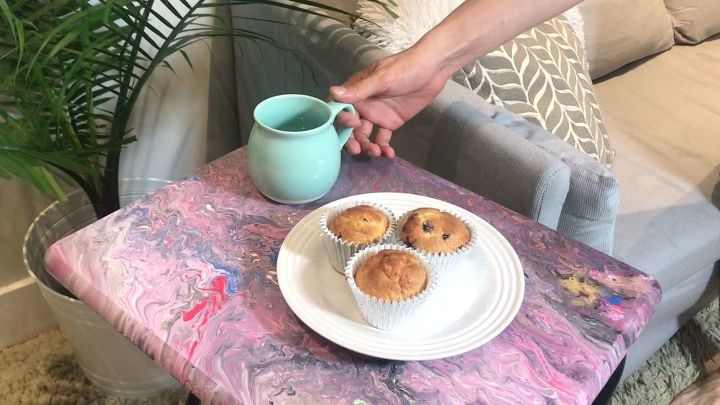
This is a great way to add a pop of color to your living room!
OPTION 2:
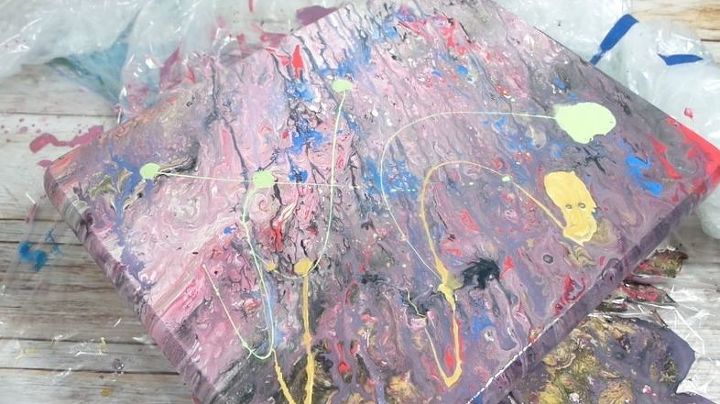
For the second table I went with a more neutral color palette with a pop of a warm color and pop of gold. I decided later on to add a splash of dark blue and green as the colors began to blend. I noticed with this pour that red is very dominant.
Prep your table the same way as the first one - by cleaning it and removing the legs. Add to something that will raise it from the ground, add your strainer and begin pouring.
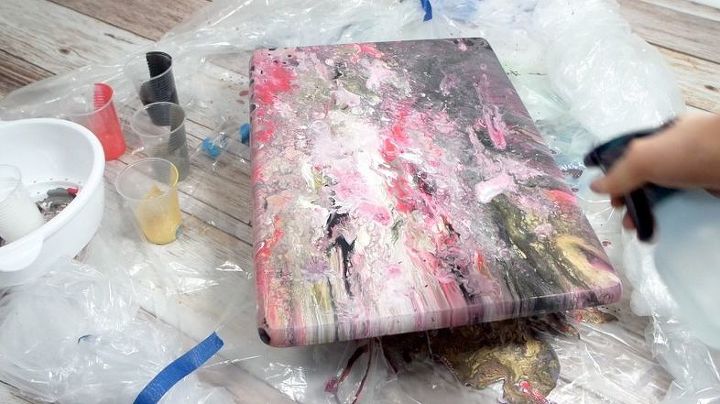
For this table I was more experimental. After pouring and moving around the top - I drizzled other colors as well as sprayed water, & added extra flow aid on it to move the paint around. I also used a blow dryer to blend the colors. After I was happy with my top I let it dry & sealed it as well.
This is a great way to change up your living room's color scheme without a big cost - add this table & swap out your throw pillows for a totally new look!
This was such a fun experiment and gave my tv trays such a custom look! You could apply this technique to so many different kinds of furniture & wall art with different paint combinations!
I hope this inspires you to turn your old piece of furniture into a custom look!
Resources for this project:
See all materials


Comments
Join the conversation
-
Love this technique

-
awesome job!! i am going to try this on something else, and thanks


Frequently asked questions
Have a question about this project?
Fantastic effect, just love it! because I am always trying to save money whilst bowing to my craft side, wondered what you did with the residue of paint spilt in the process? I could not bare to leave it unused, would have rolled glass jars in it - laid a cushion cover on it - Rolled a lampshade etc. Can't bare waste you see.........It's on my list of to try!
Would this work on art canvas?
Did you put any kind of sealer to protect your beautiful art work?