


Petite Bookshelf Makeover, Includes Video for Wrinkle-free Decoupage T
Hi, I'm Liz from SimpleDecoratingTips.com a DIY and decorating blog. I also own the DIY supply shop Frame and Frills.
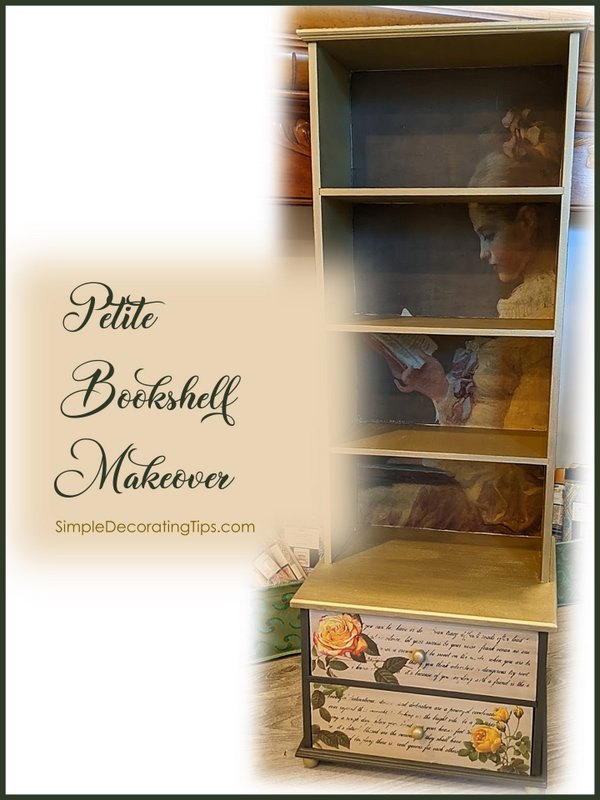
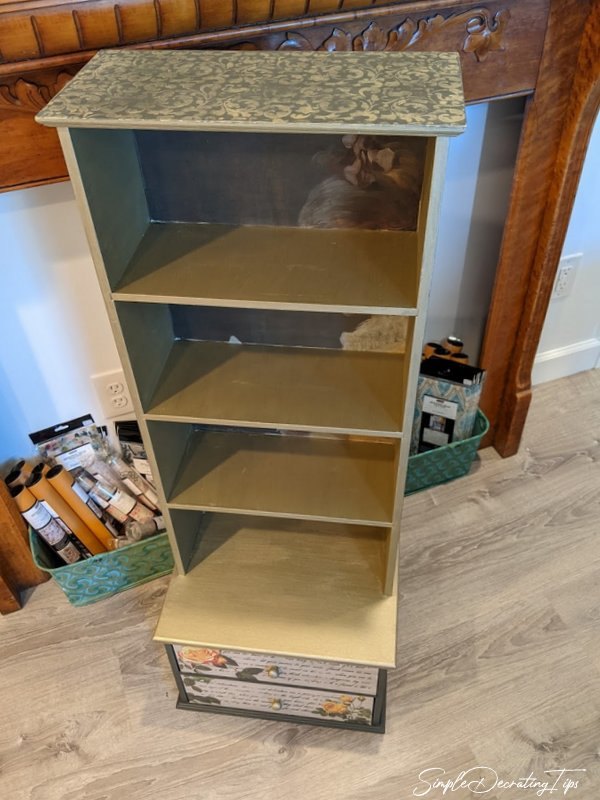
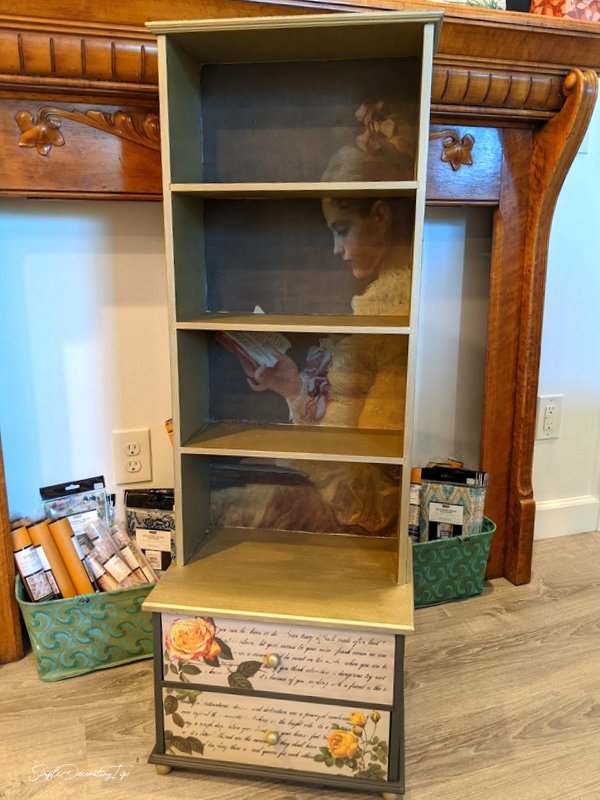
The Frame and Frills shop has been busy this week, 4 pieces got a makeover. This petite bookshelf makeover was one of them and turned out so sweet.
All the products I used in the petite bookshelf makeover are available at FrameandFrills.com in case you want to re-do something of your own!
The techniques I used to makeover this piece include:
- Painting
- Decoupage
- Transfers
- Stenciling
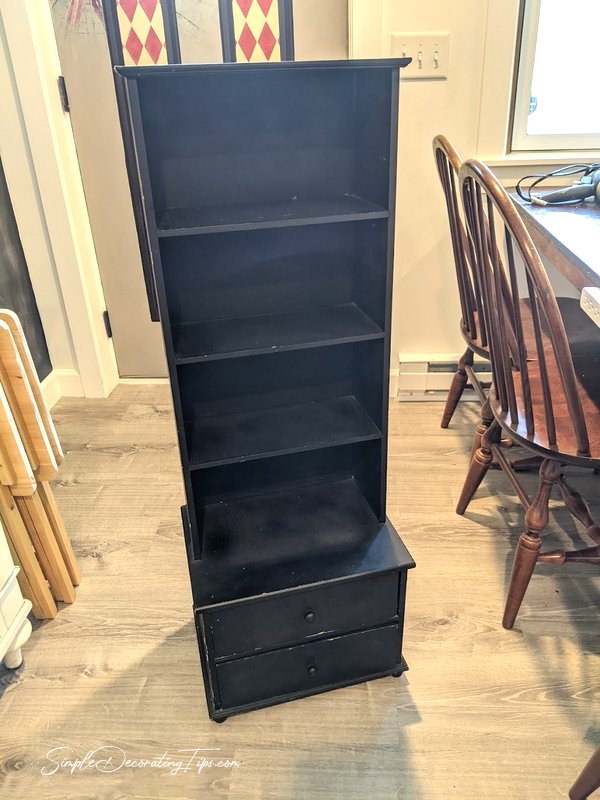
I found this small bookshelf on Marketplace. Have you checked that place out? There are soooo many great deals out there for the foundation of fun creative makeovers! Love it!!
After I thoroughly washed it with Fusion TSP Alternative, I started planning the design it would receive.
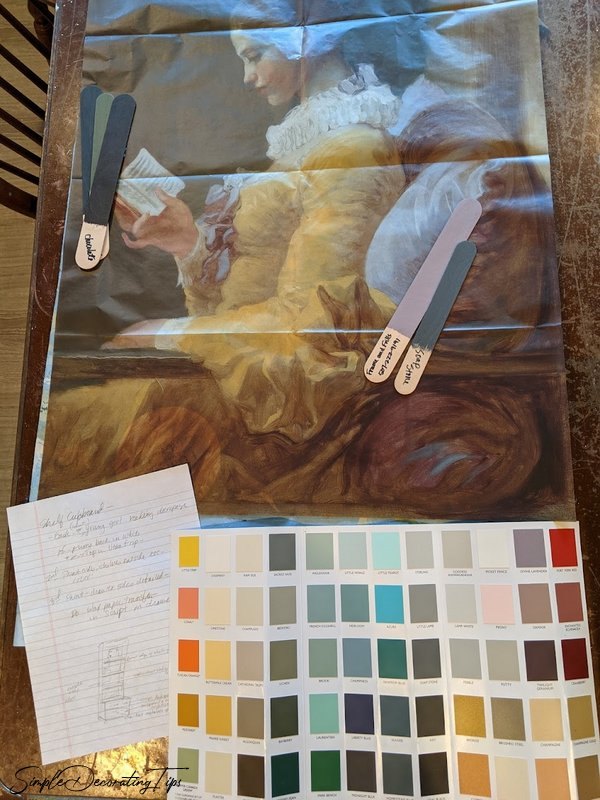
For this makeover, I used Fusion Mineral Paints, Mint by Michelle ‘ Young Girl Reading‘ decoupage paper, Re-Design with Prima Transfers and an RDS stencil.
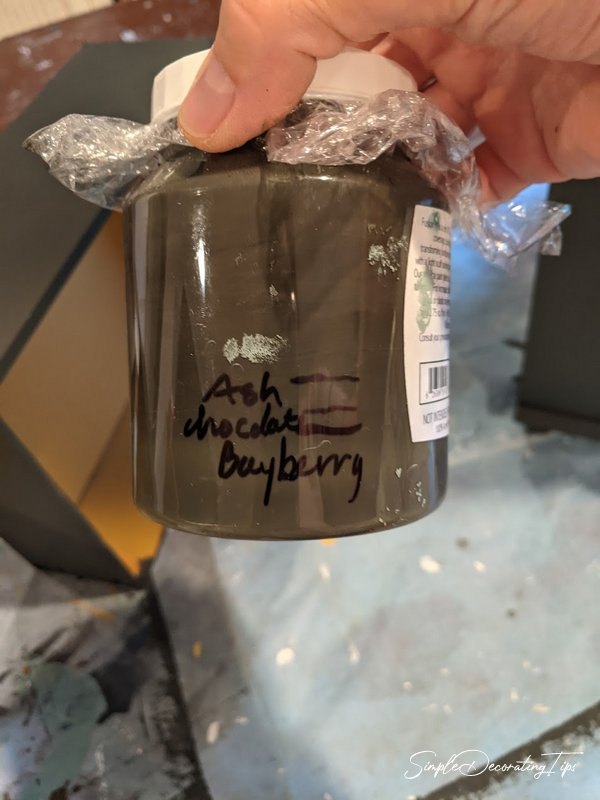
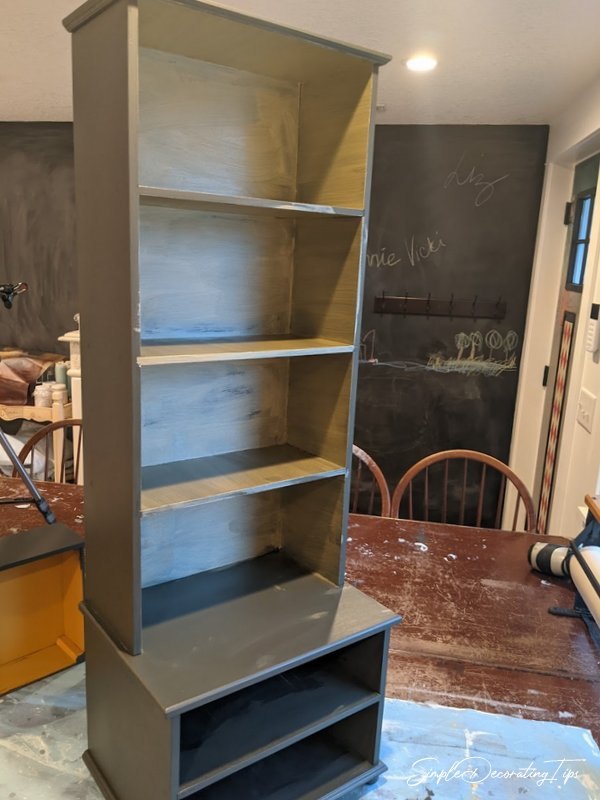
I wanted the finished piece to be dark and Victorian looking, echoing the lovely Mint decoupage paper going in the inside back. A quick custom mix of 3 Fusion colors was perfect for the main body of the bookshelf.
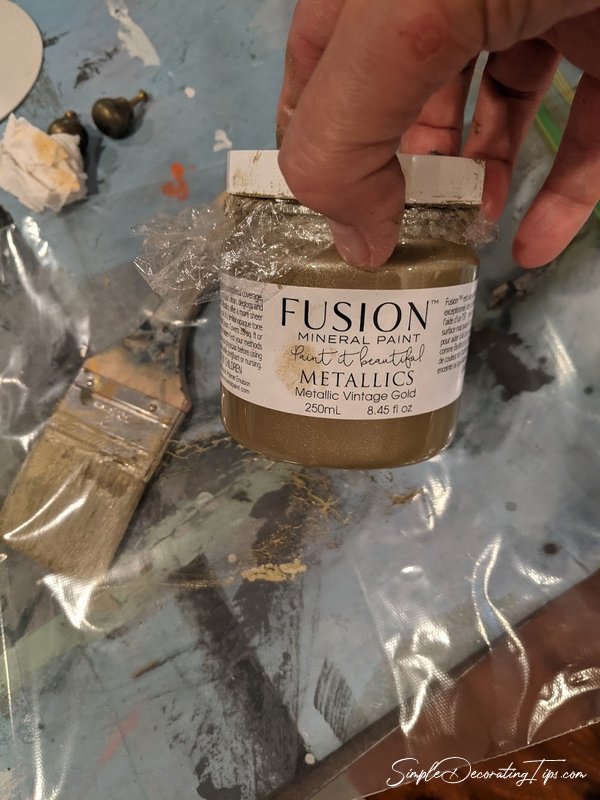
The inside walls and shelves received a metallic ‘Vintage Gold’ finish. Fusion’s metallics have the same durable qualities as the other Fusion mineral paints, but they do take a few extra coats for full coverage.
In between coats of metallic I started working on the 2 drawer fronts, detailing them with some selected transfers.
Transfers are like stickers for grown-ups! And they are so fun!!
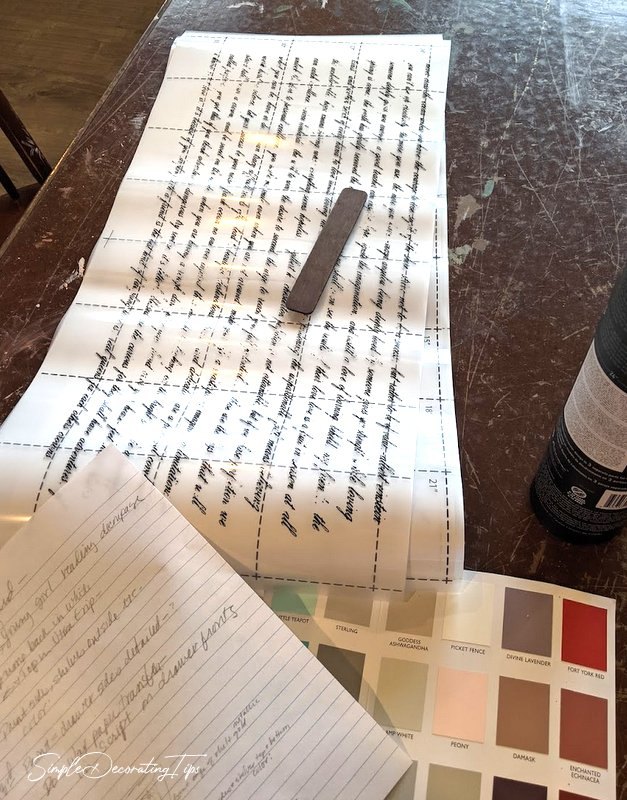
Using the ‘Never Ending Story’ rub on transfer from Prima, I cut the sizes I wanted for the drawer fronts.
For Prima transfers, it’s ideal to apply them to a clean dry raw painted surface, then use a water based top coat over them.
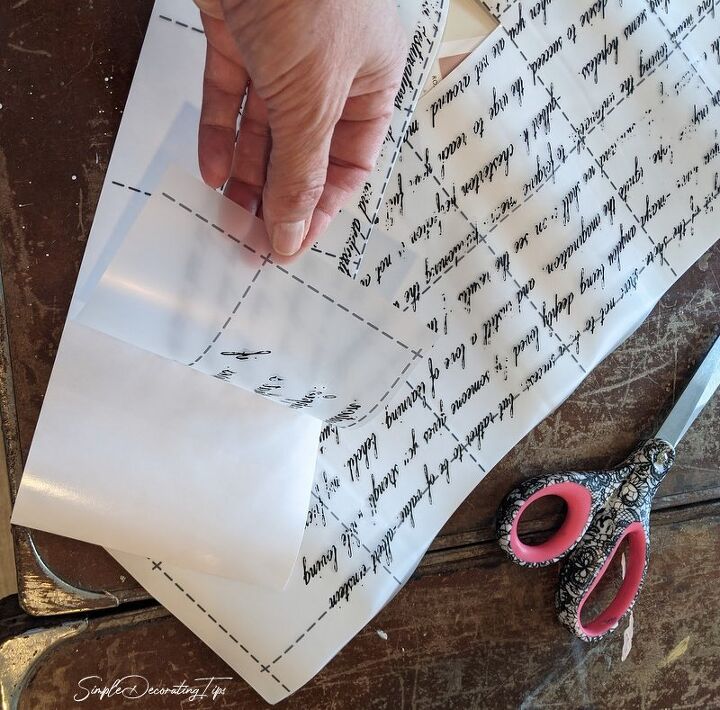
After I cut them to the size I wanted for the drawer fronts, and decided placement, I peeled the wax paper backing off. At this point, I was super careful with the transfer. The transfer is super sticky and will permanently adhere to anything it would have touched, so I took care to not touch the sticky parts with my finger nor let it fold back on itself etc.
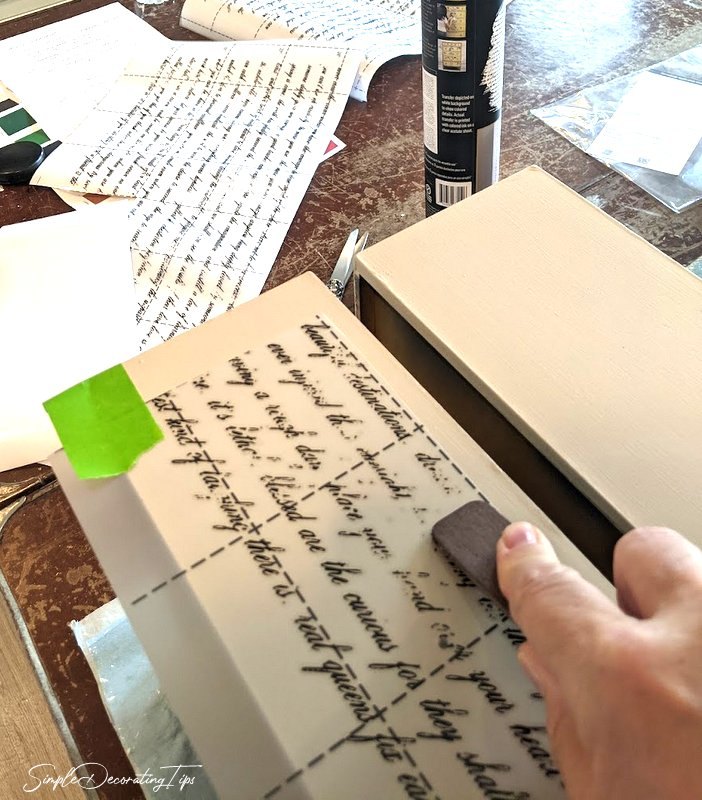
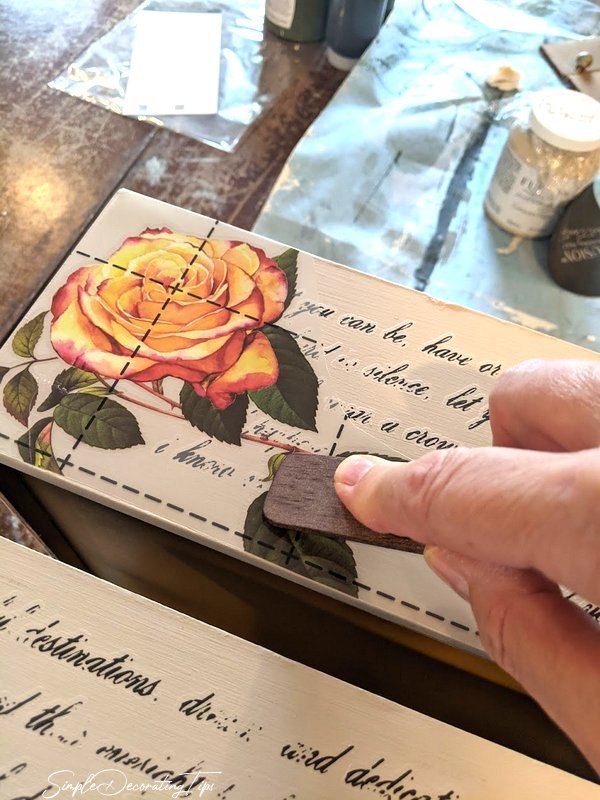
Holding the transfer in place with painter’s tape, I firmly rubbed the plastic top sheeting with the provided stick.
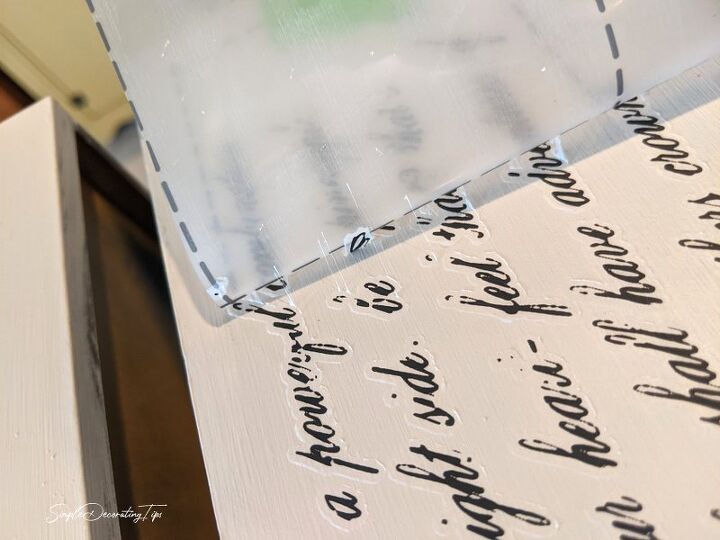
Once I felt I had rubbed over every part, I carefully and slowly lifted the thick plastic top covering to reveal the transfer. As I did so I looked for any part of the transfer that didn’t fully stick to the drawer front. If I spotted some, like in the picture above, I’d carefully lay the plastic covering back down, still in the correct placement and proceed to rub it a bit more.
The script transfer is probably one of the most difficult because of all the little parts to it. Patience is key to this process!
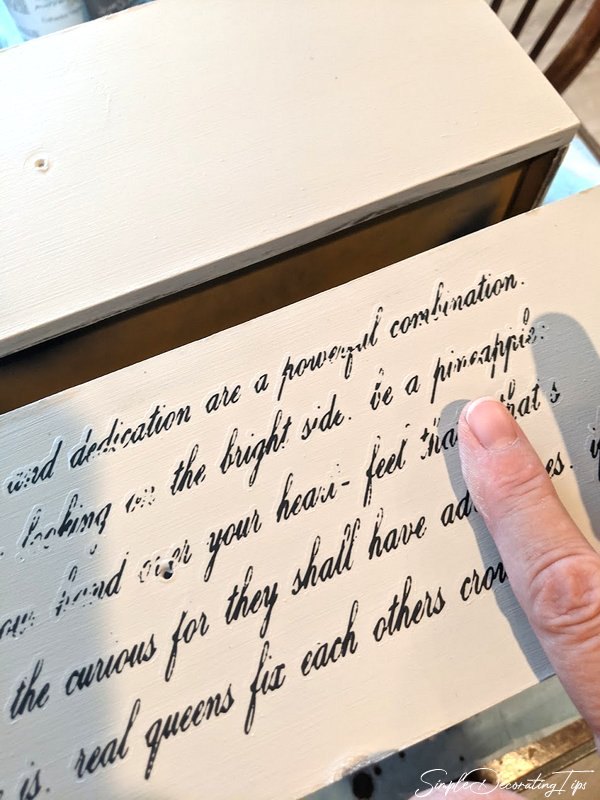
After the plastic sheeting was off, I gently went over the transfers with my finger, feeling to get it smooth. (Yes, this script is meant to be distressed, no, none of it is missing, it’s meant to be that way. LOL)
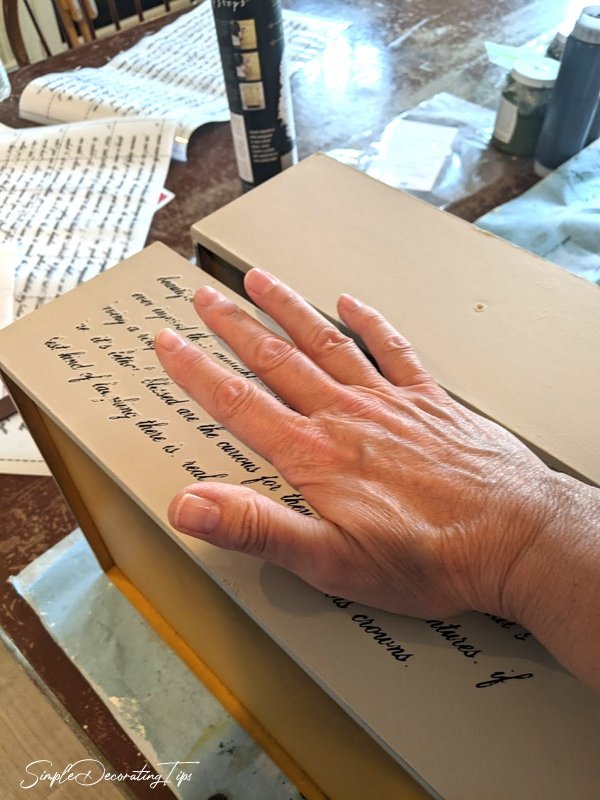
After my finger smoothed it out, I used the palm of my hand, rubbing it firmly to adhere it even better to the drawer front.
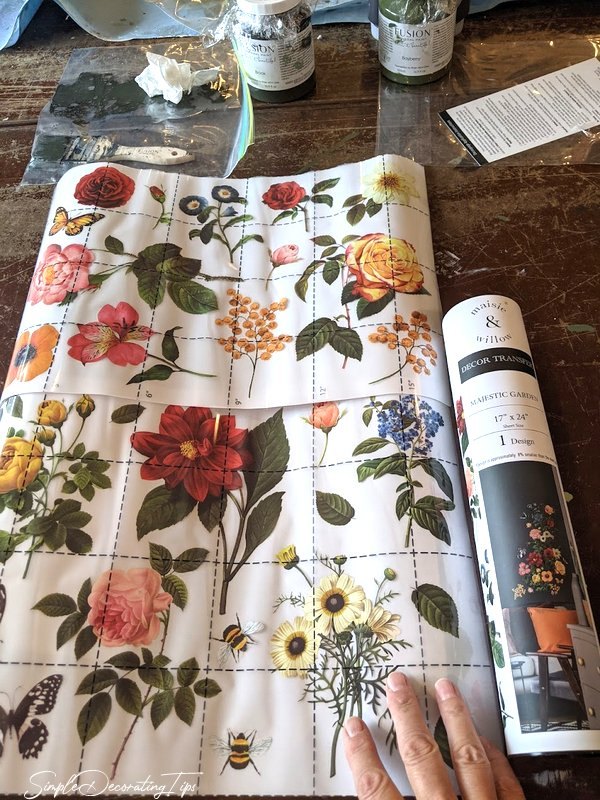
Layering transfers is fun and easy! After the script was applied, I cut out some flowers from the ‘Majestic Garden’ transfer pack. I love that there are so many transfers in one pack… perfect for a huge project, or for multiple smaller projects like this bookshelf.
Same process again. Rubbed it through the plastic covering with the supplied stick, peeled off front, and smoothed it out with my hand.
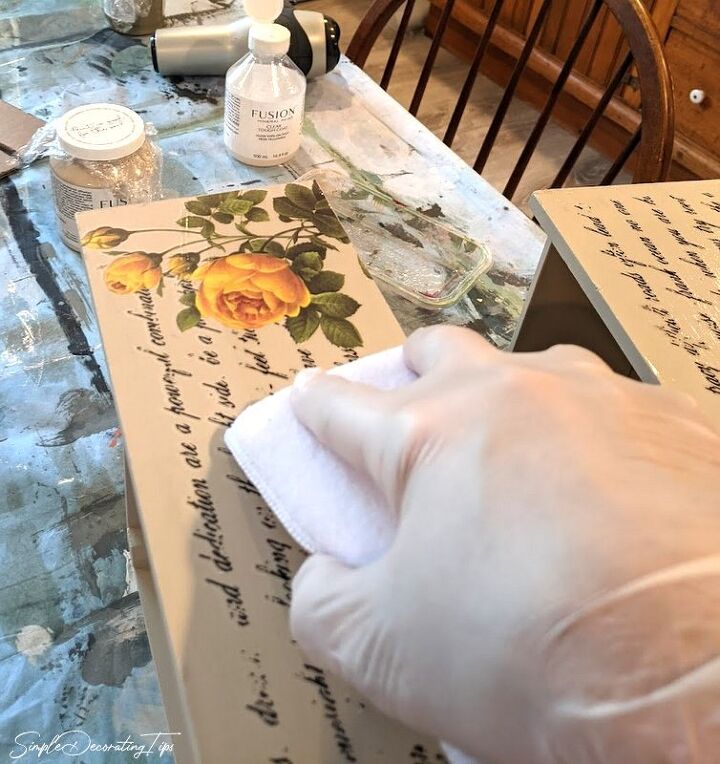
After I was done applying the transfers, I wiped a couple layers of Fusion Tough Coat, allowing it to dry overnight in between coats.
Here is a video I shared a few weeks ago showing my technique to apply Fusion Tough Coat and how to achieve a streak free finish with it.
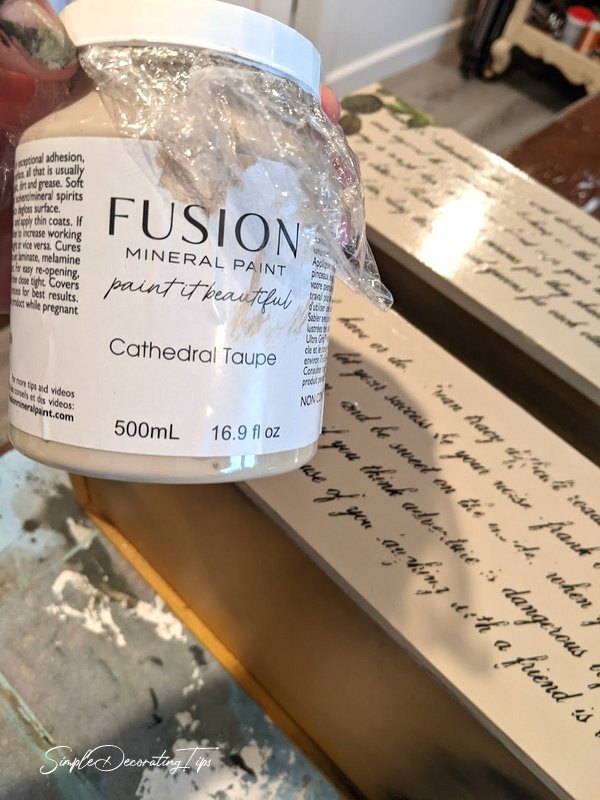
I forgot to mention, that the drawer fronts were painted with ‘Cathedral Taupe’ before the transfers were applied:
I also forgot to take a picture of one more part, but after the top coat was dry, I felt the drawer fronts looked too ‘new’ still, so a quick mix of about 50/50 Chocolate paint color with water created a simple glaze to wipe over the drawers with. Simplest glaze ever!
Next, a little stencil detail…
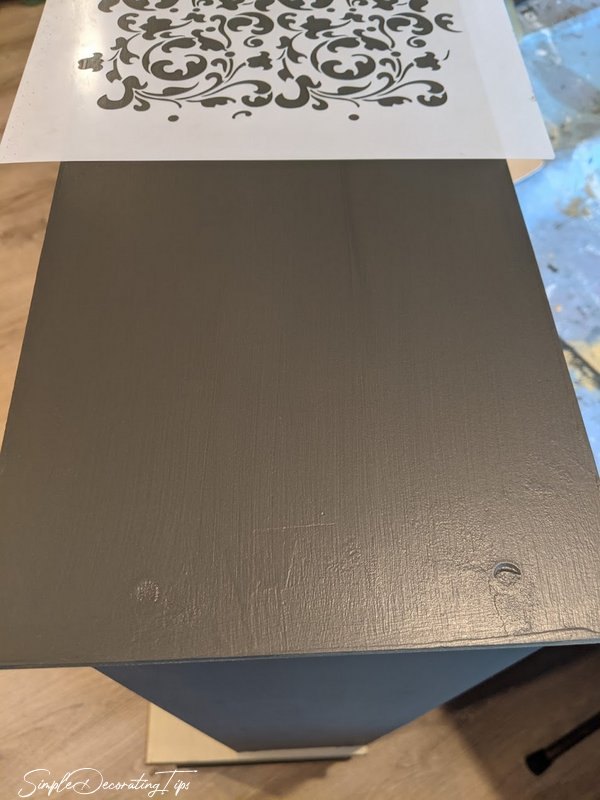
The top of the bookshelf didn’t look great. This bookshelf is petite… only about 4′ tall, so the top is visible. To camouflage the imperfections, I stenciled it with the metallic ‘Vintage Gold’ color I painted the inside shelves with.
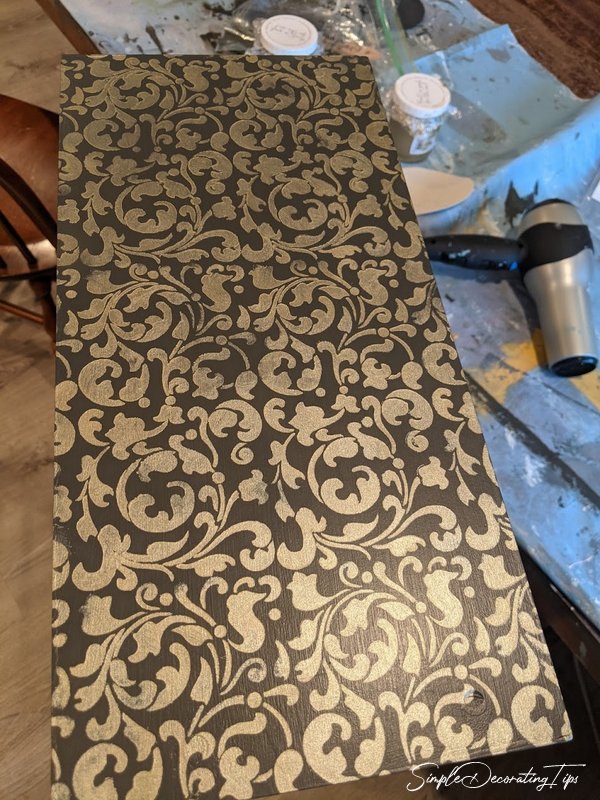
As soon as the metallic stencil was dry, I wet-sanded the top a bit to distress it. Wet-sanding is simply using water, oil or wax for the ‘wet’ part and super fine sandpaper. In this case I used one of the ultra fine sanding sponges with water.
While the stencil was out, I also went ahead and stenciled the sides of the drawers for a fun secret detail.
The final step was to decoupage the inside back. This is the main personality of the piece, with all the other details pulling from it for style and color. I used Fusion Decoupage and Transfer Gel for the decoupage medium. Works so good, I love how smooth and easy it goes on.
Here is a video I made for this post showing the technique I recently discovered to have a wrinkle free application, (thanks @mintbymichelle for the tip!):
The shelves and back of this little bookshelf are stationary so it had to be done this way, but, can I just say, decoupaging inside a cubby space like this isn’t my favorite!
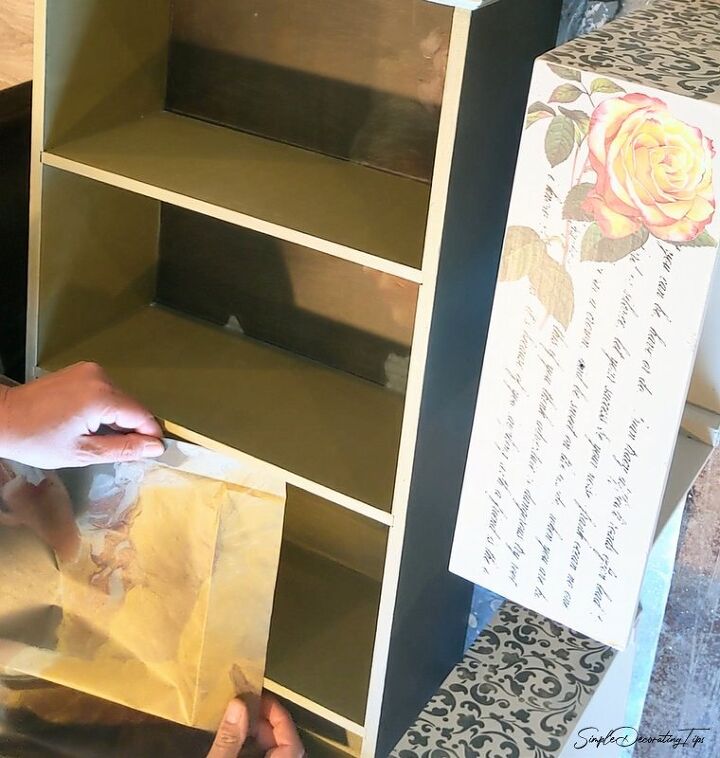
When you decoupage the front of something, you can allow the excess paper to hang over and sand it to fit once it’s dry… super simple. With the inside of the cubby, you have to try to cut it perfect beforehand.
I love the look when it’s done though, so totally worth it.
Here she is all finished! The petite bookshelf.
I think I love this particular Mint by Michelle decoupage paper so much, because that ‘young girl’ reminds me of one of my granddaughters. ((love))
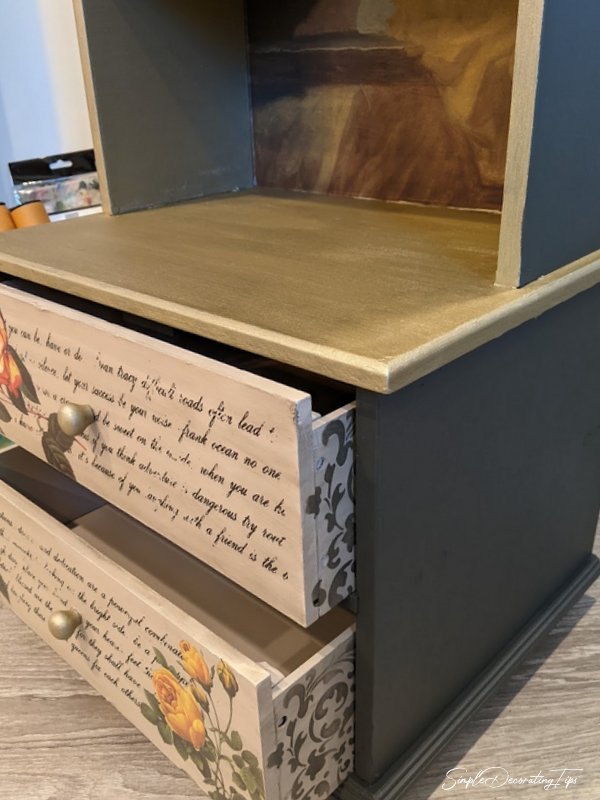
On this drawer close up, you can see the Chocolate glazed front as well as the secret stencil detail on the drawer sides.
You can also find me at Frame and Frills! I offer decorating coaching and stock amazing DIY products like Fusion Mineral Paint, Stencils, Mint by Michelle decoupage papers and ReDesign with Prima Transfers in the shop. You can shop in person or online.

Comments
Join the conversation
-
It is breathtaking! Wonderful makeover!


Frequently asked questions
Have a question about this project?