


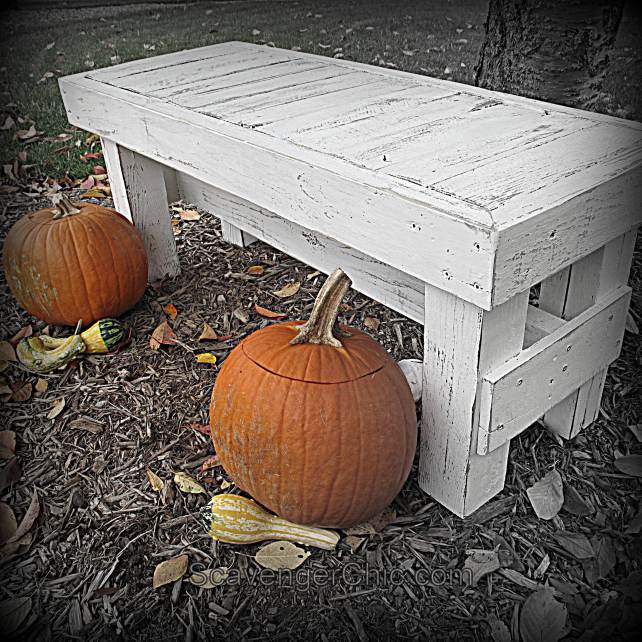
Rustic Bench / Coffee Table Diy
Looking for a bench that's easy to build and will use up some of that scrap lumber you have laying around the house? Look no further, I have the project for you.
From the lumberyard or your stash of scrap lumber, you'll need
two 2 x 4 x 8 ft treated lumber.
One 6 ft 4 x 4 post
two 42 deck balusters . When I wrote this, they were 97 cents each at Home Depot.
2 1/2 inch decking screws
finishing nails
Pallet wood
From the lumberyard or your stash of scrap lumber, you'll need
two 2 x 4 x 8 ft treated lumber.
One 6 ft 4 x 4 post
two 42 deck balusters . When I wrote this, they were 97 cents each at Home Depot.
2 1/2 inch decking screws
finishing nails
Pallet wood
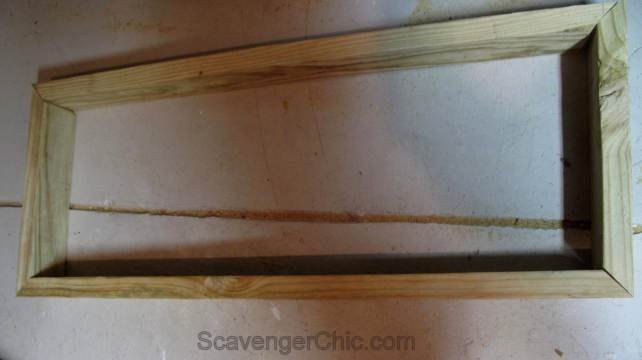
The first 2 x 4 was cut into 3 pieces... one 3 1/2 ft length, and two, 17 inch lengths
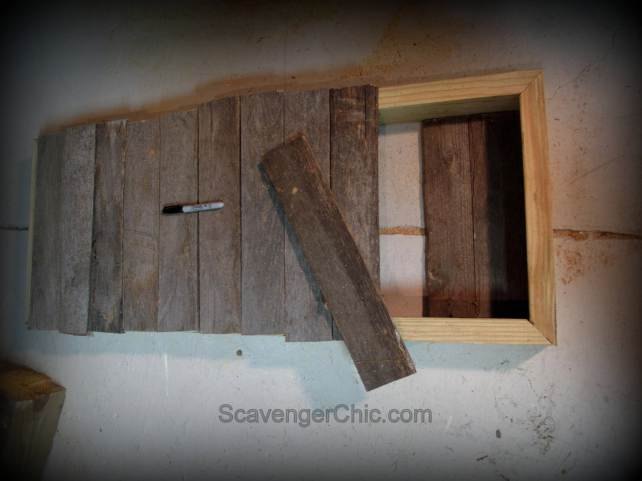
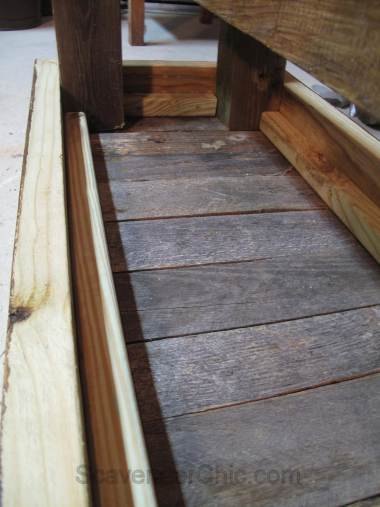
Cut pallet wood to fit inside the 24 frame. They are not attached yet.
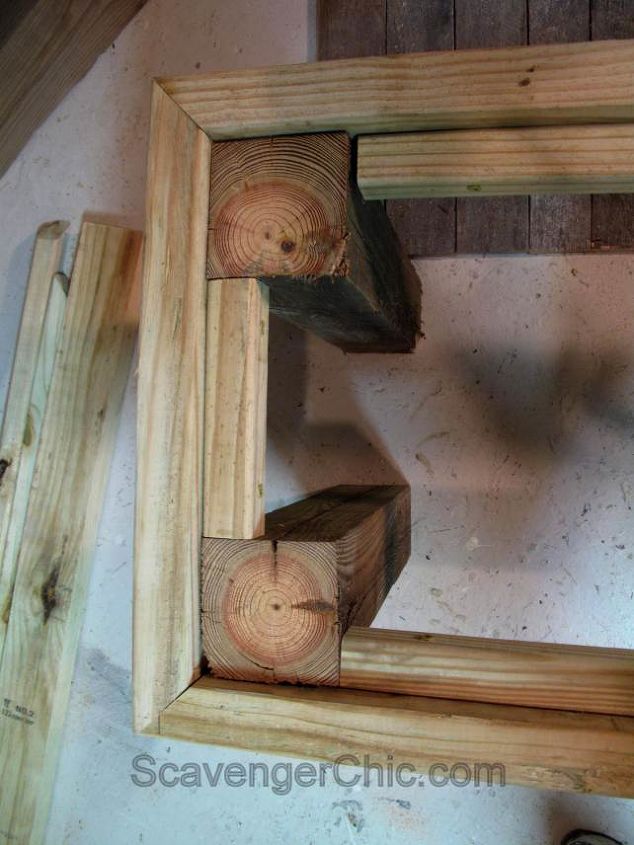
Cut my 4 x 4 post into 4 equal pieces 17 1/2 in length each.
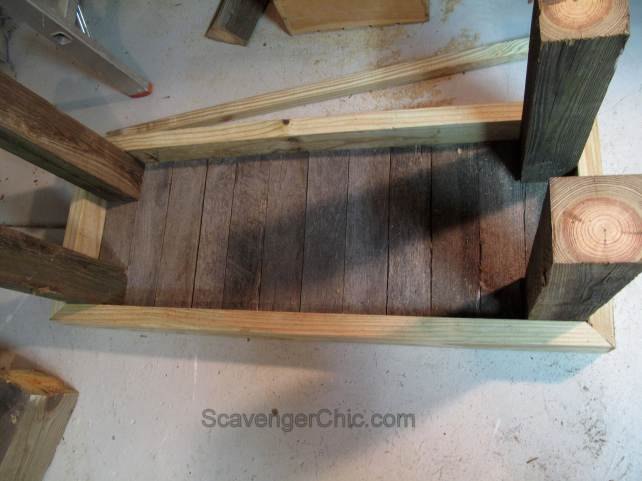
Next step was to cut my 2 x 2 x 42 deck balusters ( or spindles) to fit in between my legs. Two were about 32 in length and two were about 6 1/2 inches. (The only thing attached at this point is the outside frame)
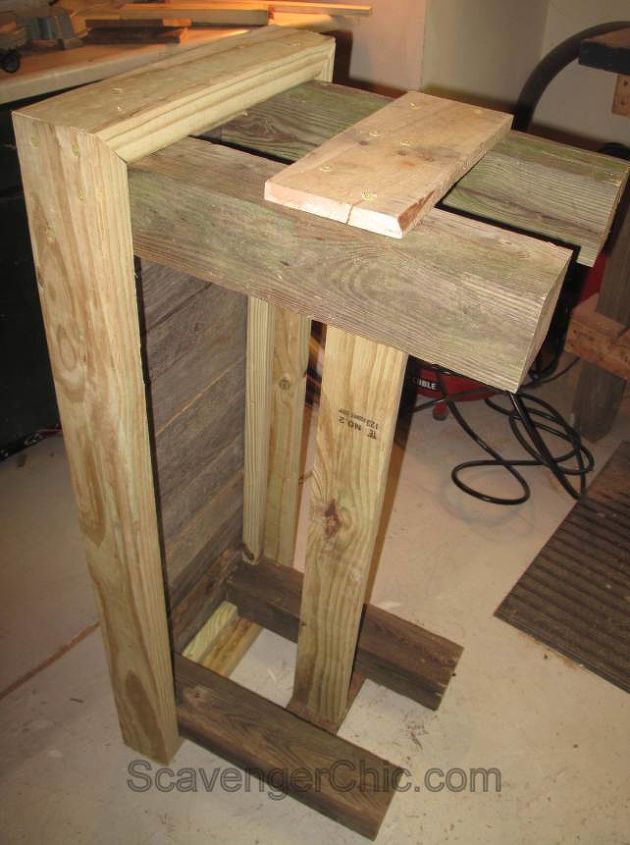
With the bench still upside down it's time to start attaching. With the deck screws attach the legs to the frame using at least 4 screws per leg. I used two on each side.
With everything attached except the pallet wood, I can finally turn the bench over.
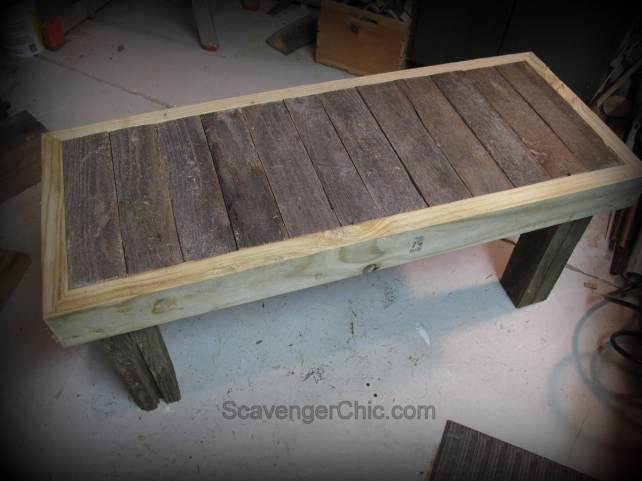
Used a scrap piece of pallet wood on each end for added stability. These 2 pieces were about 12 1/2 " in length, screw into place. Their only requirement was that they needed to be wider than the 2 x 4 cross support. I placed mine about 5 inches down from the top.
Painted the entire bench white with an exterior semi gloss paint that I had left over from painting the outside trim on my house. Sanded again with the palm sander; this tends to really bring out the grain and the palletyness of the pallet wood.
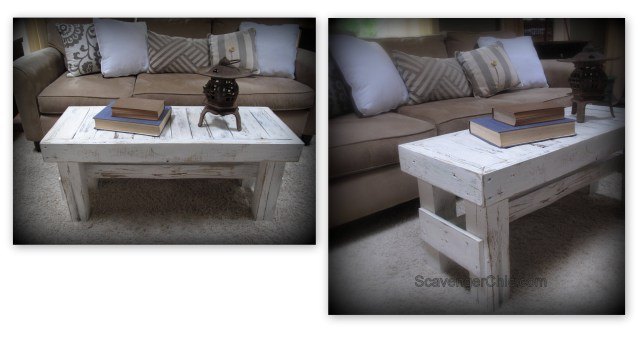
Besides an exterior bench, could also be used as a coffee table or even a bench with your dining table for extra seating at Thanksgiving.

Want more details about this and other DIY projects? Check out my blog post!


Frequently asked questions
Have a question about this project?