


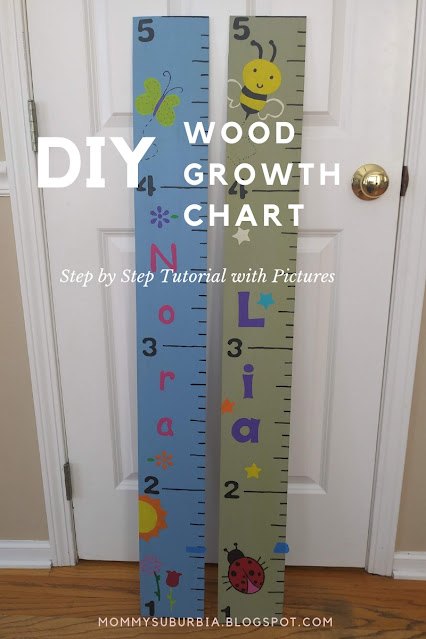
DIY Wood Growth Chart Ruler

Kids grow up so fast! Those milestones we parents track like their first tooth, rolling over, crawling, and walking happens in the blink of an eye! Keeping track of how much your child has grown each year on a growth chart is a fun way for them (and you) to see how big they have gotten.
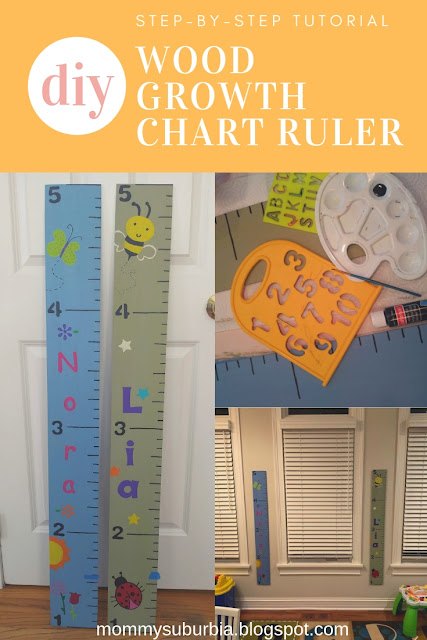
Making your own wood growth chart so you can track your child's growth is easy, fun and budget-friendly! Let me show you how to make your own wood growth chart.
Easy DIY Wood Growth Chart
Materials:
- 0.25" x 5.5" x 48" poplar wood board
- Paint or wood stain
- Paintbrush
- Ruler
- Fine grit sandpaper
- Sawtooth picture hanger
- Spray on sealer
- Newspaper or drop cloth
- Silicone wall protectors
After you gather all of your supplies you are ready to begin.
Step 1
- The first step is to cover your work surface with newspaper or a drop cloth so you don't get paint everywhere. It is up to you whether or not you want to paint or stain your wood board but both methods look great.
- Apply one coat of paint to each side and along the edges of the board allowing for the paint to dry before flipping it to the other side.
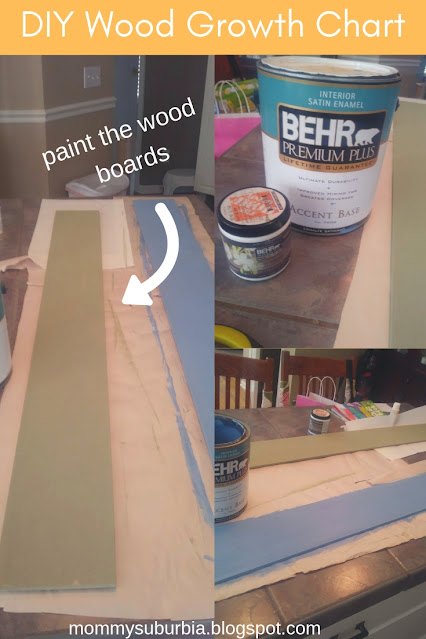
TIP - When you apply paint to wood the wood soaks up the paint resulting in a rough surface. After the paint has completely dried use fine grit sandpaper and lightly sand the painted wood. I liked the way the painted wood had a bit of a rustic look to it after I sanded it so I did not apply a second coat of paint. If you don't like a rustic look you may have to apply a second coat of paint to all sides of the board.
Lightly sand after the second coat of paint dries so that the surface is smooth and free from rough spots.
Step 2
- Once the board is painted it is time to mark out the ruler measurements lightly in pencil. You will want to take into consideration that the wood growth chart will be hung on a wall that probably has baseboards. I chose to start my measurement markings at the height of 1 foot (12"). This means that when the growth chart is hung on the wall the bottom should be 12" from the floor.
You can choose any starting point that you want for your growth chart. The reason why I chose 12 inches was so my growth chart measurements had the height of my nieces as newborns. Both happen to be 19 inches tall as newborns so I thought it would be cute to include that measurement as their first growth milestone on their growth chart.
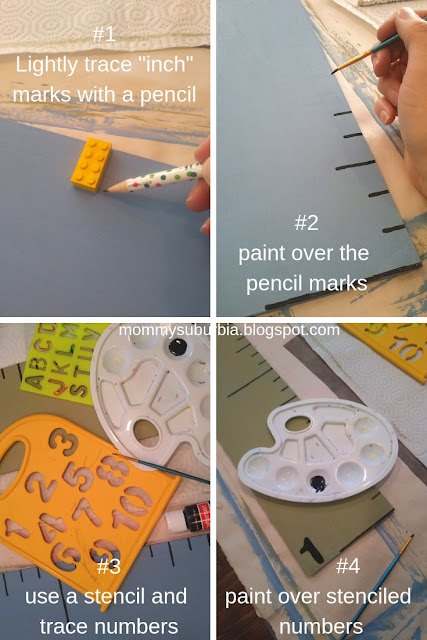
- I placed my ruler along the edge of the wood board with the bottom of the ruler even with the bottom of the board. I then lightly marked one-inch increments in pencil along the board until I had the entire length of the board marked and measured.
- Next, I grabbed a 2 x 4 Lego block ( hey, don't judge it was just laying on the counter next to me and it worked great!) to use as a template for how long I wanted my finished inch markings to look. I used the short side of the Lego to mark the length of the lines at the 1", 2", 4", 5", 7", 8", 10", 11" measurements.
- For the 3", 6" and 9" I used the long side of the Lego piece so that these markings would stand out.
- Then at every foot (2 foot, 3 foot, 4 foot, and 5 foot) I measured and marked a 3 1/2" line. You can get a better idea of how this looks from the pictures above.
- After I finished marking the inch and foot lines I used a fine tip paintbrush and painted over them with black acrylic paint. Go slow and steady so your lines stay straight and don't get wobbly! Let the paint lines completely dry before you do any more work on the growth chart.
- Now that the measurement lines are dry it is time to add the numbers at the long 3 1/2" marks to show the "foot" measurements. I used a stencil and traced my numbers lightly in pencil first.
If you don't have a stencil just print off a number in the font you like at the size that fits your project. Lay the printed number on your growth chart in the spot you like next to the appropriate "foot" marking and then with a pencil trace around the printed number pressing hard on the pencil so that the pencil leaves a mark on the wood. Lift the paper up and lightly trace over the indentations.
- Once all of the "foot" measurements have been penciled in grab your fine tip paintbrush and whatever color acrylic paint you want to use and paint fill in the numbers where you stenciled in the markings. I chose to use black acrylic paint which is the same as I used for the line measurement markings. Let the paint dry completely.
Step 3
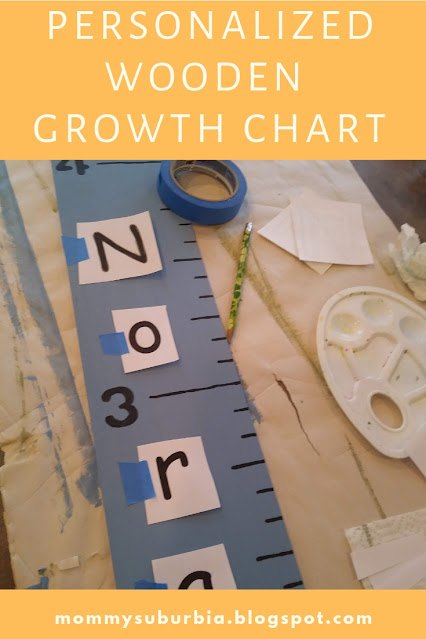
- To add a child's name on the growth chart follow the same steps used for stenciling in the numbers but this time with letters to spell out their names. After tracing the letters onto the wood use a fine tip paint brush to paint in the name. I chose a complementary color in acrylic paint to paint their names and I really love how it turned out!
Step 4
- Decorate your growth chart with cute animals, flowers, and simple shapes. The options for decorating your custom wood growth chart are endless! Let your imagination go wild. If you don't feel comfortable adding free-hand designs use a stencil and trace them.
Step 5
- Since the wood I used was fairly thin I was limited to the type of sawtooth hanger because most have long nails that would pop through the front of the wood if I used them. However, I did find one type of sawtooth hanger, a no-nail sawtooth hanger that wouldn't pop through the front of the growth chart when I attached them. They were super easy to attach requiring only a hammer to pop the edges of the hangers into the wood.
Step 6
- The last step for this project is to add a couple of clear rubber bumper pads to the bottom corners on the back of the growth chart.


Frequently asked questions
Have a question about this project?