


Clean and Organize Messy Yard Tools in Your Garage
Do you take care of your outdoor tools so they’ll last a lifetime? If not, it’s time to learn how to properly maintain and organize your messy yard tools!
When we moved into this house, two years ago, we had no organization system in place to store our yard tools in the garage.
So guess where we put them…
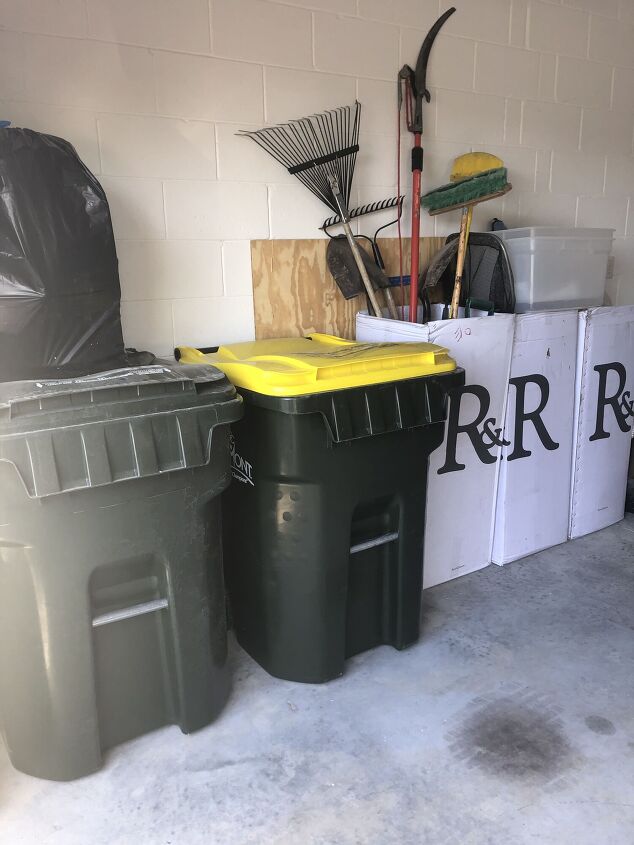
Inside mattress boxes!
This is a great option if you don’t have money in the budget to purchase an organization system.
We used those boxes for almost a year!
Then we did this…
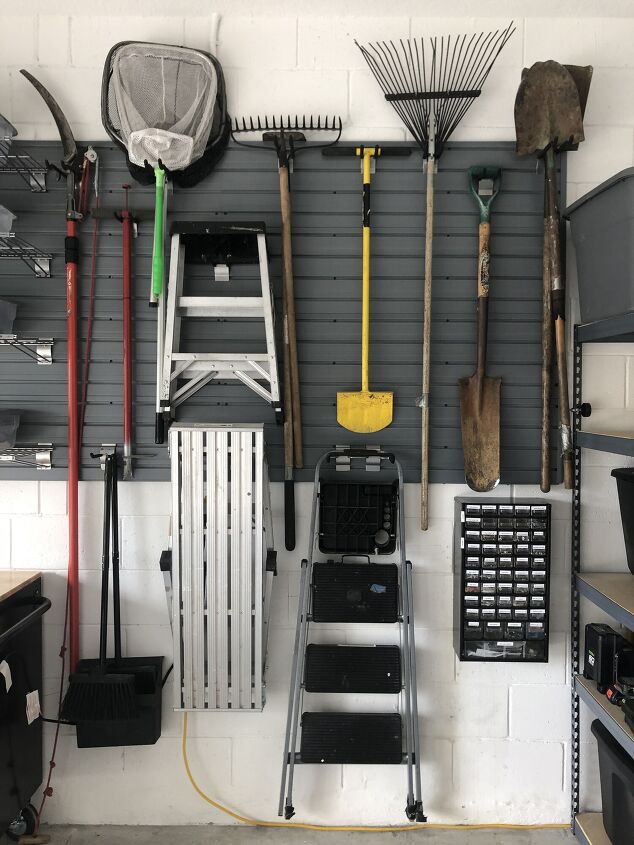
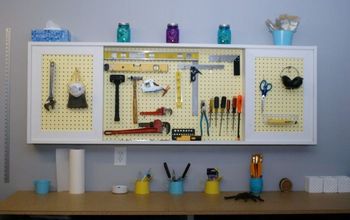
Installed a Flow Wall System to organize the yard tools and more! You can see that DIY here!
We love this system and we did a pretty good job of putting tools back when we finished with them.
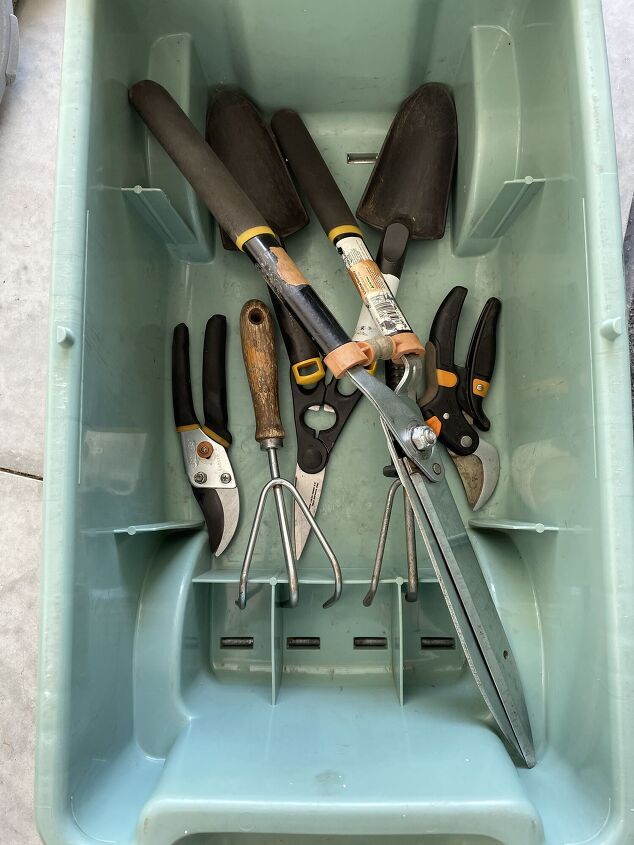
OUR MESSY YARD TOOLS
I wish I could tell you that we’ve done just as good of a job, cleaning, sharpening, and keeping our tools in good working order!
But that would be a lie!
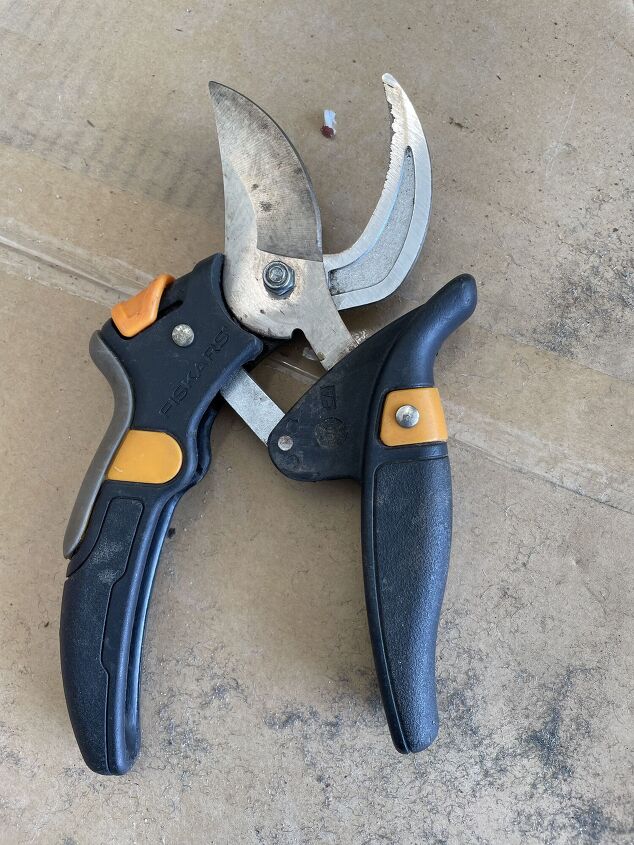
Our tools are a mess! Over the years we have neglected them and now they’re showing a lot of wear!
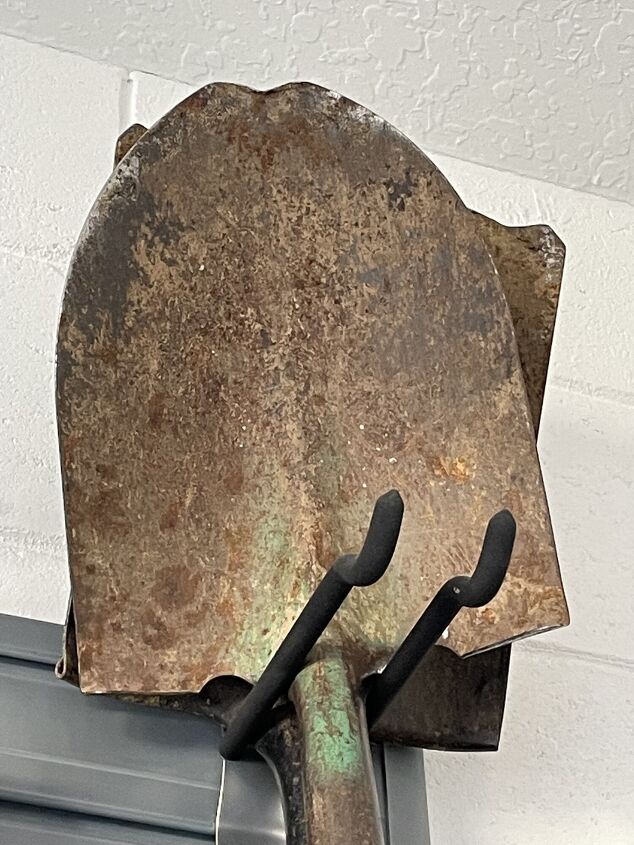
Some of them are in such bad shape, I was thinking I might need to buy some new tools.
Then it hit me, if we just cleaned them up and sharpened them, maybe we could get by.
So, I decided to do some research on how to properly maintain messy yard tools!
To my surprise and delight, I found out it’s very easy!
I feel a bit silly that it’s taken me this long to figure this out!
It’s not hard, it just takes some time, a little patience, and some elbow grease!
But when you see the transformation of our yard tools, you’ll be excited to get outside and spruce yours up too!
Want to see what those shovels looked like after a little love and care???
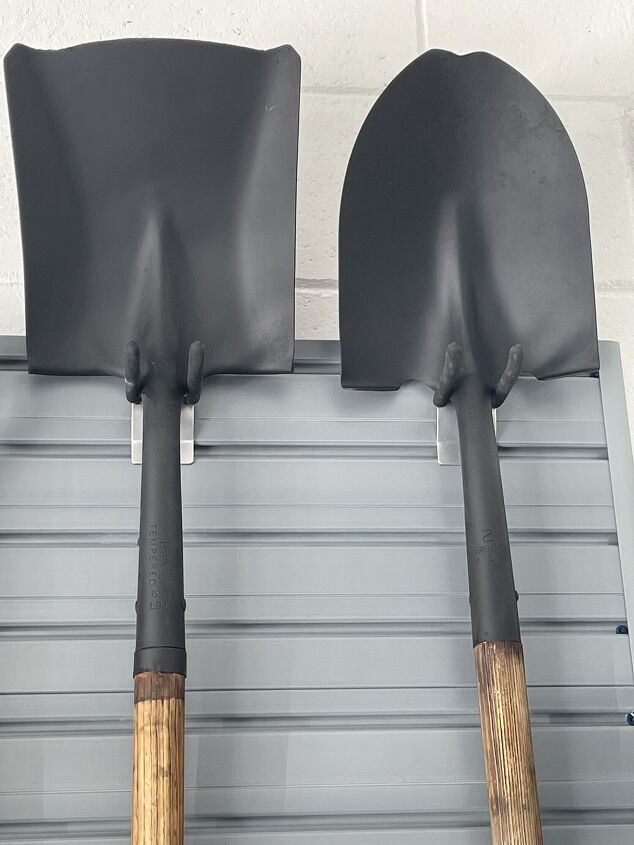
Can you believe those are the same shovels?
Let’s go!
It’s time to learn how to maintain and organize your yard tools!
STEPS TO CLEAN AND MAINTAIN YARD TOOLS
GATHER
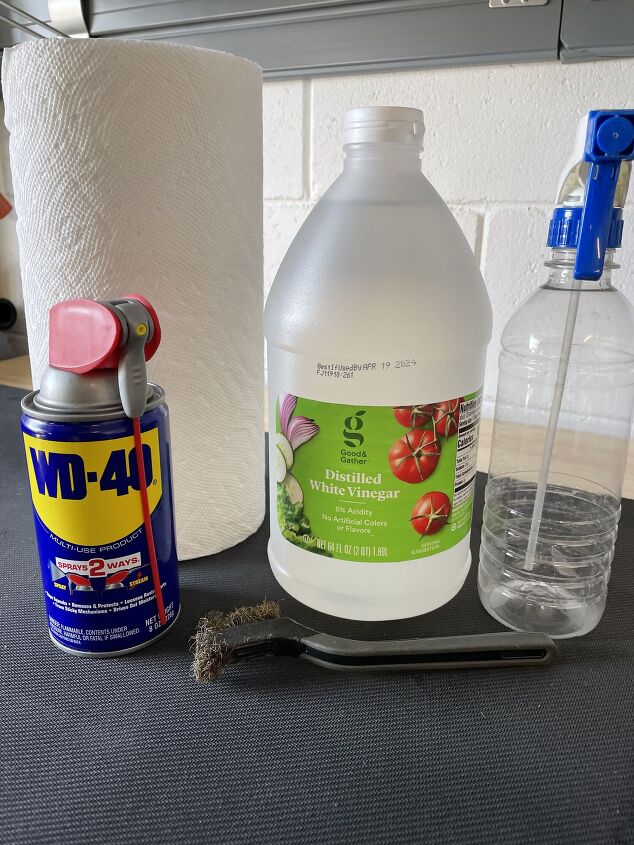
Gather or purchase the following items:
- Tools
- Bucket and/or tub/tray
- Vinegar-we used three large plastic bottles
- Paper towels
- Steel wool
- Wire brush
- Carbide sharpener
- Metal file
- Sander/sandpaper
- Painters tape
- Spray paint
CLEAN
First, you need to remove any clumps of dirt and sand!
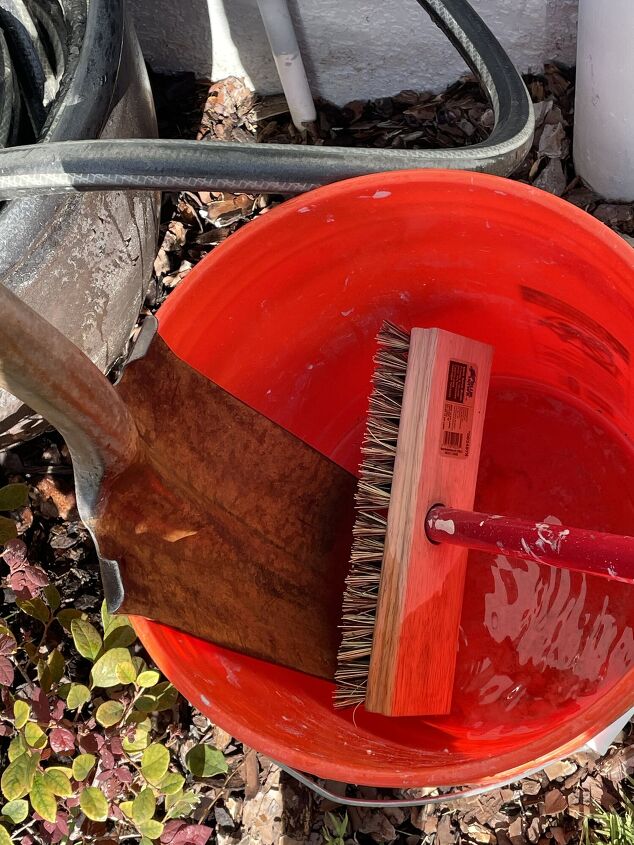
I used a bucket of water and a scrub brush to remove all the caked-on dirt. Then set them out to dry!
SPRUCE UP THE HANDLES
Next, remove any old stickers or tape from the handles with sandpaper.
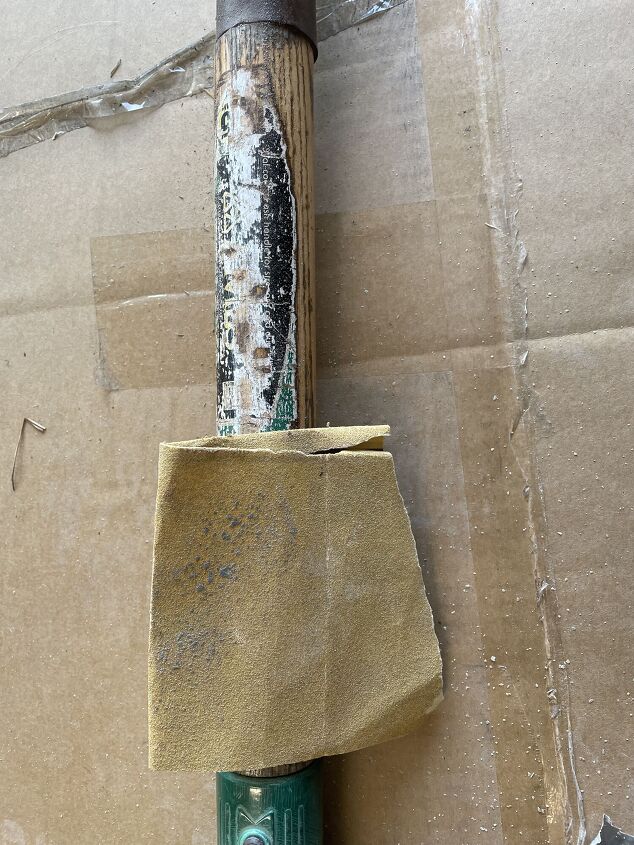
If that does not work, then ...
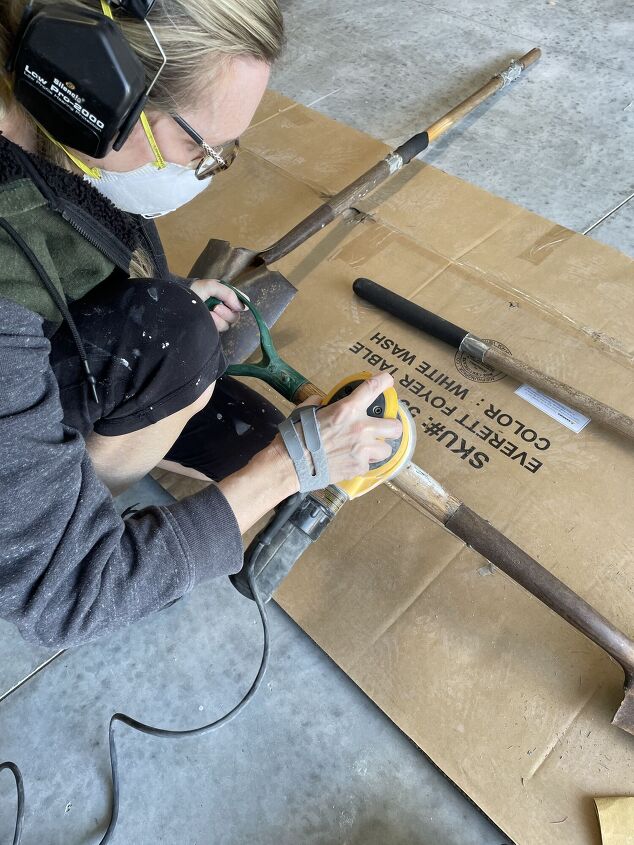
You can use a hand sander!
REMOVE RUST
I’m going to show you two ways you can remove rust!
If you have hand tools that have a minimal amount of rust use this technique.
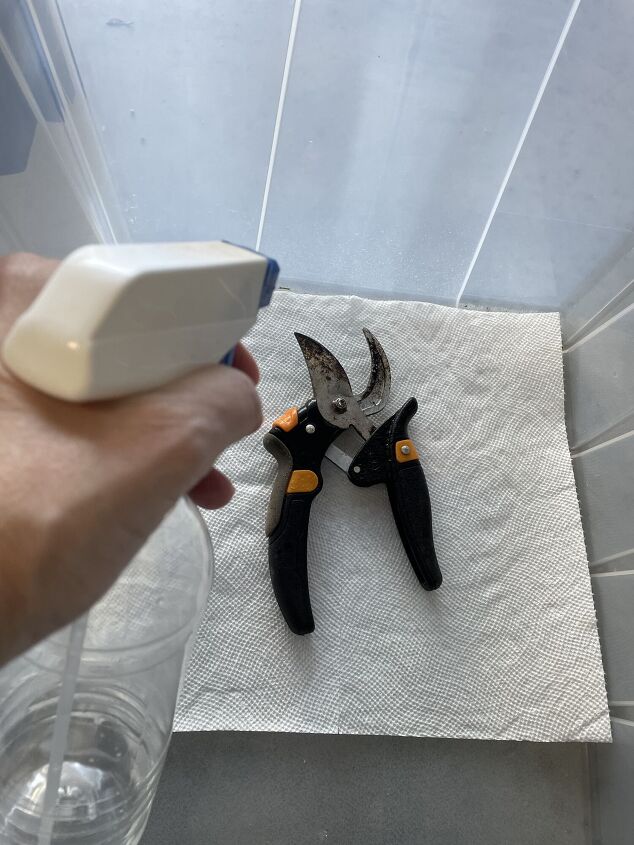
Put vinegar in a spray bottle. Put pruners on a paper towel and spray them with vinegar.
Wrap the paper towel around the tool and continue spraying until it’s soaked! Lay them inside a plastic tub and let them sit overnight.
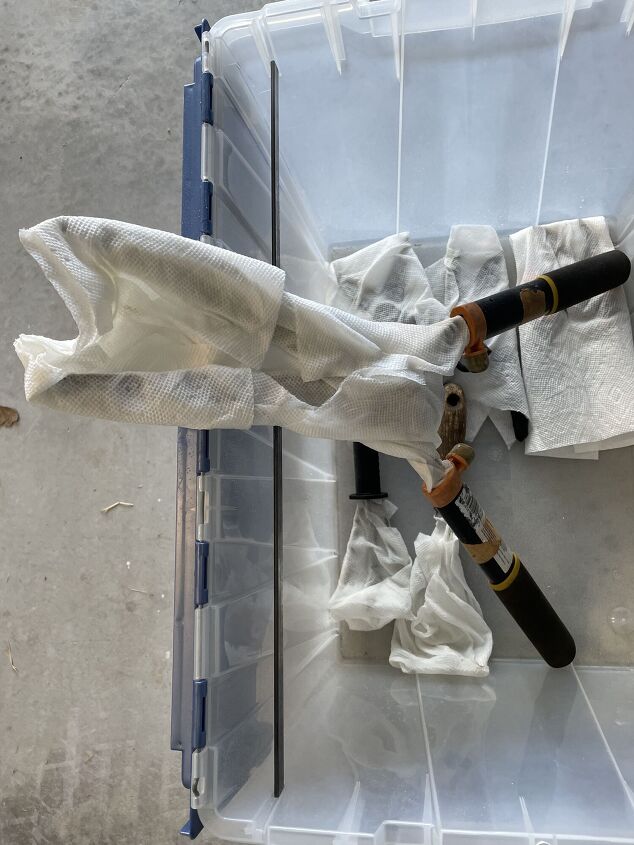
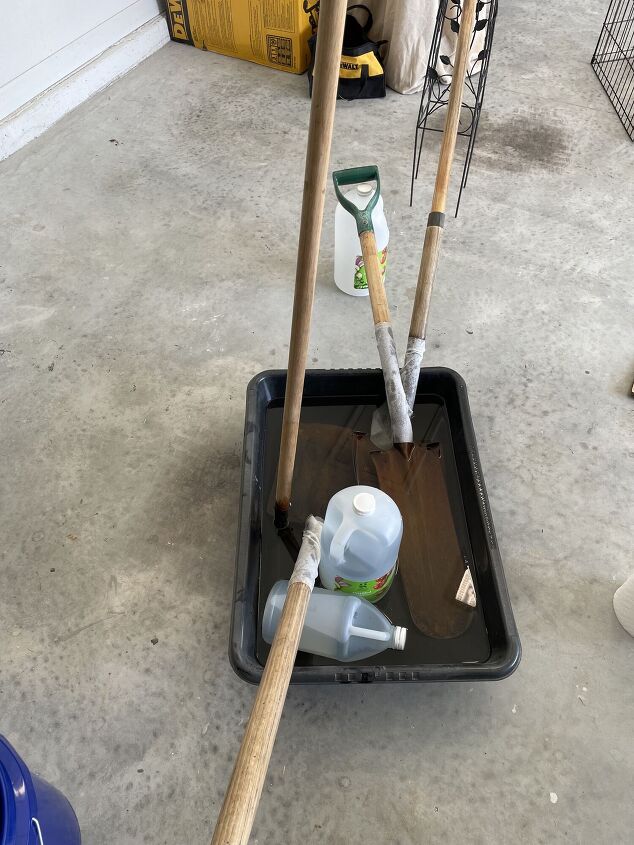
If you have large tools or items covered with a lot of rust, you can submerge them in vinegar overnight.
We used three large bottles of vinegar and poured them into a tray.
Next, we arranged our tools in the tray but the vinegar did not cover them all. To keep from buying more vinegar, we filled the empty bottles with water and set them in the tub. It caused the vinegar to rise and cover each tool.
Next, we wrapped paper towels, soaked in vinegar, around the metal parts of the handles.
Make sure the end of the paper towel is sitting in the vinegar so it will stay wet all night.
Do not let the paper towel touch the wood handle because the rust will stain the wood!
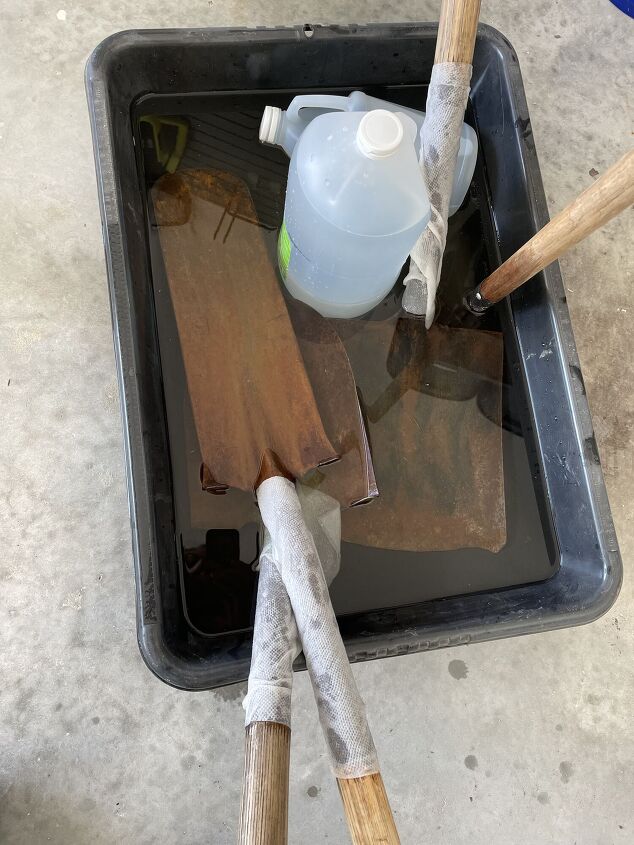
The next day our tools looked like this! You can see that huge hunks of rust are loosened.
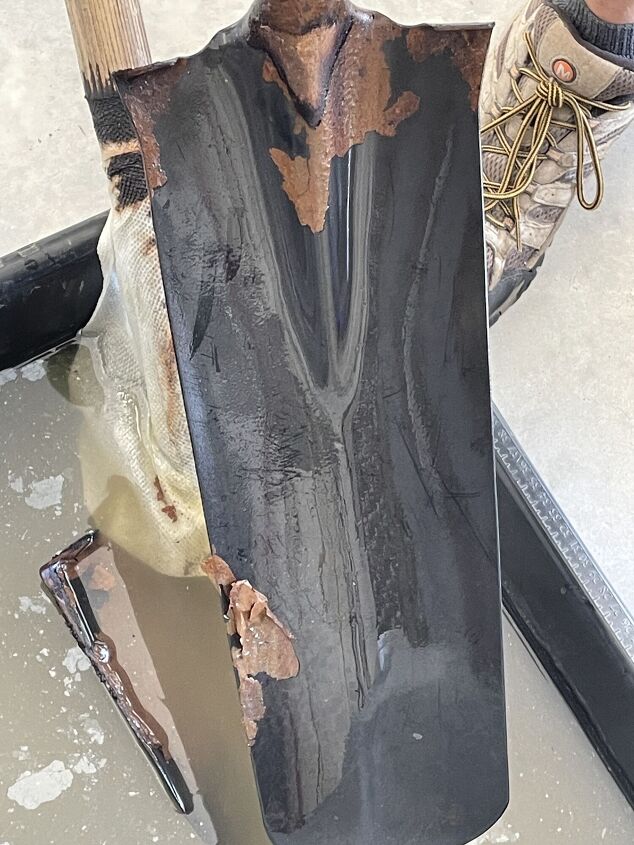
It’s so amazing! Most of the rust slid off! I am in shock at how well this worked!!
If you still have rust on the tool, use steel wool to remove it.
Before steel wool!
After steel wool!
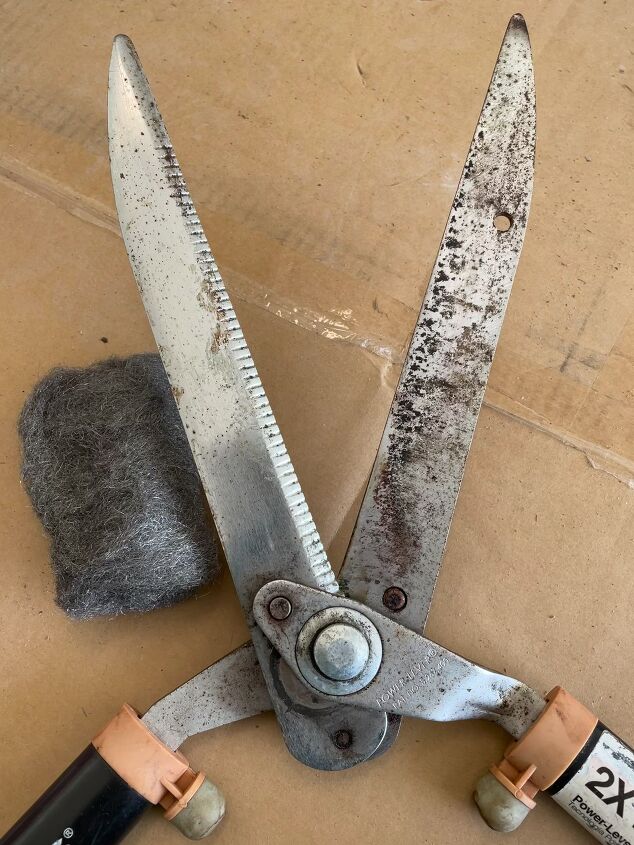
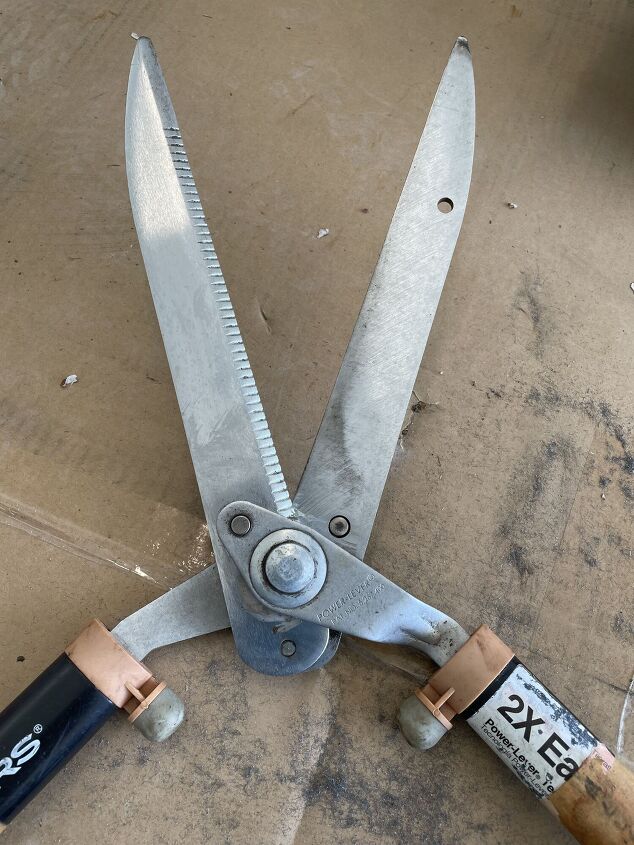
If you still have rust on the blade, use a wire brush to remove the stubborn spots!
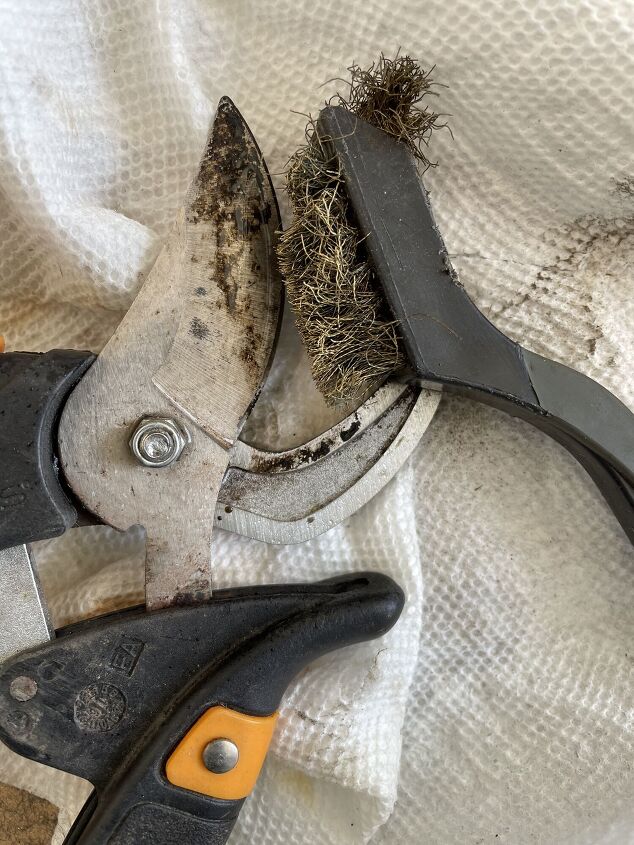
The picture above shows pruners before we used the wire brush! I think it’s time we get a new wire brush lol!!
After wire brush!
WASH AND RINSE
Use soapy water and wash all of the residues from the tool. Rinse well and let dry.
SHARPEN
Now it’s time to sharpen your tools!
Rich had a metal file for the shovels but we had to purchase a carbide file to sharpen the hand tools!
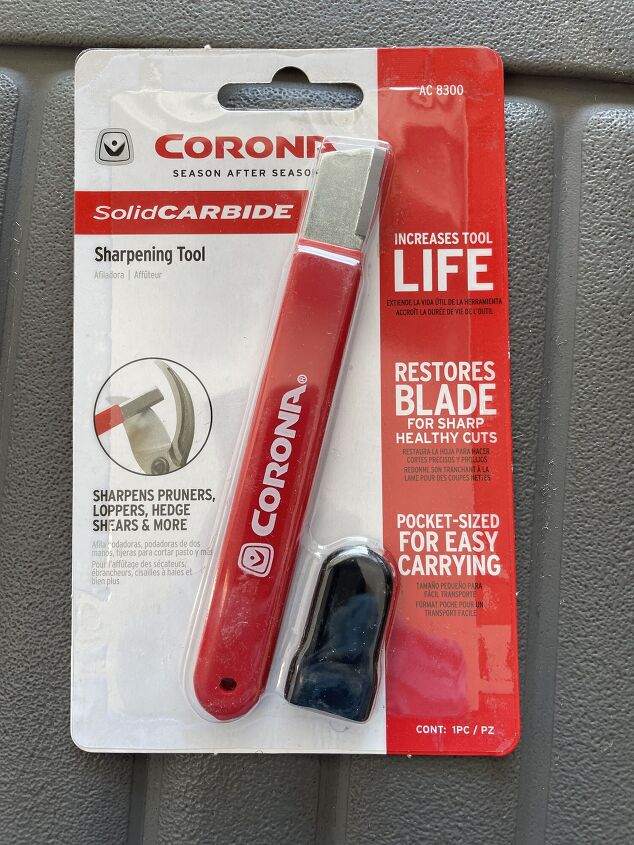
The carbide file is so easy to use, I’m embarrassed I had never bought one before now!
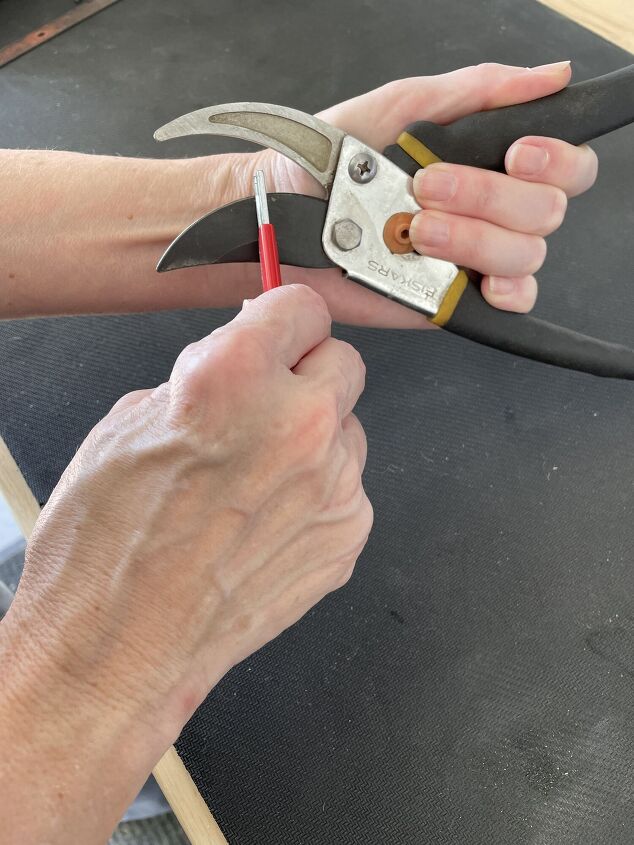
Cradle the pruner in your hand, then hold the file at an angle, moving along the beveled edge in one direction. Sweep across the blade 3 to 5 times until it is smooth.
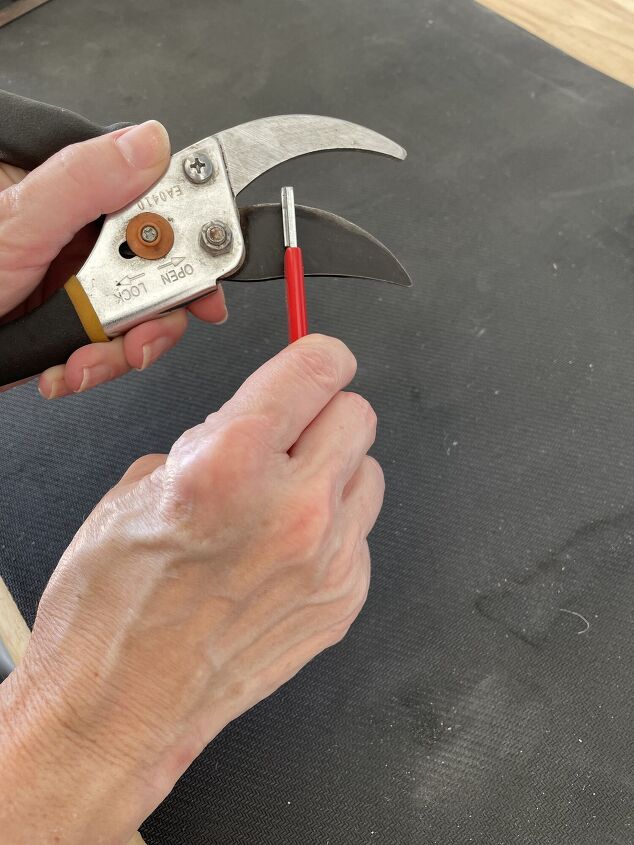
Turn the pruners over and feel the edge to see if there is a bur (a bump created by the sharpening). If so, lightly run the carbide flat against the blade to remove the bur.
For shovels, look for the beveled edge.
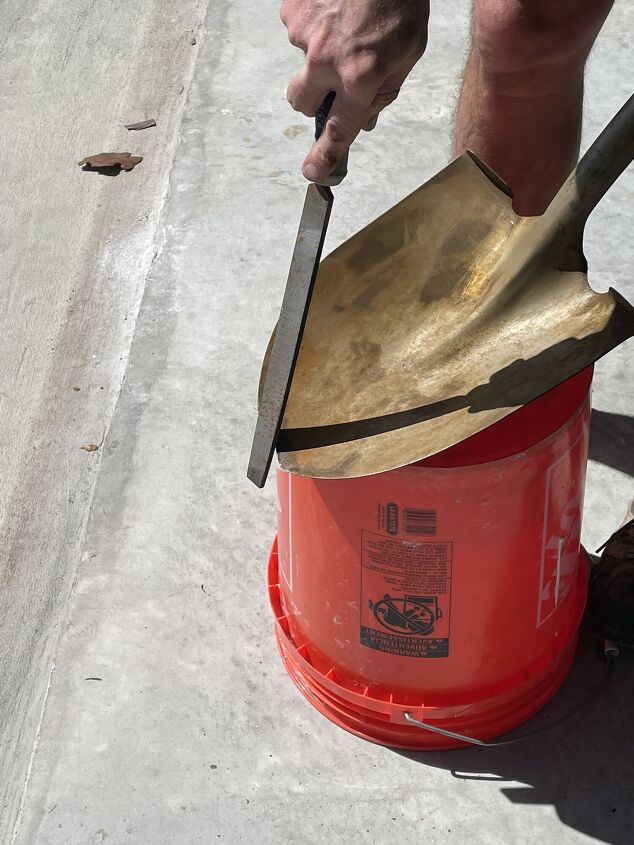
Run the file in a long movement down the bevel. Only run the file in one direction, do not go back and forth.
Check the back to see if there are any burs. If so, gently run the file down the back edge to remove them.
PAINT
This step is not necessary but I figured if we were going through all the trouble, why not make them all match! So, I decided to paint them black!
I put painter’s tape over the wood handles and lay the tools on cardboard/paper to protect the floor.
We used Rust-oleum 2X Ultra Cover Paint +Primer spray paint in Flat Black!
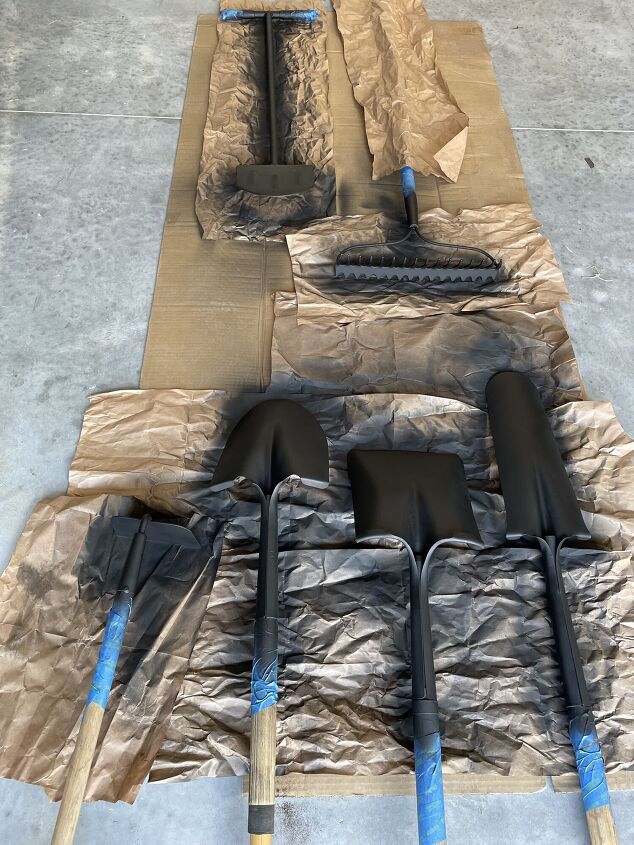
Here are the tools after two coats of paint!
OIL
To keep your hand tools in good working order, it’s important to oil them. We also oiled the handles of the larger tools, since we sanded them!

Oil the moving parts of your hand tools with WD-40!
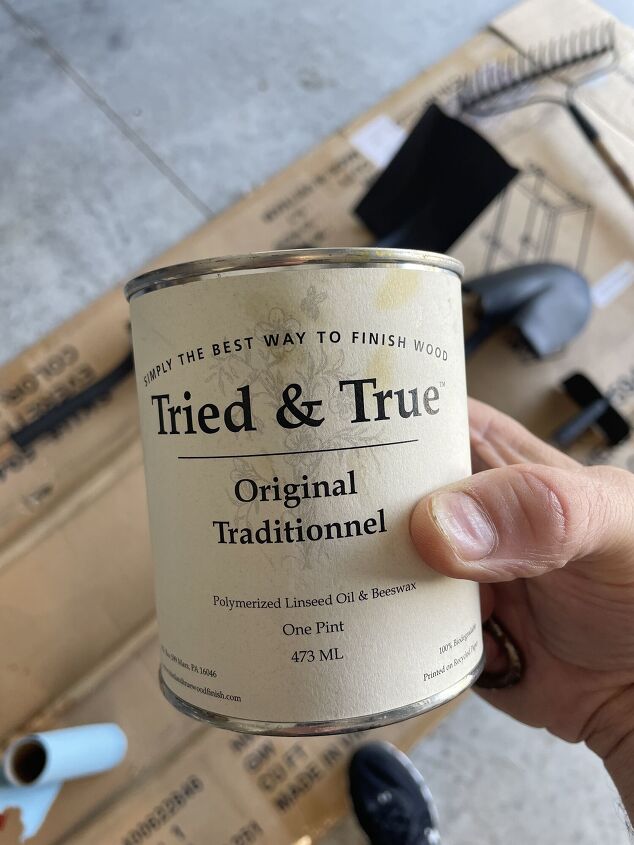
We sanded the handles and wanted to add some protection to the wood, so we rubbed them with linseed oil!
STEPS TO ORGANIZE YARD TOOLS
We will be hanging our larger tools and containing our hand tools in a garden cart/bench!
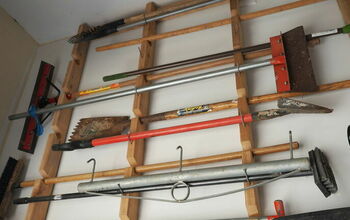
HANG YOUR TOOLS
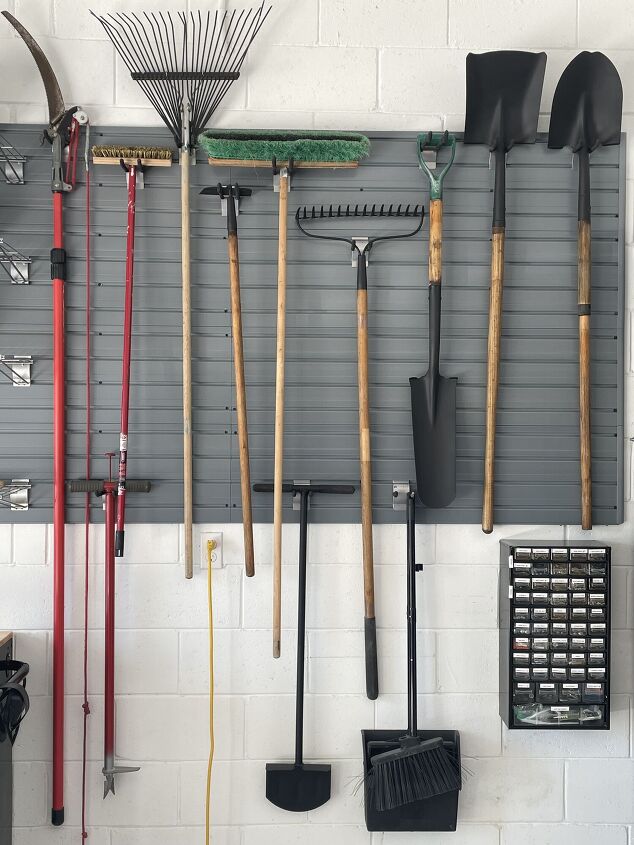
We organized the large tools on our garage wall. I love this system because the tools are so easy to reach and replace!
CONTAIN YOUR TOOLS
I gave my yard cart a good cleaning, then put my “like new” tools back inside! This handy yard cart/bench is so handy to pull around the yard!
Doing yard work is going to be so much easier with all of my sharpened and oiled tools!
Are you glad you took this time to learn how to maintain and organize your yard tools?
Or do you already do regular maintenance on your tools? Let me know your thoughts in the comments!
If you are interested in learning more about home organization, seasonal decor, and more DIY projects, from simple crafts to full room makeovers visit our blog AnOrganizedSeason.com
Blessings, Donna and Rich
Resources for this project:
See all materials


Comments
Join the conversation
-
Well done! When I was a youth, (I am 68 now) I learned to rinse off dirt and dust. Then there was a bucket with sand. And used motor oil was poured on the sand. Then mix. Shove a hoe or shovel in and pull it up and down. It would come out clean and oiled. Wipe off excess sand. There are some tools still around 50 plus years later!
{Today's environmental laws prohibit some uses of used oils.}
-
That's so interesting! Thanks for sharing with us! Just goes to show if you take good care of your tools, they can last a lifetime! Take care, Donna


Frequently asked questions
Have a question about this project?
This is not a project, but what can I do to stop my dog from tearing and destroying the other dogs bed. He tears it up where the zipper is. I need help.
Thanks
Did the carbide file include directions on what angle to hold the file against the cutting edge? I know with knives and chain saws, if you file too sharp of a beveled edge, it wears off quickly and then is too dull to work efficiently. If you file too shallow, it is a dull edge already and won't work well from the beginning. I once was given a chainsaw sharpening electric grinding tool but I could not for the life of me find that magic spot and wasted many hours ruining chainsaw chains in a futile attempt to save some money bypassing the professional sharpener service. {sigh} Some things are just not in my wheelhouse - and I'm a detail-oriented perfectionist.