


Turn an Old Toybox Into a Garden Tool Storage Dream
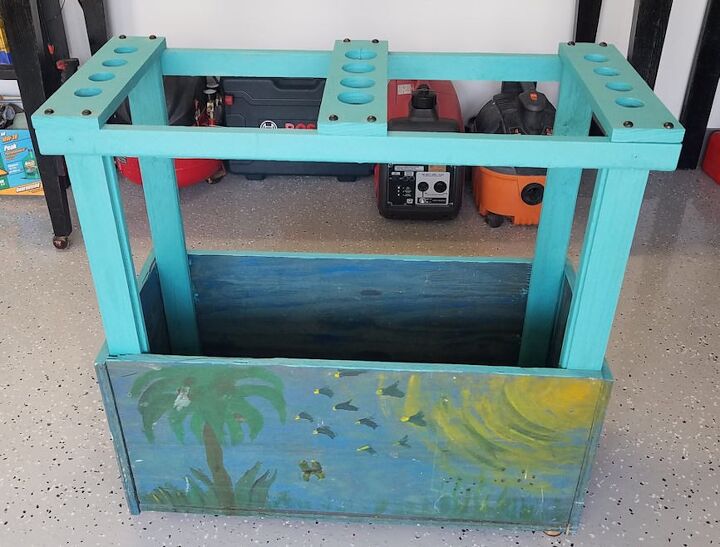
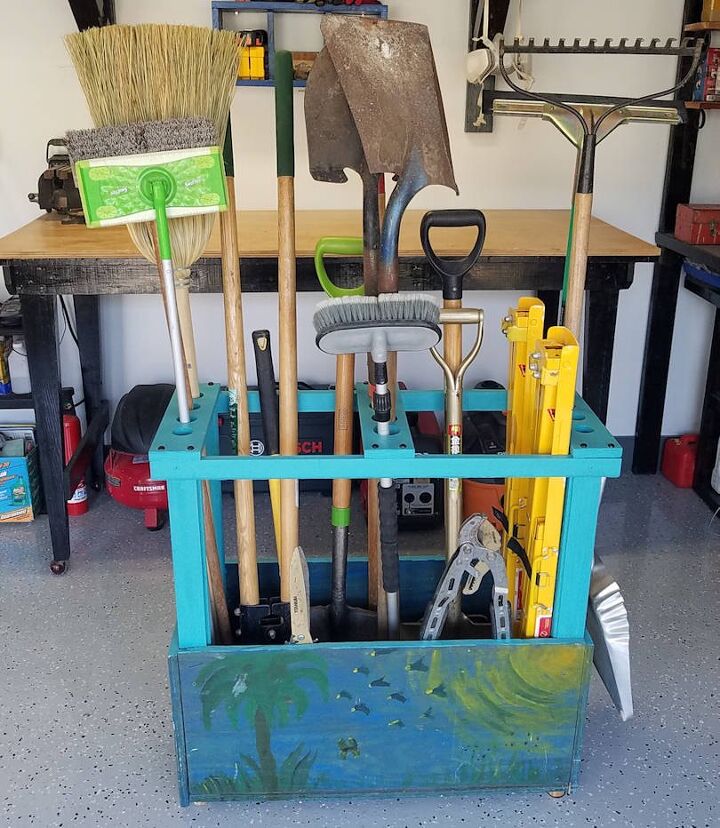
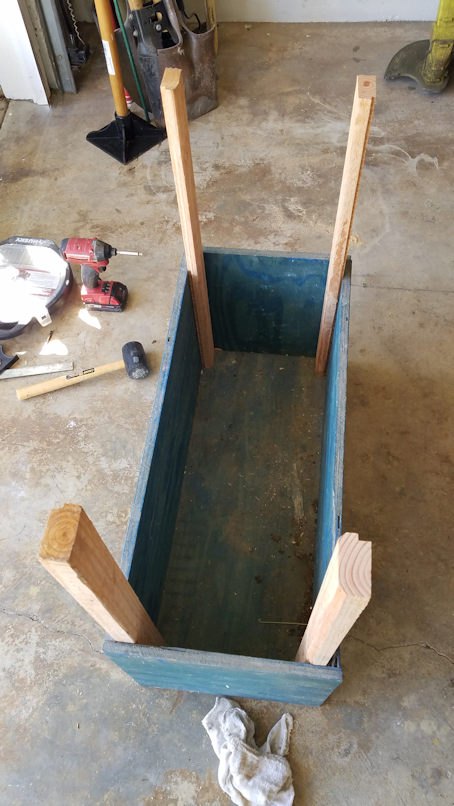
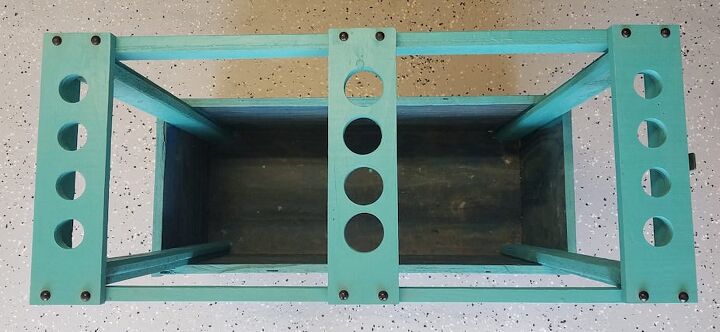
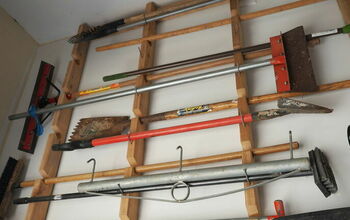
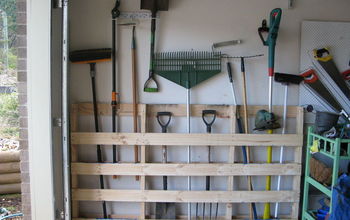
We upcycled an old plywood toybox into a functional garden tool storage box with wood scraps and dollar-bin paint. The box features top plates with two hole sizes so you can easily see, store and access your common tools. The areas in between the plates provide ample space for large and bulky tools like a gardening pick.
It’s always gratifying to rescue something old and neglected around the house. In this case, there’s a sentimental attachment too. The toybox was built and painted by our kid’s godmother more than a quarter century ago. After it was finished holding toys, it stored a pile of sports equipment, and then it moved to the garage and haphazardly held our yard tools. When we started sprucing up the garage, we decided to improve on the basic box a little bit.
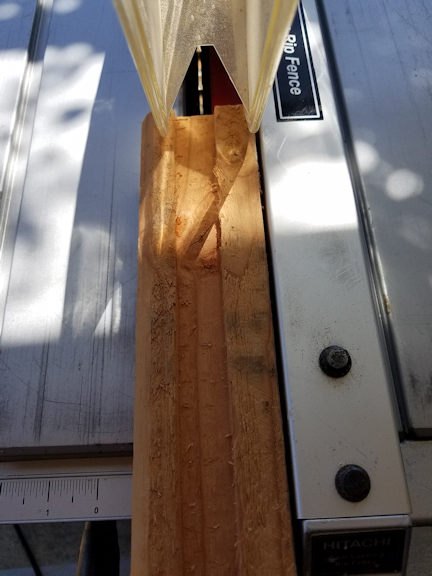
As usual, scrap wood plays a big role here. The corner posts came from some forklift timber left behind from a delivery. We split the wood into pieces that are 2¼” by 1 1/8″, but you can use regular 2×2 or 2×4 lumber.
The rails are scrap trimmings from old 2 by timbers we pulled from a staircase remodel. Finally, the top plates came from some old garage shelving we removed. Most every part had a previous life.
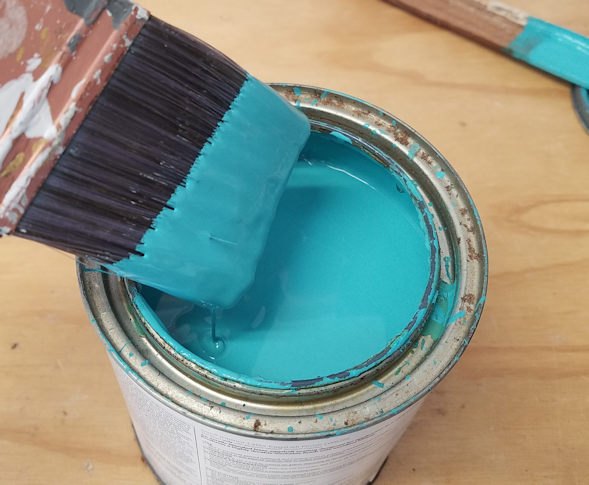
There are two things that really makes this garden tool storage box stand out though: the turquoise paint and the button plugs on the top plates. We’re the kind of people who buy the $1 quarts of paint on the hardware store’s return shelf. We’d been looking for a good place to use this color — “ San Jose Blue” — and it pairs perfectly with the painted scene on the toybox. The button plugs cover the screws in the top plates and are a cheap, easy way to upgrade the look of just about anything you build. Countersink bits make it easy to install these. Go get a set if you don’t already have them — they’ll make all your projects look better.
Tools
A drill, bits, and a chop saw will make this project go quickly, though a handsaw and miter box would be fine. If you need to rip your posts from larger stock like we did, you’ll need a table saw. In addition, you will need
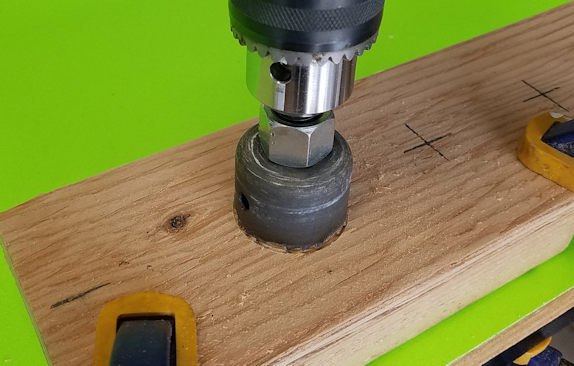
- 2″ and 1½” hole saws
- ⅜” ( countersink bit
Garden Tool Storage Box Materials
- 2×2 posts 30″ long — 4
- 2×1 rails 33″ long — 2
- 2×1 rails 12¾” long — 2
- ¾” plywood or whitewood 14¼” by 3½”— 3
- 1½” diameter dowel 2″ long — 4
- 1½” felt furniture pads — 4
- ⅜” button plugs — 12
- Paint: San Jose Blue by Benjamin Moore (interior latex, eggshell) and Gloss Black latex by Rustoleum
Garden Tool Box Construction
We already had the plywood box, so we’ll assume you do as well, but you’ll need to adjust dimensions to fit your box. We chose to make the posts 30″ high — you’ll need to consider how much overhead clearance you have in your garage and ensure your posts aren’t so tall that it becomes difficult to get a tool in and out.
Screw the posts to the inside corners of the box, then screw the rails flush to the top of the posts.
Next, cut your top plates to length and determine the sizes you’ll need for your tool holes. It helps to have the posts and rails already assembled because you can lay the plates out and make sure your holes will be properly positioned. We drilled 2″ holes on one of our plates for our larger-handled tools, and 1½” holes on the other two plates. Measure and mark the centers for each hole. Our holes are centered 3½” from each edge and 2½” apart.
Before you screw the top plates to the rails, carefully mark and drill pilot holes ⅜” from the edge. Use a #10 countersink bit to make a ⅜” hole deep enough for the button plugs.
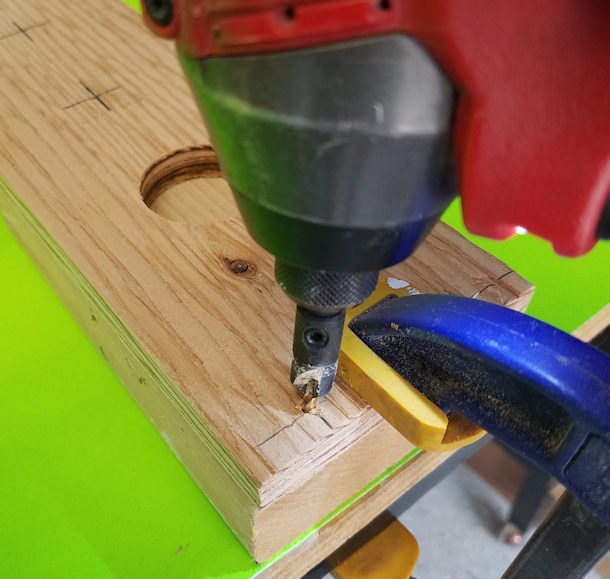
The rails are thin, so clamp each top plate in position, extend the pilot hole through the top plate in to the rail, and then carefully screw each plate down.
Cut the feet 2″ long from a piece of 1½” diameter dowel. Drill a pilot hole in the center of each foot, and countersink the holes. Turn the box over and screw the feet to the bottom corners with 2½” screws. Stick a round felt furniture pad on the bottom of each foot. (These are the same pads we used on our pool cue rack, so it’s handy to have a big pack of them. Check out our project on Manatee Pants)
Paint the frame, paint the wooden plugs and, once the paint is dry, glue the plugs in place. Now the fun part…start organizing your pile of garden tools!
Like this project? Come check out what else we're up to on Manatee Pants.
Apr 25, 2021
Resources for this project:
See all materials


Comments
Join the conversation
-
Wow! I feel as though we own kindred toy boxes! My ex-husband's Grandfather built a toy box for him and his 2 younger brothers while they were still quite young. They are now 51, 48 & 45. After he had built it, money was tight.. (When is it not? 💸) so he used what was at hand...his employer's standard issue royal blue for the job. This toy box served the 3 boys well and when they had all left home, their Mother was SO over it and of course my Ex volunteered to take it. We had it for 12 years of our marriage and when we split, he no longer wanted it either. It had mainly been used to store outdoor toys, etc. I am fairly certain it is still stored in our shed as it was used for my kids well for many years. It is the same size (before your addition) and the same blue color as yours. How I wound up with it when they so obviously adored their Papa, I really can't say. I do know that he was like a Grandfather to me as well and I will readily admit that I am overly sentimental and by now, I believe I have a legal claim to it! LOL 🧐 (My apologies for the novel I wrote!)
Patty
-
That's a great story! My favorite things are the ones that are both functional and have memories attached...then every time you use it, you get to think of people you love. I keep all my sockets in a beat-up red metal toolbox that belonged to my mechanic grandfather. My other grandfather owned a restaurant, and we have one of his serving platters in regular use in our kitchen. To me, those things are far more valuable than the "priceless" porcelain figurines and coin collections we've inherited over the years.


Frequently asked questions
Have a question about this project?