


Convenient Pot Rack for Cluttered Cabinets
by
Kasey
Pots and pans can often be the bread and butter of cookware, but with so many sizes and skillets available to equip your kitchen with, suitable storage places can quickly become scarce.
To keep your growing collection of pots and pans from overflowing, try out this quick cabinet modification.
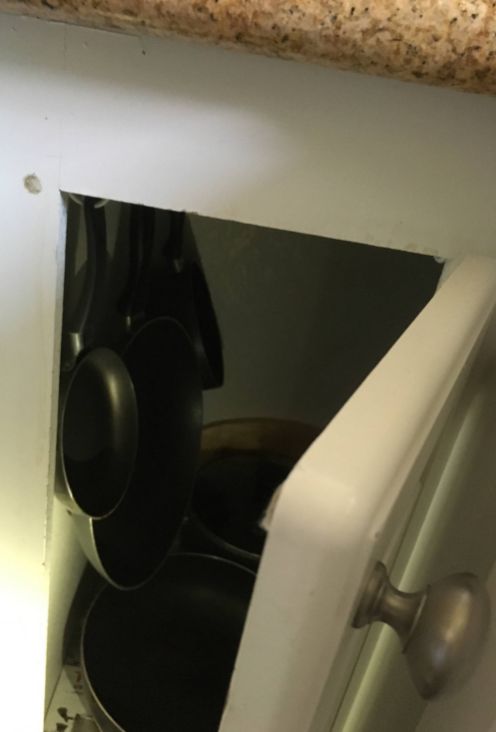
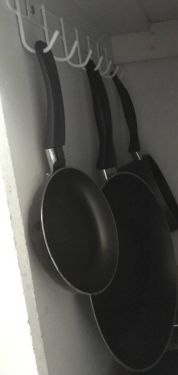
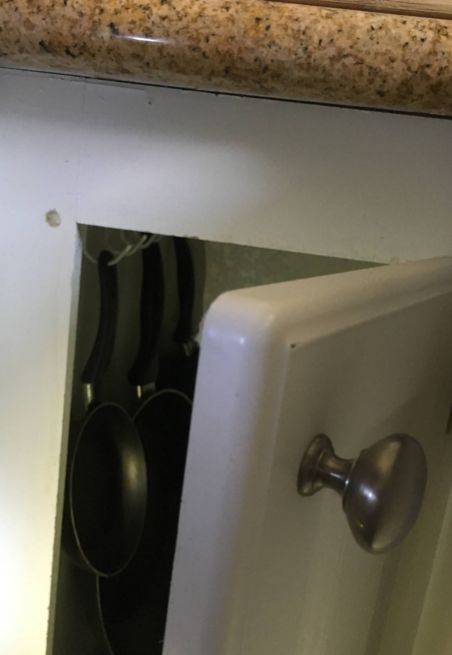
Cabinet-Mounted Pot Rack
Allowing you to make better use of your cabinet space by hanging your most often used pots and pans for faster and easier access, while still leaving space for your more specialized pieces to remain stacked below, this quick and simple project is an excellent idea for more confined kitchens.
Not to mention that while there are many costly pot racks on the market, this nifty interior-cabinet setup can be completed for just a couple dollars, making it a great low-budget project for a DIY afternoon.
Materials
Pot Rack
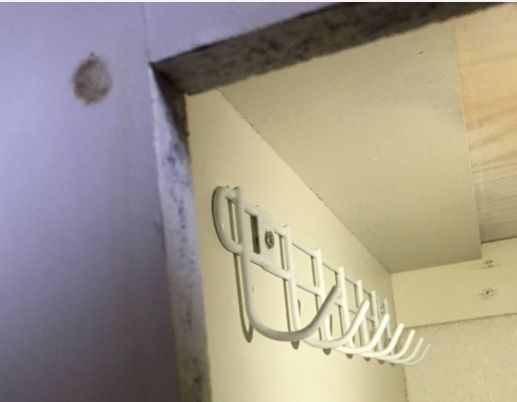
Simple closet racks, like the one pictured here, can be fashioned into fantastic pot holders and are often available for purchase at dollar stores, or can be found for slightly higher prices at superstores and online.
Otherwise, specially manufactured pot racks can also be acquired from most kitchen goods suppliers, though these can range from tens to hundreds of dollars depending on the model.
But before you do purchase a rack, you may want to measure the depth of your cabinet to learn what length of hook rack is most appropriate for you. It is a good idea to leave at least 6 inches of free space on either end of the rack you choose so that your pots and pans can comfortably hang without bunching up against the walls of your cabinet box.
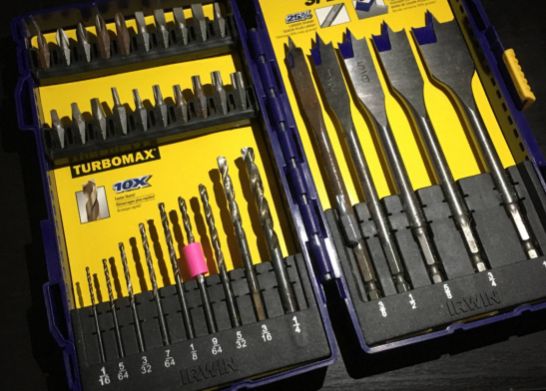
Drill and Drill Bit
Before we can mount the pot rack, some holes will need to be drilled within your cabinet in order to secure it to the inside. Any power drill should suffice for this project, and make sure you also have an appropriately sized drill bit that matches your screws.
Some Screws
Easily enough, ensure you have as many screws available as your pot rack requires.
A Pencil
It is always best to properly plan out any project before making your modifications. With this in mind, keep a pencil nearby so you can mark positions on your cabinet for more accurate drilling.
Installation
Once you have all of your materials gathered together, you are ready for installation. Just follow these simple instructions and you’ll be hanging your favorite pots and pans before you know it!
1. Positioning the Pot Rack
Because we will be mounting the rack to the interior wall of your cabinet box, any accidents should be easy to hide. However, it’s still safest to ensure that our pot rack will be perfectly positioned before making any permanent perforations.
To do this hold the pot rack in its intended place inside your cabinet, making sure that it is level and has enough clearance for your pots and pans to hang freely, and then mark your cabinet through its screw holes to indicate your drilling points.
2. Drill Holes
Now that we have planned our positioning, place your rack aside and grab your drill.
Attach the correct size of drill bit for your screws, and begin creating the screw holes for your rack by drilling into the holes you’ve marked inside your cabinet.
Note: if you are mounting the rack against the interior of your cabinet’s face, be careful not to puncture all the way through the wood of your cabinet to avoid unwanted cracks.
3. Mount the Pot Rack
With your holes created, now you just need to secure the rack to your cabinet’s interior.
Carefully position the rack by aligning its screw holes to the freshly drilled holes of your cabinet, then insert each of your screws one by one until the rack is fastened completely into place.
Comments
Join the conversation
2 comments
-
Sometimes simple is best, thanks for sharing.
-
This is an awesome idea! I feel like I am constantly rummaging through my messy pots/pans cabinet!


Frequently asked questions
Have a question about this project?