


How to Make a Dollar Tree Farmhouse Magnetic Spice Rack

The best home project doesn’t need to be expensive, and this is an idea I’ve taken to heart with my farmhouse magnetic spice rack. Including rustic appeal with modern convenience can make this a perfect fit into any classically-styled home and, even better, it's easy!
With a total cost of around $8 and only an hour of crafting time required, this can be a perfect little project. It's quick, useful, and unique. I used this as a replacement for a long-broken older rack, but these also make perfect gifts for friends and family.
Step 1. Gather Your Materials

Before you can get started on your farmhouse spice rack, you need to make sure you have the right materials and tools. If you're a DIYer like I am you should have most of the tools already lying about. If not, don't worry, everything here is cheap and easy to use.
Tools and Materials:
- Ruler
- Pen
- Box cutter or a sharp knife
- Hot glue gun
- Paint brush
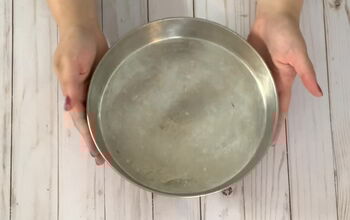
- Brownie pan
- Command wall hook
- Twine
- White chalk paint
- Poster board
- Wood contact paper
- Wood spoon and fork
- Three 2ct packs of magnetic tins (with transparent tops if possible)
I picked up all of these materials from my local Dollar Tree, but if you don't have one in your area then most DIY stores or superstores like Walmart will have what you need.
Something to keep in mind is that the wood spoon and fork are going to sit on the top and bottom of our frames, which will themselves be slightly longer than that long-edge of the brownie pan. Be sure to get spoon and fork sizes that fit within these lengths!
Step 2. Create a Frame
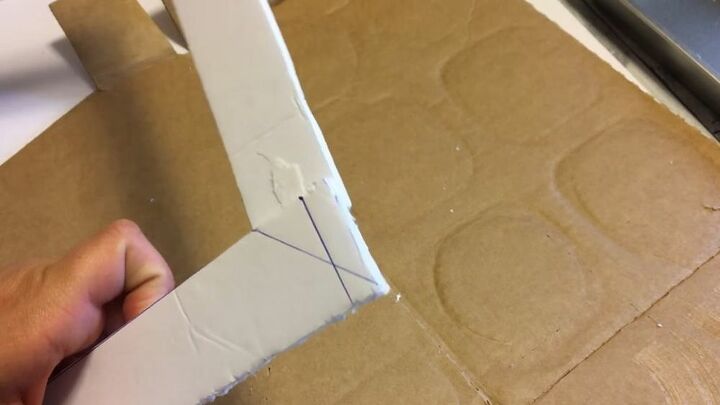
The first thing I did was to create a frame for my brownie pan using my poster board. Using my ruler, I measured the lengths of the long and short sides of my pan and marked them on my poster board. My ruler was wide enough to cover the entire upper edges of my pan, so I used that for size. If your ruler isn't wide enough for sizing then measure out enough width to cover the top sides of the pan and then cut them out – keep all widths even!
I then laid these frame borders out for size and then used my ruler to line a miter cut for the corner for a smoother fit. Finally, wrap them in wood contact paper for texture.
Step 3. Paint the Pan
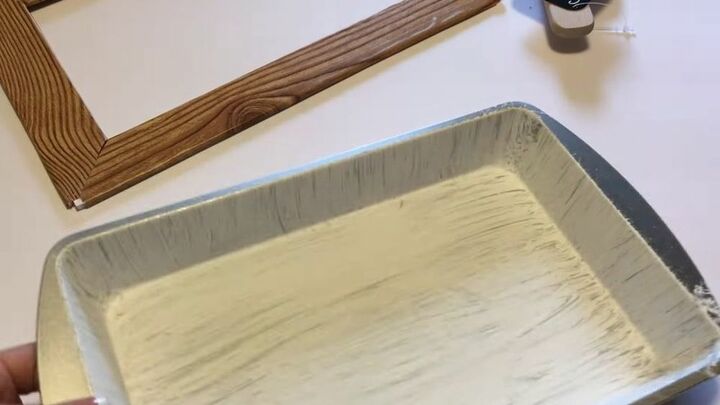
The brownie pan is nice and shiny as standard, but that’s not the finish I wanted for my backing. To cover this, I went with simple white chalk paint, which I slightly diluted for an extra rough finish.
Finding exactly what you want in terms of paint consistency can be trial and error heavy, so try it out on any other discardable surface like your left-over poster board first!
Step 4. Attach the Frame to the Pan
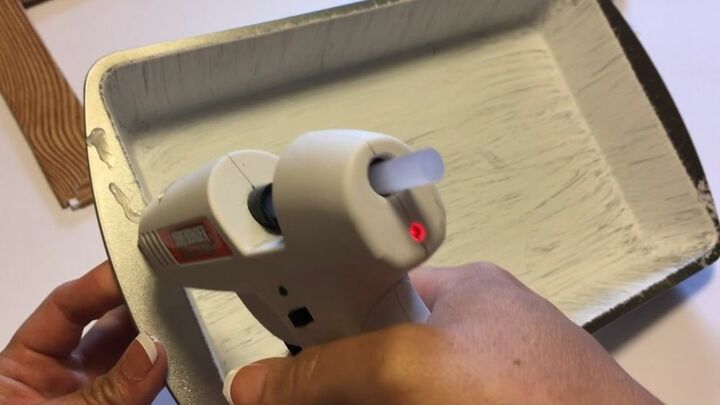
After some tea, the light coat of paint on my pan was dry, and I was ready to attach the frame. Line the border with hot glue, and hold the frame in place to attach it.
Remember, standard hot glue rules apply. It will stick to you just as happily as it will stick to the frame, so be careful!
Step 5. Add Spoon and Fork Décor
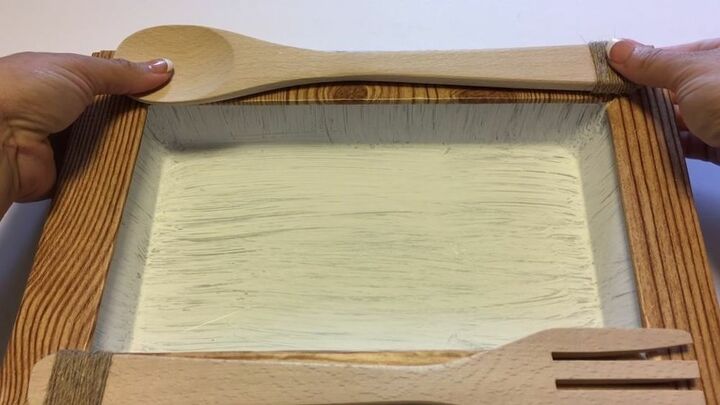
After a few minutes the frame was firmly attached, so it was time to add some décor into the equation. The wood spoon and fork I bought had some holes at the bottom I didn't like, so I covered these in wrapped twine for a nicer and more consistent look.
Once wrapped, I used a couple of globs of hot glue at the top and bottom of the spoon and fork and pressed them onto the frame. You want to be careful not to add so much glue that it overflows because removal and another try might rip the frame-paper.
Step 6. Glue Twine to Spice Tins
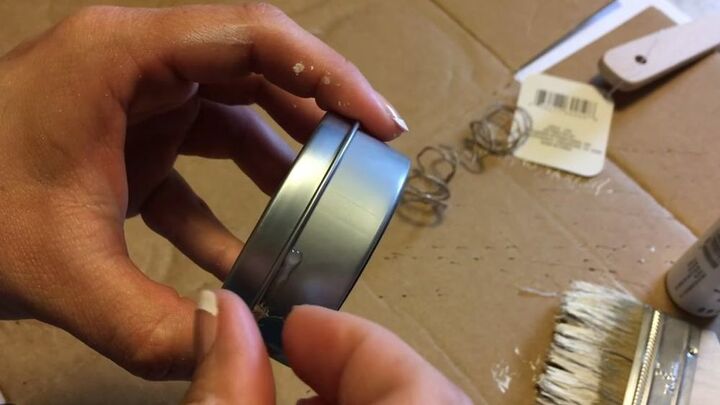
Now that the frame is done, it’s time to prepare the spice tins. To do this I first made sure the lids were firmly attached as far on as they regularly sit. Doing this without the lids on can make you attach the twine in the wrong place, which would mean the lids don't close - so checking first is a must. On the other hand, you also want to be careful that you don’t use too much glue and accidentally glue the lids on.
I then wrapped the twine to the bottom of the lid and sealed it with some glue so it doesn’t slip off later. Once the first was complete, I repeated the same method for each of the remaining five tins.
Step 7. Assemble Your Spice Rack

With all the tins completed, only two small parts of my farmhouse style spice rack were left. First, I placed the six tins evenly within the brownie pan.
The final step was using a little more twine attached to some glue on the back of the pan to create a way to hang it. This is only part of the trick though, as I also used a command hanging strip glued to the back of the pan for greater security. The twine looks great as a hanger, but we also want to make sure our hard work doesn’t break off the wall!
All Done!
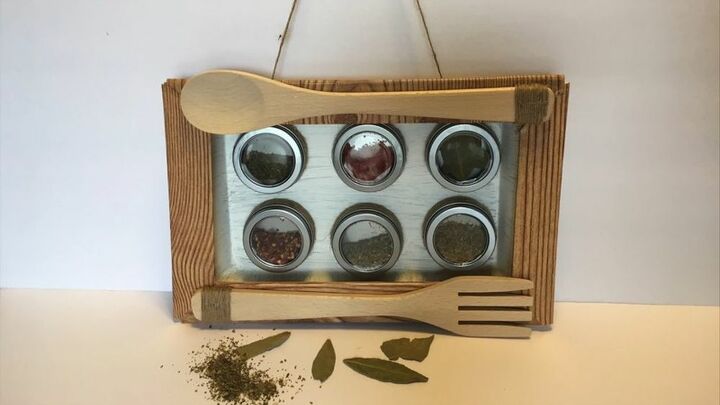
Isn't it stunning! If you give this project a try make sure to include a pic in the comments below!


Frequently asked questions
Have a question about this project?
What do you do about washing them with the twine on them