


A Step-by-Step Guide on How to Organize Kitchen Cabinets

You may have heard that learning how to organize kitchen cabinets can help you better prepare meals. That’s especially true if you don’t have a dedicated pantry.
But organized kitchen cabinets offer many other benefits, as well. You’ll save time searching because everything has its place in your cabinets—food, dishware, pots and pans, and cleaning products, for example. You’ll also save money by not wasting any food (i.e. you did actually have that backup sack of flour tucked inconspicuously in a cabinet and didn’t need to buy a new one).
Now that you’re hopefully convinced that it’s time to organize your kitchen cabinets, we’ve gathered the best tips, tricks, and materials to get you started and to keep you on track to a better-organized kitchen.
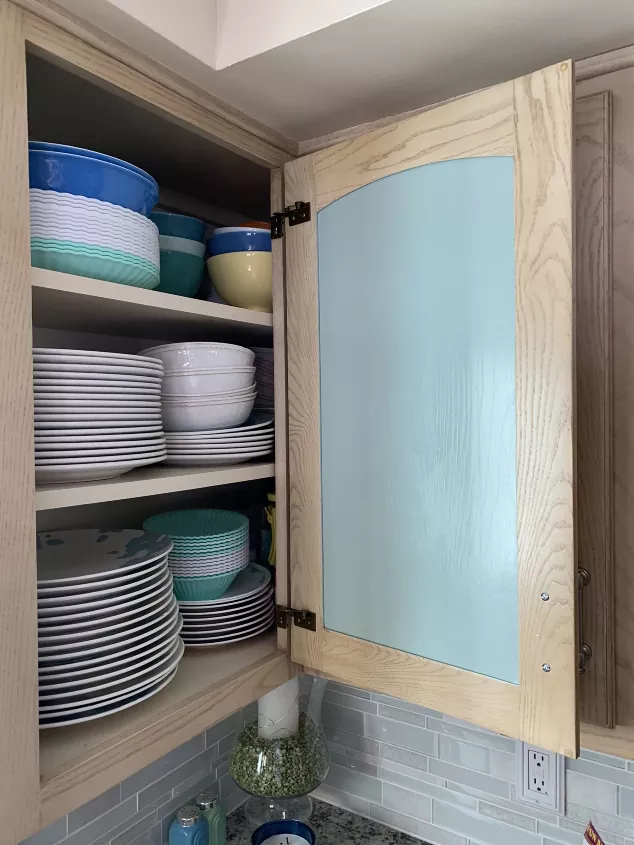
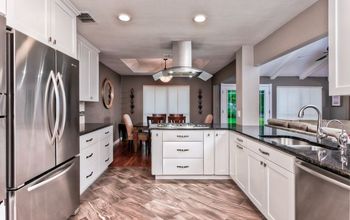
Photo via Lauren - The Little Lake Cottage
Organization and Layout Ideas for Kitchen Cabinets
There are plenty of things that need to go into your kitchen cabinets. So much so that you may wonder how they all fit in your cabinets. A good trick here is to cluster similar items and ingredients in cabinets within stations.
When you’re baking, you don’t want to frantically search behind every cabinet door for your bottle of vanilla extract; it should be right near the sugar, flour, and honey in the baking station.
Here are some ideas for stations you can base your kitchen cabinet organization around, but remember: These are merely suggestions because every cook’s kitchen is different. Organize your stations in a way that works for you!
1. Cooking station:
Spices, cooking utensils (spatulas and stirring spoons), pots, and pans near your stove
2. Baking station:
Sugar, flour, foil, parchment paper, cookie sheets, rolling pins, and your mixer, near your oven or prep area
3. Prep station:
Knives and chopping boards near your prep area (an open countertop space)
4. Dishwashing/sink station:
Cutlery, glassware, everyday dishes, plastic/glass storage containers, and water bottles near your dishwasher and sink
5. Canned goods/food station:
Canned and jarred goods (canned beans, sauces, etc.), pasta, and cereals near your prep or stove area
6. Cleaning station:
Paper goods, cleaning tools (sponges), cleaning sprays, and other chemicals near your sink and where you can store bulk items
7. Holiday station:
Items used for holidays (platters, cookie cutters) and rarely used fancier items (crystal goblets, candy dishes), usually placed in hard-to-reach cabinets
8. Pet station:
Food, treats, bowls, dishes, and pet-related medicines in a convenient cabinet
Save a Drawer for Junk
How to Organize Kitchen Cabinets
The beauty of arranging kitchen cabinets is that you can tweak whatever you find doesn’t work over time. You may find, for example, that it’s more convenient and helpful to store glassware above your dishwasher instead of transporting them to a cabinet a few feet away.
Even if you have to switch things around, you will already have cleaned and lined your cabinets.
Here’s a step-by-step guide on organizing your cabinets, starting from cleaning them out.
Tools and Materials Needed:
- Vacuum
- Crevice tool
- Brush tool
- Spray bottle
- White distilled vinegar
- Warm water
- Soft, clean rags
- Cotton swabs (optional)
1. Empty and Clean
If it’s overwhelming to do every cabinet at one time, do clean your cabinets in chunks and sections. Start with one cabinet one day, another the next, and do the same with the drawers—one at a time if necessary.
Once you empty the cabinet spaces, do the following:
- Vacuum the interior using your brush and crevice tool/attachments to pick up the build-up of all dirt and crumbs.
- Use a simple cleaning solution for the inside of cabinets: Mix a small spray bottle one part distilled white vinegar and one part warm water plus a few drops of liquid dishwashing detergent. Spray (but don’t douse) and let it sit for a minute. Wipe down the interior with a clean, soft cloth.
- Use a cotton swab dipped in the solution to get into corners and hinges.
2. Sort, Donate, and Eliminate
Focus on sorting, donating, and throwing out utensils, glassware, dishes, pots, pans, and plastic storage containers. This phase is important so you can streamline your cabinets; you’d be surprised what duplicate items you find. Use one box for donations and one box for trash. Move the boxes out of the kitchen as soon as you’re done.
3. Protect With Liners
To extend the life and beauty of your cabinet shelves and drawers, line them with self-adhesive shelf liner material that can be easily wiped clean. Carefully measure each shelf and drawer and apply the liner material per the product’s directions.
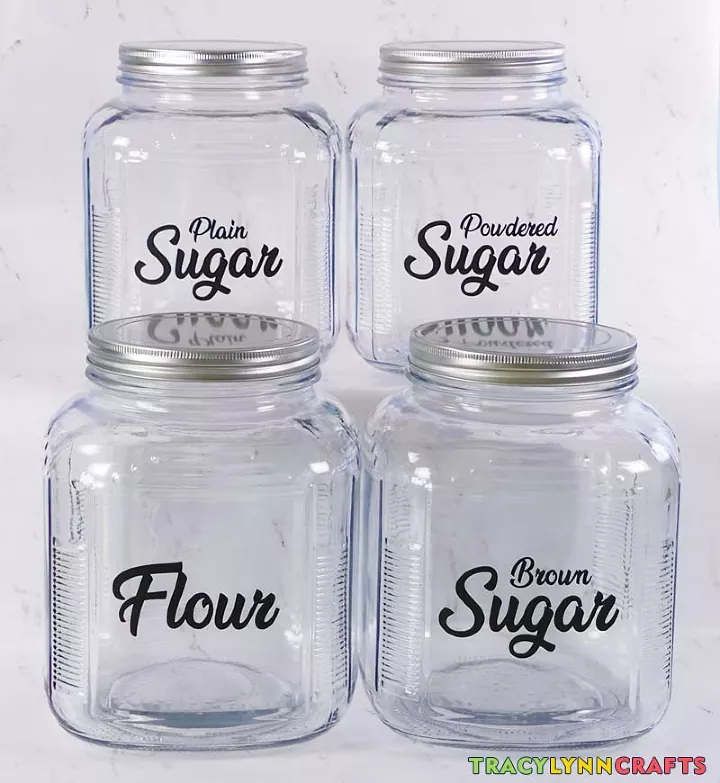
Photo via Tracy DeGarmo
4. Fill and Label Containers
One of the most gratifying steps is filling and labeling containers and having a place for everything. Chalkboard labels can be easily changed; sticker and vinyl labels are more permanent. You don’t have to stop at just labeling your bins—try labeling your drawers, shelves, and pull-outs as well.
Some items may not need bins with tops, such as prepackaged foods. If you don’t want the hassle of cleaning plastic bins, try plastic or wire basket-style bins.
Organization Tools and Materials:
- Food storage container set (for dry goods like dried beans, pasta, and cereal)
- Clear plastic storage bins (for canned goods)
- Food packet storage bin (for soft packets like tea bags, chips, and granola bars)
- Self-adhesive bins for inside bottom cabinet drawers (to hold boxes of foil and plastic wrap)
- Over-the-door organizers (for boxes, cutting boards, bags, or cleaning tools)
Measuring Bins
5. Utilize Inside Upper Cabinet Doors
Take advantage of the inside upper cabinet doors by creating a hidden corkboard message center to hang messages, recipes, charts, and receipts neatly hidden behind the door.
Tools and Materials Needed:
- Cork panels
- Scissors
- Ruler or other type of straightedge
- Removable poster tape
- Pushpins
Cork panels are typically 12 inches by 12 inches and ¼-inch thick. Slice down to size with scissors or a utility knife and straightedge if you need a smaller board to fit the door. Install with poster tape and add pushpins to hang materials.
Packages of cork boards may include squares of adhesive tape that are strong and can permanently mark your cabinets. Use removable poster tape (holds up to a pound) instead.
6. Tackle Silverware and Utensils
Forks, spoons, knives, and cooking utensils like spatulas are essential tools that you’ll likely want to grab at a moment’s notice. There are a few different options for storing silverware and utensils:
- Drawer storage: Silverware (cutlery) and utensils tend to be stored horizontally in a drawer. Make use of utensil organizers that best fit your drawer.
- Cabinet storage: If you have an appropriate cabinet space that’s deep enough, you can vertically store your silverware. But before committing to this, you’ll need to measure to make sure the utensils can fit. You can use a customized built-in holder that is divided into compartments or a large caddy that can be easily lifted out of the drawer.
- Countertop storage: Place cooking utensils upright in a caddy on the counter near the stovetop for easy reach.
Cutlery Sizes
7. Arrange Cleaning Items
Cleaning tools and bottles typically end up in a cabinet underneath or right beside the kitchen sink, out of the way of food. Without some tools in place to keep it all under control, this cabinet can quickly become sticky and disorganized.
- Add a lazy Susan under the sink to hold smaller items and sponges.
- Hang bottles with handles on the over-the-cabinet towel bar (with bottles turned backward into the cabinet).
- Perch other bottles with handles on a tension rod placed under the sink.
- Use mounting tape to add clothespins to the inside of your cleaning cabinet door to hang cleaning rags and gloves.
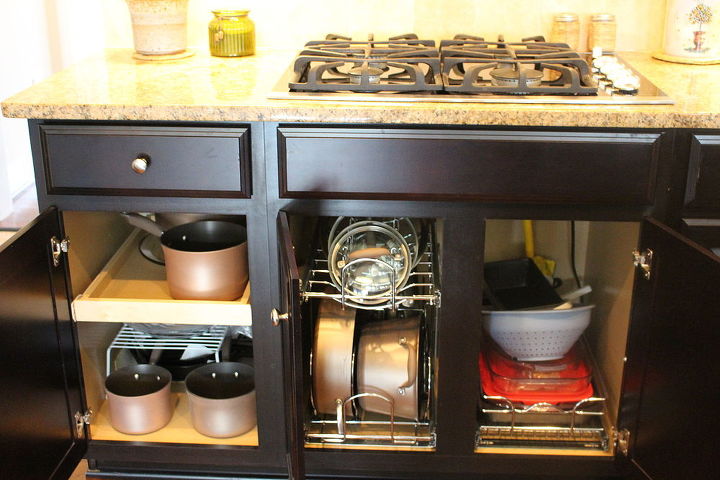
Photo via Pinky S
More Tips for Organizing Kitchen Cabinets
Now that you’ve covered the basic steps of organizing your kitchen cabinets and creating the proper stations, here are some more helpful tips to store other kitchen items.
How to Store Pot Lids
Pots and pans take up a lot of space on the bottom cabinets. The best way to triple your space is to use a lid holder that can be placed over the inside of the cabinet door. You can also use items you might already have on hand, such as file folder holders, to hold lids.
How to Store Pots
Nothing disturbs your kitchen’s Zen faster than the sound of banging pots while trying to find the one you need to use for dinner. Use a pot holder rack in the bottom cabinet rather than piling them one on top of another. For a more permanent solution, you can find rolling pot racks with systems that you can install yourself.
How to Store Spices
Store spices on tiered shelves in upper cabinets or install a spice rack on the inside door of a cabinet. Or, if you don’t have many spices, try mounting them under cabinets with a discreet pull-out under-cabinet drawer.
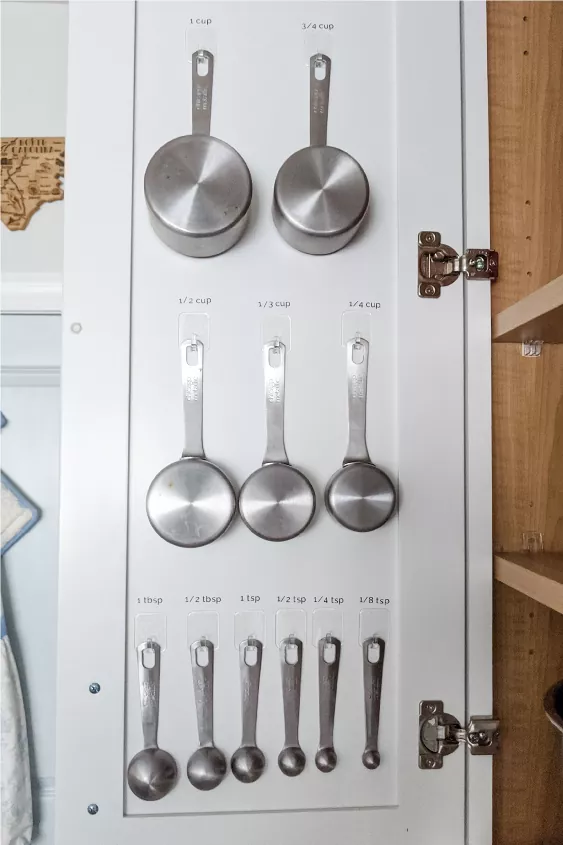
Photo via Zoe Hunt
How to Store Measuring Cups and Spoons
Measuring cups and spoons are a few of those floater items that don’t fall into a specific category. Can they fit in the silverware drawer? How about in a spot with other miscellaneous items like pizza cutters and tongs? Instead of just throwing measuring cups and spoons in a drawer, try buying a small key rack and installing it inside of your cabinet to hang them.
How to Store Large Bowls and Dishware
To store bulky dishware and bowls, try cabinet shelves. These simple items double the space in upper cabinets where you store these items. Some of these shelves are stackable to triple your space.
How to Store Less-Common Items
If you have the wall space for it, floating shelves might be worth trying in the kitchen. Use open shelves sparingly, however, to avoid a cluttered look. Display a piece of art or a vase, or use the shelving for easy access to everyday items such as plates and glassware. Just be sure to keep the shelves clean and regularly dusted.
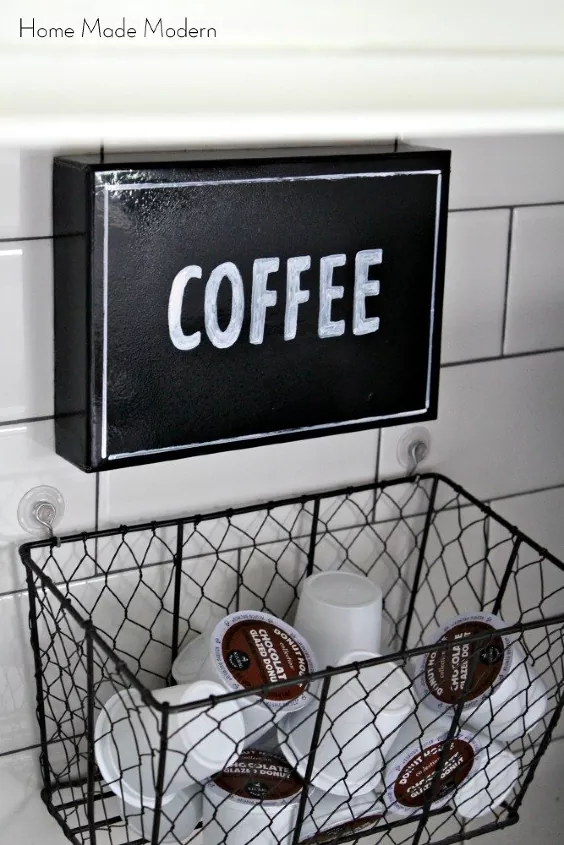
Photo via Valerie Ott
How to Make a Coffee Station
You don’t need to throw all of your K-cups, coffee mugs, and coffee paraphernalia in drawers—they are precious kitchen real estate! Instead, carve out a sliver of space on your counter for a coffee station and save a drawer. All you need is about a foot or two width of space and hang a K-cup wall holder!
Displaying Dishes
Organizing your kitchen cabinets is a simple way to make sure your daily cooking and meal preparation is more efficient and enjoyable. Use the steps above as a guideline to create a system that works for you.
Let us know if you’ve just organized your kitchen cabinets and how it went! Did you discover any helpful hints to share? We’d love to hear your tips below.


Frequently asked questions
Have a question about this project?