


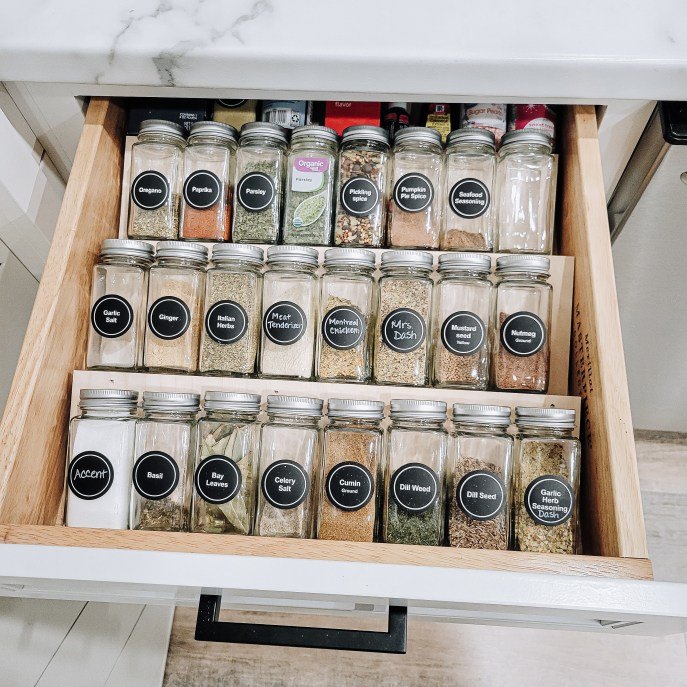
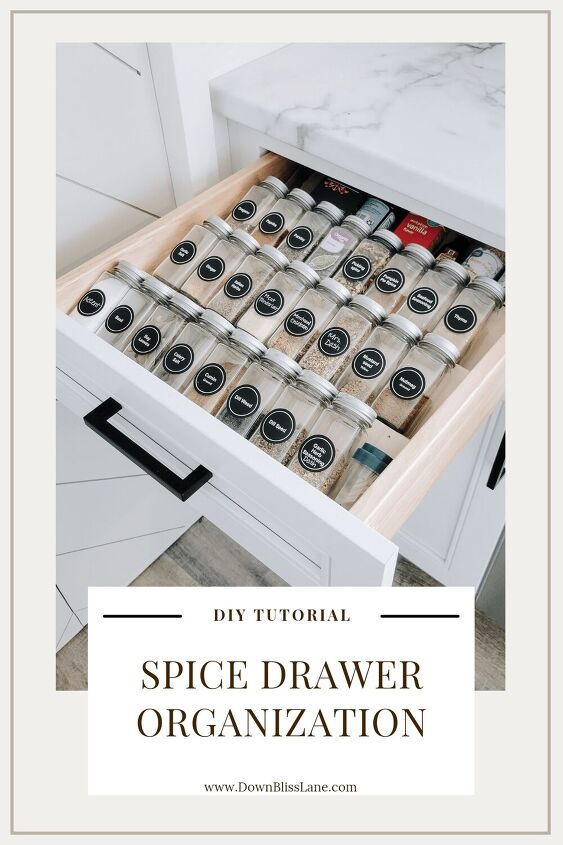
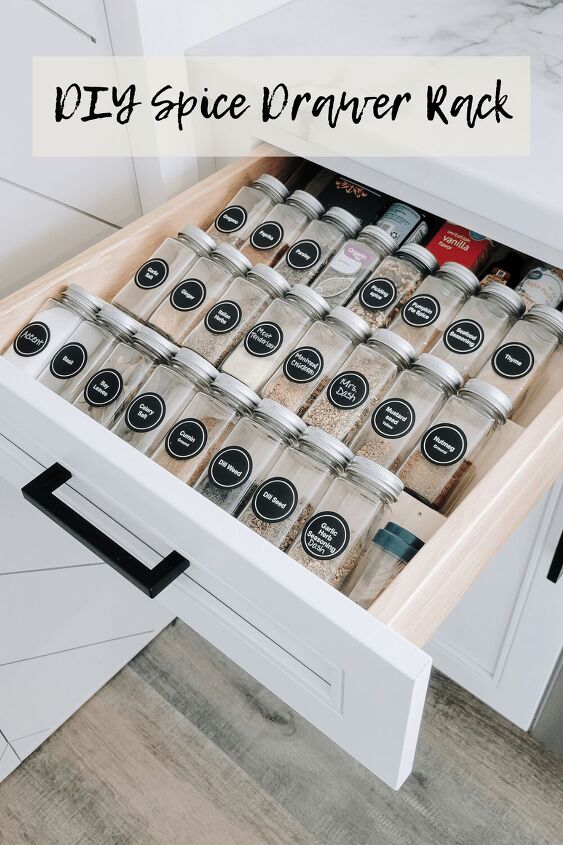
Spice Drawer Rack for Simple Kitchen Organization
Today, I’m going to show you how to make a basic spice drawer rack. It’s quick, easy, and requires minimal skill, but will leave you with some serious WOW factor when it comes to locating your kitchen spices and keeping them neat and tidy.
Some of the links in this post are affiliate links. This means if you click on the link and purchase the item, I will receive an affiliate commission at no extra cost to you. All opinions in this post remain my own. See my Disclosures for more info.
I’ve seen these racks available for purchase, if that’s your thing (if it is, that's fine - there are several options on Amazon). But, they’re also incredibly easy to make and customize to your needs! All you need is a few scraps of wood, nails and a hammer (or an air nailer), and a little time.
Spice Drawer Rack Prep Work
I call this “prep work”, but it’ll take you all of a whole whopping minute to complete. Before you start cutting any wood or nailing any pieces together, grab:
- Scratch paper
- Pencil (or pen)
- Tape measure
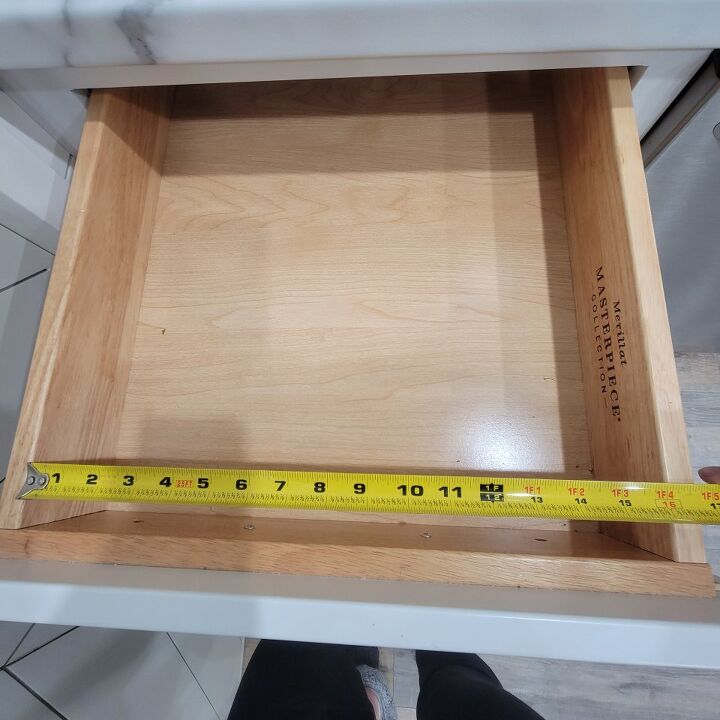
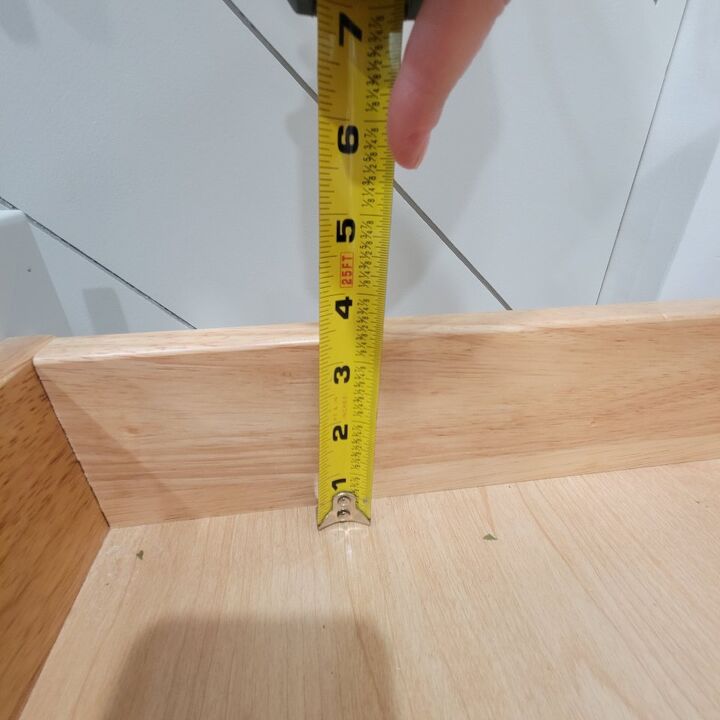
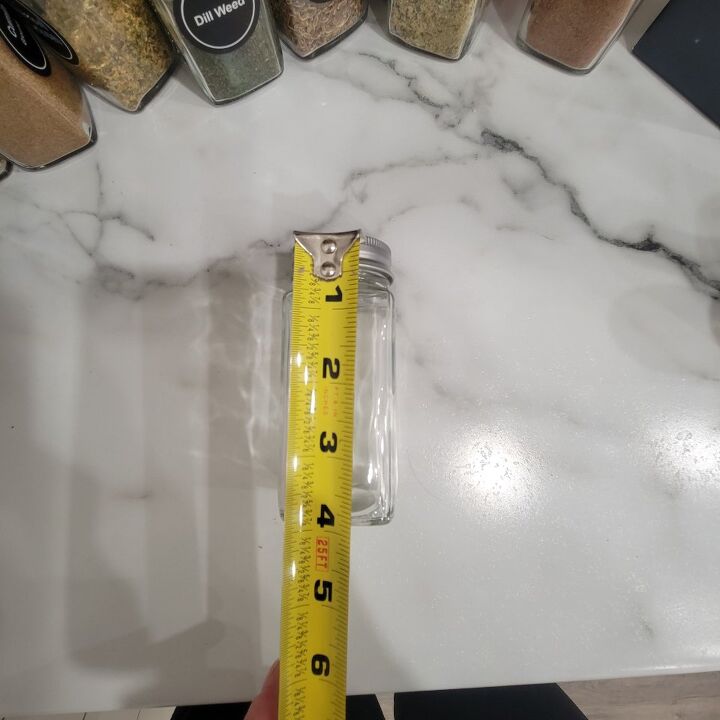
Using the tape measure, find the interior width, height, and depth of your drawer and scribble it down. Also double check the height and diameter of your spice jars.
If you don’t have spice jars yet, check out these I ordered from Amazon. I love them because they came with a BUNCH of labels, plus some extras so you can write in your own spices for whatever weird concoctions you cook with.
The drawer I used is 16″ wide, 3.5″ tall, and 19″ deep, so my instructions are based off those dimensions. I will tell you that the 3.5″ height of my drawer was perfect for this project. So if you have a drawer similar to that height, these instructions will be gold, with minimal adjustments.
Material and Tool List
- (4) 1/8″ scrap wood strips
- (4) 1/2″ scrap wood strips
- Air nailer or brad nails and hammer
- Clamps (optional, but recommended)
- Table and miter saw (both optional)
Cut the Wood Pieces to Fit Your Drawer
- The 1/8″ and 1/2″ scrap wood pieces need to be cut to fit the width of your drawer. Since mine is 16″ wide, I cut mine ON the 16″ line, and it left a nice amount of wiggle room for the rack once inserted into the drawer.
- The 1/8″ strips will be 4.5″ tall (if using 4″ jars like mine)
- The 1/2″ strips will be 1.5″ tall (again, if using my jars)
Assembling the Spice Rack
You’ve now got all your wood strips cut to the sizes you need, and you’re now ready to assemble the spice rack!
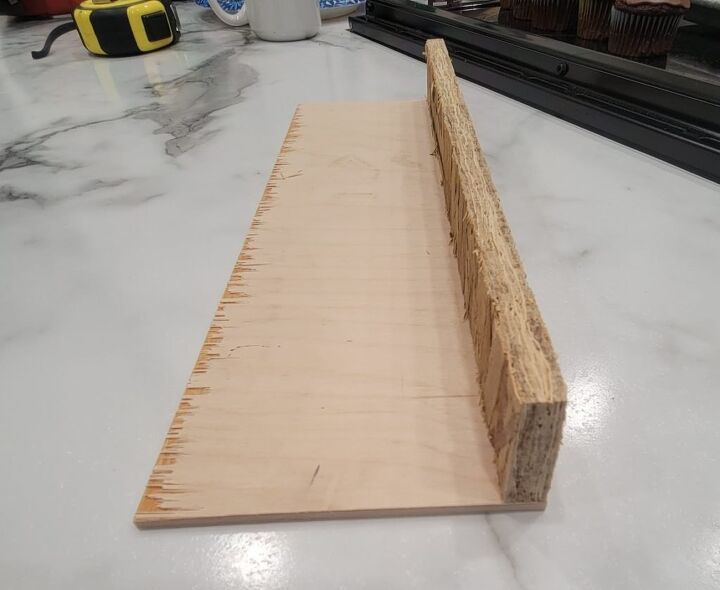
1. Line up one of the 1/8″ pieces with the raw edge of one of the 1/2″ pieces at a 90 degree angle. If you have clamps available, clamp the pieces together to prevent them from sliding around. Using the air nailer or brad nails, attach the two pieces together.
See the photo below for the alignment. You’ll see that I truly didn’t use any fancy wood for this project. I also didn’t use clamps and it was a total pain in the a**. 😬
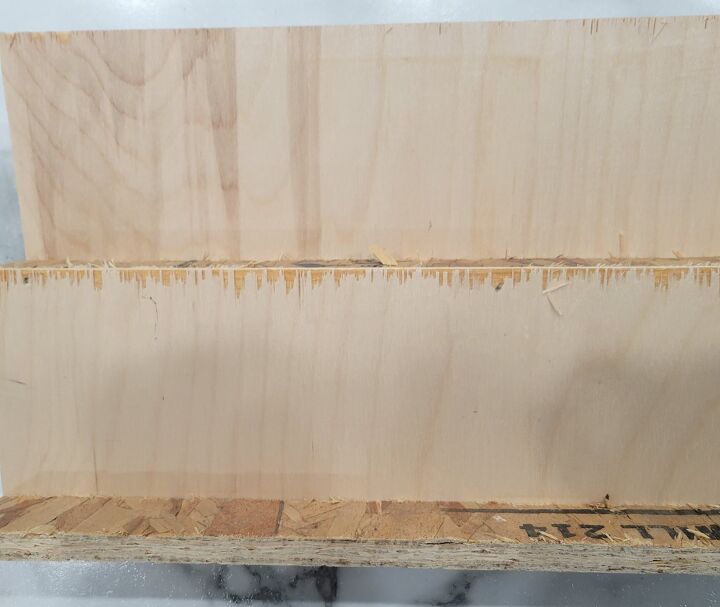
2. Repeat step 1 with the six remaining pieces of wood, making three more shelves Once done, you’ll have four single shelves ready to be nailed together for one complete spice rack shelf.
3. Flip all of your shelves upside down (so they’ll face your work surface like the one pictured above). Line up two of the shelves, with the 1/8″ piece of the first shelf lined up at a 90 degree angle with the raw edge of the 1/2″ piece of the second shelf. Nail the two shelves together.
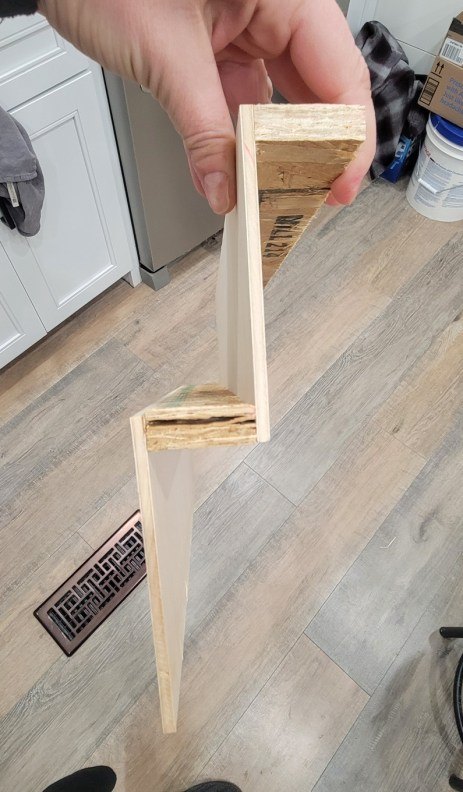
4. Repeat step 3 with the two remaining racks.
Wa-la! Slap those clever little inexpensive spice racks into your drawer, line up your spices by alphabetical order (or don’t – you do you), and admire your handiwork!
If you enjoyed this post, please show it some love by sharing!


Comments
Join the conversation
-
i can’t find where you mentioned where the spice jars came from?! Thanks for sharing this
-
Great job!


Frequently asked questions
Have a question about this project?
You mentioned a link to buy the spice shelf but I don't see it, could you furnish it? Thanks